- Как установить сервер Xrdp (удаленный рабочий стол) на Raspberry Pi
- Подготовка
- Установка Xrdp
- Подключение к Raspberry Pi
- Выводы
- Configure Raspberry Pi Remote Desktop To Windows 11/10, Mac & Linux
- Why do people use and don’t use a Raspberry Pi
- They use it because:
- Why they don’t:
- 5 Benefits to RDP to your Raspberry Pi
- Configure Raspberry Pi Remote Desktop for Windows 11, 10, Mac and Linux
- Setup VNC Server and PiTunnel
- How To Connect to your Raspberry Pi with Remote Desktop Protocol
- 4 Remote Desktop Client Alternative Choices
- Royal TS
- Terminals
- Screens for Mac
- MobaXTerm
- Conclusion
Как установить сервер Xrdp (удаленный рабочий стол) на Raspberry Pi
Xrdp — это реализация протокола удаленного рабочего стола Microsoft (RDP) с открытым исходным кодом, которая позволяет графически управлять удаленной системой.
С помощью RDP вы можете войти в систему Raspberry Pi с другого компьютера под управлением Windows, Linux или macOS и создать настоящий сеанс рабочего стола так же, как если бы вы вошли в систему на локальном компьютере. Pi и клиентский компьютер должны быть подключены к одной сети или к Интернету.
В этом руководстве объясняется, как установить и настроить сервер Xrdp на Raspberry Pi 3 и 4.
Подготовка
Raspbian Buster выпускается в нескольких вариантах. Если у вас есть Raspbian Lite, у которого нет графического интерфейса, вам необходимо установить среду рабочего стола, которая будет выступать в качестве бэкэнда для Xrdp. В противном случае пропустите этот раздел.
В репозиториях Rabsbian доступно несколько окружений рабочего стола (DE). Мы будем устанавливать Pixel , который является средой рабочего стола по умолчанию для образов Raspbian Desktop. Это быстрая, стабильная и легкая среда рабочего стола, что делает ее идеальной для использования на удаленном сервере.
Войдите в свой Pi и выполните следующие команды, чтобы установить рабочий стол Pixel:
sudo apt updatesudo apt-get install raspberrypi-ui-mods xinit xserver-xorg
В зависимости от вашей системы загрузка и установка пакетов Pixel может занять некоторое время.
После этого перезагрузите систему, чтобы изменения вступили в силу:
Установка Xrdp
Пакет Xrdp доступен в репозиториях Raspbian Buster по умолчанию. Чтобы установить его, введите:
Когда процесс установки будет завершен, автоматически запустится служба Xrdp. Вы можете проверить, что Xrdp запущен, набрав:
systemctl show -p SubState --value xrdpКоманда напечатает «работает».
По умолчанию Xrdp использует файл /etc/ssl/private/ssl-cert-snakeoil.key который /etc/ssl/private/ssl-cert-snakeoil.key для чтения только пользователям, которые являются членами группы «ssl-cert». Вам нужно будет добавить пользователя, который запускает сервер Xrdp, в группу ssl-cert .
Выполните следующую команду, чтобы добавить пользователя в группу :
sudo adduser xrdp ssl-cert Вот и все. Xrdp был установлен на вашем Pi.
Подключение к Raspberry Pi
Теперь, когда вы настроили сервер Xrdp, пора открыть клиент Xrdp и подключиться к Pi.
Если вы являетесь пользователем Windows, вы можете подключиться к своему Pi с помощью клиента RDP по умолчанию. Введите «удаленный» в строке поиска Windows и нажмите «Подключение к удаленному рабочему столу». Это откроет клиент RDP. В поле «Компьютер» введите IP-адрес Raspberry Pi и нажмите «Подключиться».
На экране входа в систему введите свое имя пользователя и пароль Raspberry Pi и нажмите «ОК».
После входа в систему вы должны увидеть рабочий стол Pixel по умолчанию. Это будет выглядеть примерно так:
Отсюда вы начинаете взаимодействовать с удаленным рабочим столом Raspberry Pi со своего локального компьютера, используя клавиатуру и мышь.
Если вы используете macOS, вы можете установить приложение Microsoft Remote Desktop из Mac App Store. Пользователи Linux могут использовать RDP-клиент, например Remmina или Vinagre.
Выводы
Установка сервера Xrdp позволяет управлять сервером Raspberry Pi с локального настольного компьютера через простой в использовании графический интерфейс.
Если у вас есть вопросы, не стесняйтесь оставлять комментарии ниже.
Configure Raspberry Pi Remote Desktop To Windows 11/10, Mac & Linux
Connect to your Raspberry Pi with remote desktop on Windows, Linux and Mac devices.

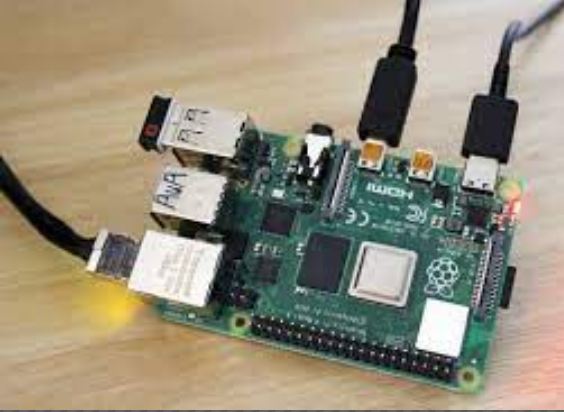
Raspberry Pi is a low-cost, credit-card-sized system that gets plugged into a system, TV, or monitor. It uses the very same standardized mouse and keyboard. OR, it can be its own computer because why not? It has the power and specifications to do so. Now, the problem is that what if you want to access your Raspberry Pi remotely from Windows 10, 11, Linux or Windows machine?
By default remote connections are turned off, in this article, we cover how you can configure your Raspberry Pi to be able to connect over remote desktop protocol (RDP).
With its help, you can explore computing and also learn how to program in various languages such as Scratch and Python.
Before you continue make sure to have the following:
- Raspberry Pi 3 or 4.
- A mouse and keyboard
- A 16 GB Micro SD card, preferably from SanDisk or Kingston.
- An internet connection (needed for the remote connection).
Why do people use and don’t use a Raspberry Pi
They use it because:
- It carries multiple sensors.
- Can be used as a portable system.
- Fast processor.
- It is a cheap mini-computer.
- Very light in weight and can be carried
- Provides support to different kinds of codes.
Why they don’t:
- It does not run Windows by default (Yet).
- It is impractical as Desktop Computer.
- It misses Graphics Processor.
- It misses eMMC internal storage and needs a micro SD card.
5 Benefits to RDP to your Raspberry Pi
The benefits are endless with the abilities it opens with having the remote desktop connection protocol enabled on the Pi. Below are some of the best advantages you get by doing so:
- You don’t need a physical cable connection.
- You can connect over your wireless or wired network.
- Connect to your Raspberry Pi computer from anywhere in the world.
- Use it as a secure server on which you can run services including a VPN.
- Access blocked sites or apps by connecting remotely over a censored network.
Configure Raspberry Pi Remote Desktop for Windows 11, 10, Mac and Linux
It is a proprietary protocol that has been designed to make use of low bandwidth connections to provide your desktop with access.
To allow usage of RDP on this we shall be using software which is known as xrdp.
This software would take both your screen and formats into RDP implementation.
It has many benefits over a VNC server or Teamviewer, the biggest being the low bandwidth needed to use it.
For this, you need X windows implementation installed to display the desktop otherwise you shall see a blank screen.
The tmate software shall work if you are only looking for terminal sharing.
First things first we need to be sure that everything is up to date, for this run the following commands:
[email protected]:~# sudo apt update && sudo apt upgrade After this, you need to install “xrdp package” to the Raspberry pi which shall allow remote raspberry to it.
If you are not aware then this is an open-source implementation of Microsoft’s proprietary RDP server which is the very same protocol to which many windows installations can be connected to and from.
Moreover, it also works with Microsoft’s own client which is built there within Windows.
As it gets installed there is nothing much left to do.
It will get installed with the best configuration automatically and work great.
To go back to its local IP address using the following command:
Setup VNC Server and PiTunnel
VNC is also another method that you can use to connect to your Pi device. The only downside is that it works on local networks and not over the public internet.
To configure VNC for remote desktop, follow the below instructions:
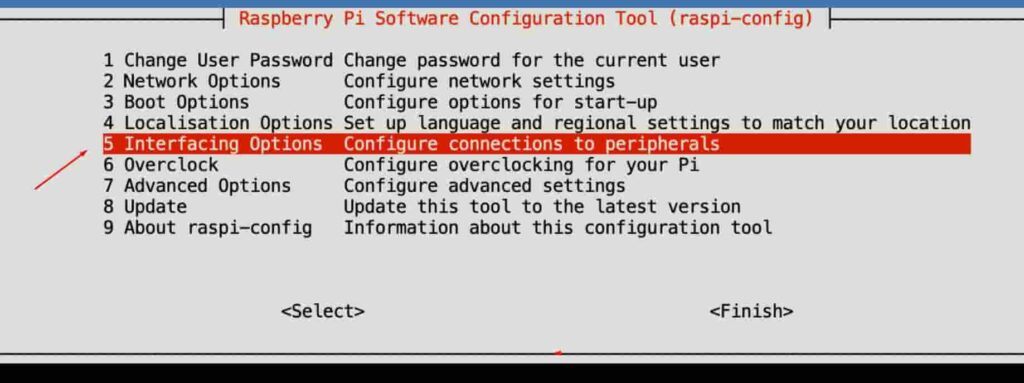
2. Now choose “interfacing Options – Option #5” and select it.
3. Now choose “VNC – Enable/Disable graphical remote access to your Pi using RealVNC“.
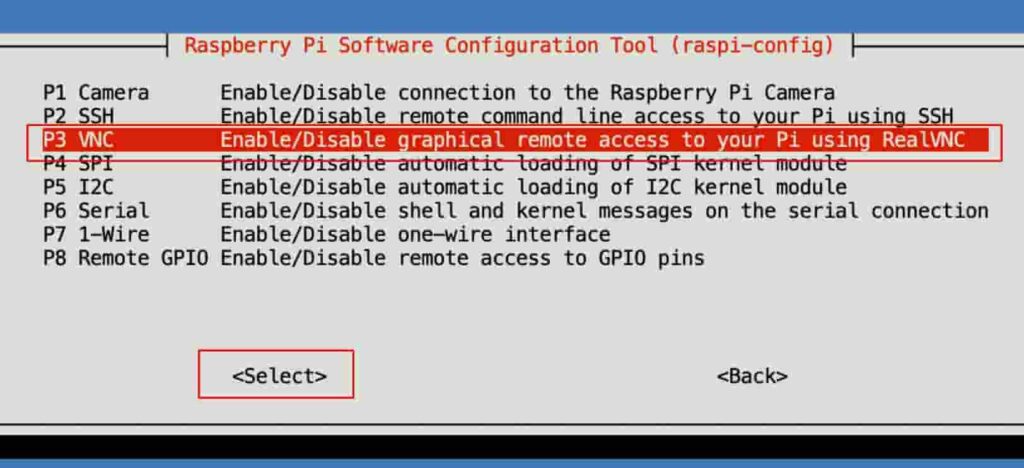
4. In the prompt window on next screen, choose “yes” to go ahead.
5. Finally hit “Ok” and your remote access is now enabled and running.
Words of advise : The default RDP port 3389 is commonly known and is always brute-forced. It is recommend you change it to something much random.
How To Connect to your Raspberry Pi with Remote Desktop Protocol
For this, you need to have a remote desktop application on your system and Pi’s local IP address.
First things first, you need to launch the “Remote Desktop Connection App” on your PC.
Click on the search bar, type the above term and open the icon that looks like a desktop.
There next to “My Computer” simply enter its local IP address or Public IP address then press the “connect” option.
Once the connection has been established you need to enter in username and passcode for Raspberry’s existing account.
If you are using the default one then for the username use “pi” and for a password use “raspberry”.

You shall now be able to have to access it by using the remote desktop tool on the PC.
If there are any issues then check to see if you are utilizing the correct IP address or not, else you can also use another method like TeamViewer or TightVNC software.
4 Remote Desktop Client Alternative Choices
Royal TS
It is designed to provide both support for RDP and others including VNC, SSH, FTP and SFTP and connection via web-based interfaces. It has many features like credential management and sharing features which mean there is no need to log in again and again.
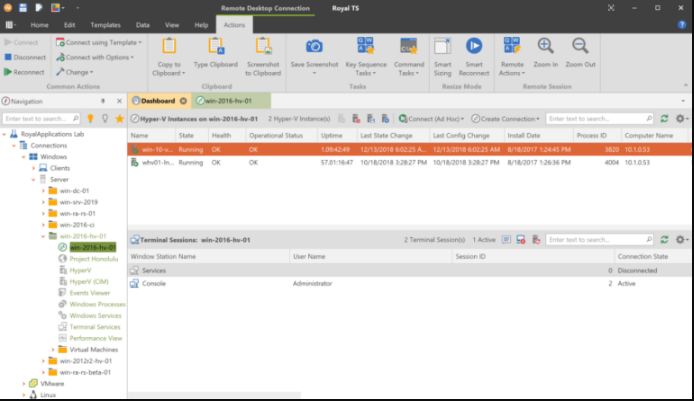
Out of many features, one great is that it is able to create command tasks and key sequence tasks through which you can create your very own tasks as well as automate troubleshooting processes part.
It carries a “lite” version which can be downloaded for free and allows up to 10 connections and credentials.
Terminals
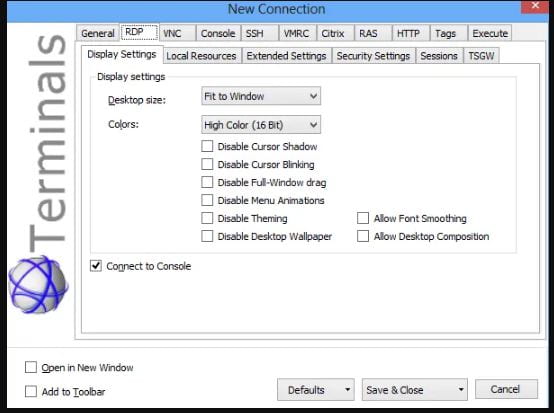
This is free and open-source. It aims to manage the issue which controls different connections at the same time. Along with providing support to RDP, it works with VNC, VMRC, SSH, HTTP and HTTPS.
It is rich in features like a multi-tab interface, resizable windows, toolbars which can be customized, connection history and many more.
Screens for Mac
If you are a Mac user and looking for an alternative then this is your call. Moreover, for users of the iPhone, it comes with Screen iOS that shall help you to control other systems from your phone or iPad simply by using an SSH connection.
It carries a free trial of screens MAC called Screens Express but with limited use for certain situations.
MobaXTerm
This one is a toolbox for remote computing. It shall provide you with many functions that to in a single windows app that is tailored for programmers, IT administrators, webmasters and other users who need to deal with their remote job in a simple manner.
Conclusion
This article touched on various aspects on the Raspberry Pi remote desktop configuration on Windows, Linux and Mac. We have used the two primary methods which involve xrdp and using VNC which is the most preferred one. We ended up showing you alternative RDP clients that you could install for wider flexibility.
Other tutorials you will find interesting to read: