- Saved searches
- Use saved searches to filter your results more quickly
- License
- berglh/remote-ubuntu-server-zfs-install
- Name already in use
- Sign In Required
- Launching GitHub Desktop
- Launching GitHub Desktop
- Launching Xcode
- Launching Visual Studio Code
- Latest commit
- Git stats
- Files
- README.md
- About
- How to Perform Graphical Installation of “Red Hat Enterprise or CentOS 7.0” Remotely Using VNC Mode
- Requirements
- Step 1: Boot RHEL/CentOS Media Installer in VNC Mode
- Step 2: Configure VNC Clients on Remote Systems
- Remote Linux installation over the network
- 3 Answers 3
Saved searches
Use saved searches to filter your results more quickly
You signed in with another tab or window. Reload to refresh your session. You signed out in another tab or window. Reload to refresh your session. You switched accounts on another tab or window. Reload to refresh your session.
Ubuntu Installation over SSH with ZFS Root
License
berglh/remote-ubuntu-server-zfs-install
This commit does not belong to any branch on this repository, and may belong to a fork outside of the repository.
Name already in use
A tag already exists with the provided branch name. Many Git commands accept both tag and branch names, so creating this branch may cause unexpected behavior. Are you sure you want to create this branch?
Sign In Required
Please sign in to use Codespaces.
Launching GitHub Desktop
If nothing happens, download GitHub Desktop and try again.
Launching GitHub Desktop
If nothing happens, download GitHub Desktop and try again.
Launching Xcode
If nothing happens, download Xcode and try again.
Launching Visual Studio Code
Your codespace will open once ready.
There was a problem preparing your codespace, please try again.
Latest commit
Git stats
Files
Failed to load latest commit information.
README.md
Ubuntu Installation over SSH with ZFS Root
This repository contains a set of three guides to remotely reinstall a server where the only access to the server is via SSH. This can be the case with leased dedicated servers in data centres or remote customer servers without any remote console access (iDRAC/hILO/etc.).
It also includes instructions on installing Ubuntu Server with a ZFS (0.80) root filesystem and a guide on creating an encrypted data pool for securely storing data on the remote server.
These guides are intended as a reference only and it’s entirely possible that it will result in data loss if necessary precautions are not taken beforehand, such as a full system back-up. I am not responsible for any errors in this guide that may result in the loss of your data.
It’s recommended to experiment with these procedures in virtual machines beforehand to emulate your exact scenarios in preparation to performing them on production systems.
2: Regarding ZFS Root File System
There are performance penalties with using ZFS as a root file system, particularly with respects to single disk systems. A lot of the benefits of ZFS integrity are lost in this configuration.
That being said, the use of ZFS snapshots and native encryption may be of benefit. If maximum performance is the desire, stick to ext4/xfs root partitions and LUKS encryption. Also consider btrfs which is becoming a more suitable option with a similar feature set to ZFS.
3: Regarding UEFI installations
These guides to not cover any instructions for UEFI systems. Please find instructions for these in the References below. The general process of this Ubuntu Server 19.10 on ZFS Root guide is still an improvement on previous ZFS Root guides in terms of order of operation, so keep it in mind when following some of the older guides below.
These guides are provided as is without any official support channels. If you require help, try the IRC channels #zfsonlinux , #ubuntu-server , #ubuntu on freenode.
Thank-you to the authors of the following guides that sourced the methods used in this series.
About
Ubuntu Installation over SSH with ZFS Root
How to Perform Graphical Installation of “Red Hat Enterprise or CentOS 7.0” Remotely Using VNC Mode
This tutorial concentrates on how to perform a graphical installation of Red Hat Enterprise or CentOS 7.0 from a remote point in VNC Direct Mode using Anaconda included locally VNC server and how to partition a hard-disk smaller than 2TB with a GPT Partition Table Layout on non-UEFI systems.
In order to access the graphical installation, your remote system that will control the installation process, requires a VNC viewer program installed and running on your machine.
Requirements
Step 1: Boot RHEL/CentOS Media Installer in VNC Mode
1. After the installer bootable media has been created, place your DVD/USB into your system appropriate drive, start the machine, select your bootable media and on the first prompt press TAB key and the boot options should appear.
In order to start b>Anaconda VNC server with a password to restrict access to installation and force your hard-disk smaller than 2TB in size to be partitioned with a GPT valid partition table, append the following options to boot menu command line.
inst.gpt inst.vnc inst.vncpassword=password resolution=1366x768
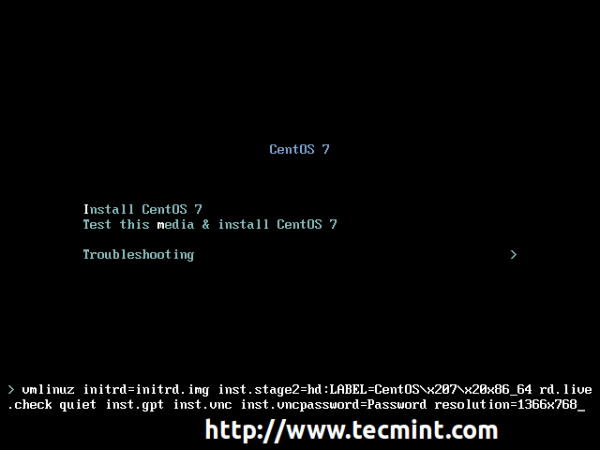
As you can see I’ve added an extra option to force graphical installation resolution to a custom size – replace resolution values with your desired values.
2. Now press Enter key to start the installer and wait until it reaches the message where it shows you the VNC IP Address and Port number to enter, in order to connect, on client side.
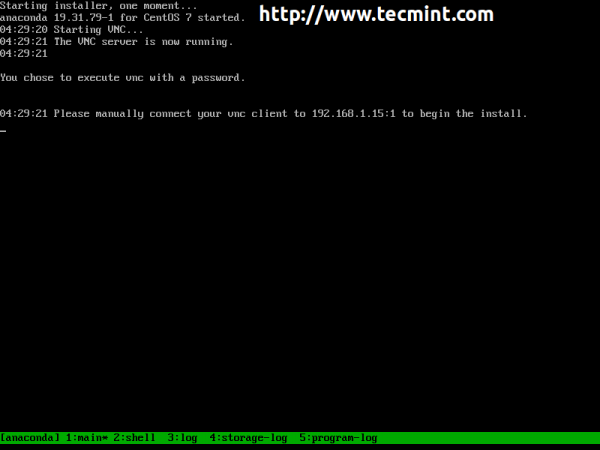
That’s it! Now the installation process is ready to be configured from a remote system using a VNC Client.
Step 2: Configure VNC Clients on Remote Systems
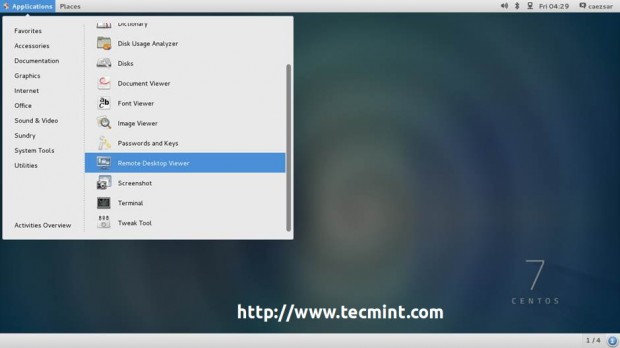
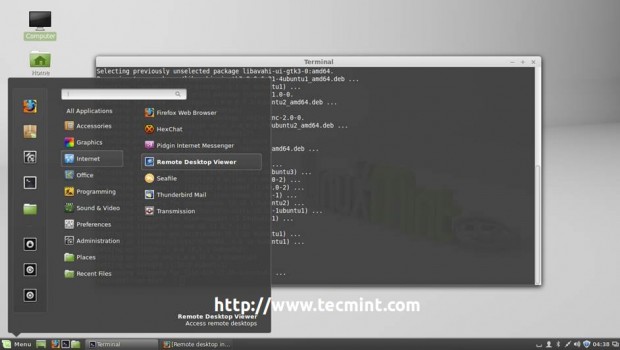
3. As a previously mentioned, in order to be able to perform a VNC installation remote systems requires a running VNC Client. The following VNC clients are available, depending on your Operating System.
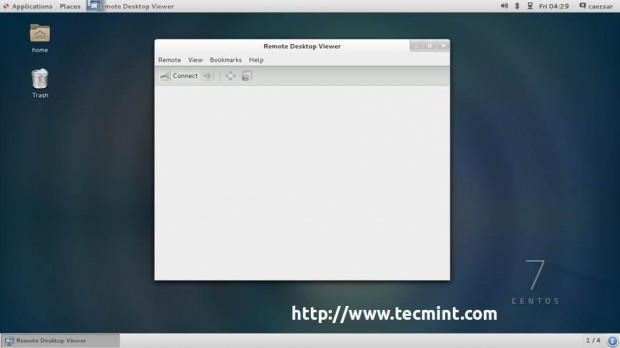
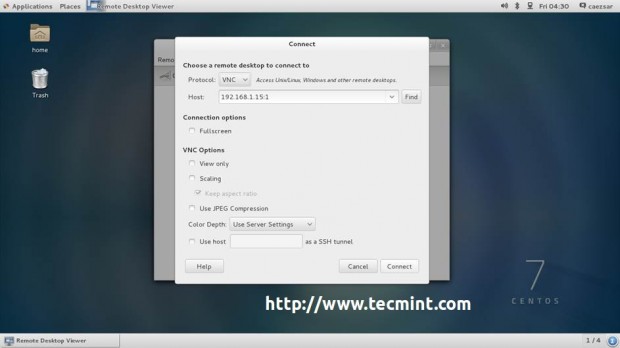
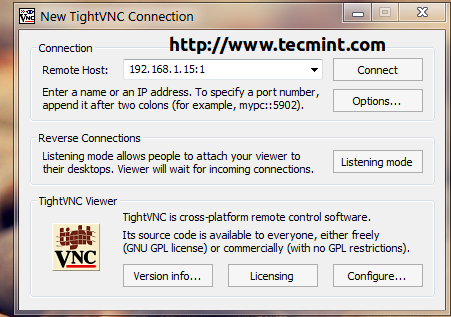
For RHEL/CentOS 7.0 installed with a Graphical User Interface open Remote Desktop Viewer, hit on Connect button and choose VNC for Protocol and add VNC IP Address and Port presented on the system where you perform the installation.
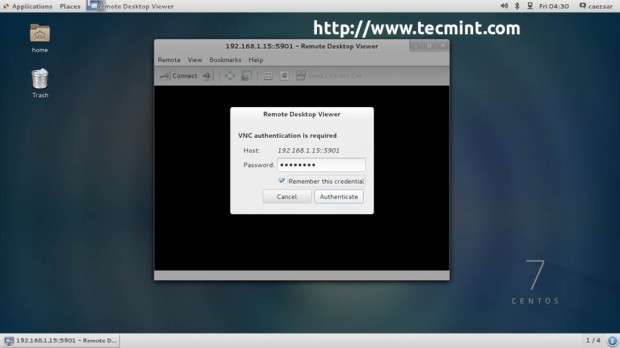
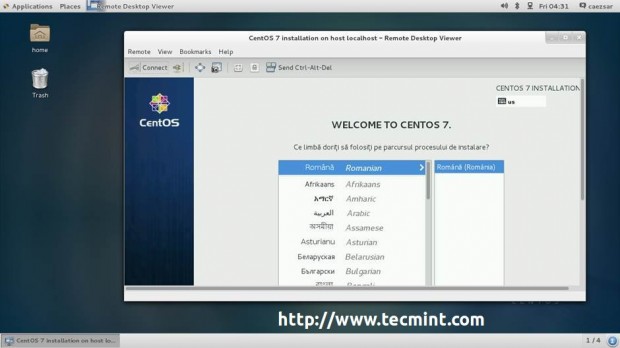
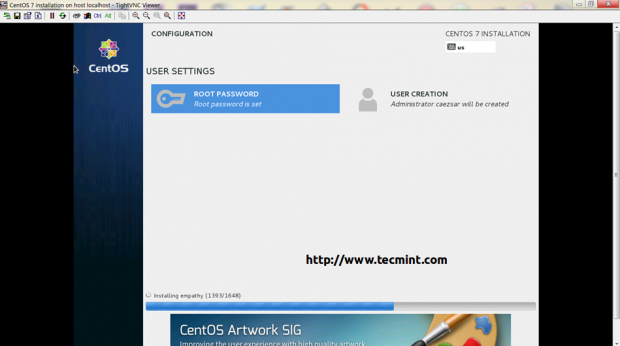
4. After the VNC Client connects to installer, you will be prompted to enter the VNC installer password. Enter the password, hit Authenticate and a new window with CentOS/RHEL Anaconda graphical interface should appear.
From here, you can continue with the installation process in the same manner as you would do it from a directly connected monitor, using the same procedure as described RHEL/CentOS 7.0 Installation Guide links provide above.
5. For Debian based distributions (Ubuntu, Linux Mint, etc) install Vinagre package for GNOME desktop environment and use the same procedure as explained above.
$ sudo apt-get install vinagre

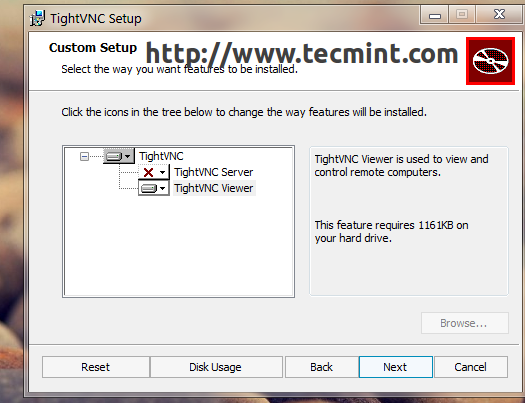
6. For Windows based systems install the TightVNC Viewer program by downloading it using the following link.
- http://www.tightvnc.com/download.php
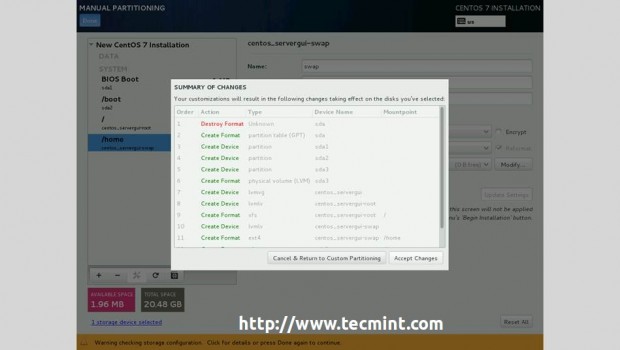
7. If you want to see details about your disk partition layout which now uses GPT on a disk smaller than 2TB, go to Installation Destination, select your disk and the partition table should be visible and a new biosboot partition should be automatically created.
If you opted for Automatically create partitions, in the contrary case you should create one as Standard Partition with Bios Boot as a File System and 1 MB in size on non-UEFI systems.
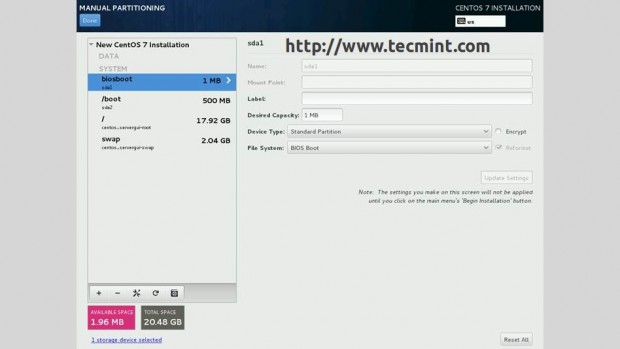
As a last note, if you are planning to use MBR Partition Layout on a disk smaller than 2TB on UEFI based systems, you must initially reformat your hard-disk, and, then create a Standard Partition with EFI System Partition (efi) as File System with a minimal value of 200 MB in size, regardless of your partitioning scheme.
Remote Linux installation over the network
Long story short — I have to remotely install an arbitrary Linux distro on a PC over the network. This is not a server and I will be installing a desktop environment. The problem is I don’t have physical access to the machine and it doesn’t have a monitor, keyboard or a mouse — so the only help I can get from the guys where the machine is to plug it to the network and turn it on. On top of that the PC is brand new so it doesn’t have an existing OS. On the bright side I have root SSH access to a Linux server in the same local network as the PC. How would I go about installing the OS, while doing the whole process remotely? Thanks in advance!
Is there a PXE environment already set up on the network? Can the IT staff throw in an install CD for you and start up openssh? If the answer to both of those is «no», then you’re out of luck.
CD — no. I think I should be able to install PXE on the Linux server I have access to, but all of the PXE installation guides I’ve seen require the user to be at the physical machine to go through the installation process.
There is that, yes, and you will also need to modify the DHCP setup on that network to get PXE working.
Check if the hardware supports Intel VPro or similar tech. Many desktop PCs, (even my laptop does) support it nowdays. It allows for remote KVM over network using just a browser or a light client.
This sounds interesting — it seems that the 3770 supports it but the H77 chipset doesn’t — so I’m out of luck. Unfortunately this requires someone actually configuring Intel AMT on the host computer.
3 Answers 3
You need a physical intervention on site anyway, so why not ask one of the people on-site to plug a USB key (prepared by you, or written with a ISO made by you) in the machine before booting it ? If you prepare this key with a listening netcat then you can directly write the HD from the network.
Once the live OS is booted, it should automatically launch
nc -l 3000 | dd bs=1M of=/dev/sda
and it should also ping your local machine so you can guess it’s IP.
Once you have the IP you run from your local machine:
dd bs=1M if=/images/myimage | nc remoteIP 3000; end command
This will dump /images/myimage directly to the remote /dev/sda. «end command» is a sendmail command or anything that will confirm to you that the operation is finished.
You can also do the opposite and run netcat as a server on your local machine and dump the image from the remote machine, it should make the firewall bypassing easier.
It require a DHCP server and a person to plug the USB key, that’s it. No PXE, no (or very few) surprise.
I love the netcat idea! I think it would be better though to open a SSHd on the target machine rather than listen. Only thing left is to roll a small LFS distro with openssh and make a small tutorial for the guys at the remote site on how to prepare the USB stick (they are using iMacs so I could basically SSH into one of them and prepare the stick myself). I guess I should install the OS in a VM and dd of its drive — this will be my image. Will the OS boot properly, as I am afraid the installation is doing some hardware specific stuff (imagine moving a Windows install to another PC)?
Although I solved the problem with a mix of all the above solutions (SSH -> PXE -> WOL -> netcat -> X11/SSH), I think your answer gave me a good idea of the steps I had to take.
This is a tough problem. I think the easiest method would be to prepare a hard disk with a completely configured OS and just ship it to the remote location and have them install it into this machine. After all, this is not rocket science and can be done by untrained people with proper directions.
If that’s not possible, you will need at least the possibility to add some statements to the DHCP server ( next-server and filename ) for this machine to allow booting via PXE from the linux server, and a static IP address for the machine from the DHCP.
After that, I would try to boot a live system via PXE and use it to download an image of an installed system and drop it onto the disk with dd or something similar.
It should also be possible to prepare a kickstart file for CentOS (or Fedora) that allows to completely install a system without any interaction (via PXE), but getting this right will take a lot of time.