- How to remove Linux distro from WSL
- Remove Linux distro on WSL from Settings
- Uninstall WSL distro on Windows 11
- Uninstall WSL distro on Windows 10
- Remove Linux distro on WSL from Command Prompt or PowerShell
- Remove imported Linux distro on WSL with commands
- Related Stories
- How to Uninstall Ubuntu from Windows Dual Boot Safely
- Uninstall Ubuntu safely from Windows dual boot mode
- Step 1: Access UEFI boot settings
- Step 2: Move Windows Boot Manager up the boot order
- Part 2: Deleting Linux partition on Windows
- Step 1: Go to disk management
- Step 2: Identify Linux partition
- Step 3: Delete Linux partition
- Step 4: Extend Windows partition
- Step 1:
- Step 2:
- Step 3:
- Step 4:
- Step 5:
- Step 6:
- Step 7:
- Step 8: If the trick in step 6 didn’t work
How to remove Linux distro from WSL
On Windows 11, you have at least three ways to remove any Linux distro from WSL, and here’s how.
Windows Subsystem for Linux (WSL) allows you to completely remove any Linux distribution (for example, Ubuntu, Kali, Mint, and Debian) in at least three ways, whether you are on Windows 11 or Windows 10.
Since Linux distros are available through the Microsoft Store, they are considered applications, which means you can use the Settings app and the Windows Package Manager (winget) command to uninstall any distribution.
You can also use the —unregister option with the wsl.exe tool, but it only resets the Linux instance without deleting the files. However, this command would remove a distribution you restored from the backup.
This guide will teach you how to uninstall any Linux distribution on Windows 11 or 10.
Remove Linux distro on WSL from Settings
Whether you have Windows 11 or Windows 10, the steps to use the Settings app to remove a Linux distro would be slightly different.
Uninstall WSL distro on Windows 11
To completely remove a Linux distro on WSL, use these steps:

Once you complete the steps, the Linux instance and the distribution will be removed from Windows 11.
Uninstall WSL distro on Windows 10
To uninstall a distro on Windows 10, use these steps:

- Open Settings.
- Click on Apps.
- Click on Apps & features.
- Select the Linux distro and click the Uninstall button.
- Click the Uninstall button again.
After you complete the steps, the Ubuntu, Kali, Mint, Debian, or the specific distribution will no longer be available on Windows 10
Remove Linux distro on WSL from Command Prompt or PowerShell
To remove any WSL distribution with commands on Windows 11 or 10, use these steps:
- Open Start.
- Search for Command Prompt (or PowerShell), right-click the top result, and select the Run as administrator option.
- Type the following command to list all the apps installed on Windows 11 and press Enter:

Type the following command to remove the Linux distro (Ubuntu, Debian, Kali, Mint, etc.) and press Enter:
winget uninstall --id "DISTRO-ID-NAME"
In the command, specify the name of the Linux distro to remove from Windows 11 completely. For example, this command removes the Ubuntu distro:
winget uninstall --id Canonical.Ubuntu

Once you complete the steps, the instance and distribution files will be removed from your computer.
Remove imported Linux distro on WSL with commands
If you imported a Linux distro from a backup on Windows 11 or 10, the option to uninstall it won’t appear in the Settings app, Command Prompt, or PowerShell. In this situation, you will need to unregister the distribution to delete it.
To remove a Linux distro after being imported (restored) from a backup, use these steps:
- Open Start.
- Search for Command Prompt, right-click the top result, and select the Run as administrator option.
- Type the following command to view a list of all available distros and press Enter:
wsl --unregister DISTRO-NAME
In the command, replace DISTRO-NAME with the name of the distro you want to set as default (see step 3). For example, this command unregisters and deletes the Ubuntu Linux distribution:

Type the following command to confirm distros and press Enter:
Once you complete the steps, the distro will reset and no longer be available in WSL, but it won’t be uninstalled from the computer. If you want to reinstall the distro, you can open it again from the Start menu.
We may earn commission for purchases using our links to help keep offering the free content. Privacy policy info.
All content on this site is provided with no warranties, express or implied. Use any information at your own risk. Always backup of your device and files before making any changes. Privacy policy info.
Since you are here.
I’ve got a small favor to ask. This is an independent site, and producing content takes a lot of hard work. Although more people are reading Pureinfotech, many use adblocker. Thus advertising revenue is falling fast. And unlike many other sites, there is no paywall blocking readers here. So you can see why your help is needed. If everyone who finds this website useful and helps to support it, the future would be much more secure. Thank you.
If you use adblocker, please disable it for this site.
$125 raised so far by 11 people.
Related Stories
How to Uninstall Ubuntu from Windows Dual Boot Safely
Trust me, installing Ubuntu in dual boot with Windows is not that difficult a task. Similarly, removing Ubuntu from dual boot is also not that complicated.
In both cases, you need to take a bit of precautions with disk partitions. Having a Windows recovery and proper backups always helps.
In this tutorial, I am going to show you the steps for uninstalling Ubuntu from Windows dual boot. The steps should be equally valid for any other Linux distribution be it Linux Mint, Debian, Fedora, Arch etc.
Uninstall Ubuntu safely from Windows dual boot mode
The process is composed of two parts:
- Change the boot order in UEFI settings and give priority to Windows Boot Manager. You may also delete Grub entry from UEFI setting, if your system gives you this option. If that doesn’t work then you’ll have to repair boot with a bootable Windows disk.
- Deleting the Ubuntu partition from Windows.
As the last resort, you need to have a bootable Windows disk or recovery disk so that you can use it to repair the boot after removing Ubuntu (if needed).
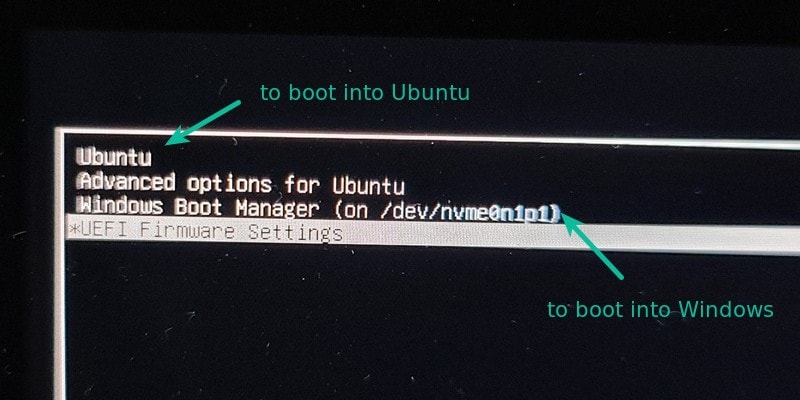
Windows boot manager lets you boot into Windows directly. And this is what you are going to use here.
Step 1: Access UEFI boot settings
Before you go on and delete the Linux partition, it will be a wise move to check if you can make Windows boot manager as the default boot option. This way, when you remove Linux, your boot process won’t be disturbed.
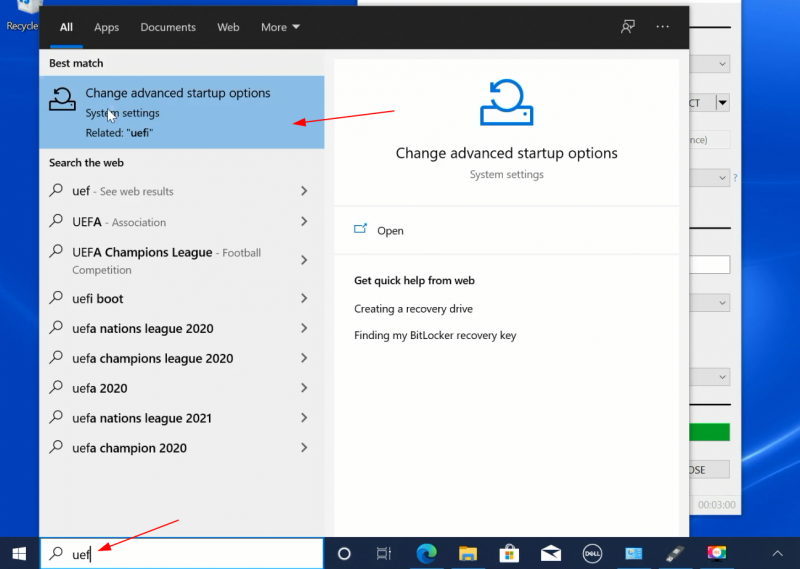
Access the UEFI settings from Windows. Search for UEFI and go to Change advanced startup options:
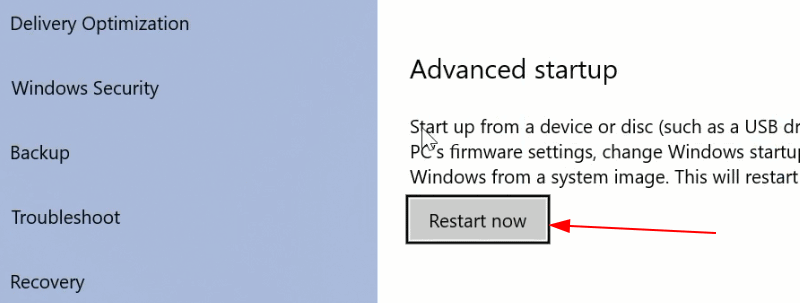
Click on Restart now:
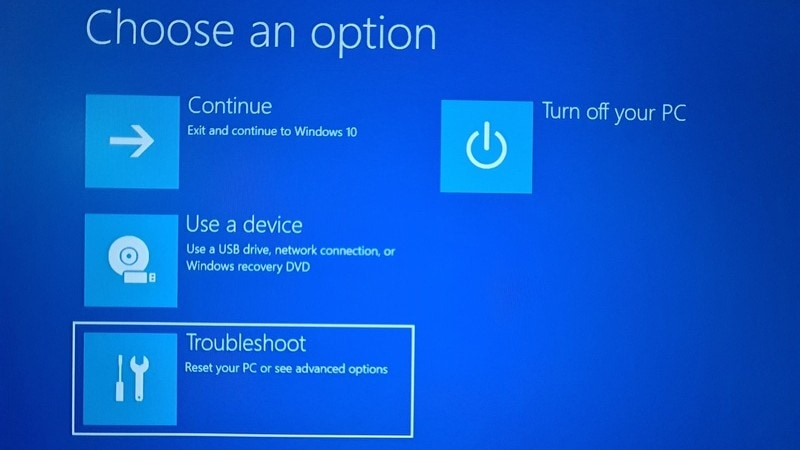
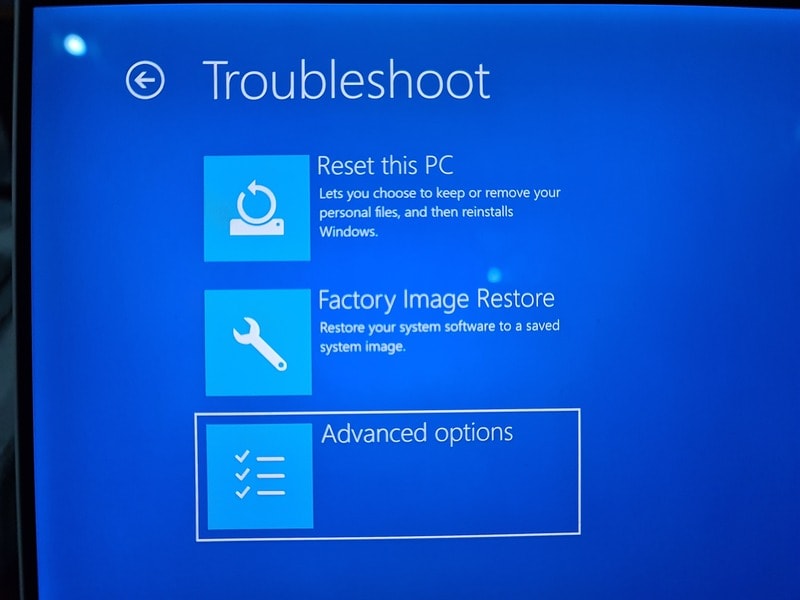
On the blue screen next, select Troubleshoot:
Select Advanced Options next:
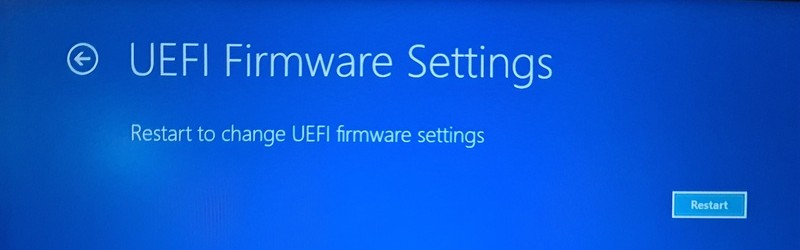
On the next screen, select UEFI Firmware Settings:

Hit restart button on the next screen:
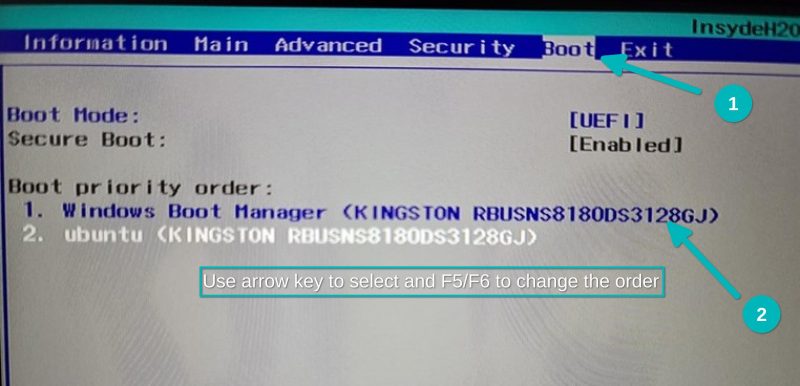
Step 2: Move Windows Boot Manager up the boot order
Now your system will boot into UEFI settings. Now, the next screen will look different for different systems and manufacturers. You have to look for boot tab here.
On my Acer predator, it looks like the image below. Here, use arrow keys to select Windows Boot Manager and press F5 to move it up the order. Press F10 to save and exit.
Now, your system should boot straight into Windows. To verify, restart your system a couple of times and see if the system boots into Windows without showing the grub screen of Linux.
If that happens, you are good to go with the next step which is to delete the Linux partition and reclaim your disk space.
Part 2: Deleting Linux partition on Windows
Let’s see how to delete the Linux partition and extend your Windows disk with available freespace afterwards.
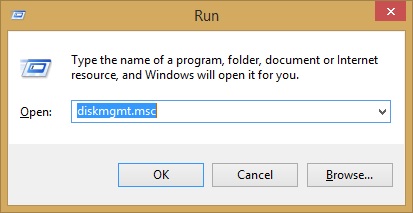
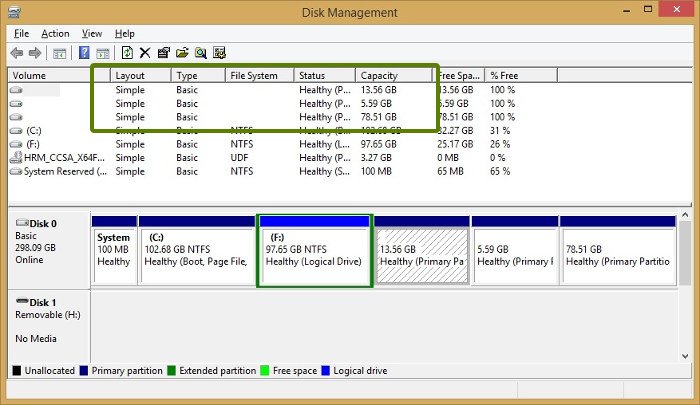
Step 1: Go to disk management
Log into Windows. Press Windows+R and type diskmgmt.msc into the dialog box. This will open the Windows disk management tool.
Step 2: Identify Linux partition
Since you installed Linux, it’ll be easy for you to recognize the Linux partition by its size.
Another hint for identifying the Linux partition is to look for those that don’t have a file system and drive number. Windows partitions are labeled with a drive number, such as C, D, E, etc., and usually use the NTFS or FAT file system.
As you can see, I have three Linux partitions here as I created root, swap and home separately when I installed Ubuntu.
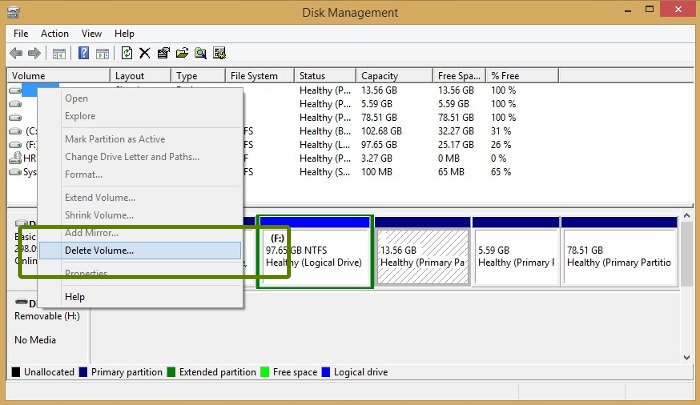
Step 3: Delete Linux partition
Select the Linux partition(s), right click on them and opt for the Delete Volume option.
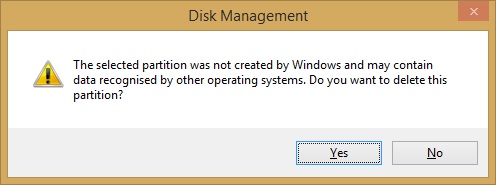
It will throw you a warning – just select Yes here.
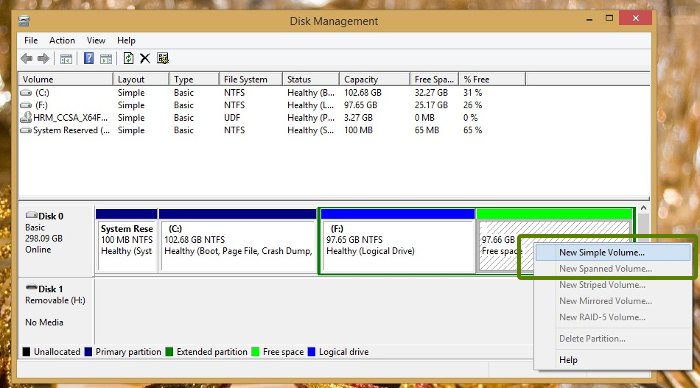
Step 4: Extend Windows partition
The deleted partition(s) will now be available as a chunk of free space. You can either extend the existing volume or create a new Windows partition from it.
I would suggest that you create a new drive (or volume or partition, whatever you want to call it) as this will be easier if you decide to dual boot Linux with Windows again.
After deleting the Linux partition, of your system boots into a broken Grub screen which shows a message like grub rescue error, you need to use Windows recovery disk and fix the Windows bootloader.
Step 1:
Put in the Windows installation disk and restart your computer. Press F10 or F12 at boot time to go into BIOS/UEFI and choose to boot from removable disk.
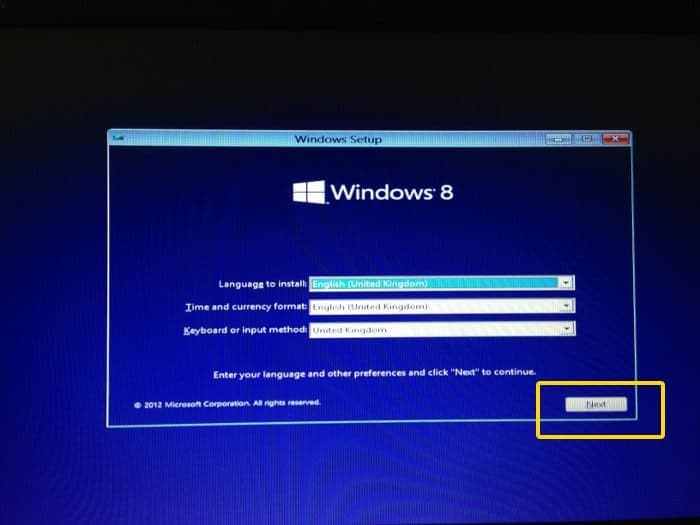
Step 2:
Choose to repair your computer:
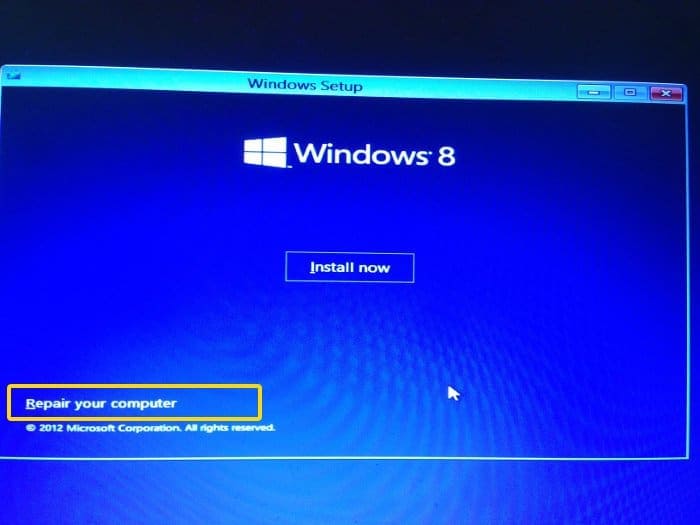
Step 3:
Go for the Troubleshoot option here:
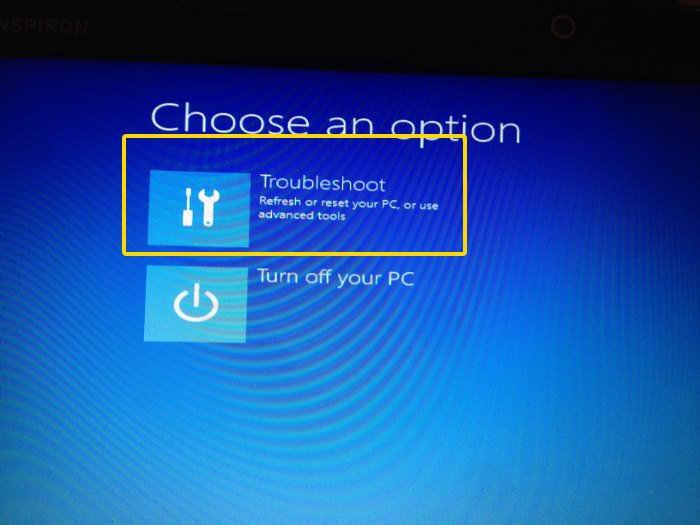
Step 4:
On the troubleshooting page, choose Advanced options:
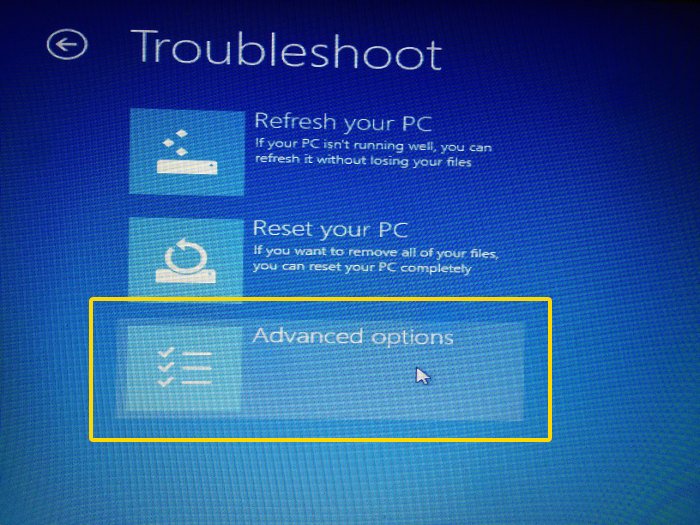
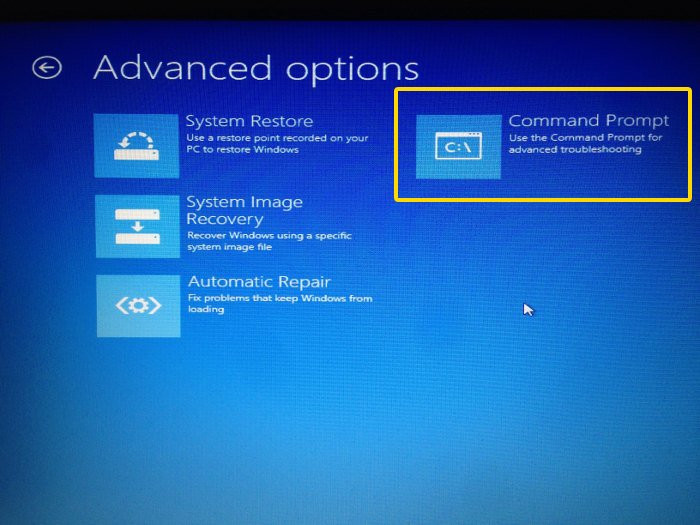
Step 5:
Look for the command prompt option in here:
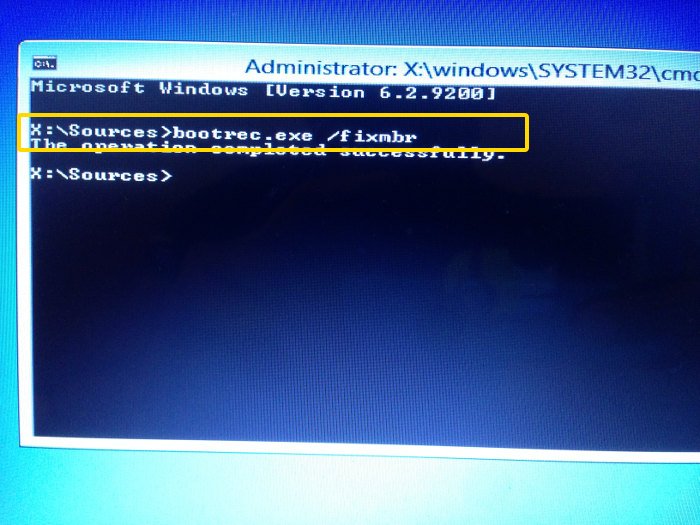
Step 6:
In the command line, type the following command to fix the Windows boot loader:
Normally, it works instantly. You don’t even have to wait for it.
Step 7:
Once it’s done, restart your computer and this time boot normally from the hard disk. You should be able to boot into Windows. If you still see a Grub rescue error, try the steps below.
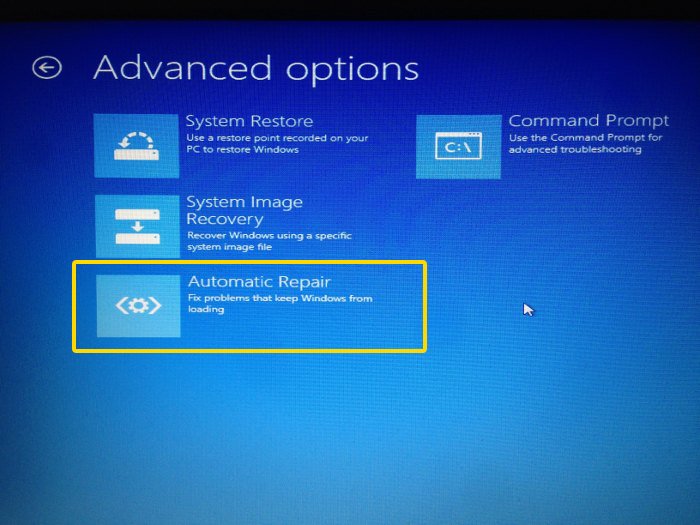
Step 8: If the trick in step 6 didn’t work
If the command in step 6 didn’t work, try Automatic repair from the advanced troubleshooting options.
It will take some time to find the issue and then repair it.
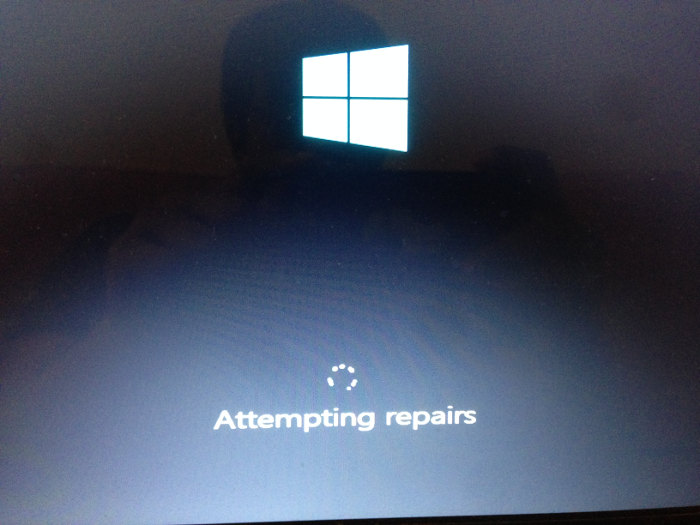
Now if you reboot, you should go into Windows normally without seeing any Grub rescue error thingy.
I hope this guide helped you safely remove Ubuntu from Windows dual boot. Feel free to ask any questions or make a suggestion.