- How to Use a Wireless Bluetooth Controller with RetroPie
- Connect your Bluetooth adapter
- Connect a wired USB controller (or keyboard)
- Update your controller’s firmware
- Verify RetroPie version
- Open RetroPie Setup
- Open Bluetooth device config
- Register a new Bluetooth device to pair the controller with your Pi
- Tell Emulation Station to recognize the controller on boot
- You’re good to go!
- Questions? Comments?
- Controller Configuration
- Controller Configuration
- Hotkey
- Ретроконсоль своими руками Часть 2. Установка и настройка RetroPie
- 1. Подготовка microSD-карты
- 2. Настройка геймпада
How to Use a Wireless Bluetooth Controller with RetroPie
Using a Bluetooth controller with RetroPie is a piece of cake — this guide will show you how. Works on all Raspberry Pi versions (including the Pi Zero).
I chose to use an 8Bitdo SNES-style gamepad as the 8Bitdo quality and compatibility is superb. There are cheaper Bluetooth gamepads out there, but you may have issues getting the controller to work properly.
This guide will focus primarily on setting up an 8Bitdo Bluetooth controller; however, the steps here will be extremely similar for other Bluetooth controllers, including Xbox controllers. Be sure to check out our master RetroPie controller guide to explore other options, too!
Howchoo is reader-supported. As an Amazon Associate, we may earn a small affiliate commission at no cost to you when you buy through our links.
Connect your Bluetooth adapter
If you’re using a Raspberry Pi Zero W, Raspberry Pi 3, or newer, skip this step.
If you’re using an older Pi that doesn’t have Bluetooth, you’ll need to add this, or a similar, USB Bluetooth adapter.
Power down your Pi. Then, connect your USB Bluetooth adapter to any available USB port. If you followed my NES PiCart guide, there’s a free USB port on the rear of the USB hub (lucky you!)
There are some very small bluetooth adapters out there! You can barely see mine plugged into the rear of my hub.
Connect a wired USB controller (or keyboard)
You’ll need to use a wired device — like a USB controller or keyboard — to navigate the RetroPie UI and update the Raspberry Pi’s configuration to accept your new bluetooth controller.
Connect a wired gamepad or keyboard. Then, connect your Pi to your display and boot it up.
Update your controller’s firmware
It’s important that your controller firmware is up to date.
If using an 8Bitdo controller, select «Firmware» and then click «Download» next to your specific controller.
The process is super simple; follow the instructions on that page to update your controller’s firmware.
Verify RetroPie version
Bluetooth controllers (and 8Bitdo support) work best when using RetroPie v4.0 or above — if you installed RetroPie between August 2016 and now, you’re already running v4.0+. If you aren’t, I recommend updating to the latest version of RetroPie or you may encounter issues. If you don’t want to update, you can still use bluetooth controllers, but the process is much more involved.
Open RetroPie Setup
Inside the RetroPie interface, navigate to the right and select the RetroPie icon/system. Then, select RetroPie Setup.
Open Bluetooth device config
Once inside the RetroPie Setup menu, navigate to Configuration/Tools and select bluetooth — Configure Bluetooth Devices.
Next, turn the 8Bitdo hack option off by selecting the 8Bitdo mapping hack (ON — old firmware) option so that it now says 8Bitdo mapping hack (OFF — new firmware).
Register a new Bluetooth device to pair the controller with your Pi
Power on your Bluetooth controller and make sure it is searching for a connection — this is normally done by holding a combination of buttons for a few seconds. The exact button sequence varies based on which Bluetooth gamepad you have, but the method will be listed in the manual that came with your controller. For my controller (the SNES30), this is done by holding down the Start button for 3 seconds until the blue light starts flashing.
Once your wireless controller is in searching mode, use your wired controller to select Register and Connect to Bluetooth Device. You’ll see a «Searching. » box and then a list of Bluetooth devices by MAC address. If you don’t see the name of your device here, select Cancel and then search again. It seems that the Bluetooth device name doesn’t always appear after searching for the first time.
After selecting your device, choose the DisplayYesNo security option. If the SNES30 is paired properly, the blue light will now be solid.
Tell Emulation Station to recognize the controller on boot
Finally, you need to tell Emulation Station to search for and recognize your new Bluetooth gamepad on system boot. From the same Bluetooth Setup menu, select Set up udev rule for Joypad (required for Joypads from 8Bitdo etc). Select your controller from this list.
Select Cancel to exit Bluetooth Setup and RetroPie Configuration. Finally, reboot your Pi.
While it’s rebooting, go ahead and unplug your wired controller. After your Pi boots to the Configure Device menu, hold down any button on your Bluetooth controller and you will be prompted to map it. You’re good to go!
The L and R bumper buttons on the SNES30 controller should be mapped as «shoulder» buttons, not «bumper» buttons.
You’re good to go!
Now you can sit back on your couch and play retro games the modern way.
Questions? Comments?
Post below and I’ll do my best to help you out! The RetroPie Wiki also has some great resources for troubleshooting 8Bitdo and other Bluetooth controllers.
Controller Configuration
RetroPie supports many popular controllers out of the box. On first boot you will be prompted to configure a controller in EmulationStation. Once you finish configuring your controller, multiple configuration profiles will be automagically generated for most of the systems in RetroPie.
Some emulators will still require manual controller configuration which will be detailed on their respective system page here in the documentation.
You can also configure controls for individual systems and individual games. For more advanced controller configuration with libretro cores (any emulator that starts with lr ) see the RetroArch-Configuration page.
Note that some controllers (primarily wireless or bluetooth controllers) may require special drivers to be installed through the RetroPie Setup Script which are detailed on their individual controller page.
Controller Configuration
On first boot this menu in EmulationStation will configure your controls for both Emulationstation and RetroArch Emulators:

Hold down any button on your keyboard or gamepad and the name will appear at the bottom and then open up into a configuration menu:

Follow the onscreen instructions to configure your gamepad- if you run out of buttons just hold down a button to skip each unused button. When you get to OK press the button you have configured as «A».

If you wish to configure more than one controller, you can do so from the start menu of emulationstation. For more details on manual controller configurations see this page Here.
See the following diagrams for reference:
| SNES Controller |
|---|
 |
| XBox 360 Controller |
|---|
 |
| PS3 Controller |
|---|
 |
Hotkey
The Hotkey button enables you to press it in combination with another button to access functions such as saving, loading, and exiting in emulators. It is suggested to use the Select button as the hotkey. The following chart shows the default hotkey combinations. For example, if you chose Select as your Hotkey, that means you hold down Select while pressing the other button to execute the command.
Note Hotkey combinations are specific to the retroarch/libretro based emulators.
| Hotkey Combination | Action |
|---|---|
| Hotkey+Start | Exit |
| Hotkey+Right Shoulder | Save |
| Hotkey+Left Shoulder | Load |
| Hotkey+Right | Input State Slot Increase |
| Hotkey+Left | Input State Slot Decrease |
| Hotkey+X | RGUI Menu |
| Hotkey+B | Reset |
Ретроконсоль своими руками Часть 2. Установка и настройка RetroPie
В предыдущей статье мы подобрали все необходимые компоненты для сборки нашей самодельной ретроконсоли. Настало время вдохнуть в нее жизнь! В этом нам поможет RetroPie — операционная система, основанная на Linux-дистрибутиве Raspbian OS и представляющая собой сборник эмуляторов разнообразных игровых приставок прошлых лет и удобный менеджер для работы с вашей игротекой в одном лице. Хотя это отнюдь не единственное из доступных решений, по нашему мнению, именно данная сборка лучше всего подходит новичку, так как требует минимальных навыков для базовой установки и настройки, отличаясь при этом стабильностью и достаточно широким спектром возможностей. Итак, приступим.
1. Подготовка microSD-карты
Первое, что необходимо сделать, — установить RetroPie на карту памяти, которая будет исполнять роль системного накопителя. Объем карточки всецело зависит от того, как именно вы планируете использовать консоль. Если вы собираетесь играть исключительно в 8/16-битные проекты или запускать игры с внешних носителей (а такую возможность RetroPie также поддерживает), то вам вполне хватит SanDisk Ultra на 32 гигабайта. В противном же случае стоит приобрести microSD-карту емкостью 128–256 ГБ: вряд ли вам понадобится хранить в памяти ретроконсоли все когда-либо выходившие игры для PlayStation и DreamCast, а для избранных релизов такого объема должно быть вполне достаточно.
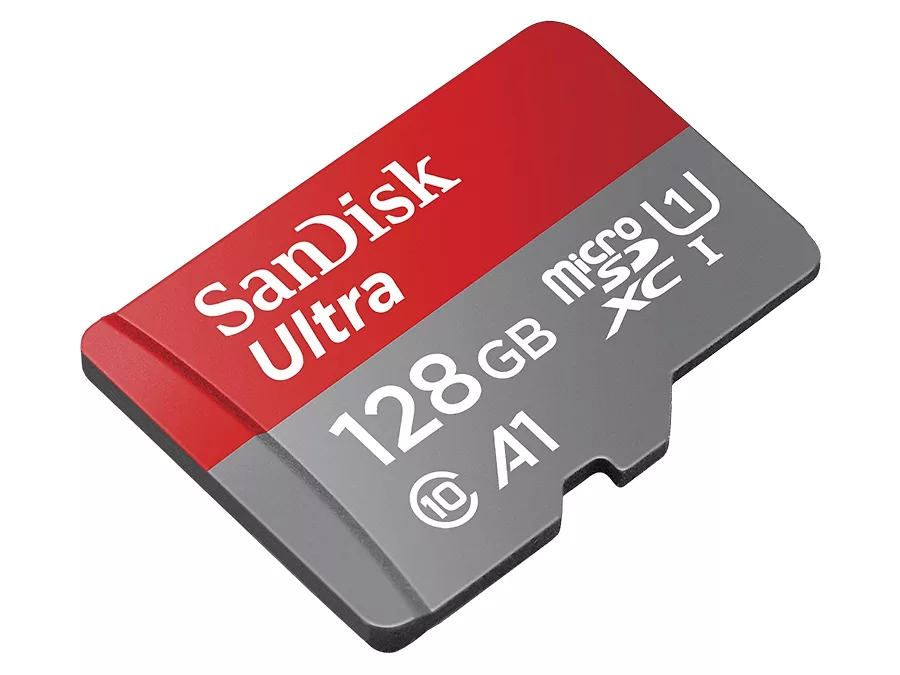
Карты памяти данной серии относятся к классу A1 (Application Performance Class). Это означает, что даже в самых неблагоприятных условиях их производительность не опускается ниже 1500 IOPS при случайном чтении и 500 IOPS — при записи файлов, при этом скорость передачи данных в последовательных операциях достигает 100 МБ/с. Таким образом, с одной стороны, вы сможете достаточно быстро загружать в память консоли даже объемные ROM’ы, а с другой — не будете испытывать проблем при работе с RetroPie или во время игр.
Если в вашем компьютере или ноутбуке отсутствует встроенный карт-ридер, для подключения флеш-карты вы можете воспользоваться SanDisk MobileMate USB 3.0. Благодаря компактным размерам устройства, его будет достаточно удобно использовать и с самой ретроконсолью, если у вас вдруг возникнет такая потребность.

Для установки RetroPie проще всего воспользоваться Raspberry Pi Imager — инсталлятором с функцией автоматической загрузки дистрибутивов из сети, доступным в версиях для операционных систем Windows, Mac OS и Ubuntu. После подключения карты памяти к ПК или ноутбуку запустите утилиту, нажмите на «CHOOSE OS», а затем выберите «Emulation and game OS» —> «RetroPie» —> «RetroPie version_number (RPI 4/400)».
Теперь кликните по «CHOOSE SD CARD», выберите нужную флеш-карту и запустите установку RetroPie, нажав на кнопку «WRITE». Дождитесь окончания процедуры.
2. Настройка геймпада
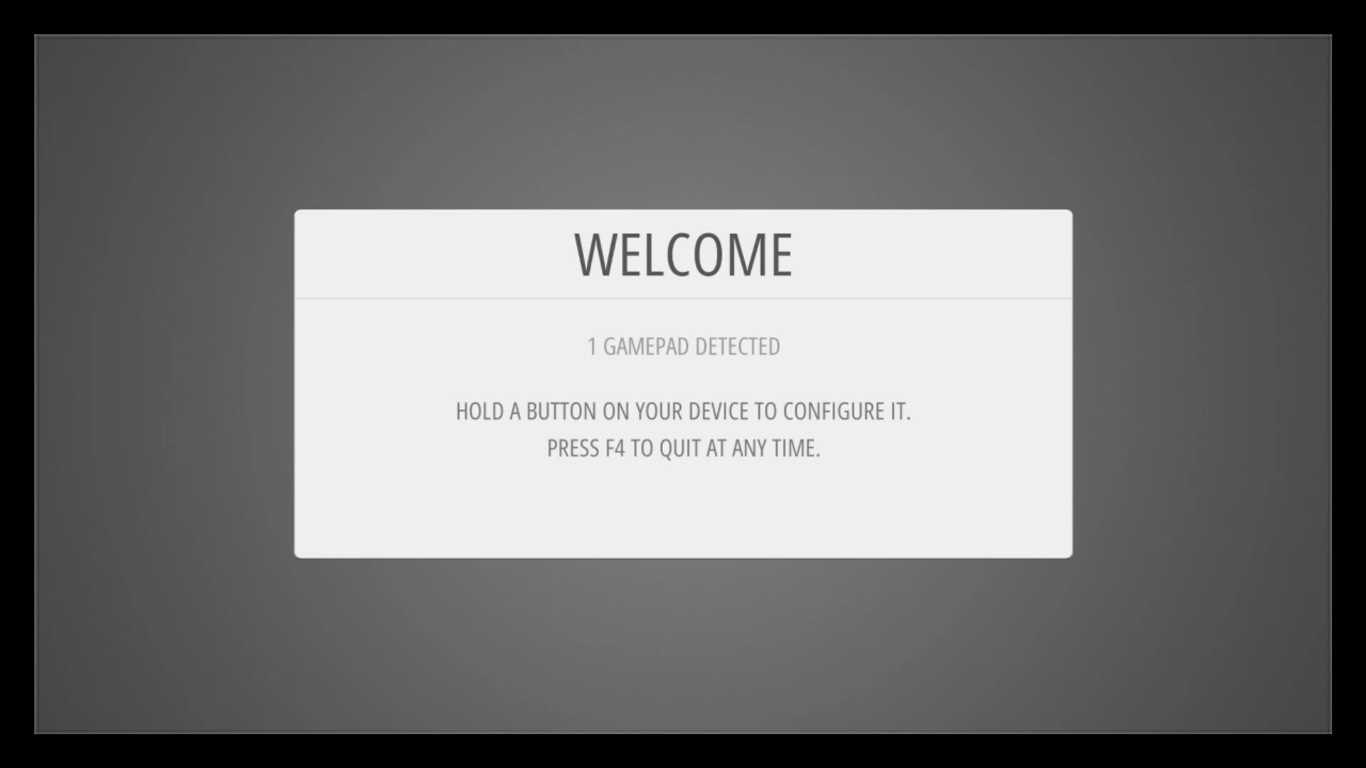
Установите карту памяти в microSD-слот Raspberry Pi, подключите геймпад через USB-кабель и включите ретроконсоль. Сразу после подачи питания инициируется процедура настройки системы, которая занимает в среднем около 1,5–2 минут.

По завершении всех операций на экране появится окно приветствия. Поскольку мы уже подключили геймпад по проводу, система автоматически его определит и предложит настроить. Для запуска мастера нажмите любую кнопку на контроллере.
Все, что требуется далее, — последовательно нажимать нужные кнопки на геймпаде в соответствии с подсказками на экране.

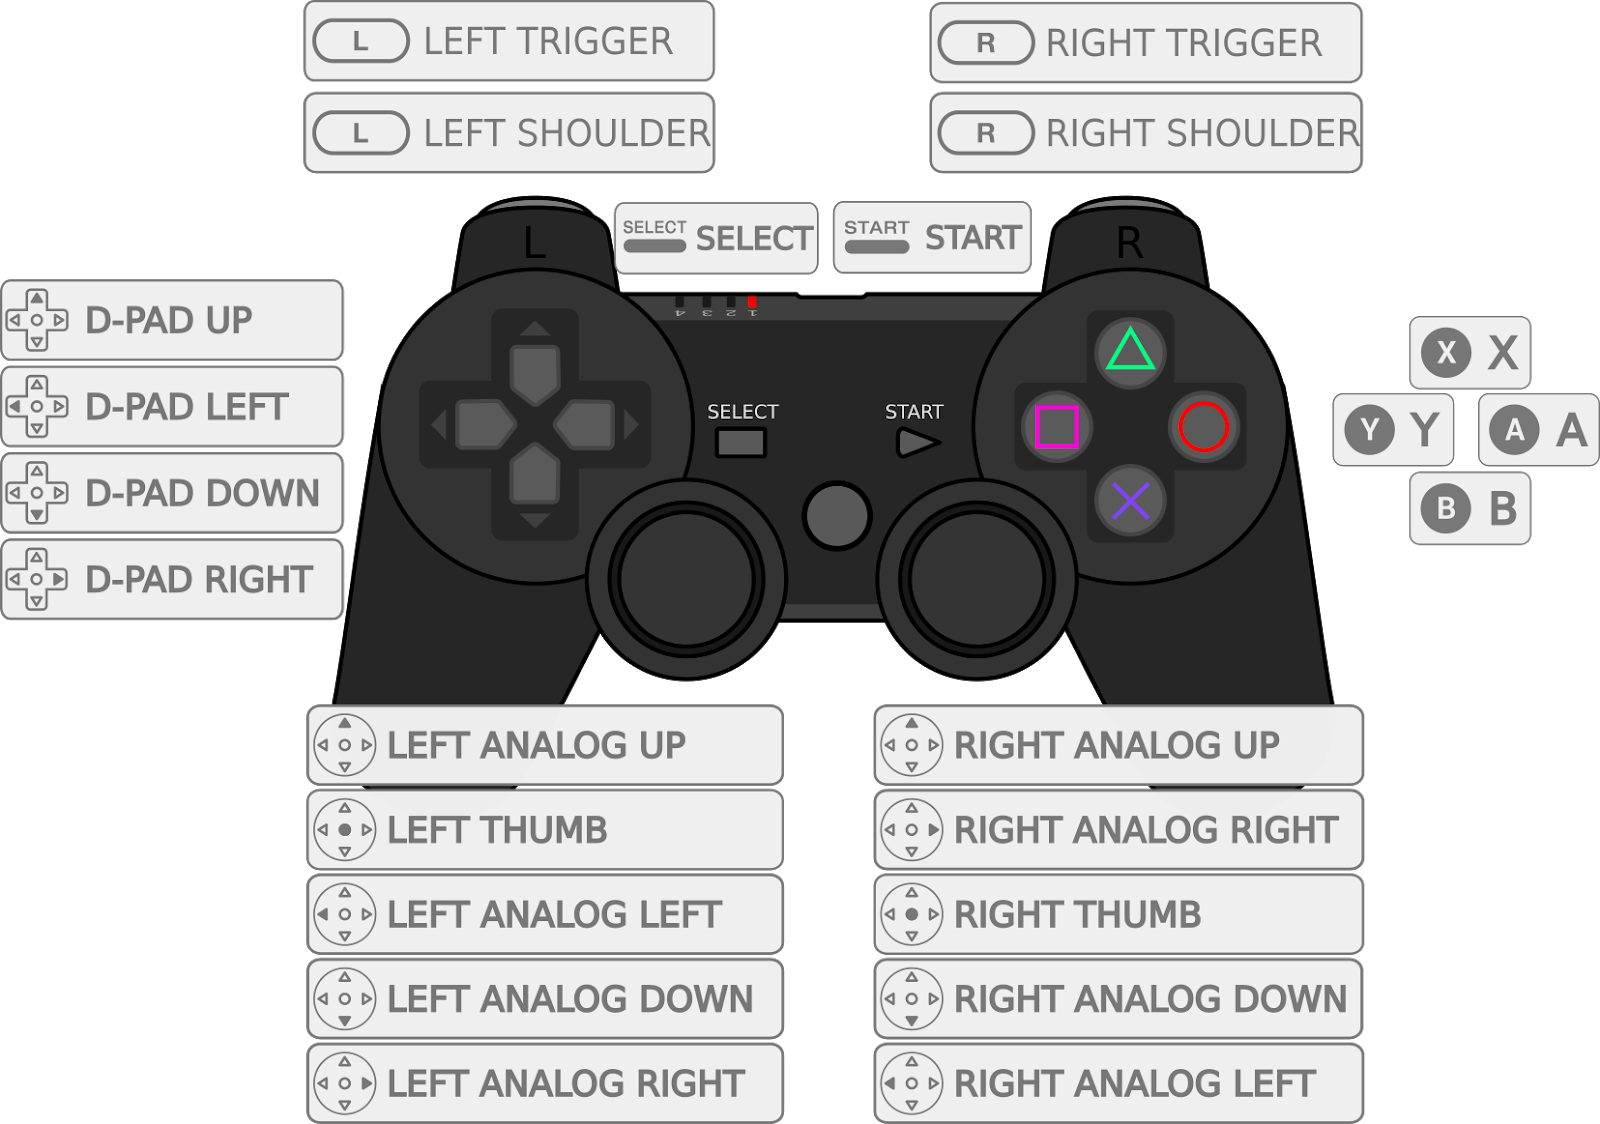
Если вы затрудняетесь с выбором, предлагаем вашему вниманию стандартную раскладку для контроллеров семейства DualShock и их аналогов.
Примечание. В самом конце RetroPie попросит вас задать кнопку «Hotkey». Лучше всего выбрать в качестве хоткея кнопку «Home», так как она не задействуется в играх. Если на вашем геймпаде таковая отсутствует (например, вы используете реплику оригинального контроллера для SNES), то на ее роль вполне сгодится кнопка «Select». Хоткеи открывают доступ к дополнительным функциям RetroArch/Libretro-based-эмуляторов, входящих в состав RetroPie. Список доступных комбинаций приведен в таблице ниже.
Комбинация клавиш