- Android Bluetooth Controlled Robot Using Arduino
- Principle Behind Bluetooth Controlled Robot
- What is Bluetooth Controlled Robot?
- Project
- Circuit Diagram
- Components Required
- About Parts
- Arduino
- HC-05 Bluetooth Module
- L298N Motor Driver
- Circuit Connection
- PCB Design
- PCB View
- Order PCB From PCBWay
- How PCB Manufacturing Process Done in PCBWay
- Features of PCBWay
- Guide for Ordering PCB From PCBWay
- Android Application for Controlling The Robot
- Working Principle of Bluetooth Controlled Robot
- Application of Bluetooth Controlled Robot
- Disadvantages of Bluetooth Controlled Robot
- Future Development
Android Bluetooth Controlled Robot Using Arduino
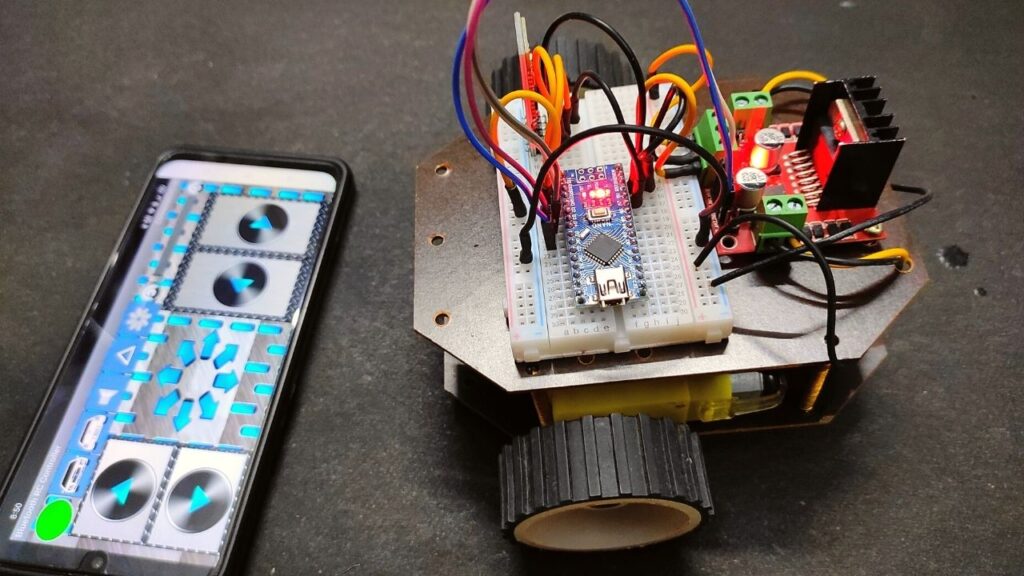
In this project, I will be going to show you a Bluetooth Controlled Robot using an Arduino and HC-05 Bluetooth module. I will use a smartphone and an android app that can operate the robotic car.
Robotics is consistently a fancy topic for understudies, hobbyists, and DIYers. As a learner, constructing a robot is most likely one of the significant activities to do subsequent to finding out about the nuts and bolts. Android controlled robots make use of a smartphone for robotic control with the help of Bluetooth technology. This is a very simple robotics project using a microcontroller.
Principle Behind Bluetooth Controlled Robot
This Bluetooth controlled robot is operated simply using Bluetooth technology and also with the user command. The user has to install an app on his/her smartphone for controlling this robot. After pairing with a smartphone and Bluetooth controlled robot, the user can operate it via commands like forward, backward, right, left, and stop. Also, it has some extra features like forward and backward light indicators, a horn and speed control. These all commands are sent to the Bluetooth receiver from the smartphone. After receiving the command through the Bluetooth receiver, it sends the analog signal to the Arduino for decoding the code. And then after processing the right code the Arduino controls the motors, lights and horns of the robot.
What is Bluetooth Controlled Robot?
Android Bluetooth controlled robot is a humanoid-assisted robotic system which can be easily controlled by using an android smartphone instead of any other methods like buttons, gestures, etc. For moving the robot, we just need to touch the forward, backward, right and left buttons of the app. Also, we can control it using the gesture function which is in-built in the app.
Project
Circuit Diagram

Components Required
- Arduino Nano
- HC-05 Bluetooth Module
- L298N Motor Driver
- BO Motor (x2)
- LED (White, Red)
- Buzzer (As Horn)
- Smartphone
- Bluetooth Controlled App
- Jumper Wires
- Mini Breadboard
- Chasis
- 9V Battery
About Parts
Arduino
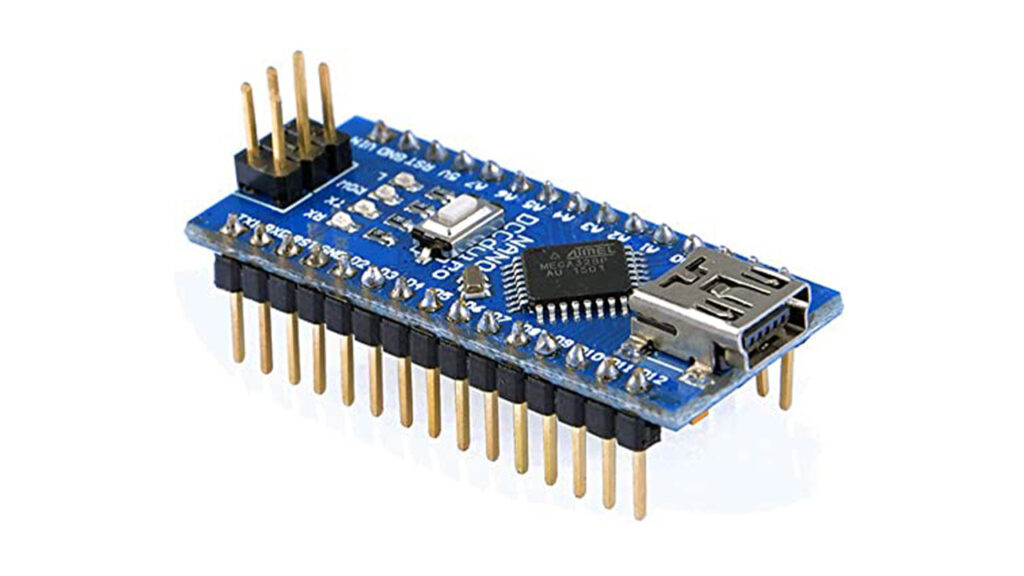
For the compact build, I choose Arduino Nano despite Arduino UNO. Arduino Nano is a small, flexible microcontroller board using an Atmega328p chip. It can also use as a substitute for UNO. All the functions are the same in these two boards. The size of its PCB is 18×45 mm. The clock speed is 16Mhz. Its input voltage is 5-12V. There are 30 pins including power pins, data pins, analog pins, and serial pins on this board.
HC-05 Bluetooth Module
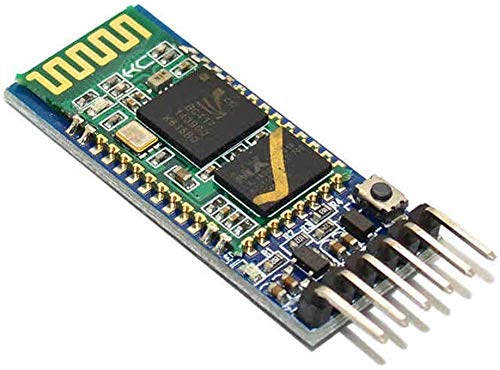
The HC-05 Bluetooth Module is liable for empowering Bluetooth communication among Arduino and android phone. It has already a default baud rate of 9600 bps. We just need to connect RX and TX with a serial converter of the Arduino and that’s it.
HC-05 Bluetooth module has two modes that are one in master mode and another one in slave mode. We can set any mode by using some AT commands. Even we can set the module’s settings by using AT command. First, we need to enter AT mode with a 38400 bps baud rate by pressing Enable button at the Bluetooth module or by giving a HIGH level at Enable pin.
L298N Motor Driver
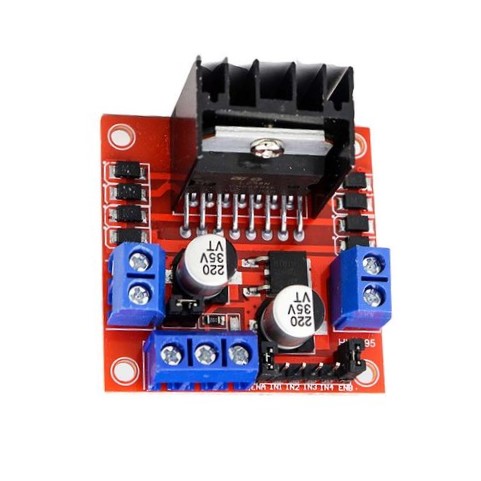
The L298N motor driver module is liable for giving the vital drive current to the engines of the robotic car.
N.B: I am using an L298N motor driver in this project, but you can also use an L293D motor driver as we use only two BO motors here. But in the case of four BO motors, we should use the L298N motor driver.
Circuit Connection
Going to build this Bluetooth controlled robot, at first we should look for the HC-05 Bluetooth module where the +5V and GND pins are directly connected to the 5V power supply or Arduino 5V supply.
After that, we need to connect the TX pin of the Bluetooth module to the RX pin of the Arduino as we know that we should only transmit data from the smartphone to the Bluetooth module of the Bluetooth controlled robot and don’t need to receive any kind of information from Arduino.
This RX pin of the Arduino depends on the SoftwareSerial library (Pin 0 and Pin 1 are arranged as RX and TX pins of the Arduino.)
Presently, the L298N motor driver module’s digital I/O pin 2 to pin 5 of Arduino are designed as to output pins of the motor driver and are associated with IN1 through IN4 of the L298N motor driver module.
| Arduino Nano | HC-05 Module |
|---|---|
| +5V | VCC |
| GND | GND |
| TX | RX |
| RX | TX |
| Arduino Nano | L298N Motor Driver |
|---|---|
| D2 | IN1 |
| D3 | IN2 |
| D4 | IN3 |
| D5 | IN4 |
PCB Design
For removing messy wiring and giving a clean look, I designed a PCB prototype for this project. It is also helpful for troubleshooting that runs great without any errors. To design this PCB board, I used EasyEDA as it is too easy to use. For ordering PCB for this, I prefer PCBWay.
PCB View


Order PCB From PCBWay
There are so many forums or communities for electronics online in today’s technical world, and one of the famous ones for PCB manufacturing is PCBWay. PCBWay is a place that brings manufacturers and customers together. They have more than a decade of experience in this field of fabrication and prototyping and assembling of PCBs. PCBWay has proved its focus on its customers’ needs in terms of cost-effectiveness, delivery, and quality.
How PCB Manufacturing Process Done in PCBWay
Standard quality for any product needs to be maintained using some parameters. PCBWay gives that opportunity through quality control in designing and manufacturing. At first, they ensure the accuracy, clarity, and validity of the PCB files that we sent to them.
Then all the boards will go through the most stringent tests other than the basic visual check. They adopt most of the testing and inspecting equipment used in the industry, such as Flying Probe Tester, X-Ray Inspection Machine, and Automated Optical Inspection (AOI) Machine. PCBWay are having 50+ new engineers on the daily basis around the world using PCBs for their work, who trust for their reliable quality. They produce high-quality pink, orange, grey, and even transparent solder mask. Moreover, according to people’s needs, they can also provide Black core PCB. Check it out for a High-Quality PCB solder mask. There are some pictures below of the new colours of solder musks.


Features of PCBWay
PCB Prototyping & Manufacturing: PCBWay produces FR-4 and Aluminum boards and advanced PCBs like Rogers, HDI, and Flexible and Rigid-Flex boards, at a very reasonable price. Just check this Instant Quote to order premium PCBs for your hobby projects. In this Christmas Sale, you can order PCB for just $5. Do check it out.
PCB Assembly: It not only offers PCB Prototyping but also offers PCB Assembly service. You can order a full PCB board with attached components by uploading your file. SMT & THT assembly starts from only 30$ including free stencil and worldwide shipping. The components can be sourced and provided by PCBWay, or by clients themselves. In this Christmas Sale, you can order PCB Assembly for just $30.
Open Source Community: It not only offers PCB Prototype & Assembly service but also gives opportunities to students for sponsorships. I think this is so great. They feature their projects on the website also.
3D Printing & CNC: It also produces Rapid Prototyping like 3D printing, CNC Machining, Sheet Metal Fabrication, and Injection Molding. The quality of the product is too premium and reliable. And also the best part is that you will receive your order within a minimum of 3 days. In this Christmas Big Sale, you can save Up to 52% Off for 3D Printing & CNC Machining.
PCBWay Store: More boutique gift modules are waiting for you to discover, giving your creativity wings. You can order all types of electronic equipment, components and many more with exciting offers. Go with the link and buy your needs, PCBWay Store.
Services: PCBWay offers great servicing of their products. It takes only 3 to 15 days according to courier service to deliver your products. Also, it has a live support facility. Whenever you have any problems, you can always reach a live customer service person to respond to your emails or messages. They have the “Return and Refund” principle, for every unusable board caused by PCBWay, they will rebuild and refund the order soon.
Guide for Ordering PCB From PCBWay

Android Application for Controlling The Robot
Here I have used a simple Bluetooth controlled app named “Arduino Bluetooth RC Car” available in the Playstore, which can communicate with a Bluetooth module using serial communication. After installing the app, we need to turn on Bluetooth and location in the smartphone to work it properly.
Now tap on the settings tab and then scan to find the correct Bluetooth module. There are some basic keys listed in the settings tab which I included in the Arduino code to work its basic functions which are forward, backward, right, left, etc. The following codes are mentioned below. We can also control this robot using gesture control with this same app.
| Function | Code |
|---|---|
| Forward | F |
| Backward | B |
| Left | L |
| Right | R |
| Forward Left | G |
| Forward Right | I |
| Backward Left | H |
| Backward Right | J |
| Stop | S |
| Front Light ON | W |
| Front Light OFF | w |
| Back Light ON | U |
| Back Light OFF | u |
| Horn ON | V |
| Horn OFF | v |
Working Principle of Bluetooth Controlled Robot
To begin with, for this Bluetooth controlled robot, I have utilized 7 keys forward, backward, left, right, light ON/OFF, horn, and speed.
At the point when a key is pressed by the user, the comparing information is transmitted to the Bluetooth module from the smartphone over Bluetooth serial communication.
In the Arduino code, the Arduino gets any of this information from the Bluetooth module (according to the key mapping) and plays out a simple switch case activity, where each case is related with suitable directions to the motor driver input pins.
As an example, if the forward key is pressed in the smartphone app, then the Arduino will activate IN1 and IN3 from the motor driver module to move the robot in the forward direction while IN2 and IN4 are in deactivation mode.
Application of Bluetooth Controlled Robot
- Low range mobile operated Bluetooth controlled robot.
- Military spy robot application.
- Home automation robots like a wheelchair.
Disadvantages of Bluetooth Controlled Robot
- As we know the connectivity range of Bluetooth communication is approximately 10 meters, so the controlling range of this robot is also limited.
- If the power is not sufficient for all the modules, especially the Bluetooth module, then the whole process will not work. Also, we can’t attach more than 3 batteries to the small chassis. So we need powerful batteries.
Future Development
- In future, we can add more sensors to work it efficiently.
- We can also add a wireless camera and display to view the sight where the robot will be moving.