- How to call Linux commands through WSL in Windows command line?
- 4 Answers 4
- How to Use Linux Terminal in Windows 10
- Raj Kumar
- Enable Windows Subsystem for Linux (WSL) and Install Ubuntu in Windows 10
- First, Check your Windows Version
- Enable Windows Subsystem for Linux
- Enable WSL 1 via PowerShell
- Enable WSL 2
- Enable WSL 2 via PowerShell
- Set WSL 2 as the Default Version
- Install your Linux distribution of choice
- Upgrade WSL1 to WSL 2 for Ubuntu
- bash shell on Windows 10
- Loved what you read? Don’t miss out on more! 😊🎉
- How to Follow All Instagram Friends on Threads
- How to Disable Automatic Driver Download on Windows 11
- How to Remove or Hide Threads Badge from Instagram Profile
- How is Threads Different from Instagram
- How to Use Threads App on Desktop Using Windows 11
- How to Switch Profiles on Threads
How to call Linux commands through WSL in Windows command line?
I would like to use ls , and many other Linux tools, from the command line on Windows 10. I know that there is GnuWin32 and other binary replacements, but none of those works as elegantly as the Windows Subsystem for Linux (WSL); including the update mechanisms. With WSL, one can call ls . from the command line via bash -c «ls . » , which works great. Ideally, however, I would just type ls on the command line. I can create an ls.bat which basically does @bash -c «ls %*» — but I would have to do that for every single command I want to export. Is there a more direct way of exporting ls (and many others) to the command line?
The bash commands available in WSL are not intended for use outside of WSL. I would be surprised if that is ever implemented.
@ifconfig Well, it doesn’t have be intended or implemented. I would be happy with a one-liner aliasing «many» well-known Linux commands to the respective WSL commands.
4 Answers 4
Apparently this was the most requested feature for WSL, and Microsoft now supports this feature. To use linux commands from within Command Prompt (or PowerShell), just prefix the command with wsl . So, for example, here’s how you run ls from CMD.
Or here’s how you update package lists.
C:\temp> wsl sudo apt-get update [sudo] password for username: Hit:1 http://archive.ubuntu.com/ubuntu xenial InRelease Get:2 http://security.ubuntu.com/ubuntu xenial-security InRelease [94.5 kB] More details can be found in the official docs. I’m not sure if you are looking for a solution which doesn’t involve any kind of prefixing. If that’s the case, I don’t know of any solution yet.
Microsoft doesn’t directly support what you’re asking for, however.
- You can create a «Console Alias» using doskey.exe, but these Console Aliases are not persistent (when you open a new Command Prompt window they’re all gone).
- CMD /? informs us of the following two Registry keys: HKey_Local_Machine\Software\Microsoft\Command Processor\AutoRun and HKey_Current_User\Software\Microsoft\Command Processor\AutoRun , which (as long as the /D option wasn’t specified) will both be checked for contents to run (in that order) when a new Command Prompt window is opened.
If we put these two things together with a FOR loop, and a nice, easily customizable file in your user folder, we can get a pretty close approximation of what I think you want.
I’m going to put this in HKLM, and reference a file in %USERPROFILE% , called exportlinuxcommands , so that it’s available to all users, but easily customizable on a per-user basis, as well as only functional for users who set it up. If you only want it for one user, or don’t want it to be customizable on a per-user basis, you’ll have to modify the instructions a bit.
- Open the Registry Editor
- Go to HKey_Local_Machine\Software\Microsoft\Command Processor
- Right-click on an empty portion of the window, and choose «New» > «String Value» (or «Expandable String Value», but the expansions seem a little pointless when you realize that the Command Processor will expand them after it reads the value anyway.)
- Name it «AutoRun» (without the quotes)
- Double-click on the new value you just created
- Enter IF EXIST %USERPROFILE%\exportlinuxcommands FOR /F %i in (%USERPROFILE%\exportlinuxcommands) DO @doskey %i=bash -c «%i $*» as the «Value data».
Now you just need to make a file in your %USERPROFILE% folder (i.e. C:\Users\YourUserName ) called exportlinuxcommands , with each Linux command you want an alias to on a separate line. For example:
Want to remove one? Remove it from the file, and it won’t be there in the next Command Prompt window you open.
Want to add another later? Just add it to the file on it’s own line, and the next time you open up a Command Prompt window, it’ll be there.
How to Use Linux Terminal in Windows 10
You can now access most of the Linux command-line utilities and applications on top of Windows 10 OS using Windows Subsystem for Linux (WSL).
Raj Kumar

Although Windows is the most widely used and most popular operating system for desktops and laptops, it is not as secure and open-sourced as Linux OS. That’s is why a lot of software developers and professionals prefer Linux OS.
Microsoft has started a partnership with Canonical, creators of Ubuntu Linux. This paved way for Linux users to use Linux on Windows. Yes, you can run Linux on top of Windows 10 without the need for a dual boot, or using VMWare/VirtualBox, or installing it as your main Operating System.
You can access various Linux commands and software from the Linux terminal in Windows 10. In this article, we’ll give you step-by-step instructions on how to install and run the Linux terminal on Windows 10 OS.
Enable Windows Subsystem for Linux (WSL) and Install Ubuntu in Windows 10
If you intend to run a Linux terminal on Windows 10, you must first turn on the ‘Windows Subsystem for Linux’ feature. Then you can download and install your choice of Linux distribution.
The Windows Subsystem for Linux (WSL) is a feature that creates a GNU/Linux environment that allows you to run core Linux command-line tools and services directly on Windows, alongside your desktop and modern store apps.
By enabling Windows 10’s Linux subsystem, you can install and run various Linux distributions (distros) such as Ubuntu, OpenSuse, SUSE Linux, Fedora, etc.
First, Check your Windows Version
But before we get into how to enable Windows Subsystem for Linux (WSL) and install Linux, you need to check if you are running a compatible version of Windows 10. WSL is only supported on both Windows 10 64-bit (from version 1607) and Windows Server 2019.
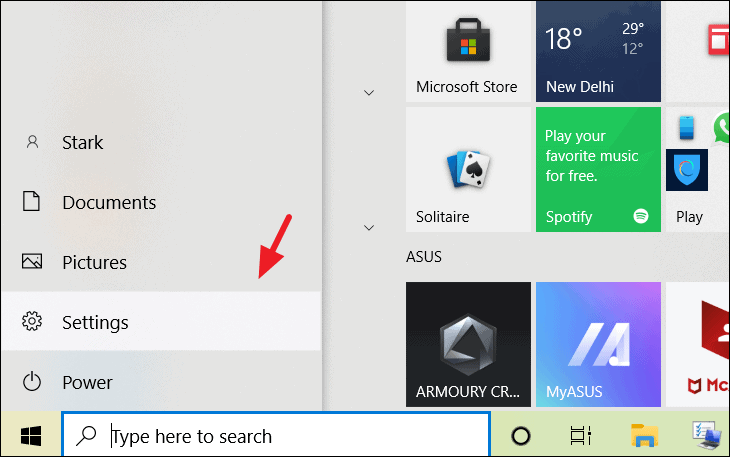
To check your Windows version and build, go to ‘Settings’ from Windows Start menu.
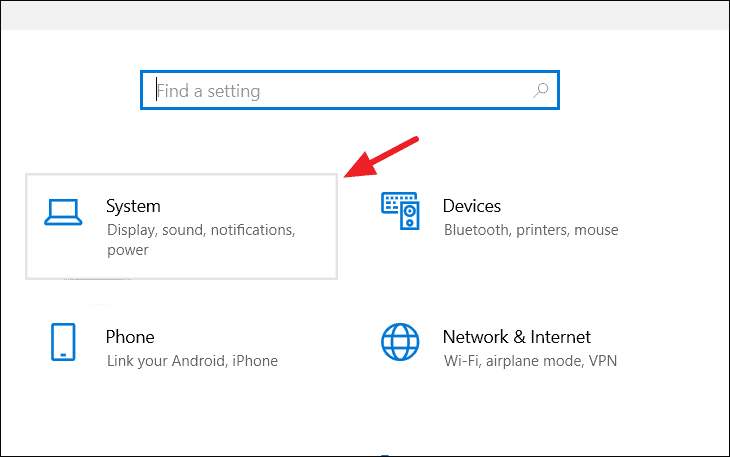
Next, click ‘System’ setting.
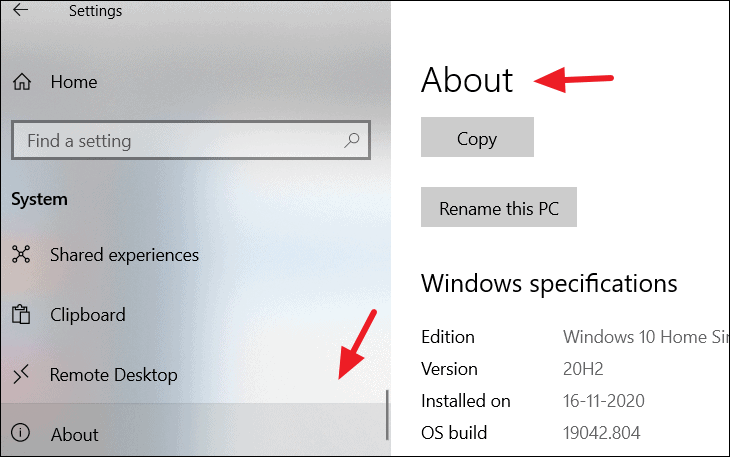
Then, scroll down and select ‘About’ option at the bottom of the left pane to view About section.
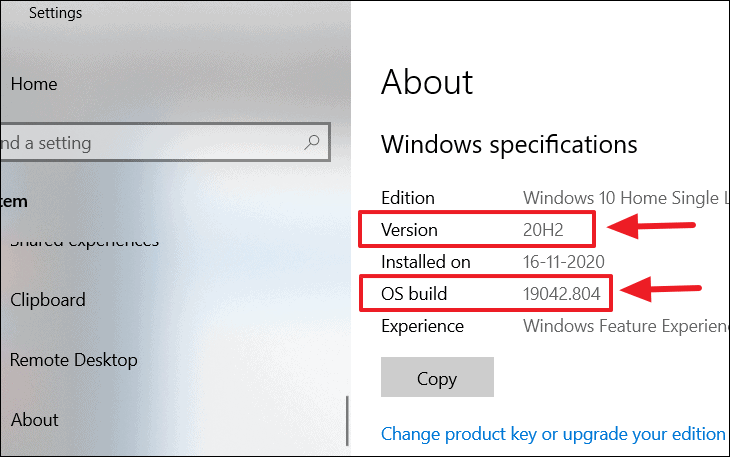
On the About page, under Windows specifications, you can see the ‘Version’ and ‘OS build’ of your Windows 10.
Enable Windows Subsystem for Linux
There are two different types of WSL versions: WSL 1 and WSL 2. While they both provide smooth and continuous integration of Linux within Windows, WSL 2 is the latest and fastest version with supports full Linux kernel and system call compatibility. WSL 1 runs a translation layer which bridges the gap between Linux kernal and Windows.
- To run WSL 2, you must be running Windows 10 x64 bit systems: Version 1903 or higher, with Build 18362 or higher.
- To run WSL 1, you will need Windows 10 x64 bit systems: Version 1709 or higher, with Build 16215 or higher.
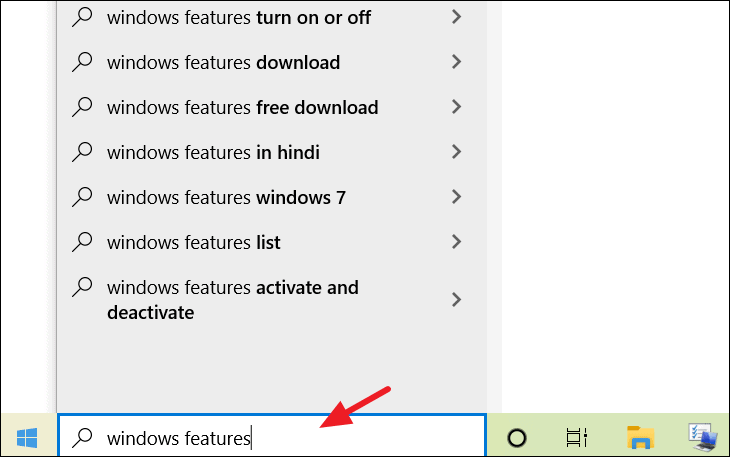
It doesn’t matter which version of WSL you want to run you must enable it first to use it. To do this, start type typing ‘Turn Windows features on and off’ into the Start Menu search field.
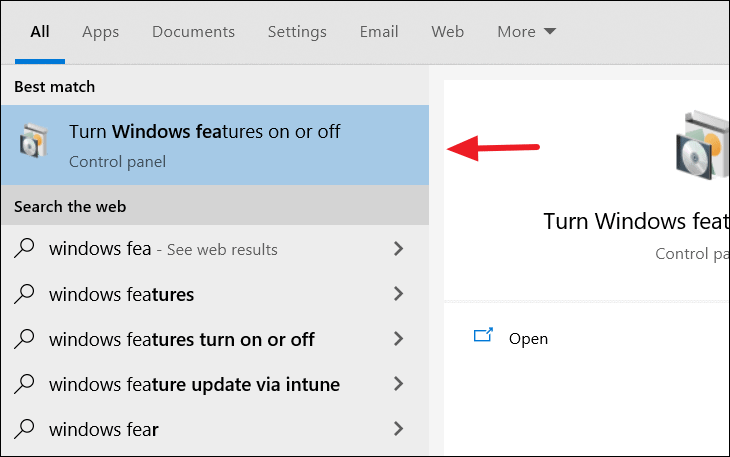
Select ‘Turn Windows features on and off’ control panel from the search result.
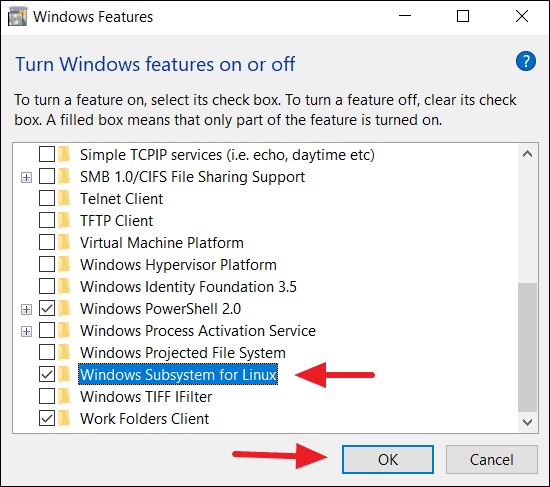
Then, scroll down to ‘Windows Subsystem for Linux’, tick the box in front of it, and click the ‘OK’ button.
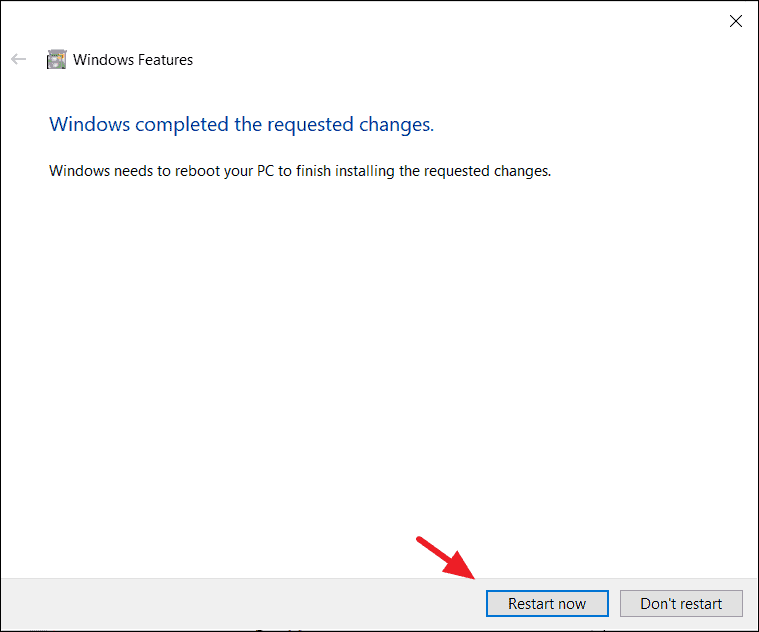
Once the changes are applied, click ‘Restart now’ to restart your computer
If you want to only install WSL 1, you can now restart your computer and install your Linux distro.
Enable WSL 1 via PowerShell
You can also enable WSL via the ‘PowerShell’ command-line tool. This does the same job as the Windows Features control panel. For that, open ‘PowerShell’ as an Administrator and run the below command.
dism.exe /online /enable-feature /featurename:Microsoft-Windows-Subsystem-Linux /all /norestart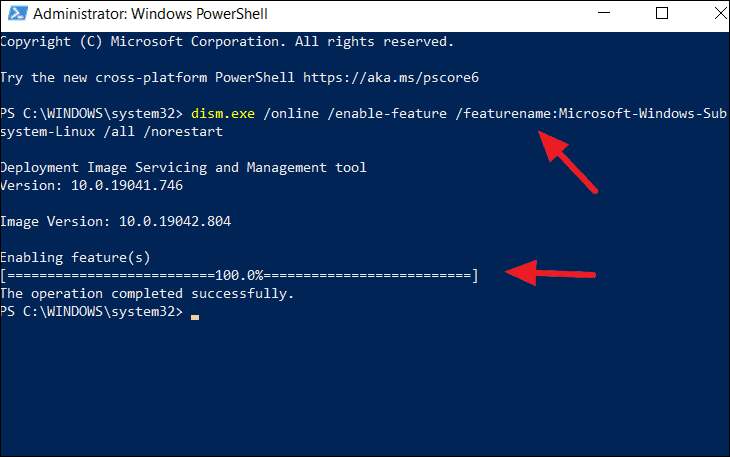
Enable WSL 2
We recommend you upgrade your WSL to version 2 for faster performance speed, and to run a real Linux kernel directly on Windows 10. All you need to do is enable the ‘Virtual Machine Platform’ feature in addition to the ‘Windows Subsystem for Linux’ feature on the Windows features control panel (see below).
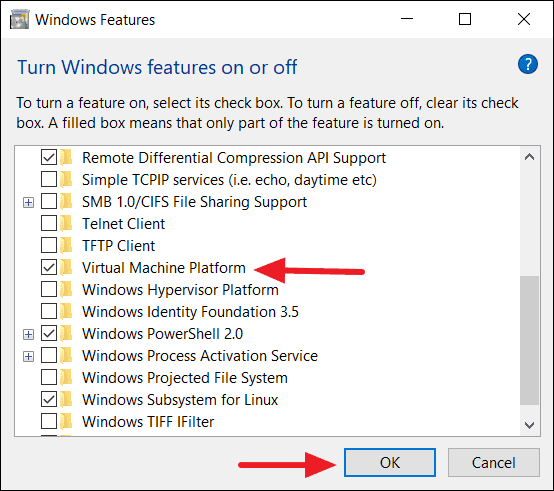
Wait for the changes to be applied, then restart your computer.
Enable WSL 2 via PowerShell
This first step to enable WSL 2 is enabling the Virtual Machine Platform feature component on Windows. You can also enable WSL 2 via the ‘PowerShell’ command-line tool. To do that, open ‘PowerShell’ as an Administrator and run the following additional command with the WSL 1 command.
dism.exe /online /enable-feature /featurename:Microsoft-Windows-Subsystem-Linux /all /norestartdism.exe /online /enable-feature /featurename:VirtualMachinePlatform /all /norestart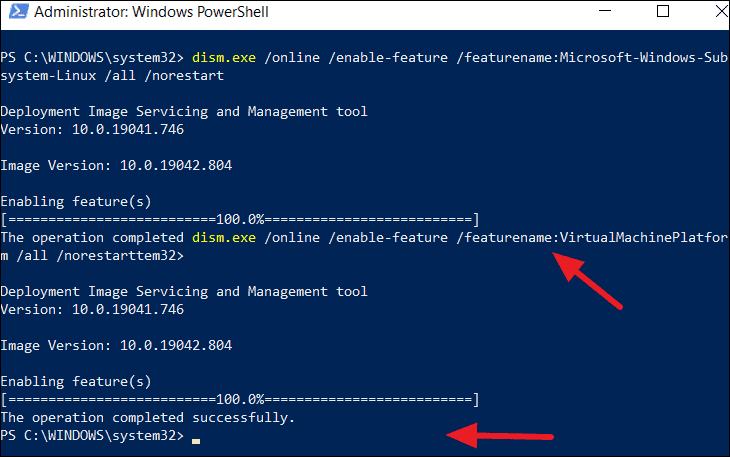
Set WSL 2 as the Default Version
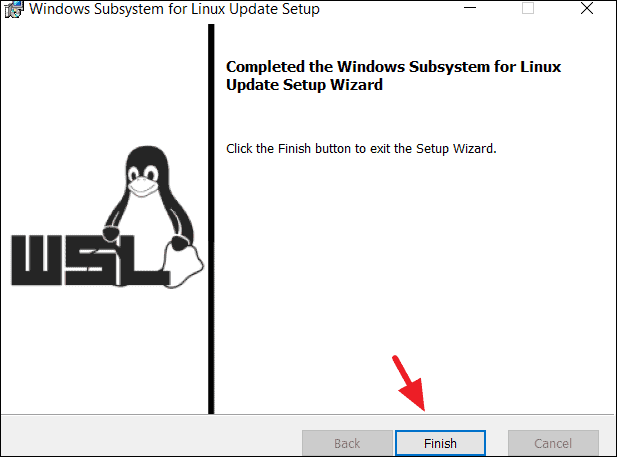
Before setting up WSL 2 as your default version for all Linux distributions, download the WSL Linux kernel package update for x64 systems.
Run the .msi installer downloaded and install it. It will take only seconds.
To set WSL 2 as your default version when installing a new Linux distribution, open PowerShell and run this command the following command:

Then restart your system to switch the feature from WSL 1 to WSL 2.
Install your Linux distribution of choice
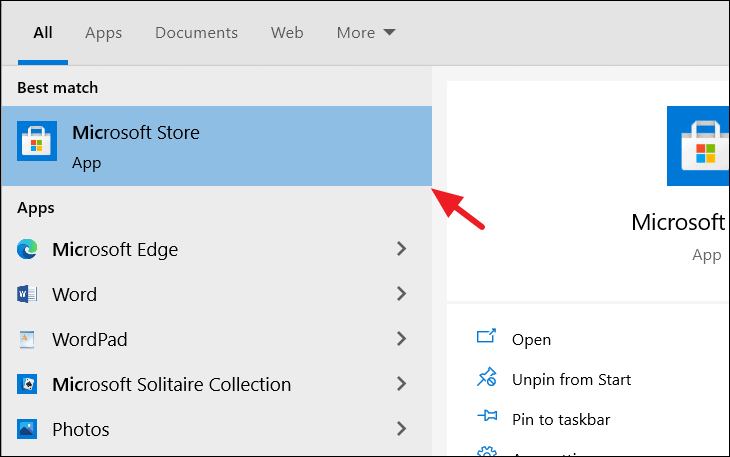
WSL is enabled, now we will install a Linux distribution. First, search for ‘Microsoft Store’ in the Start Menu search field. Then, open it from the search result.
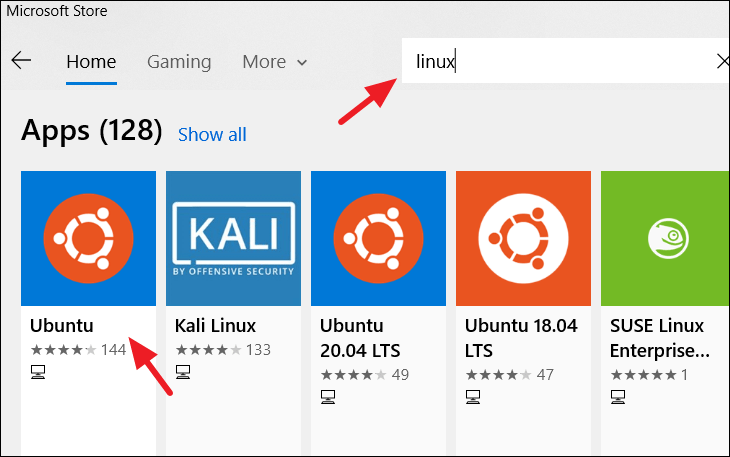
You’ll see a list of every Linux distributions currently available in the Windows Store which are supported by WSL.
- Ubuntu 16.04 LTS
- Ubuntu 18.04 LTS
- Ubuntu 20.04 LTS
- openSUSE Leap 15.1
- SUSE Linux Enterprise Server 12 SP5
- SUSE Linux Enterprise Server 15 SP1
- Kali Linux
- Debian GNU/Linux
- Fedora Remix for WSL
- Pengwin
- Pengwin Enterprise
- Alpine WSL
All of theses distributions are available for free. For our tutorial, we’ll select ‘Ubuntu’.
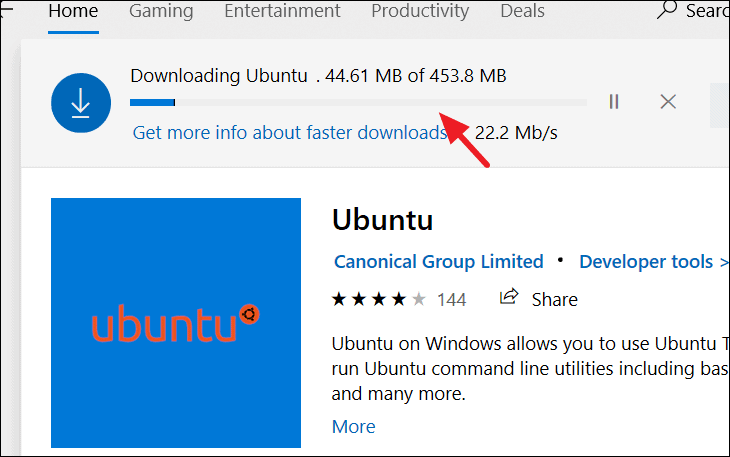
From the Ubuntu distribution’s page, Click the ‘Get’ button.

Now, Ubuntu distribution will be downloaded and installed automatically on your computer.
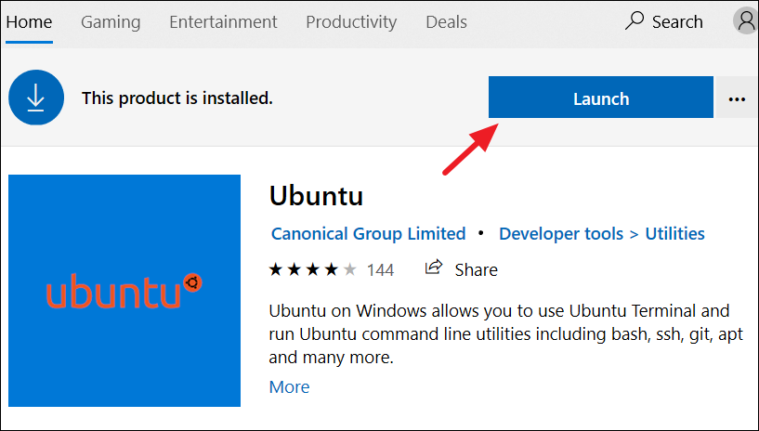
Once the installation finished, click the ‘Launch’ button to launch the terminal. You can also launch the app from the Windows Start Menu.
A new Ubuntu terminal window will appear. The first launch will take a few minutes to register the Ubuntu environment with WSL. Once that’s finished, the terminal will prompt you to create a ‘new Unix username’ and ‘new password’. Enter the new username and password and complete the setup.
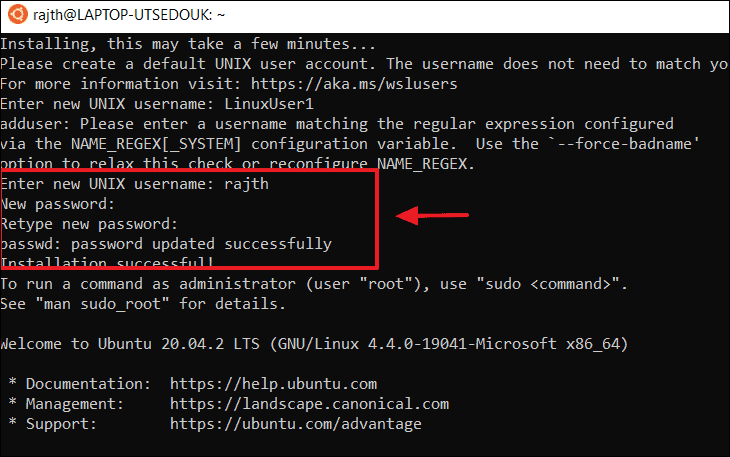
Once, the set up finished, it will take you to the bash command line. It’s better to update the software right away. In Ubuntu, you can search for, download, and install software updates, all from the apt command.
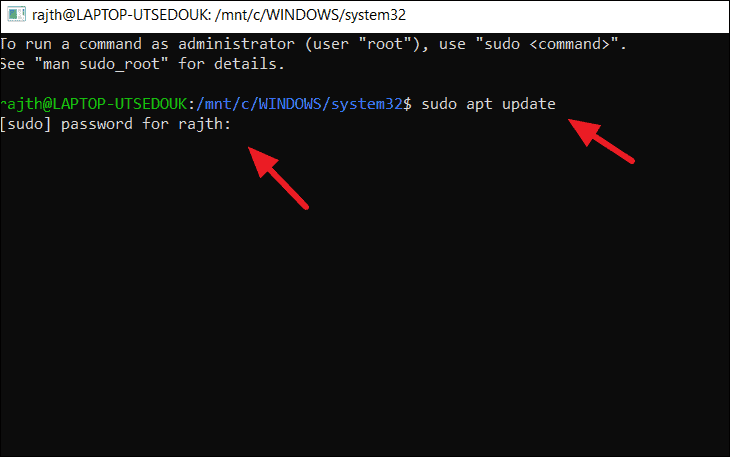
Enter the below command to update the software. And you’ll be prompted for the password, enter the newly created password to run the command as an administrator.
This ‘update’ command will update the Ubuntu repositories.
Ubuntu will download a series of package lists.
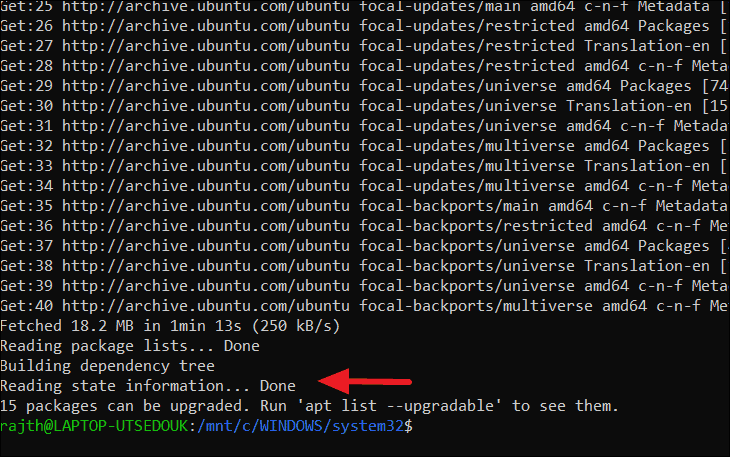
But they are not upgraded yet. To upgrade all available packages, enter the following command:
Enter ‘Y’ at the prompt to continue the installation.
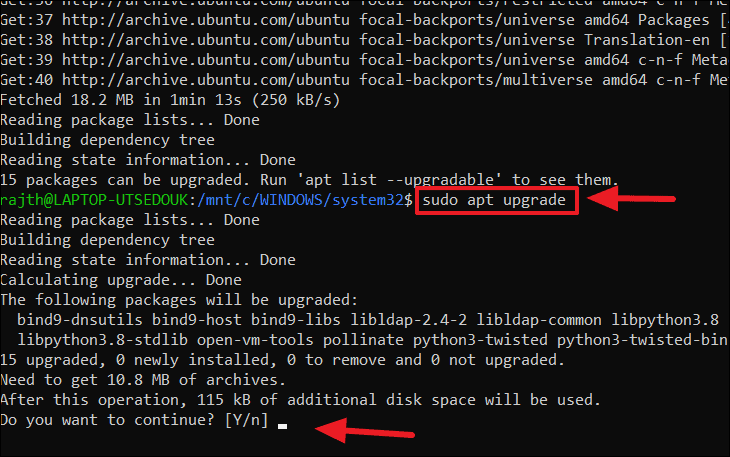
The ‘dist-upgrade’ command upgrade packages to their latest versions.
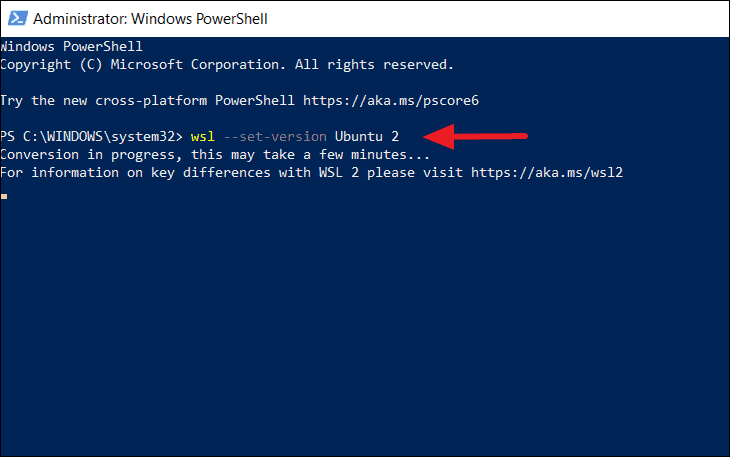
Upgrade WSL1 to WSL 2 for Ubuntu
If you wish to upgrade the existing WSL 1 version to WSL 2 for a specific distribution. Then, run the below command in PowerShell.
Replace ‘’ argument with the name of whichever distribution (Ubuntu in our case) your WSL 1 install runs.
Now, you can access Linux commands and software on a Windows 10 system using this Ubuntu Environment.
bash shell on Windows 10
You now have a full command-line ‘bash’ shell on your system based on the Linux distribution. You can access all the Linux commands and applications via that bash shell.
To run bash shell, type ‘bash’ into the Start Menu search field and click to open the bash command-line tool.
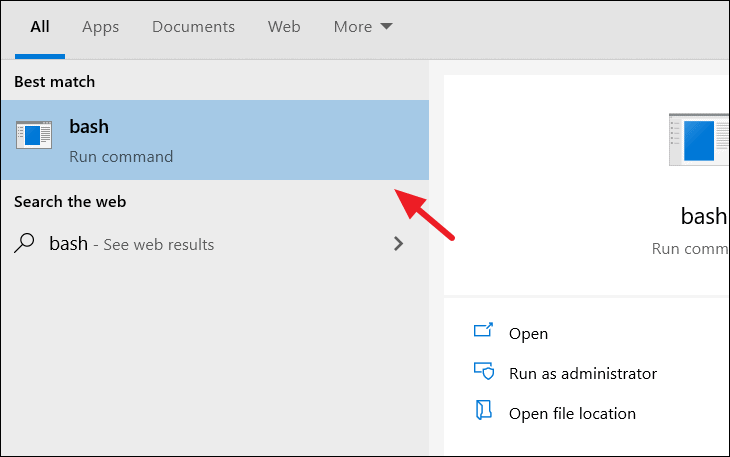
Now, you can start running commands there.

Loved what you read? Don’t miss out on more! 😊🎉

How to Follow All Instagram Friends on Threads

How to Disable Automatic Driver Download on Windows 11

How to Remove or Hide Threads Badge from Instagram Profile

How is Threads Different from Instagram

How to Use Threads App on Desktop Using Windows 11

How to Switch Profiles on Threads
While the process to switch profiles on Threads isn’t as seamless as it is on Instagram, it isn’t so cumbersome either to make steer clear of it.