- Getting started with Linux Containers on Windows Server 2019
- Prerequisites
- Install Docker EE
- Enable Linux Container Support
- Deploy a Linux Container
- (Optional) Install Docker Compose
- (Optional) Enable Remote Management of Docker Engine
- Linux containers on Windows 10
- Linux containers in a Moby VM
- How to Run Linux Containers on Windows Server 2019
- Why you should use Linux containers on Windows Server 2019
- What is Docker EE?
- Install Docker on Windows Server 2019
- How to Create a Container Registry
- How to Deploy and Manage Containers using PowerShell
- Install Docker on Windows Server 2019
- Conclusion
Getting started with Linux Containers on Windows Server 2019
As some of you would have seen, I spent some time last week getting familiar with Linux Containers on Windows Server 2019, and I thought I would share what I did to get it all up and running.
Prerequisites
To get started, you’ll need to have the following in place:
- A Windows Server 2019 VM or Bare Metal host
- (VM-Only) Nested Virtualization enabled
- (VM-Only) MAC Address Spoofing enabled
- Hyper-V and Container Windows Features Enabled.
- You can install these from command line with
- Install-WindowsFeature -Name Hyper-V,Containers -IncludeAllSubFeature -IncludeManagementTools
Install Docker EE
Installing Docker involves 2 steps, installing the Package Provider that contains the latest version of Docker, and installing the Docker Package.
Installing the Package Provider is straight forward
Install-Module DockerMSFTProviderOnce that’s in place, we need to import the new module and the associated package provide
Import-Module -Name DockerMSFTProvider -Force Import-Packageprovider -Name DockerMSFTProvider -ForceWe can confirm this has worked by using Find-Package to see the new docker package is available
PS C:\> Find-Package docker ################################ # Expected Output ################################ Name Version Source Summary ---- ------- ------ ------- Docker 18.09.1 DockerDefault Contains Docker EE for use with Windows Server. Docker 1.3.2 PSGallery This module helps with development using Doc.Now all that is left is to install Docker itself
Install-Package -Name Docker -Source DockerDefaultEnable Linux Container Support
Now that we have Docker installed, we need to make some changes to the default configuration to enable support for Linux Containers.
This involves setting an Environment variable and creating a docker daemon configuration file.# Set LCOW_SUPPORTED Variable to 1 for enabled [Environment]::SetEnvironmentVariable("LCOW_SUPPORTED", "1", "Machine") # Enable Experimental Features in Dockerd daemon.conf $configfile = @" "experimental": true > "@ $configfile | Out-File -FilePath C:\ProgramData\docker\config\daemon.json -Encoding ascii -ForceBecause Linux Containers still need a Linux kernel, we need to deploy LCOW for it to run.
You should use the latest LCOW release hereInvoke-WebRequest -Uri "https://github.com/linuxkit/lcow/releases/download/v4.14.35-v0.3.9/release.zip" -UseBasicParsing -OutFile release.zip Expand-Archive release.zip -DestinationPath "$Env:ProgramFiles\Linux Containers\."And all that’s left to do now is restart the server for everything to apply.
Deploy a Linux Container
You may be wondering why I’ve got a section for actually deploying a container, as surely it will ‘just work’ now everything is setup, and that’s true, but because we now can deploy either Windows or Linux containers, we need to specify which we want.
This is done with an additional switch, —platform
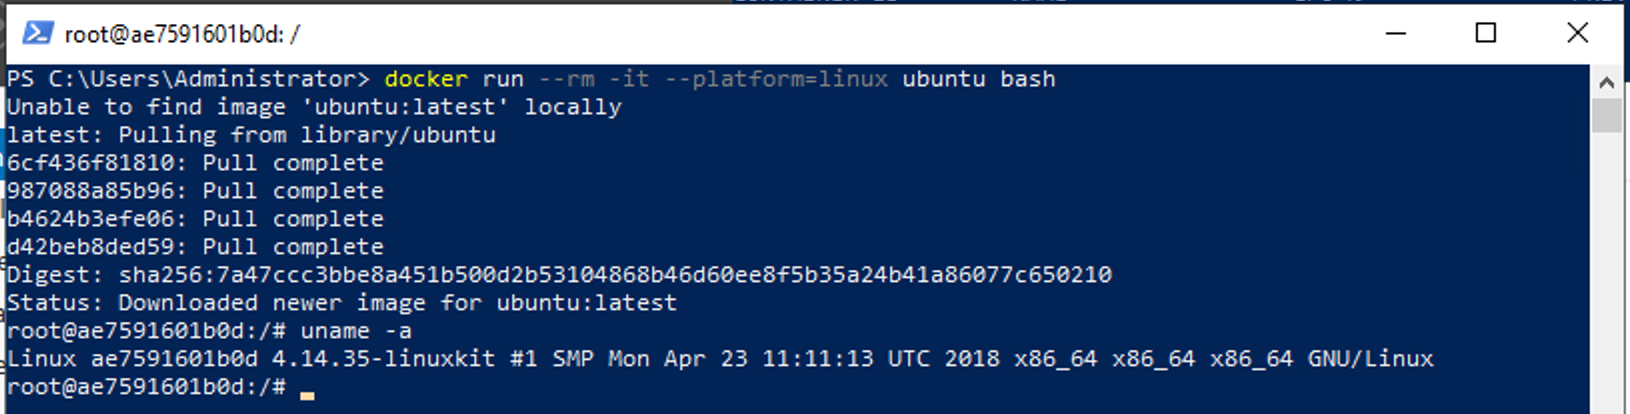
Personally I like to use ubuntu as a quick test containerdocker run --rm -it --platform=linux ubuntu bash
Now if you’re like me and planning on deploying mostly Linux Containers, you probably don’t want to specify the —platform parameter every time you start a container.
Luckily the default platform can be changes to Linux with another Environment variable.[Environment]::SetEnvironmentVariable("LCOW_API_PLATFORM_IF_OMITTED", "linux", "Machine")(Optional) Install Docker Compose
Now if you’ve been dealing with Docker on Linux for a while, you’ll probably be used to using Docker-Compose. Good news is it’s available for Windows Server as well, and is just as easy to deploy.
$dockerComposeVersion = "1.23.2" Invoke-WebRequest "https://github.com/docker/compose/releases/download/$dockerComposeVersion/docker-compose-Windows-x86_64.exe" -UseBasicParsing -OutFile $Env:ProgramFiles\docker\docker-compose.exe(Optional) Enable Remote Management of Docker Engine
To enable access to the docker engine from other machines, such as your local workstation or a portainer deployment, we need to add a hosts entry to the Dockerd daemon.json file.
In our setup, we can do this with an easy find and replace.# New host entry to add $RemoteAccess = @" "hosts": ["tcp://0.0.0.0:2375", "npipe://"], "@ # Get Existing Config $Config = Get-content C:\ProgramData\docker\config\daemon.json # Insert our host entry into the beginning of the file and write the changes back. $Config.Replace(",$RemoteAccess)|Out-File -FilePath C:\ProgramData\docker\config\daemon.json -Encoding ascii -Force # Restart the docker service to apply the changes Restart-Service DockerAs always, I hope this was helpful to someone else out there looking to experiment with the latest and greatest from Microsoft.
Ben Thomas is a highly skilled and experienced Solutions Advisor working at Datacom Systems Ltd for the past decade, where he has gained a wealth of knowledge and expertise in the field. Ben is well-respected within the industry and has been recognized for his contributions as a Microsoft MVP.
In addition to his work at Datacom Systems, Ben is passionate about learning and sharing his knowledge with others in the IT community. He is dedicated to staying up-to-date on the latest technologies and trends, and is particularly skilled in the areas of Hybrid Cloud and Private Cloud.
Linux containers on Windows 10
Linux containers make up a huge percent of the overall container ecosystem and are fundamental to both developer experiences and production environments. Since containers share a kernel with the container host, however, running Linux containers directly on Windows isn’t an option. This is where virtualization comes into the picture.
Linux containers in a Moby VM
To run Linux containers in a Linux VM, follow the instructions in Docker’s get-started guide.
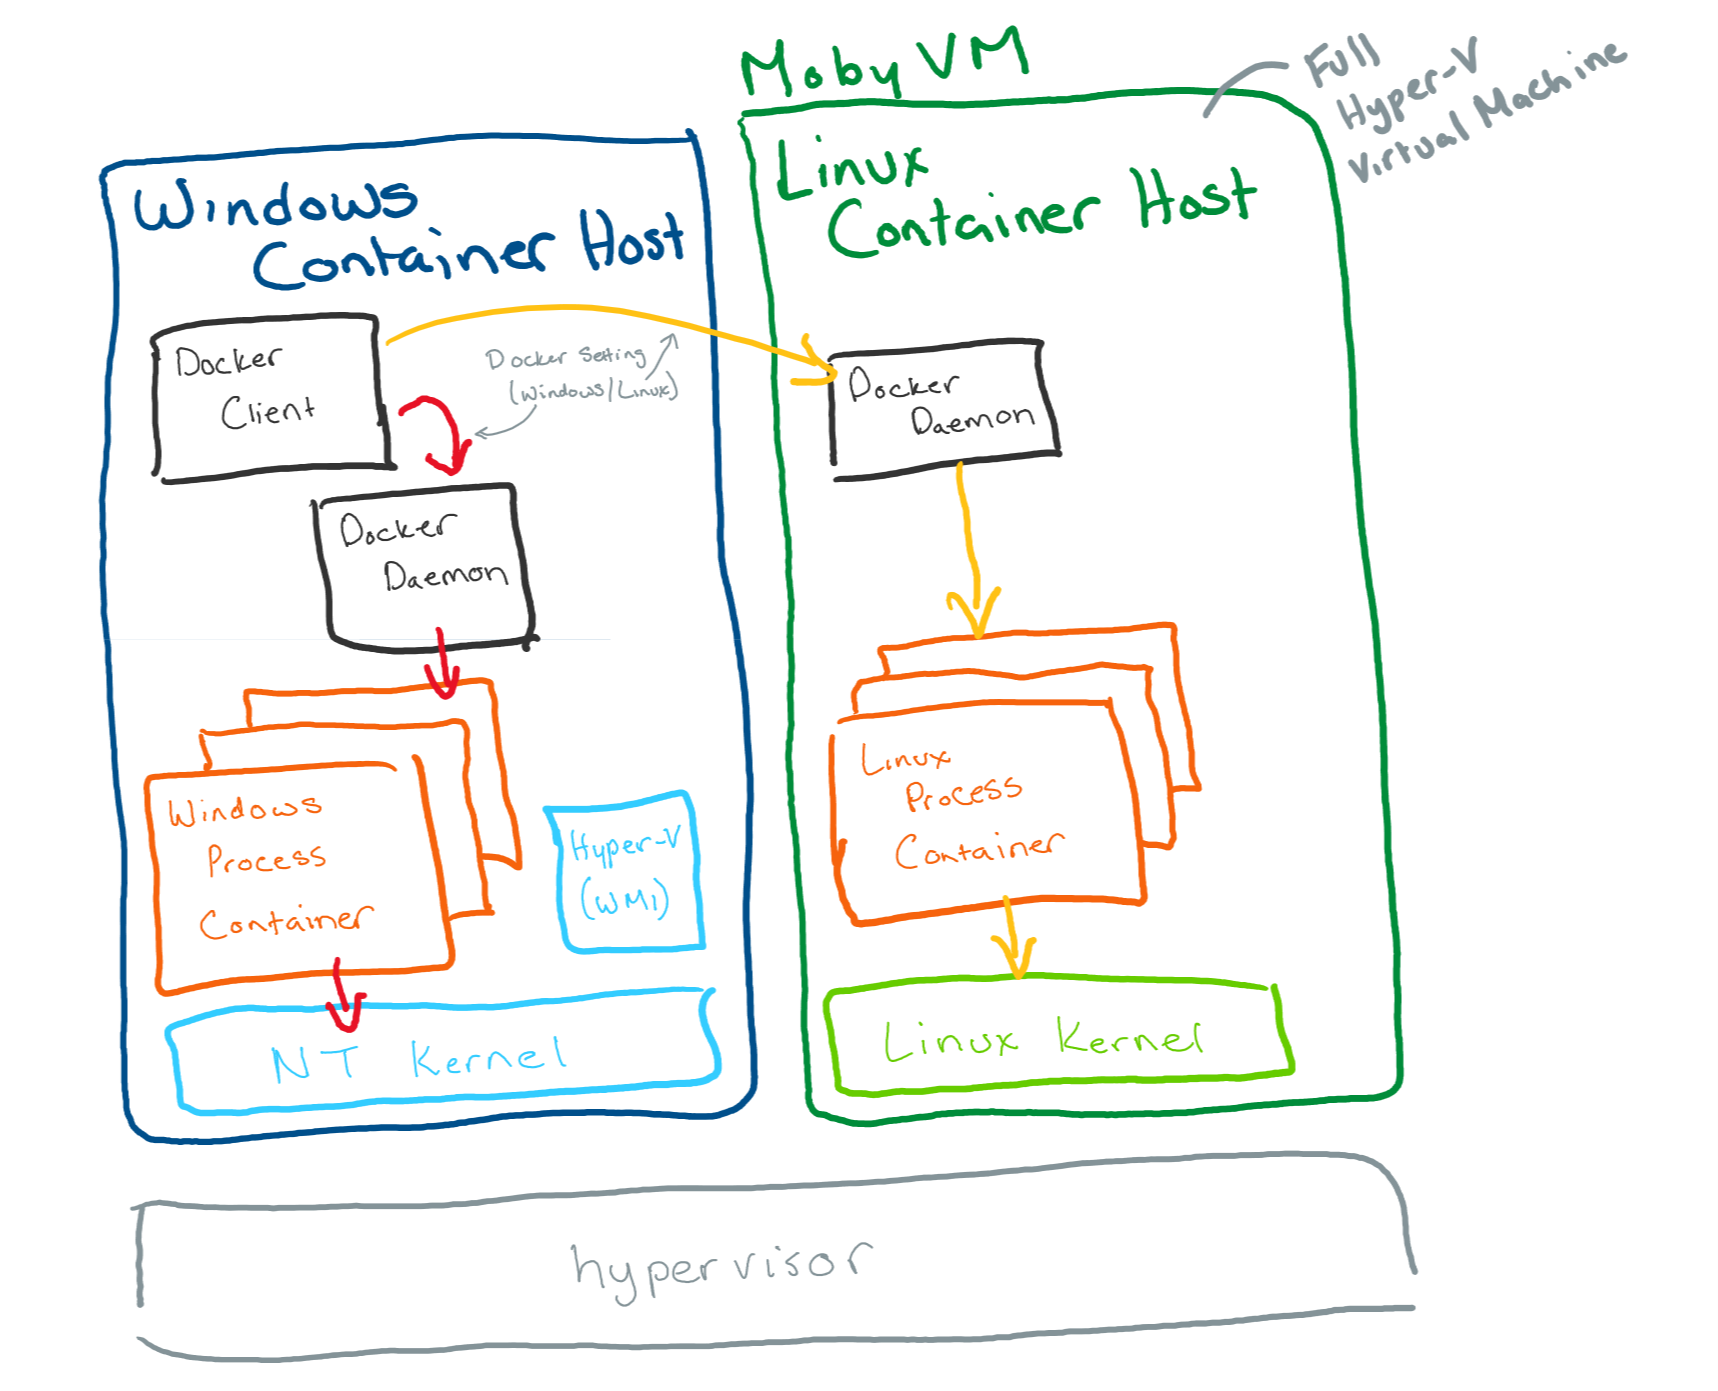
Docker has been able to run Linux containers on Windows desktop since it was first released in 2016 (before Hyper-V isolation or Linux containers on Windows were available) using a LinuxKit based virtual machine running on Hyper-V.
In this model, Docker Client runs on Windows desktop but calls into Docker Daemon on the Linux VM.
In this model, all Linux containers share a single Linux-based container host and all Linux containers:
- Share a kernel with each other and the Moby VM, but not with the Windows host.
- Have consistent storage and networking properties with Linux containers running on Linux (since they are running on a Linux VM).
It also means the Linux container host (Moby VM) needs to be running Docker Daemon and all of Docker Daemon’s dependencies.
To see if you’re running with Moby VM, check Hyper-V Manager for Moby VM using either the Hyper-V Manager UI or by running Get-VM in an elevated PowerShell window.
How to Run Linux Containers on Windows Server 2019

[Updated] Docker on Windows only runs Windows containers. To use Linux containers on Windows Server, you need to use the Docker Enterprise Edition Preview which includes a complete LinuxKit system for running Docker Linux containers. This article will teach you How to Run Linux Containers on Windows Server 2019. You can choose your perfect Windows VPS Server Packages from the Eldernode website.
Why you should use Linux containers on Windows Server 2019
What is Docker EE?
Docker EE stands for Docker Enterprise Edition and is designed for enterprise development. It makes it easy to build, ship, and run business-critical applications with their dependencies and avoid crazy dependency issues common with the use of Virtual Machines. This technology is an integrated, supported, and certified container platform for CentOS, Microsoft Windows servers, and Oracle Linux. Also, Docker EE supports both AWS and Microsoft Azure cloud providers.
Install Docker on Windows Server 2019
In this section, we will explain how to run Linux containers on Windows Server 2019. To do this follow the steps below and enter the required commands.
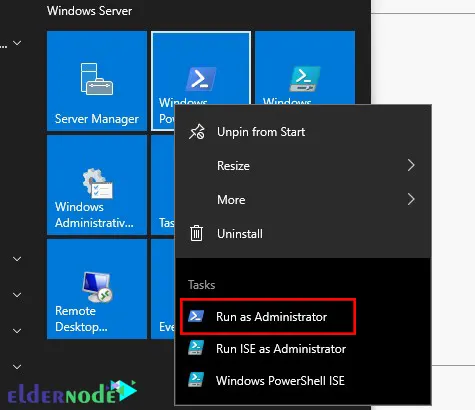
First, you should enable the Windows Server 2019 containers feature. To do this, go to the Windows server> Windows Powershell and open PowerShell as an administrator:

And install the Docker-Microsoft package management provider from the PowerShell Gallery using the following command:
Install-Module -Name DockerMsftProvider -Repository PSGallery -ForceAfter you enabled Containers, you can install the Docker Engine and Client with the command below:
Install-Package -Name docker -ProviderName DockerMsftProviderOnce the installation is completed, reboot the computer using the following command:
You can check the Docker version with the command below:
Get-Package -Name Docker -ProviderName DockerMsftProviderHow to Create a Container Registry
Once installed, you will need to configure the server to allow access to the Docker Hub.
Now follow the steps below to create a container registry:
–> Choose the project you want to create a registry on the navigation bar.
–> Choose Packages> New Repository on the project sidebar menu.
–> Specify repository settings such as choosing Container Registry, specifying the registry name and description, choosing the type of Access, and Selecting immutable tag names and immutable images.
–> Click on Get Started to see the command-line snippets.
How to Deploy and Manage Containers using PowerShell
First, start the Docker daemon by entering the following command:
And download the pre-created .NET sample image from the Docker Hub registry using the command below:
docker pull mcr.microsoft.com/dotnet/samples:dotnetapp-nanoserver-2009Finally, you need to deploy a simple container running a .NET Hello World application by running the command below:
docker run mcr.microsoft.com/dotnet/samples:dotnetapp-nanoserver-2009Congratulations the container will start and print the hello world message.
Install Docker on Windows Server 2019
Before doing anything you should uninstall your current Docker CE with the following command:
Uninstall-Package -Name docker -ProviderName DockerMSFTProviderIf you are using a Linux Virtual Machine running on Hyper-V, enter the following command to enable Nested Virtualization:
Get-VM WinContainerHost | Set-VMProcessor -ExposeVirtualizationExtensions $trueNow it’s time to install the preview Docker EE build. To do this, run the following command:
Install-Module DockerProvider Install-Package Docker -ProviderName DockerProvider -RequiredVersion previewThen you need to enable LinuxKit for running Linux containers with the command below:
[Environment]::SetEnvironmentVariable("LCOW_SUPPORTED", "1", "Machine")Finally restart Docker Service using the following command:
You can pull a test docker image using the command below:
docker run -it --rm ubuntu /bin/bashIf you want to switch back to running Windows containers, enter the command below:
[Environment]::SetEnvironmentVariable("LCOW_SUPPORTED", "$null", "Machine")Conclusion
Docker EE for the windows server enables native docker containers on the Windows server. In this article, we taught you how to run Linux Containers on Windows Server 2019. We hope you enjoyed this tutorial, you can ask questions about this training in the comments section.
Click on a star to rate it!
Average rating 1 / 5. Vote count: 1
No votes so far! Be the first to rate this post.