- How to Install and Use Putty on Ubuntu Linux
- Prerequisites
- Installing Putty from Command Line
- Launch Putty SSH Client
- Use Putty to access Cloud VM
- 23 thoughts on “How to Install and Use Putty on Ubuntu Linux”
- How to Install PuTTY on Ubuntu
- Install PuTTY on Ubuntu
- Step 1: Enable Universe Repository
- Step 2: Update Package Repository
- Step 3: Install PuTTY
- Step 4: Verify Installation
- Run PuTTY
- Установка PuTTY в Linux
- Установка PuTTy в Linux
- How to Install PuTTY on Linux
- How to Install PuTTY on Linux
- Install PuTTy on Ubuntu and Linux Mint
- Install PuTTy on Debian
- Install PuTTy on Arch Linux
- Install PuTTy on CentOS, RHEL, Fedora, Rocky & AlmaLinux
- Install PuTTy from Source Code in Linux
How to Install and Use Putty on Ubuntu Linux
In this post, we will cover how to install and use putty on Ubuntu Linux.
System Admins who had worked on Windows Operating system , surely they have used putty software to ssh UNIX like systems. When they migrated to Ubuntu Desktop , they might require putty to manage their UNIX and Linux systems.
PuTTY is the most popular SSH client. It supports flexible terminal setup, mid-session reconfiguration using Ctrl-rightclick , multiple X11 authentication protocols, and various other interesting things not provided by ssh in an xterm. Putty also supports various protocols like Telnet, SCP, rlogin, SFTP and Serial.
Prerequisites
- Pre-Installed Ubuntu System
- Sudo User with admin rights
- Internet Connectivity
Note: We have tested below procedure of installing putty on Ubuntu 22.04 / 20.04 system.
Putty can be installed either from command line or synaptic package manager.
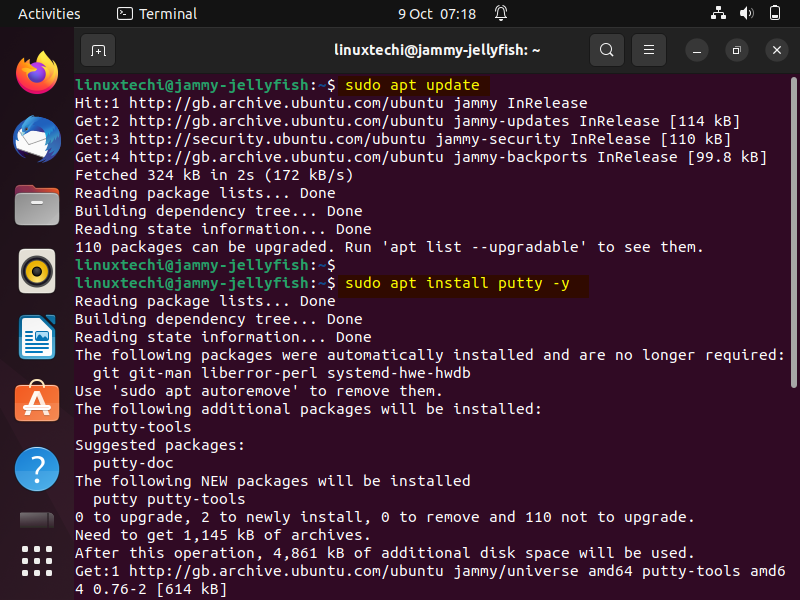
Installing Putty from Command Line
Putty package and its dependencies are available in the default package repositories of Ubuntu 22.04/20.04. So, its installation is quite easy.
Open the terminal on your ubuntu system and run below apt commands to install putty.
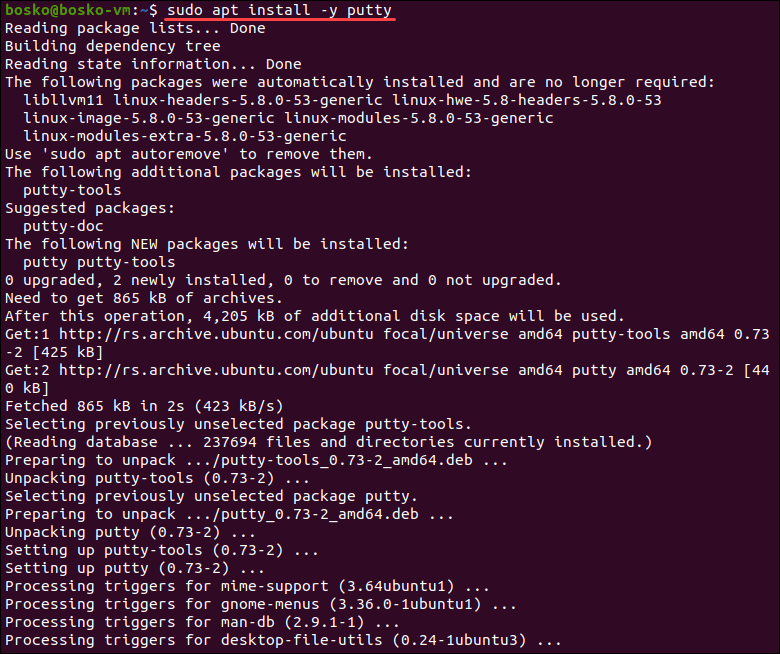
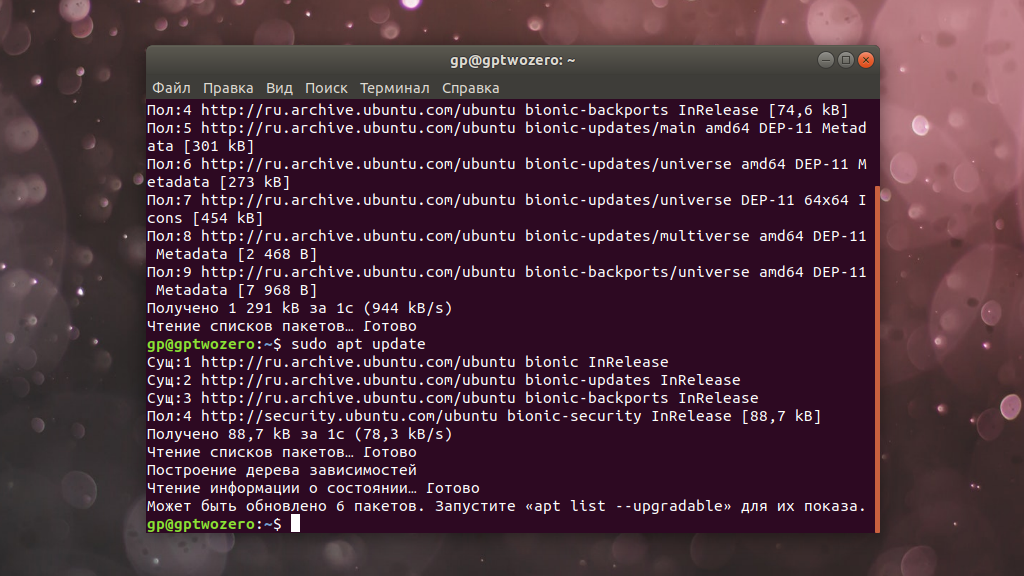
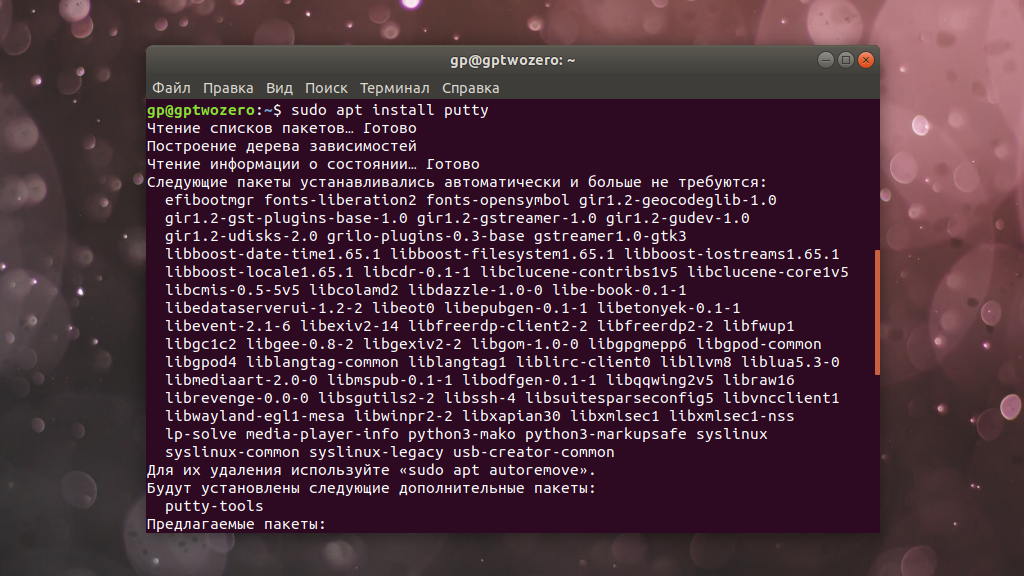
$ sudo apt update$ sudo apt install putty -y
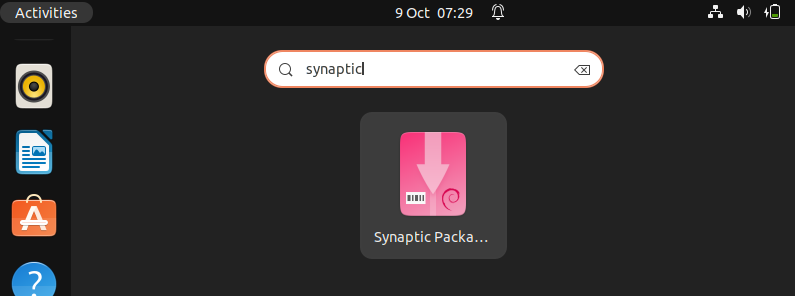
Alternate way to install putty is via Synaptic Package Manager GUI, In case synaptic is not installed the first install it via below command,
$ sudo apt install synaptic -y
Once the synaptic is installed, access the Synaptic Package Manager, search synaptic from Activity as shown,
click on “ Synaptic Package Manager ” icon. It will prompt you to enter your user’s password.

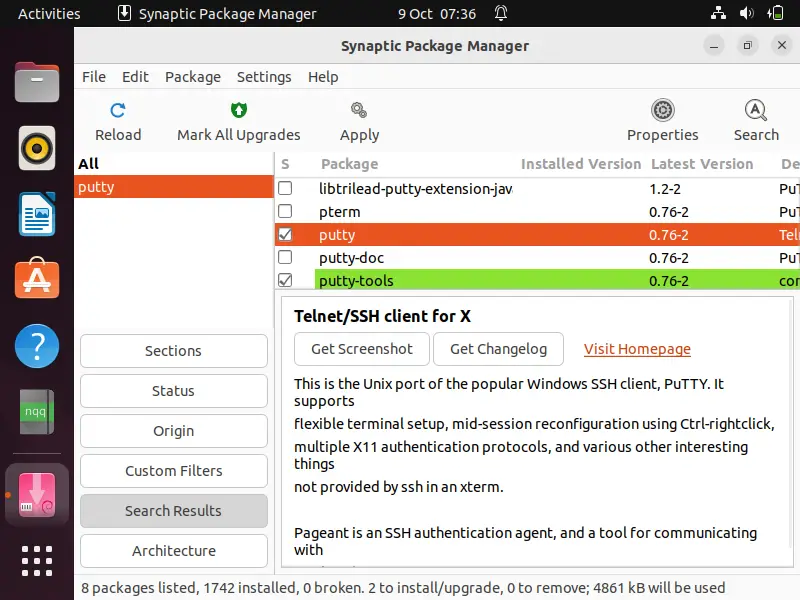
choose putty and Select ‘ Mark for Installation ‘ option & then click on apply.
Launch Putty SSH Client
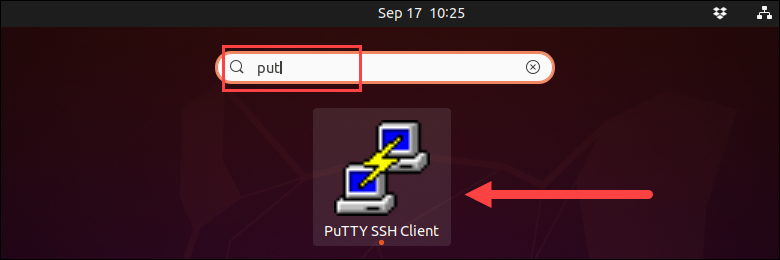
Search putty from Activity as shown below,
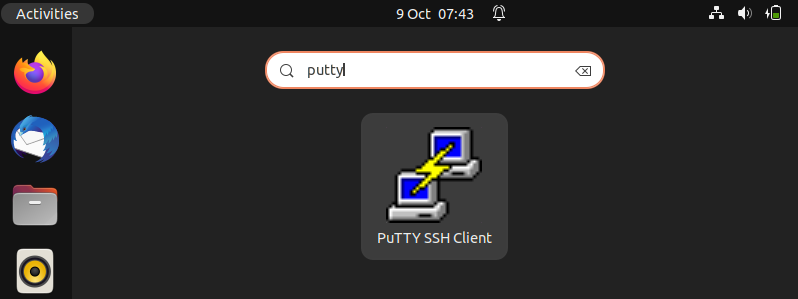
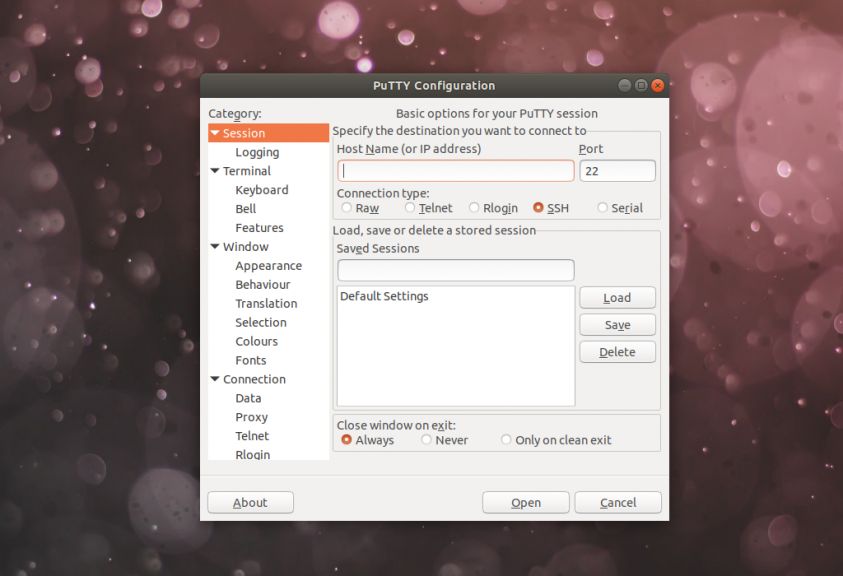
Click on PuTTY SSH Client
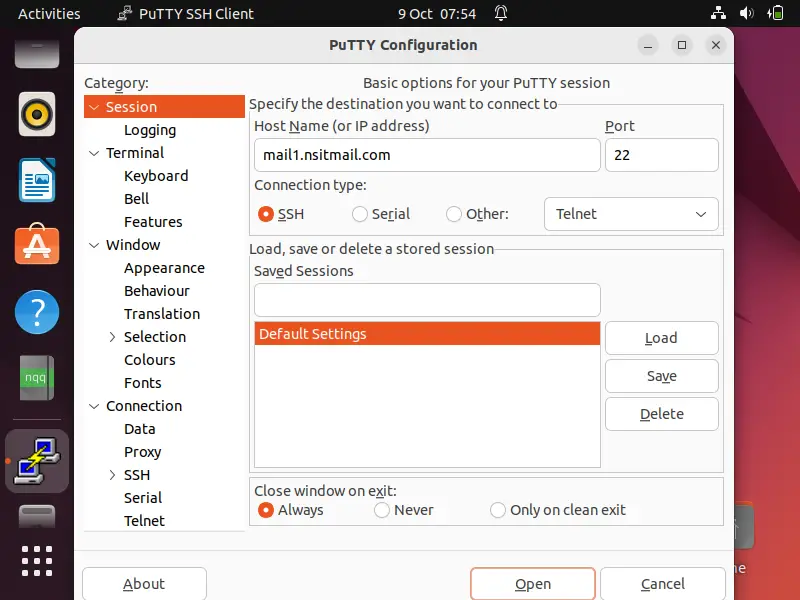
Enter Remote Server’s IP Address or Hostname.
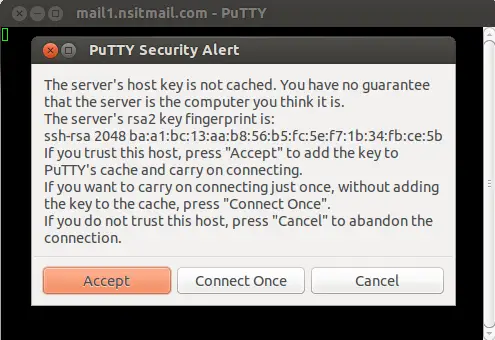
Click On Accept , then it will ask for User Name & Password as shown below :
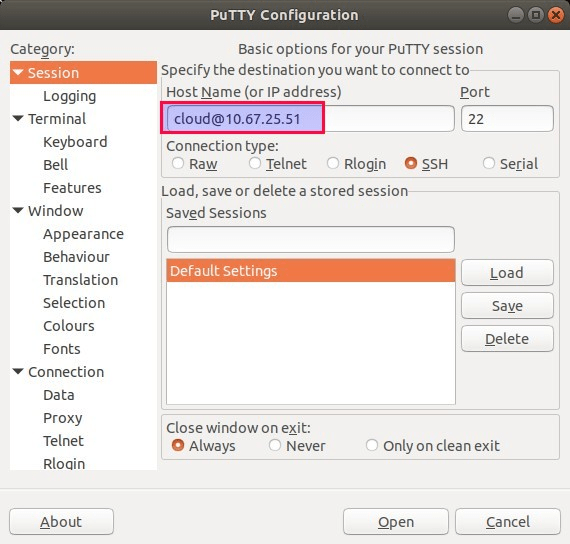
Use Putty to access Cloud VM
Let’s suppose we want to access our public cloud VM (virtual machine) via putty using their private SSH keys, so for that refer the below steps:
2) Enter User Name and External IP address of your Cloud VM in ‘Host Name’ field
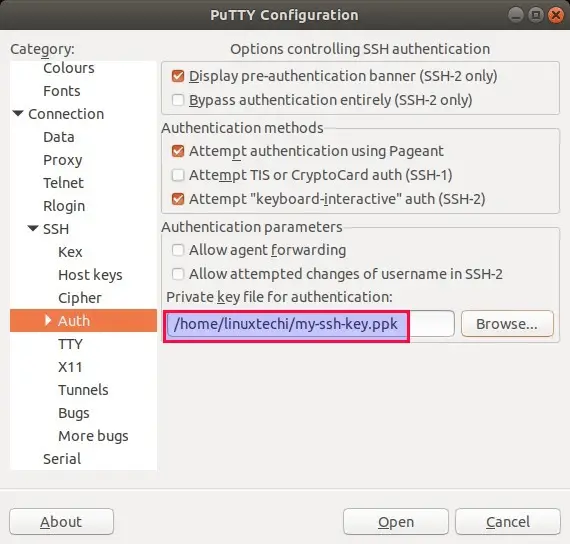
Here User name is the same user for which SSH keys are generated. By default SSH keys are generated in .pem format and putty don’t accept .pem ssh private keys, so it is recommended covert .pem ssh keys into .ppk format. One of the easiest way to convert keys into .ppk is via PuTTYgen utility, example is shown below. Puttygen utility will be installed automatically when we install putty.
$ puttygen my-ssh-key.pem -o my-ssh-key.ppk
3) From SSH Tab, choose ‘Auth’ and then browse .ppk format ssh key,
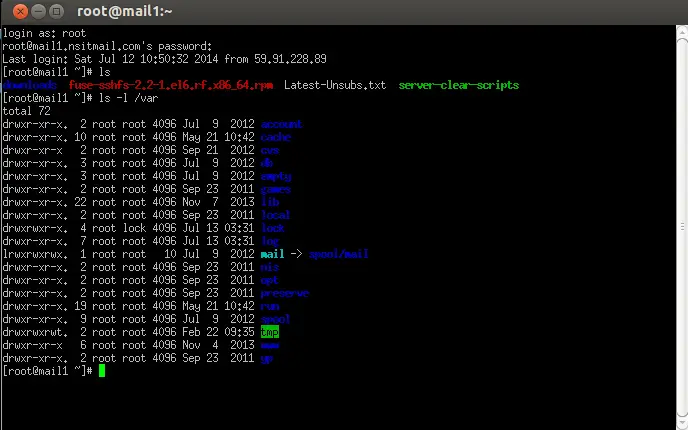
Now click on Open to start the SSH session with cloud VM, After the successful Connection to the Cloud VM, run the commands and other tasks that you want to do and to come out of VM or disconnect from VM type exit command.
That’s all from this guide, please do post your queries and feedback in below comments section.
23 thoughts on “How to Install and Use Putty on Ubuntu Linux”
Nice post. But why would you need to install putty, it’s just a frontend for ssh. It’s much easier to use ssh from the command line. Reply
Hi. Putty is more than just ssh. A good use is to use the serial option to “console in” to cisco devices. It also has a great Rlogin option. Reply
wondering if anyone can help. I am completely new at Ubuntu. Currently running Zorin Core and I’m trying to connect my cisco lab to my PC using puTTy using a Serial connection. Now when I select “Serial” , the “serial line” tab is automatically filled out: /dev/ttyS0.
I hit open and get an error saying : Unable to open connection to :
Unable to open serial port.
What is it I need to do to make make that serial connection communicate with my client on the PC? Appreciate any help I can get. Reply
I think you don’t have permissions to open it. From a terminal: chown $USER /dev/ttySo (or the path that appears there). You could also do it with the file manager. Reply
How does one do a paste from the clipboard in Putty?
Ctrl-V and Ctrl-Shift-V do not work.
The Windows version of Putty has no problems with this. Reply
plus 3 – me too! Have not found a WAY TO replicate the much loved Putty cut and paste in my Lubuntu. Reply
How to Install PuTTY on Ubuntu
PuTTY was developed for Windows as an open-source SSH and Telnet client, available outside Windows as well. Since it is open source, it has gained popularity among Linux users as well.
PuTTY supports a wide range of protocols, including serial connection, rlogin, SFTP, SCP, Telnet and SSH.
This guide shows how to install PuTTY on Ubuntu.

Install PuTTY on Ubuntu
The easiest way to install PuTTY on Ubuntu is via the terminal. Follow the steps below to install PuTTY.
Step 1: Enable Universe Repository
PuTTY is available in the Ubuntu Universe repository. To enable the repository:
1. Open a terminal window (Ctrl + Alt + T) and enable the Universe repository on your system by running:
sudo add-apt-repository universe2. Enter your password when asked and press Enter.
If the universe repository is already enabled on your machine, the output states so. Otherwise, it enables the Universe repository on your machine.

Step 2: Update Package Repository
Update your system package repository before installing PuTTY to make sure you install the latest program version.
Note: Updating the repository is essential before installing new software because it makes sure your package lists from all repositories and PPAs are up to date. That way, you are installing the latest stable program version.

Step 3: Install PuTTY
Install PuTTY by running the following command:
Note: Specifying the -y flag automatically answers YES to any questions during the installation process. If you would rather review them, leave out the -y flag.
Installing the PuTTY package also grants access to several command-line tools:
- pscp . A PuTTY tool for copying files via the SCP protocol.
- psftp . A PuTTY tool for managing files via SFTP. This allows you to securely copy, delete, transfer, and list files.
- puttygen . RSA and DSA key generator.
Step 4: Verify Installation
After the installation completes, you can verify it and check the program version by running:
The output shows the program release version and other details.

Run PuTTY
- Another way to run PuTTY is to find it in the Application menu by typing ‘putty’ and launching the tool.
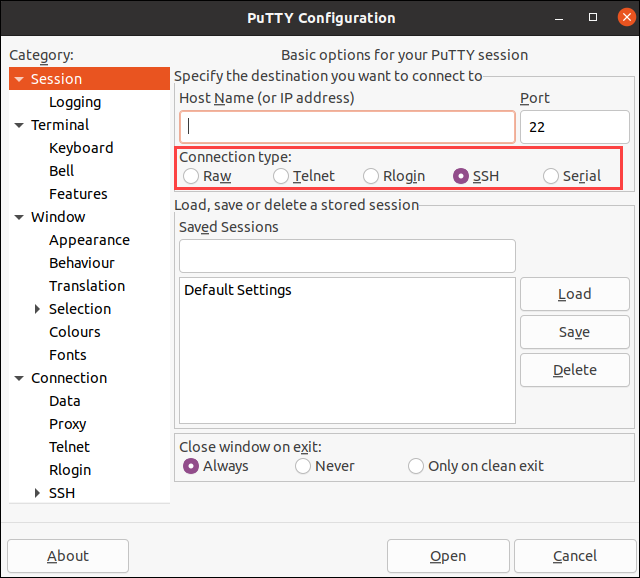
After running PuTTY, the configuration options allow you to choose the connection type. Choose between raw, Telnet, rlogin, SSH, or serial connection. Enter a port number, a server hostname or IP address, and start a new session.
Note: If you are looking to use a different Telnet and SSH client, read about popular PuTTY alternatives.
You should now have PuTTY installed on your Ubuntu system and ready to use.
Feel free to test out PuTTY, as it has various benefits. Apart from its session management, PuTTY offers several other great customization features that allow you to find and fix bugs, access serial ports, etc.
For Windows and Mac installation guides, check out our articles on installing PuTTY on Windows and installing PuTTY on Mac.
Установка PuTTY в Linux
Утилита PuTTY заметно выделяется среди огромного количества существующих на рынке SSH-клиентов. В данный момент это бесспорно самый популярный клиент для подключения к удалённому компьютерному узлу и управления ним.
PuTTy станет незаменимым помощником в случае, когда необходимо выполнять администрирование Linux удалённо либо просто подключиться из среды Windows к ОС семейства Unix. В этой статье мы рассмотрим как выполняется установка PuTTy Linux.
Обратим внимание на несколько особенностей:
- Простая установка во всех наиболее распространённых ОС.
- Удалённое администрирование из под Windows или Linux.
- Работа через последовательный порт.
- Поддержка работы с VPN.
- Поддержка IPv6.
- Использование клиентов SCP-SFTP.
- Перенаправление портов.
- Разные варианты аутентификации (в том числе и с открытым ключом).
- Сжатие данных, применяемое до окончания процесса аутентификации.
Разработчики программ используют PuTTy для создания локальной среды, а администраторы сетей — для удалённой настройки маршрутизаторов и управления Linux.
Кроме открытого исходного кода у PuTTy есть ряд других преимуществ перед другими клиентами SSH. Пакет программы состоит только из исполняемых файлов, что исключает привязку к DLL, версии ОС и другим приложениям.
PuTTy ориентирован не только на удобство использования, но и на безопасность. Технология реализует только клиентскую сторону соединения, остальная работа производится на сервере.
Установка PuTTy в Linux
Установка PuTTy в Ubuntu проста и не вызовет сложностей даже у начинающих пользователей Linux. Запустите терминал (сочетание клавиш для быстрого запуска приложения: Ctrl+Alt+T):

Убедитесь, что репозиторий universe активен. Выполните следующую команду:
sudo add-apt-repository universe

Убедившись, что репозиторий включён, обновите Ubuntu, используя команду:
После этого утилиту можно найти в главном меню и запустить:
Для других операционных систем установка утилиты не очень сильно отличается. Все операции выполняются с помощью команды sudo.
sudo apt-get install putty
Интерфейс PuTTy практически идентичен в любой операционной системе.
Обнаружили ошибку в тексте? Сообщите мне об этом. Выделите текст с ошибкой и нажмите Ctrl+Enter.
How to Install PuTTY on Linux
PuTTY is a free and open-source cross-platform SSH and telnet client that even after being around for over 20 years remains one of the most popular SSH clients being used especially on the Windows platform.
Linux distros ship with SSH capabilities built into their terminal but in real-world environments, I have seen PuTTY being used instead of the default Linux systems more times than I cared to count.
The quickest reasons that come to mind for such scenarios include:
- Familiarity: users are more comfortable using an SSH client they got familiar with while using Windows.
- Debug mode: Connection to serial pots and raw sockets is more user-friendly with PuTTY.
- Convenience: PuTTY has a GUI that undeniably makes it easier to use especially by SSH and/or terminal newbies.
It is possible for your own reasons for wanting to use PuTTY on GNU/Linux are different. It doesn’t really matter. Here are the steps to take in order to install PuTTY on the Linux distro of your choice.
How to Install PuTTY on Linux
PuTTY is available to install from the default official repositories in most Linux distributions. For instance, you can install PuTTY on Ubuntu and its derivative distros via the universe repository.
Install PuTTy on Ubuntu and Linux Mint
First, you’ll have to enable the universe repository so that you can access its packages, update your system to recognize its new access rights, and then run the install command.
$ sudo add-apt-repository universe $ sudo apt update $ sudo apt install putty
Launch PuTTY to see that its UI mirrors that of the windows version. Happy you 🙂

Install PuTTy on Debian
Just like for Ubuntu, PuTTY is available for Debian and all its distros via aptitude (i.e. using apt-get) as shown.
$ sudo apt-get install putty
Install PuTTy on Arch Linux
Arch Linux and its derivatives can also install PuTTY from the default repositories.
Install PuTTy on CentOS, RHEL, Fedora, Rocky & AlmaLinux
PuTTY is available to install via the distro’s default package manager.
$ sudo yum install putty OR $ sudo dnf install putty
Install PuTTy from Source Code in Linux
It’s possible that you want to get your hands ‘dirty‘ and build the SSH client from scratch yourself. You’re in luck because it is open-source and the source code is available to download putty from the official putty website using the following wget command.
$ wget https://the.earth.li/~sgtatham/putty/latest/putty-0.78.tar.gz $ tar -xvf putty-0.78.tar.gz $ cd putty-0.78/ $ ./configure $ sudo make && sudo make install
That’s all folks! You’re now equipped with the knowledge to install PuTTY on any Linux distro, in any environment. Now learn how to use putty with these useful putty tips and tricks.
Do you use a different SSH or telnet client? Tell us about it in the comments section below.