Jadelinux Always be free!
Install and set up SAMBA. Samba is the standard Windows interoperability suite of programs for Linux and Unix. SAMBA allows you to share folders between Linux, Windows and MAC. This tutorial will show you how to install and set up Samba share.
The first thing we need to do is disable SeLinux. In order to do this you must have root privileges type su and switch to root user.
Once you have switched to the root user type
Find the line SELINUX=enforcing and change it from SELINUX=enforcing to SELINUX=disabled
Push ctrl + x then hit Enter to save then reboot the computer.
#
# This file controls the state of SELinux on the system.
# SELINUX= can take one of these three values:
# enforcing — SELinux security policy is enforced.
# permissive — SELinux prints warnings instead of enforcing.
# disabled — No SELinux policy is loaded.
SELINUX=enforcing
# SELINUXTYPE= can take one of these two values:
# targeted — Targeted processes are protected,
# minimum — Modification of targeted policy. Only selected processes are protected.
# mls — Multi Level Security protection.
SELINUXTYPE=targeted
#
After the reboot launch the terminal again and switch to the root user.
Installing x86_64 2:4.1.3-2fc20
samba
Total download size: 534 k
Installed size: 1.6 M
Is this ok [y/d/N]
Hit y then enter to continue
Now we need to back up the original smb.conf file. It’s good practice to back up important config files and in case of anything going wrong we will have the original to fall back on.
Now to confirm that the file has backed up successfully type
Now we need to create a share folder. It’s this folder the will be accessible over the network. Change directory with the cd .. command.
As you can see the prompt has changed from
Now we create our shared folder. Type the command mkdir share
Type ls again and you should see
Now we need to change the permissions of the folder this can be done by typing chmod 0777 share
OK now we need to configure SAMBA and allow it to access the share folder we just created and also give our user the rights to assess the share. So we need to change directory. cd /etc/samba
As you can see the prompt has changed again from
You will need to delete all the text inside the smb.conf and replace it with the text below. You can copy and paste the code and edit it to your needs.
The line with valid users = jhealy needs to be changed to your username Example valid users = johndoe
workgroup = WORKGROUP
server string = Samba Server Version %v
log file = /var/log/samba/log.%m
max log size = 50
security = user
passdb backend = tdbsam
load printers = yes
cups options = raw
[LinuxShare]
path = /home/share
valid users = jhealy
browsable = yes
writable = yes
guest ok = no
read only = no
You can download a pre-built config file Here
Push ctrl + x then hit Enter to save
Because Samba has its own password database, you have to set a password for your user. Type the command smbpasswd -a jhealy
You are then prompted to type a new password for your samba access. Type your password hit enter then retype your password. You should see something like
Now we need to start the samba service for Fedora we run the command «systemctl start smb.service» and «systemctl start nmb.service»
[root@Jadelinux samba]# systemctl start smb.service
[root@Jadelinux samba]# systemctl start nmb.service
Also to make sure the service starts after reboot for Fedora run these commands «systemctl enable smb.service» and «systemctl enable nmb.service»
[root@Jadelinux samba]# systemctl enable smb.service
[root@Jadelinux samba]# systemctl enable nmb.service
There is one more thing we need to do and that’s to configure the firewall to allow the samba to pass through.
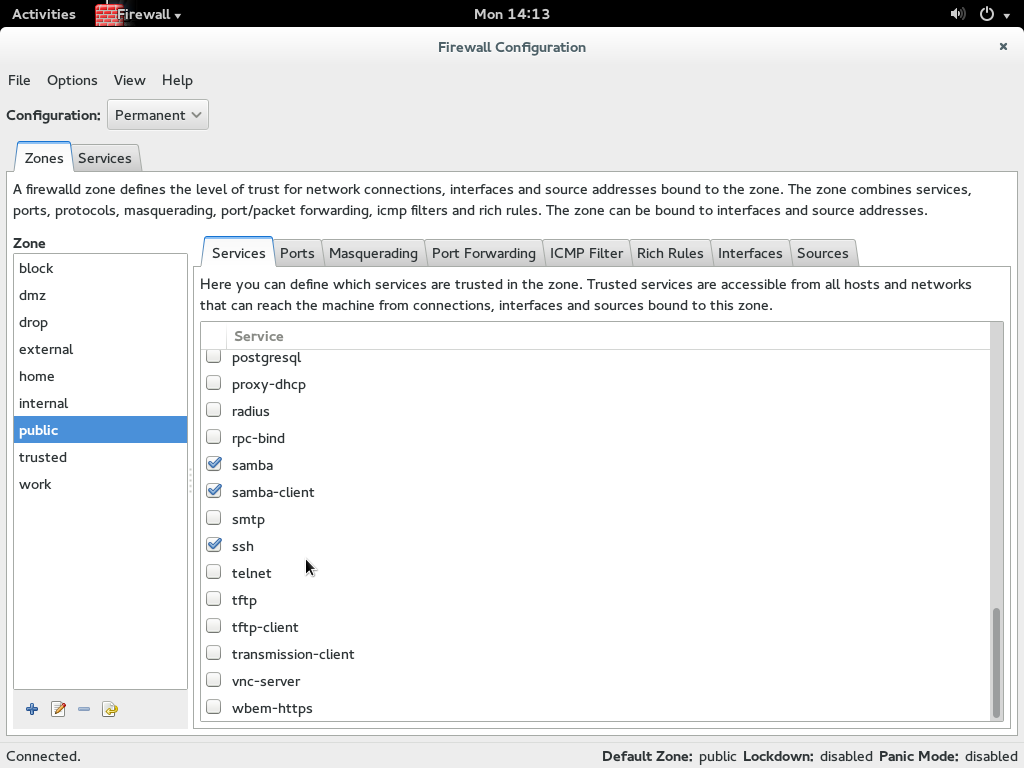
Launch Firewall and enter your root password. At the top left hand corner there is a dropdown menu «Configuration» and Permanent needs to be selected
Under Zone select public and under services on the right hand side select samba and samba-client
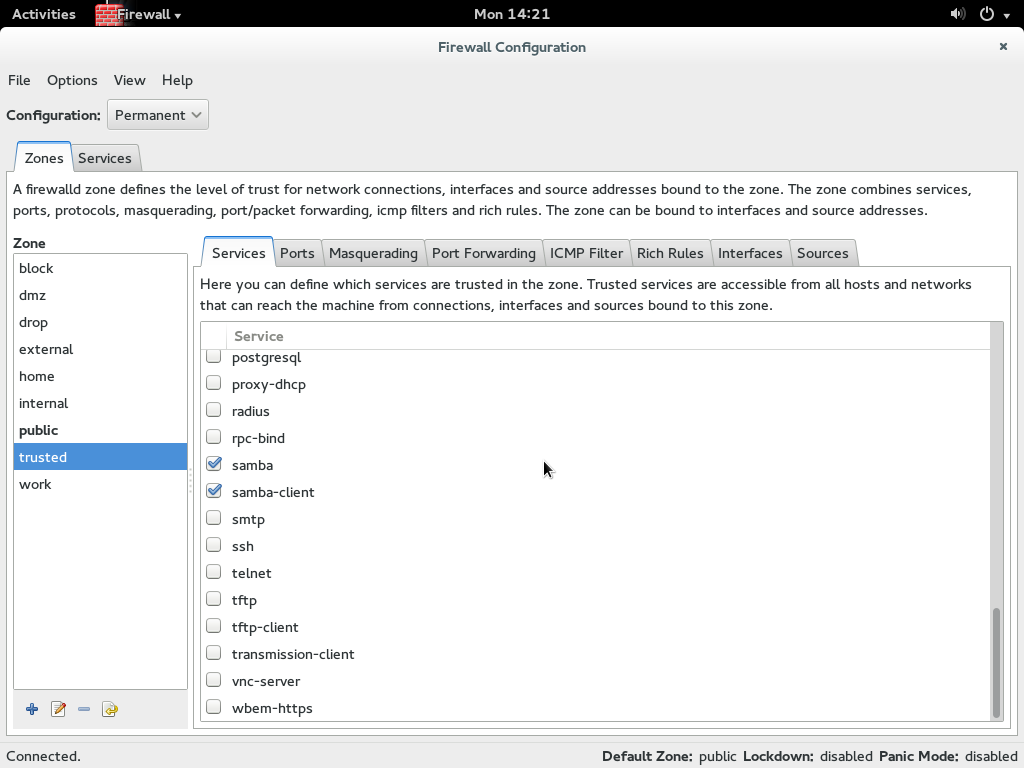
Now under zone again select trusted and on the right hand side under service select samba and samba-client
Now exit firewall and reboot your computer.

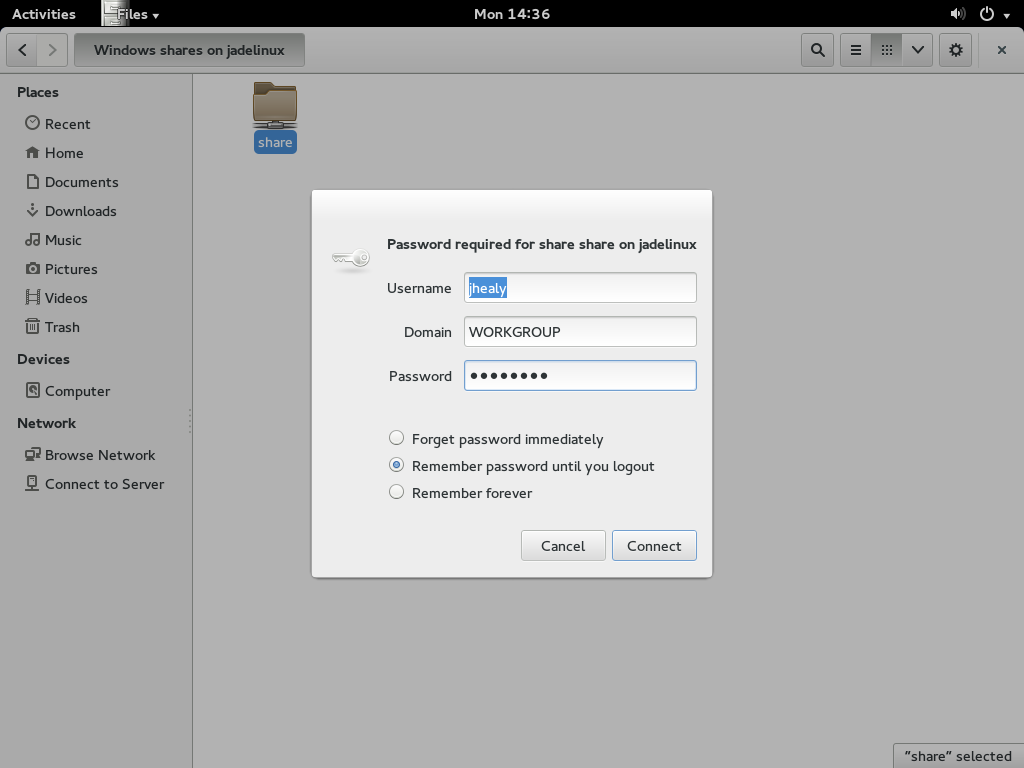
After you have rebooted the computer click on files browser. On the left hand side under network click on Browse Network this will show you a list of computers sharing folders on the network. You should see your computer name listed here. Double click on it.
You are prompted to enter a username and password these are the details you entered during the samba setup.
That is it you have successfully installed and configured SAMBA file share. I hope this has helped you.
Samba-доступ к каталогу в Fedora Linux

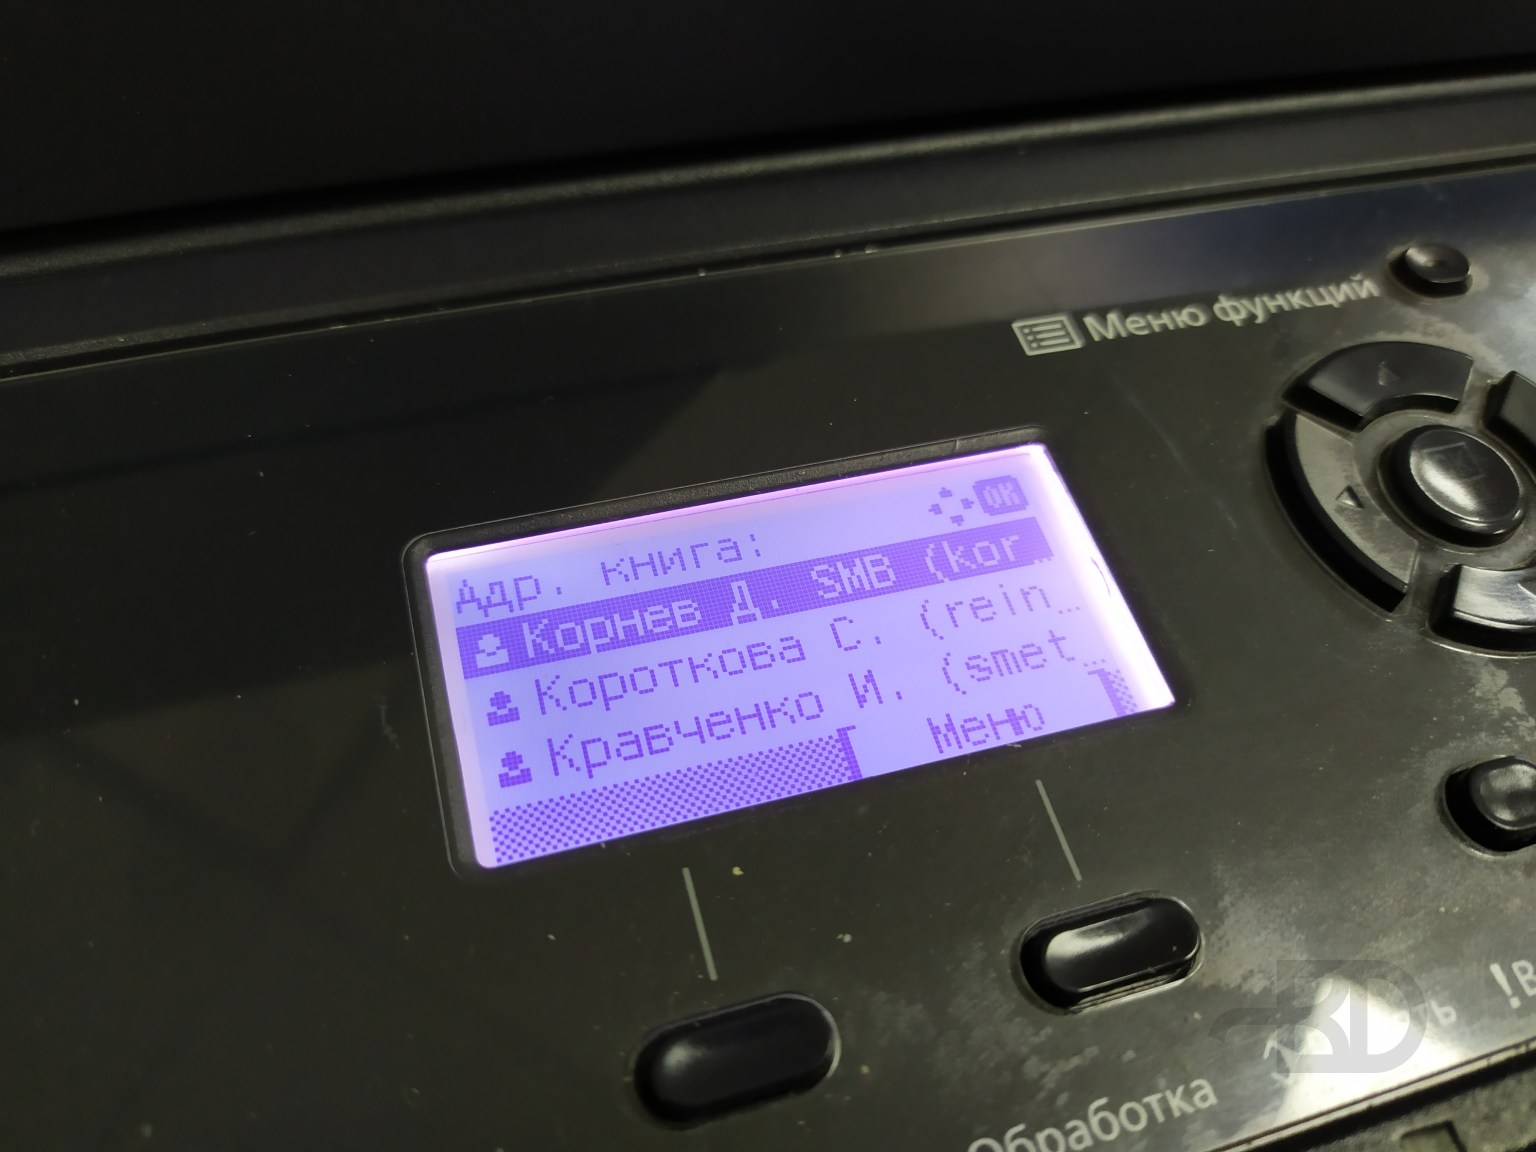
На работе сетевой МФУ. Сканируя документы он складывает готовые файлы в настроенный заранее каталог. Делать это он может по протоколу SMB или FTP. Я уже писал про настройку Samba в Ubuntu. Теперь про Fedora. Здесь есть свои особенности.
Установка и активация Samba:
sudo dnf install samba sudo systemctl enable smb --nowfirewall-cmd --get-active-zones sudo firewall-cmd --permanent --zone=FedoraWorkstation --add-service=samba sudo firewall-cmd --reloadКак и в предыдущей статье я создаю для доступа специального пользователя и создаю сам каталог для складирования. Каталог размещаю за пределами домашнего каталога этого пользователя, хотя может правильнее было бы в нём. В общем не принципиально, делайте, как удобнее.
Создаём пользователя share-user без домашнего каталога:
sudo useradd -d /dev/null share-userЗадаём пароль этому пользователю:
Пользователя и пароль также внесём в базу данных Samba:
sudo smbpasswd -a share-userСоздаём каталог, например, /mnt/share , обязательно от имени и группы этого пользователя.
Лучше сразу добавить своего обычного пользователя в группу share-user, чтобы проще было потом работать с файлами, для применения изменений нужно перезайти или перезапустить компьютер:
sudo usermod -aG share-user имя_вашего_пользователяНастраиваем SELinux, иначе каталог будет недоступен для записи:
sudo semanage fcontext --add --type "samba_share_t" /mnt/share sudo restorecon -R /mnt/shareПример конфига /etc/samba/smb.conf :
[global] security = user passdb backend = tdbsam workgroup = WORKGROUP server min protocol = NT1 server string = MySMB [share] comment = MySMB Share path = /mnt/share valid users = @share-user force group = share-user create mask = 0771 directory mask = 0771 writable = yes browseable = yes write list = userГруппу workgroup укажите в соответствии со своей.
Параметр server min protocol = NT1 лучше не ставить, если и без него у вас будет работать. Дело в том, что есть разные версии протокола SMB. Часто бывает, что даже не сильно старые МФУ не поддерживают новые версии протокола. Данным параметром мы разрешаем подключение с использованием SMB v1.
Перезапуск Samba для применения изменений:
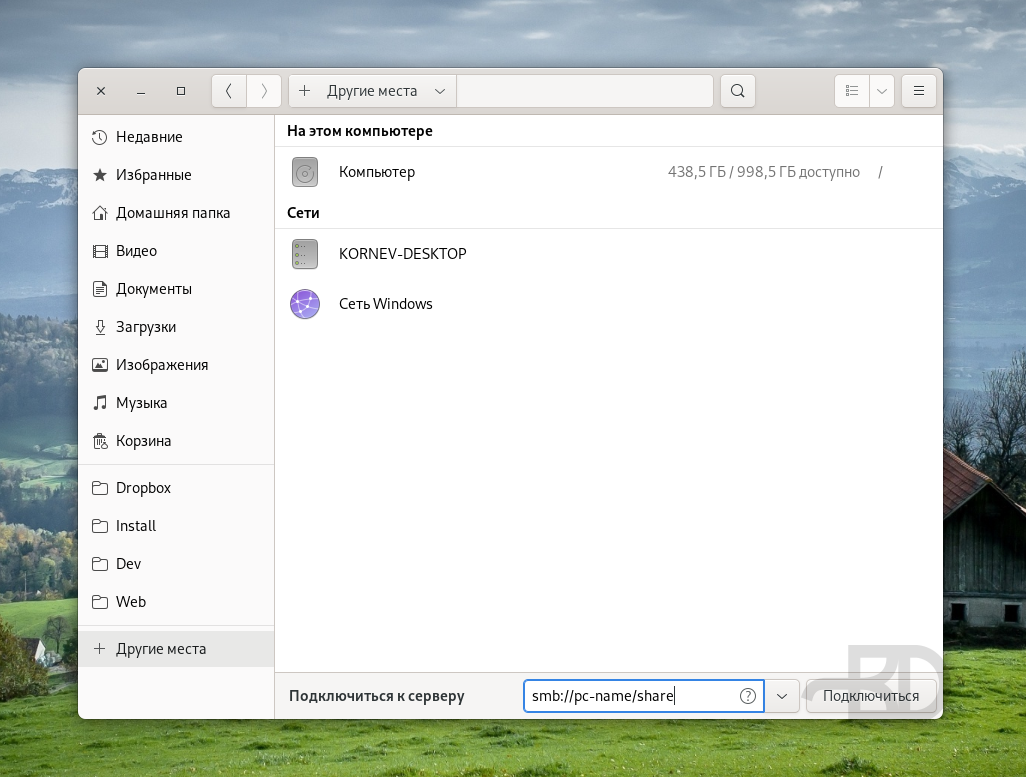
sudo systemctl restart smbСтоит попробовать подключиться. Можно прямо со своего же компьютера, через программу «Файлы». Ссылка для подключения имеет вид smb://pc-name/share . При этом вам надо будет указать пользователя share-user и его пароль. Если подключение будет успешным, обязательно проверьте возможность записи в каталоге. Просто создайте, например, пустой каталог. Все ОК? Тогда можно добавлять данные SMB-доступа в МФУ.
Дополнительную информацию можно пискать здесь.
elemc blog
I’ll speak to him again. What do you read, my lord?
Samba в Fedora GNU/Linux
На самой настройке Samba, я не буду заострять внимание, ибо материалов на эту тему — тонны.
Я лишь расскажу, как правильно подготовить и установить samba на Fedora.
Ну и приведу мой махонький файлик smb.conf для примера.
Установка
Установка достаточно проста.
Ставим пакеты:
Настройка samba
Редактируем файл /etc/samba/smb.conf по вкусу, я использую простенький и понятный файл, такого вида:
[global]
workgroup = WORKGROUP
server string = Alexei Laptop
netbios name = ALEX-LAPTOP
printcap name = cups
load printers = yes
printing = cups
cups options = raw
log file = /var/log/samba/log.%m
max log size = 50
encrypt passwords = yes
map to guest = bad user
security = user
dns proxy = no
case sensitive = auto
dos charset = 866
unix charset = UTF-8
passdb backend = tdbsam
[public]
comment = Public Stuff
path = /tmp/samba-shares
force user = nobody
force group = nobody
writable = yes
guest ok = yes
create mask = 0664
directory mask = 0777
[alex]
comment = Alexei stuff
path = /home/alex
force user = alex
force group = alex
writable = yes
guest ok = yes
create mask = 0644
directory mask = 0755
[media]
comment = Media stuff
path = /media
force user = alex
force group = alex
writable = yes
guest ok = yes
create mask = 0644
directory mask = 0755
Обрати, друг, внимание, что force user и force group должны соответствовать правам на данные каталоги. Это важно, без этого не будет работать.
SELinux
Самое вкусное! Из-за нежелания, лени или еще чего-то, многие отключают SELinux, но я умею его готовить, потому не отключаю 😉
По-умолчанию SELinux в Fedora почти ничего samba-серверу не разрешает, это в общем-то правильно, ибо не фига.
Но на то мы и тут, давайте разрешать…
Список возможных «переключателей» разрешений, можно посмотреть такой командой:
В ответ мы получим, что-то вроде:
allow_smbd_anon_write --> off samba_create_home_dirs --> off samba_domain_controller --> off samba_enable_home_dirs --> off samba_export_all_ro --> off samba_export_all_rw --> off samba_run_unconfined --> off samba_share_fusefs --> off samba_share_nfs --> off use_samba_home_dirs --> off virt_use_samba --> off
Ну и включаем логику, последовательно разрешаем то, что нам надо:
| allow_smbd_anon_write | разрешить запись гостями (не авторизованными пользователями) |
| allow_smbd_anon_write | разрешить запись гостями (не авторизованными пользователями) |
| samba_create_home_dirs | samba может создавать домашние каталоги (обычно это полезно в доменах) |
| samba_domain_controller | разрешить использование в качестве контроллера домена |
| samba_enable_home_dirs | разрешить шарить пользовательские каталоги |
| samba_export_all_ro | разрешить любой экспорт на «только чтение» |
| samba_export_all_rw | тоже самое для «читать-писать» |
| samba_run_unconfined | разрешить samba запускать скрипты с контекстом unconfined (это неопределённый контекст SELinux) |
| samba_share_fusefs | разрешить шарить примонтированные fuse’ом каталоги (т.е. например в /media смотнирован ntfs-диск, который надо бы расшарить, вот этого сделать не получится, пока данный переключатель выключен) |
| samba_share_nfs | тоже самое, но для NFS-монтировок |
| use_samba_home_dirs | разрешает использовать каталоги /home |
| virt_use_samba | виртуалы могут использовать samba с хоста |
Включаем командой setsebool -P имя=значение имя2=значение2. Т.е. например себе я включаю следущие «переключатели»:
setsebool -P virt_use_samba=1 use_samba_home_dirs=1 samba_share_fusefs=1 samba_export_all_rw=1 samba_export_all_ro=1 samba_enable_home_dirs=1 allow_smbd_anon_write=1
Внимание! Команда выполняется достаточно продолжительное время.
Запускаем демоны
Для Fedora 14 мы запускаем сами демоны так: