How to execute a command in screen and detach?
How can I get screen to execute a command and then detach (That is, automatically in a single script without further input beyond initially starting the script)? e.g. I run myscript.sh and it automatically starts a screen session, executes a command, then detaches.
It is important to note that for many of these answers, screen will automatically terminate your screen when the command is done running and the program exits. So, you might think it didn’t work, but you are likely just not seeing it because it terminated. That is why there is a sleep or exec command in answers below, to force screen to not terminate.
8 Answers 8
-d -m
Start screen in detached mode. This creates a new session but doesn’t attach to it. This is useful for system startup scripts.
Somehow your command wasn’t found, or isn’t working correctly in the automatically-created screen environment. Try just doing screen yourcommand without the -d and -m and see how that goes first.
You’re sort of right. screen terminates when the command finishes, contrary to my expectations. But your answer does work.
You can change that by enabling the zombie option in screen. Put zombie xy in your ~/.screenrc . It should also be possible to enable it for one session only b putting zombie xy in another file and using -c file but for some reason that’s not working when I try it. Or just use sh -c ‘yourcommand;while :;do sleep 9999; done’
@AlanCurry, Nope, this doesn’t work for me either, even though the command runs perfectly (and takes several hours) when run in a screen manually.
To run a single command in screen and detach, you may try:
To run multiple commands, try:
screen -dm bash -c "sleep 10; myscript.sh" Please note that when a program terminates, screen (per default) kills the window that contained it.
If you don’t want your session to get killed after script is finished, add exec sh at the end, e.g.:
screen -dm bash -c 'sleep 5; exec sh' To list all your sessions, try:
This worked for me on Ubuntu 16.04. In addition to name your session so you can return to it later, add -S sessionname : screen -dmS MyLongRunningScript bash -c «. » .
@kenorb, the problem is that it only worked with single quotes. Let’s say: ‘for k in `seq $i $j`; do echo $k; done’ , where $i and $j are from the parent script.
This is a robust answer. I needed bash -c . I can only assume that when I called screen -dm head foo > bar it wrote screen -dm head foo to bar . screen -dm bash -c «head foo > bar» fixed that.
In order to start new session in background with name ‘sleepy’
screen -S sleepy -dm sleep 60 In order to kill ‘sleepy’ session
@Toolkit The issue is that you have the command in quotes and so it was treated as one large command. Obviously we can’t take it out of quotes because of the semicolon. To solve this, execute the command like so: screen -S sleepy -dm bash -c «cd myfolder;sleep 60»
screen -dmS screen_session_name bash -c 'echo "doing stuff"; exec bash' it happen to me when I pressed control c (sig int) to exit my program. it exits all the way from all bash. so I found this to catch SIGINT. and prevent exit from last bash. (need to type exit to exit)
screen -dmS "screenNameHere" bash -c "trap 'echo gotsigint' INT; cd /mydir ; my_command_here; bash" example: screen -dmS "status_updates" bash -c "trap 'echo gotsigint' INT; cd /opt/status_update ; forever index.js ; bash" I find it useful to use cron to run nodejs programs on startup. and to run the screen at boot time. in cron there are special events syntax @reboot event
to edit cron, execute: crontab -e then type @reboot screen -dmS "screenNameHere" bash -c "trap 'echo gotsigint' INT; cd /mydir ; my_command_here; bash" How to Detach the Screen Session
The screen command makes it possible to send the running applications to the background, and you can reattach them when necessary. The command acts as a terminal multiplexer. You can utilize its various options to create a new shell window that you can send (detach) or pull from the background (reattach) to resume using it.
With the screen command, you can reattach your process which is running in the background even if your session accidentally disconnects, such as when accessing a remote machine. That way, your work won’t get interrupted or lost in case of a long process.
This guide covers everything about using the screen command, from installation to detaching and reattaching the screen session.
How to Use the Screen Command
The GNU screen allows creating a screen session and sending it to run in the background, such that even when your connection breaks, you can pull the process from the background and your process will still be active.
You can create multiple screen sessions and navigate each using various options. First, check if you have the screen installed using the following command:
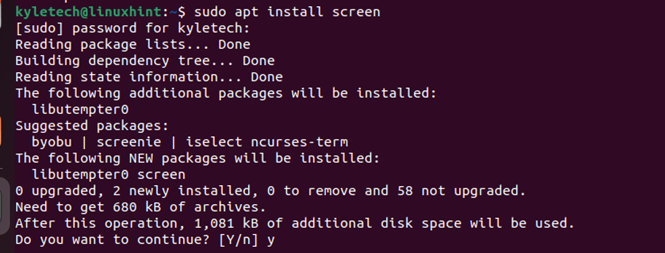
If not the screen is not yet installed, here’s how to install it on Ubuntu and Debian:
Use yum for CentOS and Fedora:
You can start a screen session using this command:
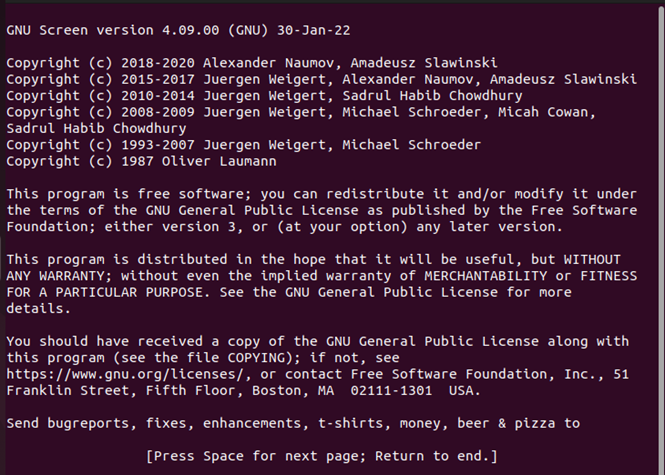
A welcome page will appear like in the following image. You can press the space or return keys to navigate the window.
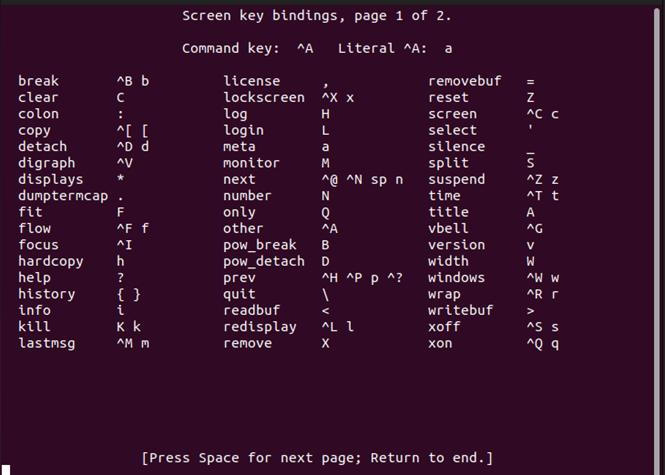
To quickly get started with the various commands, open the list of commands for screen by pressing the Ctrl+a ? keyboard keys. You will get all the commands displayed as follows:
Detaching and Reattaching the Screen Sessions
Once you run the screen command, the active shell becomes the first screen session. You can confirm the active sessions using the following command:
We only have one attached session which is the current shell. On the right, you will note the attached message to imply that it is the active shell.
We can send it to the background(detach) by pressing the Ctrl+a d keyboard keys. You will get a message like the one in the following illustration which confirms that the screen session has been detached.
The message displays the screen session ID. If you defined the name for the session, it is also displayed in the screen session.
If we list the available screen sessions, the session is now detached. This means that it’s running in the background and the process on the shell is active. That way, if the connection breaks, like in the case of accessing a remote server, we can access the session. Our process that runs in the shell will still be active.
To reattach the screen session, use the -r flag followed by the session ID or its name. In this case, we have its session ID as 5608. We run the following command:
Once you execute the command, the session will reattach and open the process which runns in the background like in the following case where the background process runs an upgrade and update command. You will find your process still running or completed.
If the process is completed, you can close the screen session by typing exit on the terminal:
You will get the message that the screen is terminated on the other active shell. If that is the only screen session, the listing of the active sessions will display none.
Naming a Screen Session
So far, we detached and reattached a screen session using its ID. However, if you have multiple screen sessions, you can create a custom name for each for easy identification using the -S option.
Let’s create a screen session named linuxhint-screen. Use the following command:
If we list the active screen sessions, we have our session created successfully.
You can detach the named screen session by pressing the Ctrl+a d keyboard keys. You will get the detach message which shows the session ID and its name.
To reattach it, use its name instead of the session ID as shown in the following:
Also, typing exit closes the screen session. You will get a message which confirms that the session is terminated.
Conclusion
The screen command lets the users detach and reattach the screen sessions, such that if the connection breaks, their session still runs in the background, uninterrupted. You can pull it anytime. To detach a screen session, use the ctrl+a d command. This guide covered all the details about screen sessions in Linux including the steps on how to install it, create a session, detach it, reattach it, and name the session.
About the author
Denis Kariuki
Denis is a Computer Scientist with a passion for Networking and Cyber Security. I love the terminal, and using Linux is a hobby. I am passionate about sharing tips and ideas about Linux and computing.


