- Как создать загрузочную флешку с Linux
- 1. Загрузите ISO-образ
- 2. Запишите образ на носитель
- Windows
- macOS
- Linux
- Startup Disk Creator
- Etcher
- dd
- 3. Загрузитесь с флешки
- Create a bootable USB stick on Ubuntu
- 2. Requirements
- 3. Launch Startup Disk Creator
- 4. ISO and USB selection
- 5. Confirm USB device
- 6. Installation complete
- Finding help
- Create a bootable USB stick with Rufus on Windows
- 2. Requirements
- 3. USB selection
- 4. Select the Ubuntu ISO file
- 5. Write the ISO
- 6. Additional downloads
- 7. Write warnings
- 8. Writing the ISO
- 9. Installation complete
- Finding help
Как создать загрузочную флешку с Linux
Записав дистрибутив на внешний носитель, вы сможете установить новую ОС или опробовать её работу в Live-режиме.
Чтобы запустить Linux на своём компьютере безо всяких виртуальных машин, вам понадобится загрузочная флешка. Для этой задачи подойдёт носитель объёмом от 4 ГБ. Все данные с него будут стёрты, поэтому предварительно скопируйте нужные файлы куда-то ещё. После этого воспользуйтесь нашей инструкцией.
1. Загрузите ISO-образ
Для создания загрузочной флешки вам понадобится один из дистрибутивов Linux. Они распространяются в формате образа диска ISO. Чтобы вы не ломали голову, на каком дистрибутиве остановиться, мы собрали проверенные варианты.
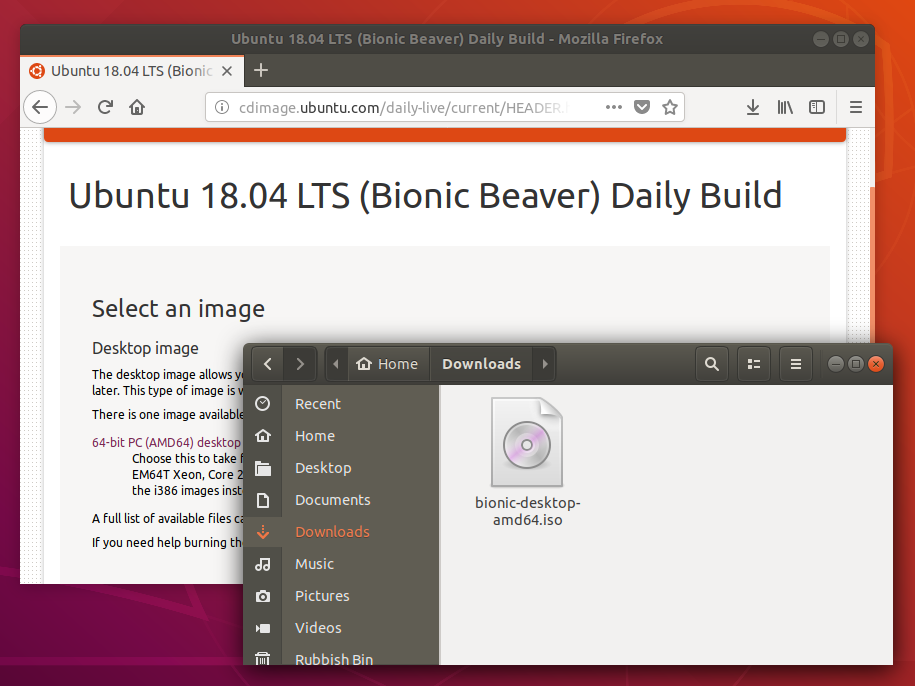
В качестве примера возьмём Ubuntu из-за её популярности, но для других Linux действия идентичны. Откройте сайт Ubuntu, перейдите в раздел Download и нажмите на зелёную кнопку, чтобы скачать ISO-файл системы. Если разработчик предлагает загрузить ISO через торрент, воспользуйтесь этой возможностью. Так выйдет быстрее.
2. Запишите образ на носитель
Действия будут несколько различаться в зависимости от операционной системы вашего компьютера.
Windows
Пожалуй, идеальный инструмент для записи загрузочных ISO-файлов на флешки в Windows — это Rufus. Программа отличается быстротой и может работать даже без установки.
- Скачайте Rufus с официального сайта, установите и запустите. Либо просто откройте без инсталляции, если выбрали переносную версию.
- Укажите носитель, на который нужно записать образ. Если в компьютер вставлена одна флешка, то Rufus выберет её по умолчанию.
- Выберите скачанный образ ISO. Скорее всего, он будет находиться в папке «Загрузки». Другие параметры для продвинутых пользователей не трогайте: Rufus сам знает, что делать.
- Нажмите на кнопку «Старт». Если понадобится подтверждение, нажмите «Да» и OK. И ждите, пока Rufus не закончит работу.
macOS
- Загрузите приложение balenaEtcher и переместите его в папку с программами, затем запустите.
- Нажмите Select Image и укажите скачанный вами ISO.
- Щёлкните Select target и выберите нужный носитель.
- Теперь нажмите Flash, чтобы начать запись.
Возможно, понадобится ввести пароль суперпользователя macOS. Сделайте это и ждите, пока процесс не завершится.
Linux
Есть целых три способа создать загрузочную флешку на этой ОС.
Startup Disk Creator
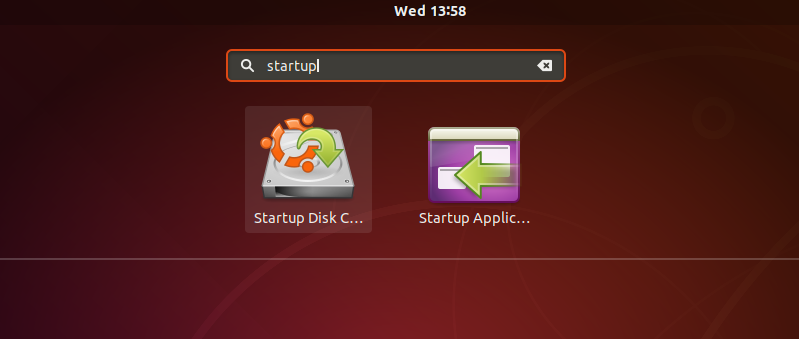
Это встроенный инструмент для создания загрузочных флешек. Он есть в Ubuntu и многих её производных. Программу можно найти в меню запуска по названию «Создание загрузочного диска» или Startup Disk Creator.
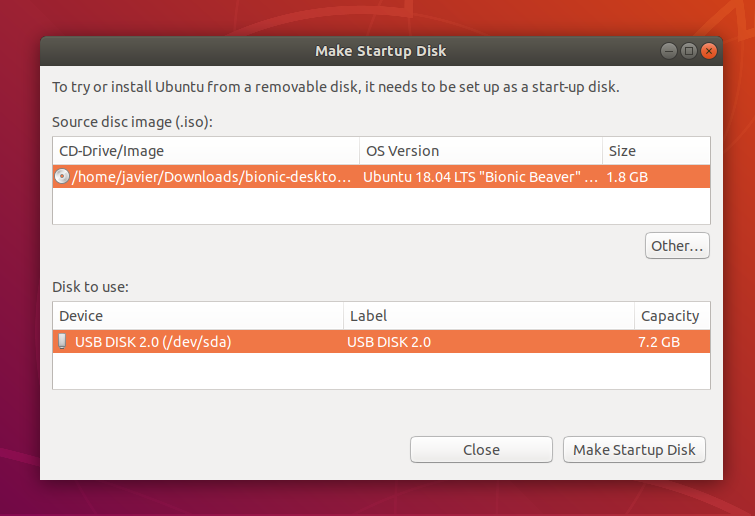
Откройте приложение, нажмите «Обзор» и укажите нужный ISO-образ. Затем выберите носитель и щёлкните «Создать загрузочный диск». Если понадобится, введите свой пароль суперпользователя Linux.
Etcher
Ещё один вариант — кроссплатформенный Etcher.
- Скачайте программу с официального сайта, распакуйте ZIP-архив и запустите.
- Нажмите Flasf from file и укажите скачанный вами ISO.
- Щёлкните Select target и выберите нужный носитель.
- Нажмите Flash, чтобы начать запись.
- Введите пароль суперпользователя, если система его запросит, и ждите.
dd
Это терминальная команда Linux, работающая во всех дистрибутивах. Полезна, если хотите быстро создать загрузочную флешку, ничего не устанавливая.
- Откройте «Терминал» и введите команду lsblk . Вы увидите имена всех ваших накопителей в виде sda1, sda2, sdb1 и так далее. Запомните имя флешки, например sdb1.
- Введите команду sudo umount /dev/sdb1 и пароль суперпользователя. Это отключит флешку, сделав её доступной для записи.
- Теперь введите команду sudo dd if=путь/к/образу/ubuntu.iso of=/dev/sdb1 bs=4M .
Вместо путь/к/образу подставьте адрес папки, где лежит ISO-образ. Или, чтобы не путаться в адресах, переложите образ в свою домашнюю папку. Если файл называется ubuntu-20.04.1-desktop-amd64.iso , команда будет выглядеть вот так: sudo dd if=ubuntu-20.04.1-desktop-amd64.iso of=/dev/sdb1 bs=4M .
Подождите несколько минут. Когда в командной строке снова появится курсор и отчёт о том, сколько данных было скопировано, можете извлечь флешку.
3. Загрузитесь с флешки
Теперь нужно запустить Linux с флешки. Вот как это сделать:
- Вставьте загрузочный носитель с Linux в компьютер.
- Перезагрузите устройство. Когда компьютер начнёт загружаться снова, жмите на клавишу перехода в настройки BIOS. Обычно это F2, F8, F9 или F12 — зависит от производителя оборудования. Чаще всего нужная клавиша высвечивается на экране во время загрузки BIOS.
- В меню BIOS перейдите в раздел загрузки Boot, если система не перенаправила вас туда сразу.
- Выберите вашу флешку, сохраните настройки и перезагрузитесь.
После этого компьютер должен загрузиться с выбранной флешки.
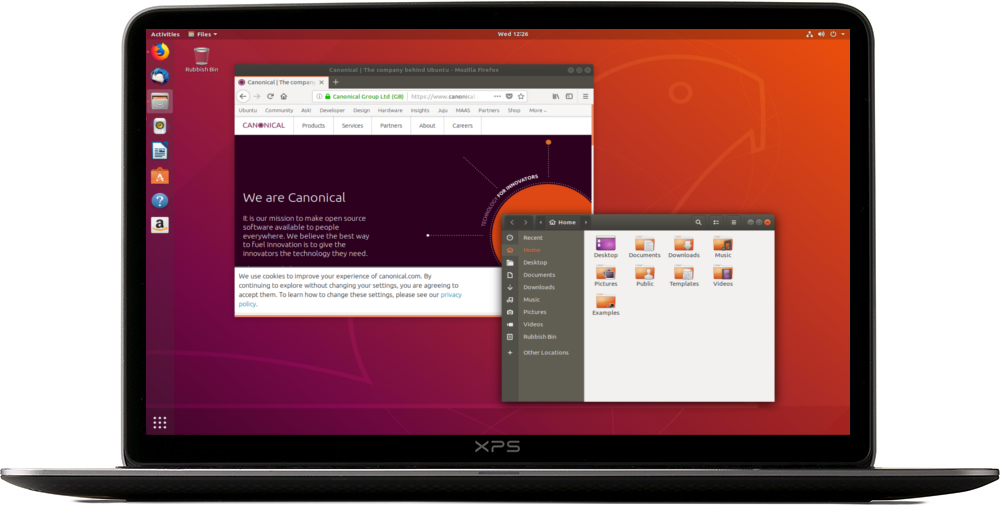
Create a bootable USB stick on Ubuntu
Creating a bootable Ubuntu USB stick is very simple, especially from Ubuntu itself, and we’re going to cover the process in the next few steps.
Alternatively, we also have tutorials to help you create a bootable USB stick from both Microsoft Windows and Apple macOS.
2. Requirements
- A 4GB or larger USB stick/flash drive
- Ubuntu Desktop 14.04 or later installed
- An Ubuntu ISO file. See Get Ubuntu for download links
3. Launch Startup Disk Creator
We’re going to use an application called ‘Startup Disk Creator’ to write the ISO image to your USB stick. This is installed by default on Ubuntu, and can be launched as follows:
- Insert your USB stick (select ‘Do nothing’ if prompted by Ubuntu)
- On Ubuntu 18.04 and later, use the bottom left icon to open ‘Show Applications’
- In older versions of Ubuntu, use the top left icon to open the dash
- Use the search field to look for Startup Disk Creator
- Select Startup Disk Creator from the results to launch the application
4. ISO and USB selection
When launched, Startup Disk Creator will look for the ISO files in your Downloads folder, as well as any attached USB storage it can write to.
It’s likely that both your Ubuntu ISO and the correct USB device will have been detected and set as ‘Source disc image’ and ‘Disk to use’ in the application window. If not, use the ‘Other’ button to locate your ISO file and select the exact USB device you want to use from the list of devices.
Click Make Startup Disk to start the process.
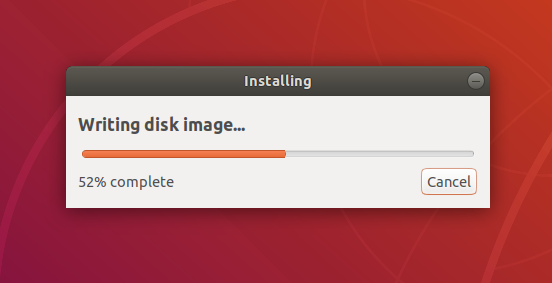
5. Confirm USB device
Before making any permanent changes, you will be asked to confirm the USB device you’ve chosen is correct. This is important because any data currently stored on this device will be destroyed.
After confirming, the write process will start and a progress bar appears.
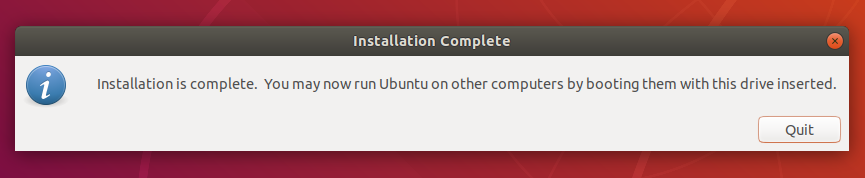
6. Installation complete
That’s it! You now have Ubuntu on a USB stick, bootable and ready to go.
If you want to install Ubuntu, take a look at our install Ubuntu desktop tutorial.
Finding help
If you get stuck, help is always at hand:
Create a bootable USB stick with Rufus on Windows
This tutorial will show you how to create a bootable USB stick on Microsoft Windows using Rufus.
For most users we recommend balenaEtcher instead of Rufus which is simpler to use and also available on MacOS and Ubuntu. Instructions are now included in the primary Install Ubuntu Desktop tutorial.
Creating a bootable Ubuntu USB stick from Microsoft Windows is very simple and we’re going to cover the process in the next few steps.
Alternatively, we also have tutorials to help you create a bootable USB stick from both Ubuntu and Apple macOS.

2. Requirements
- A 4GB or larger USB stick/flash drive
- Microsoft Windows XP or later
- Rufus, a free and open source USB stick writing tool
- An Ubuntu ISO file. See Get Ubuntu for download links

Take note of where your browser saves downloads: this is normally a directory called ‘Downloads’ on your Windows PC. Don’t download the ISO image directly to the USB stick! If using Windows XP or Vista, download version 2.18 of Rufus.
3. USB selection
Perform the following to configure your USB device in Rufus:
- Launch Rufus
- Insert your USB stick
- Rufus will update to set the device within the Device field
- If the Device selected is incorrect (perhaps you have multiple USB storage devices), select the correct one from the device field’s drop-down menu

You can avoid the hassle of selecting from a list of USB devices by ensuring no other devices are connected.
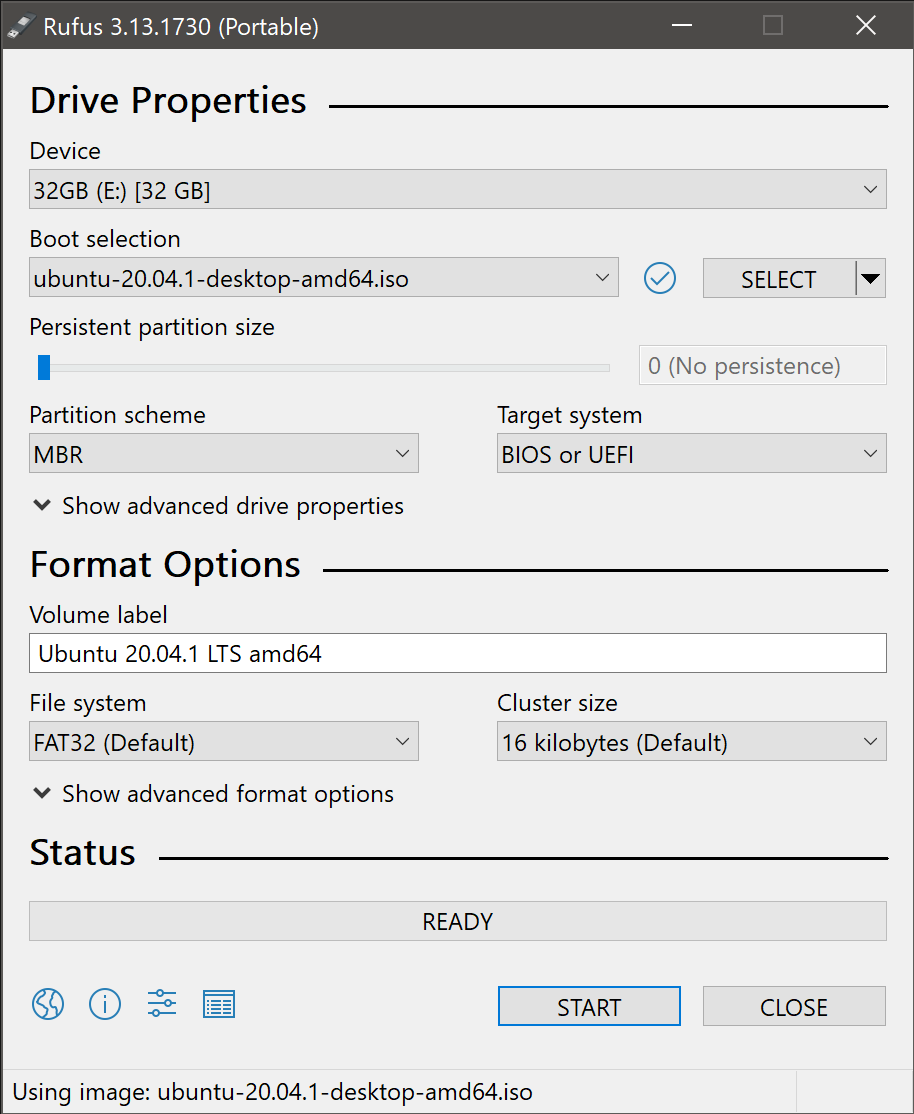
4. Select the Ubuntu ISO file
To select the Ubuntu ISO file you downloaded previously, click the SELECT to the right of “Boot selection”. If this is the only ISO file present in the Downloads folder you will only see one file listed.
Select the appropriate ISO file and click on Open.

5. Write the ISO
The Volume label will be updated to reflect the ISO selected.
Leave all other parameters with their default values and click START to initiate the write process.
6. Additional downloads
You may be alerted that Rufus requires additional files to complete writing the ISO. If this dialog box appears, select Yes to continue.

7. Write warnings
You will then be alerted that Rufus has detected that the Ubuntu ISO is an ISOHybrid image. This means the same image file can be used as the source for both a DVD and a USB stick without requiring conversion.
Keep Write in ISO Image mode selected and click on OK to continue.

Rufus will also warn you that all data on your selected USB device is about to be destroyed. This is a good moment to double check you’ve selected the correct device before clicking OK when you’re confident you have.
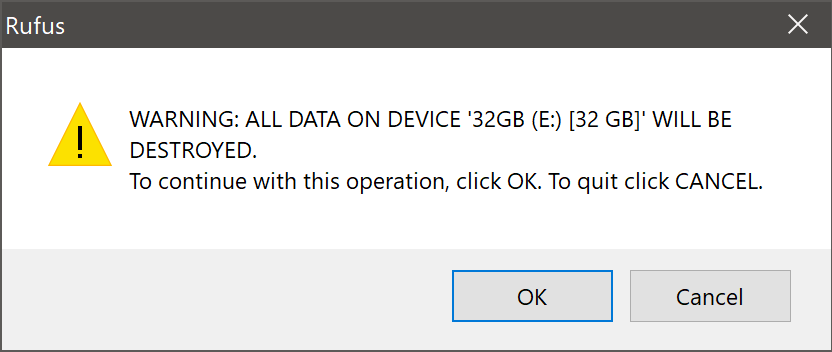
If your USB stick contains multiple partitions Rufus will warn you in a separate pane that these will also be destroyed.
8. Writing the ISO
The ISO will now be written to your USB stick, and the progress bar in Rufus will give you some indication of where you are in the process. With a reasonably modern machine, this should take around 10 minutes. Total elapsed time is shown in the lower right corner of the Rufus window.

9. Installation complete
When Rufus has finished writing the USB device, the Status bar will be filled green and the word READY will appear in the center. Select CLOSE to complete the write process.

Congratulations! You now have Ubuntu on a USB stick, bootable and ready to go.
To use it you need to insert the stick into your target PC or laptop and reboot the device. It should recognise the installation media automatically during startup but you may need to hold down a specific key (usually F12) to bring up the boot menu and choose to boot from USB.
For a full walkthrough of installing Ubuntu, take a look at our install Ubuntu desktop tutorial.
Finding help
If you get stuck, help is always at hand: