- How to perform grep operation on all files in a directory?
- 5 Answers 5
- How to Search Text in Multiple Files in Linux
- 1. Search text files with the grep tool
- About the grep tool
- How to use the grep tool
- Advantages and disadvantages of the grep tool
- Pros:
- Cons:
- 2. SearchMonkey
- Pros:
- Cons:
- 3. Recoll
- Pros
- Cons
- 4. DocFetcher
- Pros
- Cons
- 5. Regexxer
- Pros:
- Cons:
- Conclusion
How to perform grep operation on all files in a directory?
Working with xenserver, and I want to perform a command on each file that is in a directory, grepping some stuff out of the output of the command and appending it in a file. I’m clear on the command I want to use and how to grep out string(s) as needed. But what I’m not clear on is how do I have it perform this command on each file, going to the next, until no more files are found.
5 Answers 5
In Linux, I normally use this command to recursively grep for a particular text within a directory:
- r = recursive i.e, search subdirectories within the current directory
- n = to print the line numbers to stdout
- i = case insensitive search
grep $PATTERN * would be sufficient. By default, grep would skip all subdirectories. However, if you want to grep through them, grep -r $PATTERN * is the case.
@Tomáš Zato, just supply all your file patterns instead of *: grep $PATTERN *.cpp *.h . If you need more specific rules for what files should be grepped, use find command (check Rob’s answer).
@Chris it’s possible you don’t have *.scss files in current directory but somewhere deeper in subdirs so grep does not look in all the files you wanted. You should use —include option to tell grep to look recursively for files that matches specific patterns: grep -r x —include ‘*.scss’ . (note the quotes, they prevent the pattern from being expanded by the shell). Or just use find (see Rob’s answer).
You want grep -s so you don’t get a warning for each subdirectory that grep skips. You should probably double-quote «$PATTERN» here.
How to Search Text in Multiple Files in Linux

For Linux users, the need to search for words in one or multiple files arises quite often.
There are many different applications that can do a good job for you. Which application will be most suitable for you depends on your needs and preferences. The applications are mainly distinguished by the following characteristics:
- Command line tools vs. tools with a graphical interface.
- Whether they are able to search only in text files, or in all commonly used document types.
- Whether they use indexing or not.
In this article we will introduce you to different types of search applications, so that you can choose the most suitable one for you.
Note: If you are a Mac user, you can take a look at our article How to Search on Mac.
1. Search text files with the grep tool
About the grep tool
The most popular command-line tool for searching text in Linux is grep. It was created more than 45 years ago! Its developer is the American computer scientist Ken Thompson.
Grep can search in all kinds of text files (.txt, .html, .xml, etc.), but cannot search in other types of documents such as OpenOffice files, PDF files and others.
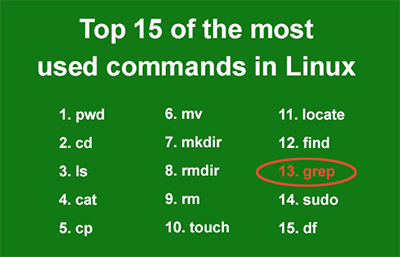
In fact, the grep command is in the top 15 of the most used commands in Linux, according to Hostinger.
The utility is supported by the UNIX, Linux, and Mac operating systems.
There is also a Windows alternative to grep called findstr, which you can read more about in our article How to Search Files in Windows 10.
How to use the grep tool
The grep tool is built into the operating system, so you don’t need to install it.
The simplest syntax to find a string in a single file using the grep command is:
grep ‘searched-word’ filename
By default, the search with grep is case sensitive.
Let’s gradually add the most useful options to our search.
1. Make the search case-insensitive with the «-i» option:
grep -i ‘searched-word’ filename
2. Search recursively in all files in a given directory with the «-r» option:
grep -ir ‘searched-word’ ‘/directory’
3. Search whole words only with the «-w» option:
grep -irw ‘searched-word’ ‘/directory’
4. Print the line numbers in which the searched word was found with the «-n» option:
grep -irwn ‘searched-word’ ‘/directory’
5. Search for multiple words syntax:
grep -ir ‘word1|word2|word3’ ‘/directory’
Many other useful grep options can be found in the official Grep Manual.
Advantages and disadvantages of the grep tool
Like any software tool, along with the convenience it gives to you, grep has some drawbacks. Let’s summarize its pros and cons.
Pros:
- Great flexibility through a wide range of options.
- Works effectively with regular expressions.
- It is built into the operating system.
Cons:
- Cannot search in any other types of documents except text files.
- Doesn’t have a graphical interface.
- Difficult reading of long lines of text in the results.
- Not so powerful for searching in source code, compared to ack.
2. SearchMonkey
SearchMonkey is a free and open source GUI application for Linux OS, which uses the capabilities of the grep tool. SearchMonkey is also available for Windows and Mac users.
In addition to searching in text files, SearchMonkey supports:
- OpenOffice and LibreOffice files (.odt).
- Microsoft Office files (.docx).
- PDF files (.pdf).
The tool can search a directory recursively and returns the file names and the highlighted content that you search.
Go through the following steps to install and use the tool:
1. Install the application with the following command in the Terminal:
sudo apt install searchmonkey
2. Launch the application.
3. Choose the folder to be searched.

4. Check the «Containing» checkbox, enter your search words and press «Enter.»

5. Click on a file from the list on the left pane to see the fragments of text found.

If you want to search a specific directory, click on the “Advanced” tab and choose the desired folder.
In the «Advanced» pane, you can use additional criteria to filter the results such as by the file size, date of last modification, and others.

With SearchMonkey, you can also use regular expressions in the same way as in the grep tool.
Pros:
- Completely free and open source.
- Lightweight and easy to use.
- Doesn’t use indexing.
- Many options for refinement of the search.
- Works with regular expressions.
Cons:
- Slow performance, not suitable for big directories.
- Does not support RTF, Excel (.xlsx, .xls), PowerPoint (.pptx, .ppt), old Word (.doc) and other popular document types.
- Cannot search for a combination of words that occur in one sentence.
- Doesn’t show all lines from the results in one place, you have to check each file one by one.
3. Recoll
Recoll is a desktop search tool, available for Linux, Windows, and MacOS. The Linux version is free. It can search not only in text files, but also in most common document formats including:
- OpenOffice and LibreOffice files (.odt).
- Microsoft Office files (.docx, .xlsx, .xls, .ppt).
- PDF files (.pdf).
- AbiWord files (.abw).
By default, Recoll indexes the files on your «home» directory, which can take some time.
Here are the steps to install and use the program:
1. Install Recoll with the command:
sudo apt-get install recoll
2. Launch the application.
3. On the «First indexing setup» window click on «Start indexing now.»

4. On the «Missing helper programs» message click «OK.»

5. Type your search terms and press «Enter.»
6. From the results list, click on «snippets» to see all text fragments containing the searched words.

7. On the «Snippets» window, you see the pages and the lines in which your searched words are found.

If you need to search in a folder outside your «home» directory, go to «File» -> «Special indexing» and click on the «Browse» button to select the desired directory.
Pros
- Free for Linux users.
- Supports most common document types.
- Easy-to-use graphical interface.
- Supports advanced search options.
- Allows document preview without opening the file.
Cons
- Although the application uses indexing, the searches are relatively slow.
- Does not support the Word 97-2003 «.doc» format or the PowerPoint «.pptx» file format.
- Cannot search for a combination of words.
- You have to click on each result’s «snippets» to see the fragments found.
4. DocFetcher
DocFetcher is a free and open source desktop search tool, available for Linux, Windows, and MacOS. In addition to text file formats, it supports almost all of the document formats which you may use:
- Microsoft Office 97-2003 files (.doc, .xls, .ppt).
- Microsoft Office 2007-365 files (.docx, .xlsx, .pptx, .docm, .xlsm, .pptm).
- Microsoft Outlook email files (.pst).
- OpenOffice files (.odt, .ods, .odg, .odp, .ott, .ots, .otg, .otp).
- PDF files (.pdf).
- Rich Text Format (.rtf).
- AbiWord files (.abw, .zabw).
- And others.
Here are brief instructions for using DocFetcher:
1. Install DocFetcher with the command:
sudo snap install docfetcher
3. Right-click on the «Search Scope» pane at the bottom left and choose «Create index from»->»Folder.»

4. Choose a folder, give a name to the index and click the «Run» button.

5. Wait until the index is created. When it is ready, you will see a check mark in the «Search Scope» pane on the left.

6. Type your search words and press «Enter.»

7. Click on a file name to see the fragments of the text containing your searched words. You can navigate in the results with the «up» and «down» arrows.

Pros
- Free and open source application.
- It has a portable version.
- It can search in archive formats (.zip, .7z, .rar, .tar).
- Offers additional search options – wildcards, similar words, proximity search and others.
Cons
- Creating an index can take a long time for large folders.
- Cannot perform case-insensitive search.
- The navigation in the text results is not user-friendly.
- Cannot search for a combination of words in a sentence.
5. Regexxer
The regexxer application provides rich possibilities for using perl-style regular expressions. It is a free and open source application with a user-friendly graphical interface, created in 2002.
Regexxer is available only for Linux, and you can most easily install it in Debian and Ubuntu.
Here’s how you can use Regexxer:
1. Install the application with the command:
sudo apt-get install regexxer
2. Launch the application, select a search folder and make sure the «recursive» checkbox is selected.
3. Click the «Find files» button.

4. Type your search terms in the «Search» box and click the «Find» button.

5. Use the arrows at the bottom to navigate in the results.

6. In the left pane you can see the number of results found in the corresponding files, and in the right pane, the text containing the searched words.
Pros:
- Completely free and open source.
- Easy to install and use.
- Simple and intuitive graphical interface.
- Supports all types of perl-style regular expressions.
- Highlights the searched words in the results.
- Doesn’t use indexing.
Cons:
- Regexxer is slower than other similar applications.
- Sometimes becomes unresponsive or closes unexpectedly.
- Cannot search in any other types of documents except text files.
- Cannot search for a combination of words that occur in one sentence.
Conclusion
I hope you enjoyed this guide to finding text files in Linux.
I am fully aware that many more things can be added for the presented applications, and also that there are many other useful tools in this niche.
Now I would like to hear from you: which of the presented applications is most useful for you? Do you have any problems using these tools? Do you want to add anything else that is important on this topic?
Let me know your thoughts by posting a comment in the comments section below.
Dimitar is a software developer and entrepreneur with over 20 years of experience in software development and online marketing.