2 Simple Steps for Securing Your Linux Desktop
When you first connect a freshly installed desktop machine to the Internet, there are several important things to bear in mind. Two obvious considerations of securing a desktop machine include frequently running package updates and configuring a few firewall rules to help keep the bad guys out.
In this article, we’ll look at these two steps from both a desktop perspective and, to provide a bit more context, we’ll also look at what’s going on within the system that’s running the desktop on the command line.
Linux Mint
I’m using Linux Mint on my laptop, version 19 which is codenamed Tara. If you click on the link to download Linux Mint, you can see that the engine that runs it is actually Ubuntu. And, according to that webpage, my version will have security patches available for it until the year 2023, so there’s no need to upgrade until then.
I really enjoy using Linux Mint as it’s incredibly sophisticated when it comes to installing a new desktop. Over the past few years, I’ve used it on a variety of laptops and every time Linux Mint has installed all the software required for the hardware support automatically without needing manual intervention.
Package Updates
Without further ado, let’s look at how to go about updating the packages on your desktop. This applies equally to some modern Linux Mint and Ubuntu versions. By regularly updating the packages on your desktop, you’re not only getting the latest software features, you are also actively removing bugs that could cause performance or stability issues. Most importantly, however, you’re plugging security holes that could cause serious headaches with your desktop machine.
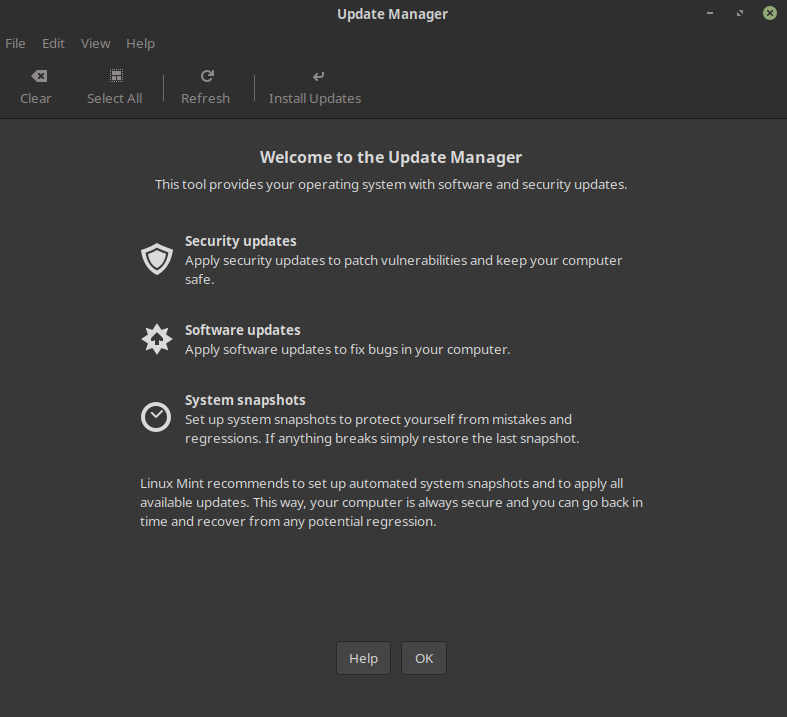
In Linux Mint (and Ubuntu as a result) if you hit the Windows key (bottom-left on the keyboard) or click the Menu icon (bottom-left of the screen on the taskbar), you should see a list of programs that you can run as well as a search box. In the search box, type: update manager. In Figure 1, you can see what pops up after you’ve done that and then hit the Enter key.
Figure 1: The graphical Update Manager where you can update software packages on some modern Linux Mint and Ubuntu versions.
After clicking the OK button, you’ll be shown which packages you can install. From inside Update Manager, you can finely tune getting updates from geographical servers closest to where you are located (for improved download speeds) and choose whether you want to automatically install certain types of updates (e.g., only security updates), among other things.
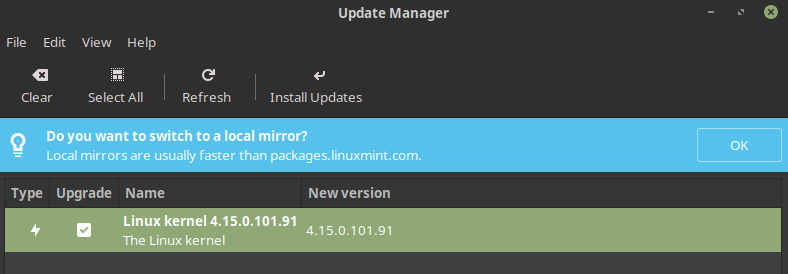
In Figure 2, we can see that I have a kernel package update waiting to be installed in green and also a note about choosing my nearest “mirror,” highlighted in blue. The mirrors noted in blue are the package update servers mentioned previously.
Figure 2: I can choose a faster update server and install a newer version of the kernel package, too.
If you look under the Edit pull-down menu of Update Manager then you’re also offered a relatively painless way of upgrading three further versions all the way up to Linux Mint 19.3, codenamed Tricia, which brings you right up to date with the latest Linux Mint desktop. Under the Edit pull-down, again the Preferences option gives you all the choices that you need to configure how and when your updates take place.
If you’re new to the command line, then you can achieve the same functionality using the command below. You will need to become the “root” superuser or use sudo and enter your password before being able to run this command.
When you get a bit more familiar with using the package update commands, you’ll remember to always update the package list first. Update Manager will do it for you, but the command above left that part out to keep things simple.
Here is the command to update new packages, which should always be run beforehand:
$ apt update Hit:1 http://security.ubuntu.com/ubuntu bionic-security InRelease Hit:2 http://archive.canonical.com/ubuntu bionic InRelease Hit:3 http://archive.ubuntu.com/ubuntu bionic InRelease Hit:4 http://archive.ubuntu.com/ubuntu bionic-updates InRelease Hit:5 http://archive.ubuntu.com/ubuntu bionic-backports InRelease Ign:6 http://packages.linuxmint.com tara InRelease Hit:7 http://packages.linuxmint.com tara Release Reading package lists. Done Building dependency tree Reading state information. Done All packages are up-to-date.
As you can see from the results of that command, my desktop machine is using a number of servers to check for different package updates, including from linuxmint.com and ubuntu.com. Once you’ve updated your package list, the next step is upgrading any new packages that the update command spotted. You can do this as follows:
After you’ve used those two commands a few times, you would then simply run the following command to update those packages and perform a packages “update” before doing an “upgrade” all on one line:
Remove the -y if you want to manually check new packages before they’re installed. Otherwise, -y means you’re happy to proceed without checking the packages.
There are various ways to update packages. For example, there’s a more graphical, but still run from the command line, version of the apt package manager called aptitude . Typing the following command will show you a menu-driven package system:
You can also automate some of this process. Listing 1 shows a script that you could add to a scheduled job (research how to create a cron job for help with this), which will email you if an update is available for your packages. Note the relatively complex command-line version of the aptitude command used inside the script; it’s very powerful. To use the script, simply save the contents of Listing 1 to a file and run:
Just change the parts to the name you gave the file.
Listing 1: Send an email if package updates are available.
#!/bin/bash # Send an email when package updates are available so that you can manually check you want to update them. # Author: Chris Binnie trigger="following"; filename=/tmp/apt-tmp; apt-get -qq update (aptitude -q -s full-upgrade -o Aptitude::Delete-Unused=false --assume-yes --target-release `lsb_release -cs`) > $filename count=`grep $trigger $filename | wc -l`; if [ $count -gt 0 ] then # The word $trigger exists $count times in the file $filename so let’s send an email. (cat $filename) | mail -s "$(uname -n): Pending Security Updates" chrisbinnie@devsecops.cc else # The word $trigger doesn't exist in the file $filename so I’ll exit. exit 0 fi
I’ll leave you to try the various package manager options. Next, we’ll move onto setting up your desktop’s firewall.
Keeping the Bad Guys Out
The network is an obvious way for intruders to break into a system and an important aspect of securing your desktop machine. Thankfully, Linux Mint offers a built-in firewall that’s really easy to use. The complexity of what it’s actually doing under the graphical user interface is a little mind-blowing, so we’ll just take a quick look at how to check what actions it’s taking in case troubleshooting is required.
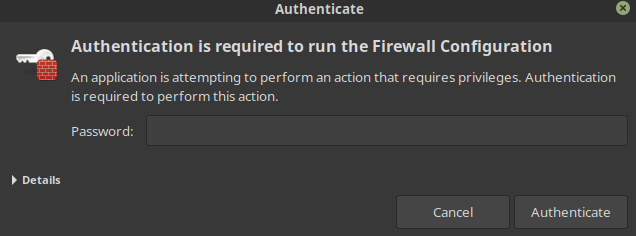
If you click the Menu icon at the bottom-left of your screen on the taskbar or hit the Windows key on your keyboard, then you should be able to enter the word “firewall” into the search box and then select Firewall Configuration. At this stage, you’ll need to enter your password again because you’re affecting a privileged part of the desktop. Figure 3 shows the pop-up box that you can expect to see.
Figure 3: Enter your password to proceed.
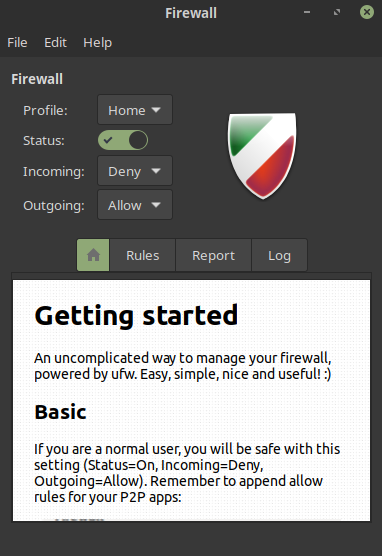
Enter your password and then have a look at the next dialog box, which is the main configuration area that we’ll be concerned with. Figure 4 shows what to expect.
Figure 4: The main firewall configuration pop-up box.
The immediate things to note when you’re presented with Figure 4 is that the shield on the right is filled with colors and not grayed out. A colored shield means the Status checkbox is selected correctly and that your firewall is enabled and properly protecting your system.
Firewall Rules
The firewalling in this version of Linux Mint and Ubuntu is based upon the excellent Uncomplicated Firewall (known as UFW), which we’ll look at in a moment on the command line. The documentation states that, as a normal user, if you first enable the firewall (you can tell it’s enabled because the Status selector is green and you have a colored shield) and then deny incoming traffic but allow outgoing traffic, then you have probably chosen the best settings for you.
Think about that for a moment. If you’re opening a web browser and then visiting a website, that’s classified as “outgoing” traffic. However, if someone has spotted your desktop machine is online and wants to try and attack your machine then “incoming” traffic will be denied. It’s very simple but extremely effective. The clever UFW also means that if your desktop is in the middle of an established conversation with another online service then that will also be permitted and treated just as if your desktop machine originated it, like outbound traffic.
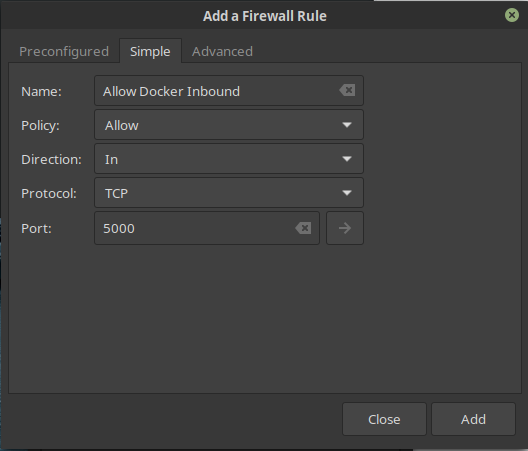
The only downside to strict inbound traffic rules on a firewall is that you need to make exceptions for any services that it doesn’t already know about or they won’t work as expected. In FIgure 5, you can see where to do that by clicking the Rules tab as seen in Figure 4.
Figure 5: How to add exceptions to your firewall rules, specifically, for a network port to accept connections to a Docker registry.
The settings may be a little complex for new users, but if you need to make changes the documentation should be able to help you.
Let’s see what ufw looks like at the command line. This excellent tool was created to take the pain out of configuring the kernel’s Netfilter firewall called iptables . In Figure 6, you can see how complex iptables can appear.
Figure 6: IPtables can be daunting for new users.
However, if we look at Figure 7, we can see that this command, directly working with ufw and not iptables, will offer us:
Figure 7: Compared to iptables, ufw is much clearer.
Let’s quickly look at how to open up a firewall port on the command line with ufw . We’ll choose the common TCP port 22, which is the default port used for the Secure Shell (SSH) service.
$ ufw allow 22 Rule added Rule added (v6)
As you can see, two rules have been added after running that command. The first is for IPv4 and the second is for IPv6 – different types of network addresses.
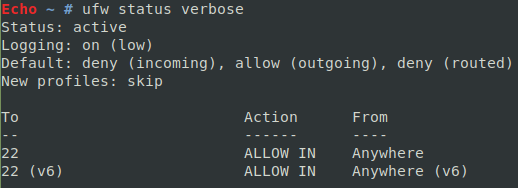
Let’s now run the status command as seen in Figure 7 again. In Figure 8, we can see the results.
Figure 8: We’ve opened TCP port 22 for SSH successfully.
As hoped, we now allow access to our desktop machine by TCP port 22 from anywhere on the Internet. To close that port, run this command:
And, having checked the status again with the command, you’ll note that any traffic will be blocked on TCP port 22 from now on. To remove any trace of the “deny” rules too, simply run this command afterwards:
If you get totally stuck, you can try disabling the firewalling temporarily with this command:
$ ufw disable Firewall stopped and disabled on system startup
It’s equally easy to switch it back on:
$ ufw enable Firewall is active and enabled on system startup
As you get more involved with the excellent ufw , try the following command. It shows the numbered lines of rules so that you can manipulate the rules more easily.
Listing 2 shows the output from that command which is from a slightly busier machine than our previous desktop examples.
Listing 2: A busier machine running ufw and displaying numbered rules from IPv4 and IPv6.
Status: active To Action From -- ------ ---- [ 1] 80/tcp ALLOW IN Anywhere [ 2] 443/tcp ALLOW IN Anywhere [ 3] 444/tcp ALLOW IN Anywhere [ 4] 25/tcp ALLOW IN Anywhere [ 5] 22/tcp DENY IN Anywhere [ 6] 2222/tcp ALLOW IN Anywhere [ 7] 80/tcp (v6) ALLOW IN Anywhere (v6) [ 8] 443/tcp (v6) ALLOW IN Anywhere (v6) [ 9] 444/tcp (v6) ALLOW IN Anywhere (v6) [10] 25/tcp (v6) ALLOW IN Anywhere (v6) [11] 22/tcp (v6) DENY IN Anywhere (v6) [12] 2222/tcp (v6) ALLOW IN Anywhere (v6)
Once you’re more familiar with using ufw on the command line, this process becomes second nature so it’s well worth trying it for yourself.
The End
In this article, we’ve looked at both managing software updates and configuring a firewall to protect your desktop machine, running in the desktop itself and on the command line. It’s obviously important to keep your software up to date, but making sure that a simple firewall is enabled is also extremely valuable and adds a welcome level of protection to any desktop machine.
If you haven’t already enabled your firewall and have not been performing frequent package updates, then I hope you will do so straight away. There’s no excuse now that you’re armed with the know-how. These simple steps just might save you lots of time and headaches in the future.
Ready to find a job? Check out the latest job listings at Open Source JobHub.
Contact FOSSlife to learn about partnership and sponsorship opportunities.
