- Отправка почты из командной строки (консоли) Linux
- Sending mail from linux console
- Introduction
- Prerequisites
- Its time to now open terminal
- How to install sSMTP to send mails from your Linux command line (CLI)
- Step 1
- Step 2
- Step 3
- Case 1: Send Mail Directly From The Command Line
- Case 2: Send Mail From A Shell Script
- Error 1
- Conclusion
- Grade My Email Check your spam now?
Отправка почты из командной строки (консоли) Linux

21.04.2021

VyacheslavK

CentOS, Linux, Ubuntu

комментария 4
В данной статье мы рассмотрим основные утилиты для отправки электронных писем по SMTP из консоли Linux – mail/mailx/mutt. Данная инструкция применима ко всем современным дистрибутивам Linux.
Для отправки почты из командной строки Linux вам нужно установить Mail User Agent, которые умеет подключаться к smtp серверам для отправки и получения почты.
В первую очередь рассмотрим утилиту mail (mailx). Для ее установки, выполните:
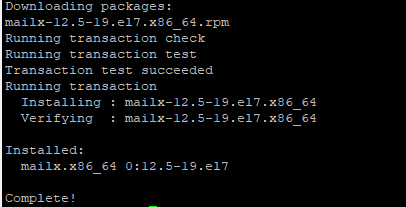
Mailx содержит в себе несколько утилит для работы с почтой, мы же подробно остановимся на mail.
Обратите внимание, что на вашем хосте обязательно должен быть установлен какой-нибудь почтовый сервер. Например, postfix или sendmail:
Основные опции при отправке писем:
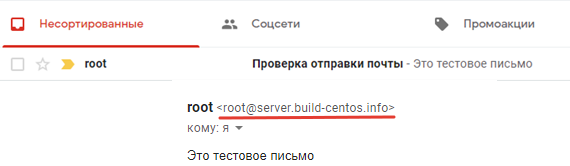
Чтобы отправить простое сообщение из консоли Linux, воспользуйтесь командой:
# echo «Это тестовое письмо» | mail -s «Проверка отправки почты» [email protected]
Проверьте, что письмо доставлено в ящик.
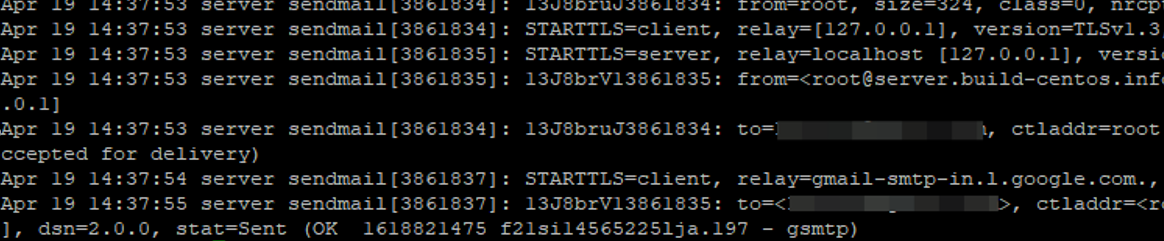
Если вам нужно посмотреть подробные логи отправки писем по SMTP, их можно посмотреть в файле:
Без указания дополнительных опций письмо отправляется с дефолтного почтового ящика и скорее всего будет помечено как спам в большинстве популярных почтовых сервисах.
Чтобы указать другого отправителя письма (mail from), используйте ключ -r:
# echo «Это тестовое письмо 2» | mail -s «Проверка отправки почты 2» -r [email protected] [email protected]
Если нужно отправить письмо нескольким получателям, перечислите их через запятую:
# echo «Это тестовое письмо 3» | mail -s «Проверка отправки почты 3» -r ad[email protected] [email protected], [email protected]
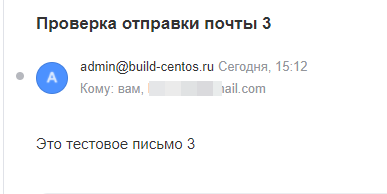
Как видите, письмо было отправлено двум получателям. А с помощью ключа -c вы можете отправить копию письма на указанный ящик:
# echo «Это тестовое письмо 4» | mail -s «Проверка отправки почты 4» -r [email protected] -c [email protected]
Если вам нужно прикрепить к письму файл, укажите путь к файлу в параметре –a.
# echo «Файл во вложении» | mail -s «Проверка вложения» -a /root/test.txt -r [email protected] [email protected]
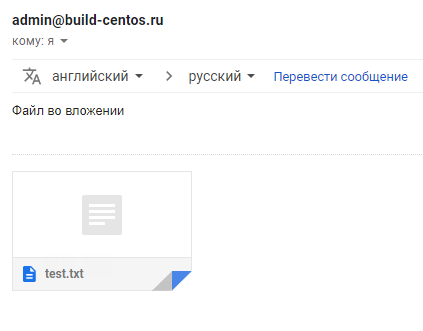
В указанных почтовый ящик должно прийти письмо с вложением. Если нужно отпрравить два или более файлов, добавьте каждый файл через собственный атрибут –a:
# echo «Вложены 2 файла » | mail -s «Вложение нескольких файлов » -a /root/test.txt -a /root/message.log -r [email protected] [email protected]
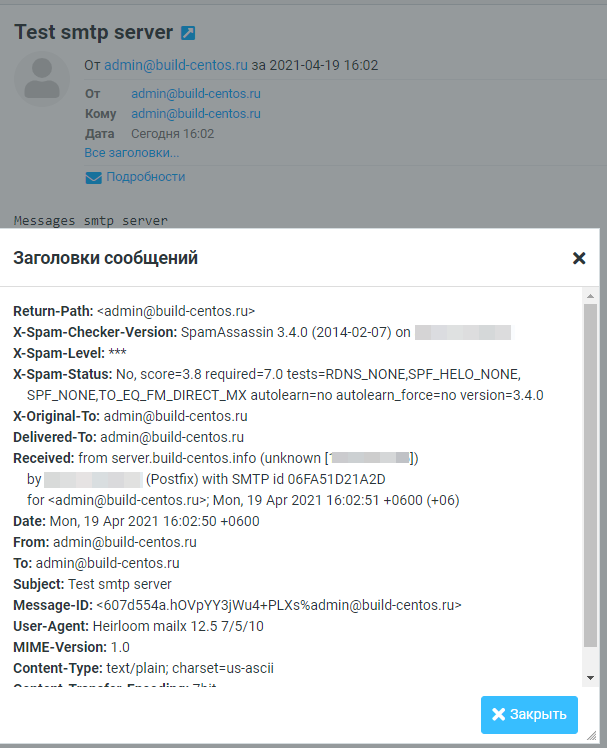
Вы можете отправить письмо через конкретный SMTP сервер. Его имя и порт подключения указываются в параметре -S smtp= :
# echo «Messages smtp server» | mail -s «Test smtp server» -S smtp=»build-centos.ru:25″ -r [email protected] [email protected]
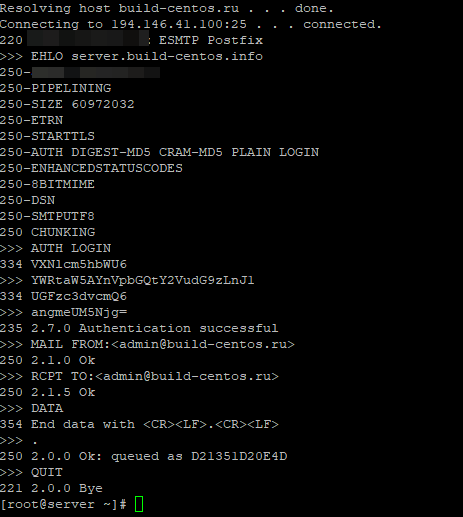
Если удаленный SMTP сервер требует авторизации перед отправкой, вы можете указать имя пользователя и пароль с помощью параметров -S smtp-auth-user и -S smtp-auth-password.
При запуске этой команды перед вами появятся список SMTP команд для подключения, авторизации и отправки почты.
Если для отправки нужно использовать TLS шифрование и игнорировать проверку подлинности сертификата сервера, добавьте параметры:
-S smtp-use-starttls
-S ssl-verify=ignore
Чтобы не задавать все параметры в командной строке, вы можете указать их в файле ~/.mailrc. Например, добавьте в этот файл такие строки:
set smtp-use-starttls set ssl-verify=ignore set smtp=smtp://smtp.gmail.com:587 set smtp-auth=login set smtp-auth-u[email protected] set smtp-auth-password=sdf#23ddsH3sq9- set from= [email protected]
Теперь для отправки письма через релей Gmail с аутентификацией достаточно выполнить команду:
$ echo «Test mail » | mail -v -s «Testing gmail auth» [email protected]
Вы можете использовать команду отправки почты для в своих bash скриптом. Например, создайте следующий скрипт, которые будет отправлять вам информацию по свободному месту на дисках:
Добавьте этот скрипт в планировщик cron и вы будете регулярно получать письма с информацией о свободном месте на вашем сервере.
0 0 * * * /home/root/freespace.sh
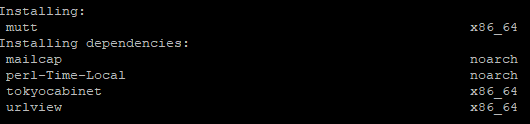
Еще одна популярная утилита для отправки почты в Linux это mutt:
# sudo apt-get install mutt — для Debian/Ubuntu
# yum install mutt -y — для CentOS/Redhat
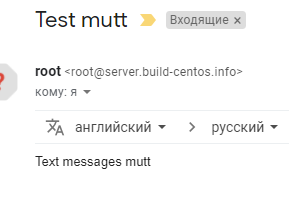
Синтаксис mutt такой же, как и у mail/ mailx:
# echo «Text messages mutt» | mutt -s «Test mutt» [email protected]
Если вам нужно просто проверить работу удаленного SMTP сервера, вы можете отправить письмо вручную через telnet.
Таким образом, вы можете легко отправлять письма из командной строки, встраивать отправку email оповещений в свои bash скрипты или ватчдоги (удобно для контроля их выполнения).
![]() Предыдущая статья Следующая статья
Предыдущая статья Следующая статья ![]()
Sending mail from linux console

Vishal Chauhan
Published on 2019-09-20· Updated on 2020-07-17
The author voluntarily contributed this tutorial as a part of Pepipost Write to Contribute program.
Introduction
Notifications are getting more important these days to stay updated among various online activities. Moreover, these notifications can be emails, SMS or push. This tutorial is going to demonstrate you the simplest way of sending notifications, over one of the most popular channels that is email. You are going to learn the process of sending emails from the terminal or a shell script from a Linux operating system, using some of the popular CLI tools.
This tutorial is going to help you in sending critical server-level emails like Cron reports, script logs, customer registrations, receipt, bank statement over email. There are many ways to send emails from the server, but let’s explore the tool that’s easy to install and easy to code.
With simple libraries and little configurations, you can have a CLI tool in your Linux OS that you can use to send mails from the terminal.
Prerequisites
- Linux operating system
- SMTP Configurations (SMTP server details and authentication credentials)
- Your favourite editor (Optional)
- Configure Gmail SMTP/ready with any other custom SMTP server details. In this tutorial, you are going to use Gmail SMTP to send emails, so make sure that;
undefinedundefined
Google SMTP server configurations would look something like this:
- SMTP Server/Hostname: smtp.gmail.com
- SMTP Username: [Your Gmail Address]
- SMTP password: [Your Gmail Password]
- SMTP Port: 587
- TLS/SSL: Required
Its time to now open terminal
There are various tools and libraries which you can install to send emails from the terminal. Few of the popular libraries are:
In this tutorial, you’re going to learn the steps on how to install and use sSMTP to send mails from your Linux command line. Click here, in case you want to learn how to install and use Mailx to send mails from your Linux command line.
How to install sSMTP to send mails from your Linux command line (CLI)
Step 1
Use the below command to install ssmtp:
sudo apt-get install ssmtp
Optional:
CentOS users can use the below command to install ssmtp:
In CentOS, you may see an error during installation as «package ssmtp is not available», in such a case below command, is going to be helpful to fix the issue:
sudo yum --enablerepo=extras install epel-release
Step 2
Once ssmtp installed successfully, you need to make the below global configurations which required for sending mail.
Open the following file in your favourite editor:
sudo vim /etc/ssmtp/ssmtp.conf
Edit the above file with the below details:
mailhub=smtp.gmail.com:587 useSTARTTLS=YES AuthUser=username-here AuthPass=password-here TLS_CA_File=/etc/pki/tls/certs/ca-bundle.crt
The above configuration is going to be used to send email using your Gmail SMTP. In case you want to use some other third-party SMTP, then mention the hostname of the same. e.g. if you want to use Pepipost SMTP, then instead of smtp.gmail.com, you need to mention smtp.pepipost.com in the mailhub parameter. mailhub is used for SMTP server address which consists of two part host:port
Now you are all set to sending mails from the command line (CLI).
Step 3
There are multiple ways to use ssmtp command to send emails.
Case 1: Send Mail Directly From The Command Line
For this, copy-paste the below command, and you’re ready to send email from your command line:
-vvv is the verbosity to see the logs while sending the mail
Case 2: Send Mail From A Shell Script
You can use the same ssmtp to send mail from a shell script too. For that, open your preferred editor and create a shell script file with name saymail.shand copy-paste the below code:
#!/bin/sh SUBJECT="Test Subject" TO /cdn-cgi/l/email-protection" data-cfemail="680b1a0912112811071805090104460b0705">[email protected]" MESSAGE="Hey There! This is a test mail" echo $MESSAGE | sudo ssmtp -vvv $TO
Make sure you have set the right permission access to your script file. If not, here is the command to set the permission:
Now, the code is ready to be executed. Just run the shell script using the below command:
Hope now you’re able to send mails using the shell script too.
Below are few errors/exceptions which you may encounter while sending the mail using ssmtp:
Error 1
In case while sending the email, if might get the below error as output:
ssmtp: Authorization failed (535 5.7.8 https://support.google.com/mail/?p=BadCredentials u65smyez14952a76922r5pfui.104 — gsmtp)
Solution: In such a case, try doing following as solution:
- Enable «Allow less secure app» in your google accounts settings, as explained in the above prerequisites section.
- The provided login credentials can be invalid. Make sure you have the correct credentials.
Once the issue is fixed, re-run the shell script and the success output will be something like this;
[] EHLO kali [] STARTTLS [] EHLO kali [] AUTH LOGIN [] dmlzaGFsY2hhasd2dWhhbjIyMTJAZ21haWwuY29t [] MAIL FROM:[email protected]> [] RCPT TO:[email protected]> [] DATA [] Received: by kali (sSMTP sendmail emulation); Thu, 19 Sep 2019 21:45:14 +0530 [->] From: "root" [email protected]> [->] Date: Thu, 19 Sep 2019 21:45:14 +0530 [->] Hey There! This is a test mail [->] [->] . [] QUIT [Conclusion
Hope the steps explained above were useful and you were able to successfully send mail using linux command line (CLI). Feel free to contribute, in case you encountered some issue which is not listed as a part of this tutorials.
Use below comments section to ask/share any feedback.Grade My Email
Check your spam now?Netcorecloud's toolkit is the solution to all your email problems.