About
Linux Terminal Server Project helps in netbooting LAN clients from a single template installation that resides in a virtual machine image or a chroot on the LTSP server, or the server root (/, chrootless). This way maintaining tens or hundreds of diskless clients is as easy as maintaining a single PC.
LTSP has been redesigned and rewritten from scratch in 2019 by alkisg in order to support new technologies like systemd, updated desktop environments, Wayland, UEFI etc. Only the new version is actively developed, while the old one is now called LTSP5 and is in minimal maintenance mode.
LTSP automatically configures and uses the following tools:
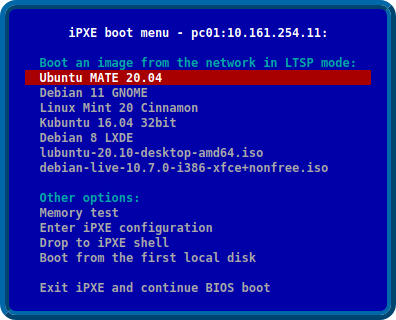
- iPXE: network boot loader that shows the initial client boot menu and loads the kernel/initrd.
- dnsmasq or isc-dhcp-server: DHCP server that assigns IPs to the clients, or ProxyDHCP server when another DHCP server is used, e.g. a router.
- dnsmasq or tftpd-hpa: TFTP server that sends ipxe/kernel/initrd to the clients.
- dnsmasq: optional DNS server for DNS caching or blacklisting.
- mksquashfs: creates a compressed copy of the template image/chroot/VM to be used as the client root /.
- NFS or NBD: serve the squashfs image to the network.
- tmpfs and overlayfs: make the squashfs image temporarily writable for each client, similiarly to live CDs.
- NFS or SSHFS: access the user’s /home directory which resides on the server.
- SSH or SSHFS or LDAP: authenticate users against the server.
What are you waiting for? Continue to the installation page!
Installation
All the terminal commands in the documentation should be run as root, which means you should initially run sudo -i on Ubuntu or su — on Debian.
Server OS installation
The LTSP server can be headless, but it’s usually better to install the operating system using a «desktop» .iso and not a «server» one. All desktop environments should work fine, but MATE receives the most testing. Any .deb-based distribution that uses systemd should work; i.e. from Ubuntu Xenial and Debian Jessie and onward. If you choose Ubuntu, you may also consider removing snap to avoid some issues.
Adding the LTSP PPA
The LTSP PPA is where stable upstream LTSP releases are published. It’s mandatory for distributions before 2020 that have the older LTSP5, and optional but recommended to have in newer distributions. Follow the ppa page to add it to your sources, then continue reading here.
Installing LTSP server packages
The usual way to transform a normal installation into an LTSP server is to run:
apt install --install-recommends ltsp ltsp-binaries dnsmasq nfs-kernel-server openssh-server squashfs-tools ethtool net-tools epoptes gpasswd -a administrator epoptes Replace administrator with the administrator username. If you’re not using the PPA, also replace ltsp-binaries with ipxe . Description of the aforementioned packages:
- ltsp: contains the LTSP code, it’s common for both LTSP servers and LTSP clients.
- ltsp-binaries: contains iPXE and memtest binaries.
- dnsmasq: provides TFTP and optionally (proxy)DHCP and DNS services. Possible alternatives are isc-dhcp-server and tftpd-hpa, but only dnsmasq can do proxyDHCP, so it’s the recommended default.
- nfs-kernel-server: exports the virtual client disk image over NFS.
- openssh-server: allows clients to authenticate and access /home via SSHFS.
- ethtool, net-tools: allow disabling Ethernet flow control, to improve LAN speed when the server is gigabit and some clients are 100 Mbps.
- epoptes: optional; allows client monitoring and remote control; the gpasswd command allows the sysadmin to run epoptes.
All those packages can also be displayed with apt show ltsp | grep ^Suggests .
Network configuration
There are two popular methods to configure LTSP networking. One is to avoid any configuration; this usually means that you have a single NIC on the LTSP server and an external DHCP server, for example a router, pfsense, or a Windows server. In this case, run the following command:
Another method is to have a dual NIC LTSP server, where one NIC is connected to the normal network where the Internet is, and the other NIC is connected to a separate switch with just the LTSP clients. For this method to work automatically, assign a static IP of 192.168.67.1 to the internal NIC using Network Manager or whatever else your distribution has, and run:
You can read about more ltsp dnsmasq options, like —dns or —dns-servers, in its man page.
Maintaining a client image
LTSP supports three methods to maintain a client image. They are documented in the ltsp image man page. You can use either one or all of them. In short, they are:
- Chrootless (previously pnp): use the server root (/) as the template for the clients. It’s the easiest method if it suits your needs, as you maintain only one operating system, not two (server and image).
- Raw virtual machine image: graphically maintain e.g. a VirtualBox VM.
- Chroot: manually maintain a chroot directory using console commands.
In the virtual machine and chroot cases, you’re supposed to install the ltsp package to the image, by adding the LTSP PPA and running apt install —install-recommends ltsp epoptes-client , without specifying any other services. In the chrootless and virtual machine cases, if you’re using separate partitions for some directories like /boot or /var, see the ltsp image man page EXAMPLES section for how to include them. When the image is ready, to export it in squashfs format and make it available to the clients over NFS, run the following commands.
Virtual machines need to be symlinked before running ltsp image :
ln -s "/home/user/VirtualBox VMs/debian/debian-flat.vmdk" /srv/ltsp/debian.img ltsp image debian For a chroot in /srv/ltsp/x86_32:
You need to run these commands every time you install new software or updates to your image and want to export its updated version.
Configuring iPXE
After you create your initial image, or if you ever create additional images, run the following command to generate an iPXE menu and copy the iPXE binaries in TFTP:
In LTSP5, syslinux was used, but iPXE replaced it as it’s much more powerful. You can read more about it in the ltsp ipxe man page.
NFS server configuration
To configure the LTSP server to serve the images or chroots over NFS, run:
For finetuning options, see the ltsp nfs man page.
Generate ltsp.img
A new procedure that wasn’t there in LTSP5 is provided by the following command:
This compresses /usr/share/ltsp, /etc/ltsp, /etc/ and the server public SSH keys into /srv/tftp/ltsp/ltsp.img, which is transferred as an «additional initrd» to the clients when they boot. You can read about its benefits in its man page, for now keep in mind that you need to run ltsp initrd after each LTSP package update, or when you add new users, or if you create or modify /etc/ltsp/ltsp.conf, which replaced the LTSP 5 «lts.conf».
Questions
Questions? Start a discussion or come to the online chat room.
Настройка LTSP сервера на Ubuntu 18.04 | LinuxMint 19
Сегодня рассмотрим пример установки и настройки LTSP сервера на Ubuntu 18.04.
Linux Terminal Server Project (LTSP) — это свободно распространяемый дополнительный пакет для Linux с открытым исходным кодом, который позволяет нескольким людям с маломощными компьютерами (терминалами) использовать вычислительные мощности одного более производительного компьютера (сервера). При этом, все приложения запускаются на сервере, а терминалы, так же называемые тонкими клиентами (или X-терминалами), просто принимают видеоряд, посылаемый сервером, и кроме него ничего не обрабатывают. Как правило, терминал представляет собой маломощный компьютер, в нём даже может отсутствовать жесткий диск, вследствие чего он может работать тише, чем обычный настольный компьютер.
LTSP был переработан и переписан с нуля в 2019 году alkisg для поддержки новых технологий, таких как systemd, обновленные среды рабочего стола, Wayland, UEFI и т. д. Сейчас только новая версия активно развивается, в то время как старая(теперь называется LTSP5) находится в режиме минимального обслуживания. В связи с эти статья была полностью переработана для нового LTSP сервера.
Была установлена Ubuntu 18.04. Как установить систему я думаю вы разберетесь сами, благо материалов на эту тему в интернете куча. Будем считать, что система установлена и готова к использованию, все действия подойдут для всех производных дистрибутивов Ubuntu