- Bridge WiFi to Ethernet in Windows 10
- Is it Possible to Bridge the Internet from WiFi to Ethernet?
- How to Bridge WiFi to Ethernet in Windows 10
- How to Remove a WiFi to Ethernet Bridge Connection
- Closing Words
- How to bridge WiFi and Ethernet adapters to share internet on Windows 11 or 10
- How to share internet using wifi adapter to Ethernet cable
Bridge WiFi to Ethernet in Windows 10
Before we find out how to bridge WiFi to Ethernet in Windows 10, it is essential to know what exactly it is. When you create a network bridge from WiFi to Ethernet, you are letting the bandwidth of the WiFi internet connection on your PC be shared through Ethernet or the LAN port. By doing so, you will be providing internet to other devices through a LAN wire.
This technique is quite proper when you have WiFi internet, but a device you need to use only connects to the internet via LAN port or ethernet. You can also use this process to create a Local Area Network among multiple Windows 10 computers.
This article shows if Windows 10 lets you create a bridge connection from WiFi to LAN. If yes, then how to create this bridge connection. Let us find out all you need to know about WiFi to Ethernet bridge connection.
Is it Possible to Bridge the Internet from WiFi to Ethernet?
Yes, it sure is possible to create a bridge connection from WiFi to LAN. You can do it from Windows settings. This means that you do not require to install any third-party software to bridge WiFi to Ethernet in Windows 10. All you need to do is access the Control Panel, where you will find all the options required to carry out internet connection sharing between WiFi and Ethernet.
The following section will find the steps and screenshots that will guide you through creating a network bridge from WiFi to Ethernet.
How to Bridge WiFi to Ethernet in Windows 10
Creating an internet connection sharing bridge is quite simple and straightforward. As mentioned earlier, this can be done through the Control Panel window. Follow the steps provided below, and you will be able to make a network bridge yourself:
Bridge WiFi to Ethernet Using Control Panel
Step 1: Open Control Panel on your Windows PC. Although there are several ways to launch Control Panel, we will do it through the Run box. Press Win + R keys together. This will open the Run box. In the box, type control panel, then press the Enter key on your keyboard.
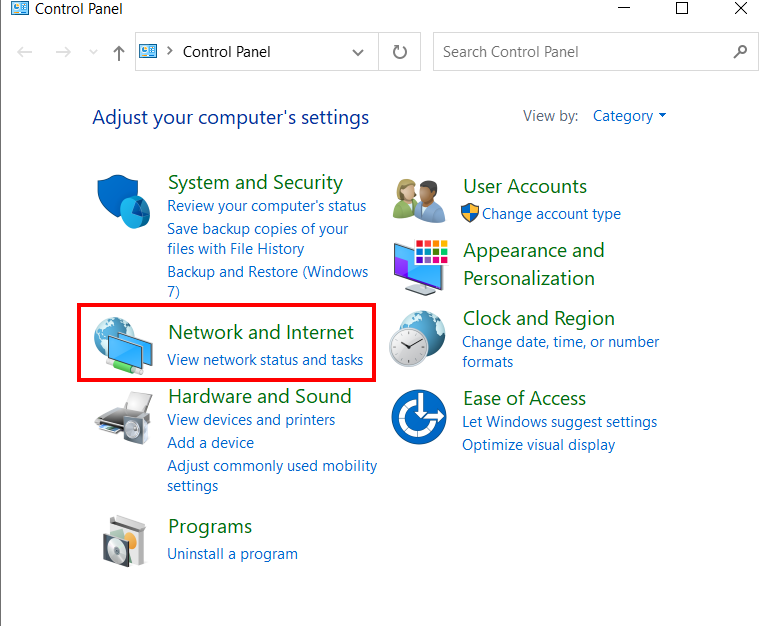
Step 2: The Control Panel window will open. In the Control Panel window, click Network and Internet option.
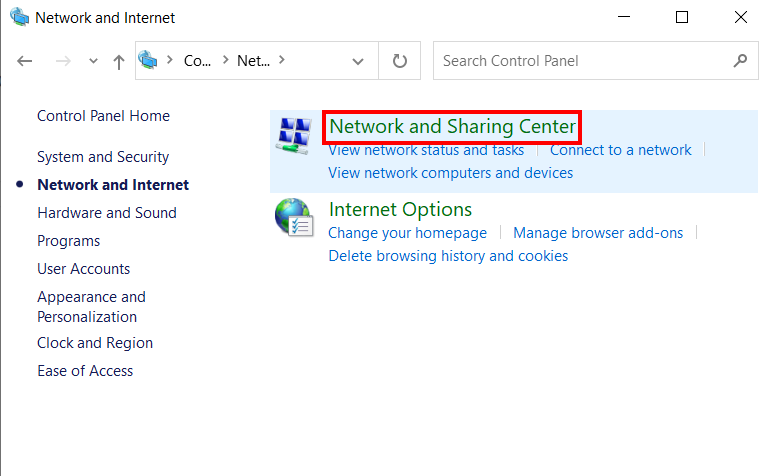
Step 3: On the next screen that opens, select the Network and Sharing Center option.
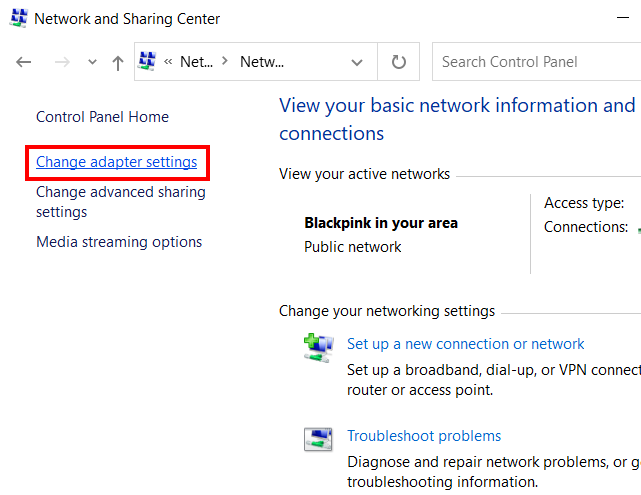
Step 4: Again, you will see new options on the next screen. Go to the left panel on this window, then select the option that says Change adapter settings.
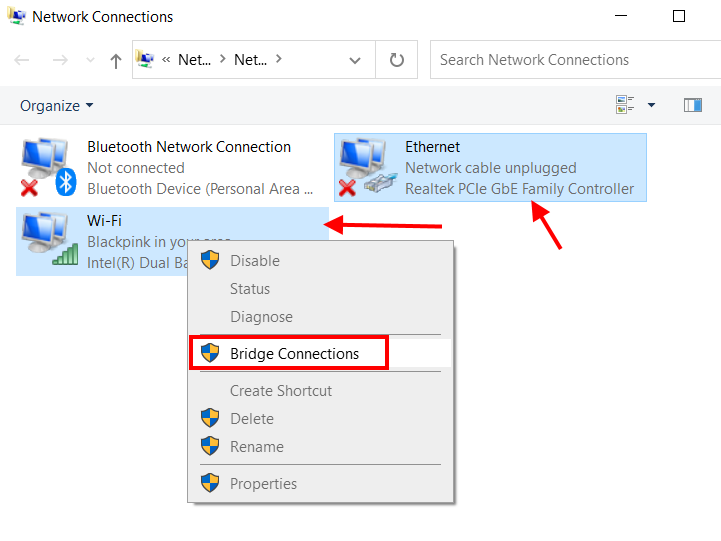
Step 5: A new window will appear now. Here, you will be able to see all the network adapters available on your Windows 10 PC, including the wireless network adapter and the ethernet adapter.
To create a bridge between the two, make a click on the wireless network adapter icon. Now press the Ctrl key and keep it pressed till you select the ethernet adapter icon. Once both the WiFI adapter and the Ethernet are chosen, make a right-click on any of the icons. A context menu will appear. Here, select the Bridge Connections option.
Once a network bridge is created, you will see a new WiFi adapter appear on the Network Connection window. The name of the adapter should be Network Bridge, as shown in the screenshot below.
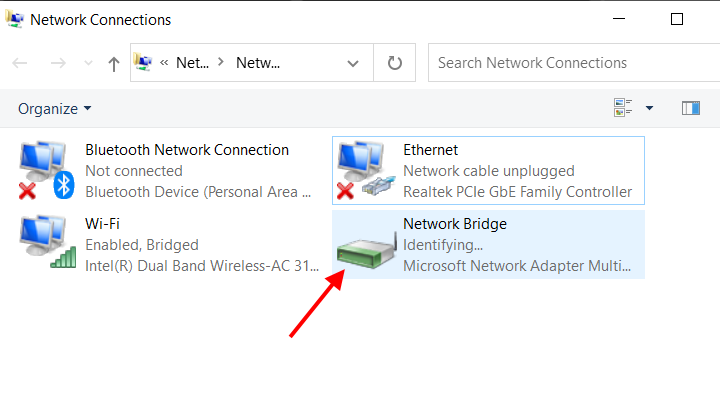
Now, you should access the internet on any device that you connect the LAN cable to your Windows 10 PC. This way, you have been successful in creating a WiFi to Ethernet bridge in Windows 10.
But what if you want to manage the bridge connection between WiFi adapter and ethernet adapter? Well, by accessing the Network Connection window from the Control Panel, you can efficiently operate the Wi-Fi to ethernet bridge.
Here, you can disable, enable, rename, change properties, or even delete the bridge connection if you like. You can change the IP address and DNS setting too. If there seems to be a problem between the Wi-Fi to Ethernet bridge, you can even run a diagnosis for the same.
Go to the Network Connections window through Control Panel > Network and Internet > Network and Sharing Center > Change adapter settings.
This will evoke the Network Connections window. Here, make a right-click on the Network Bridge icon to see all the options in the context menu.
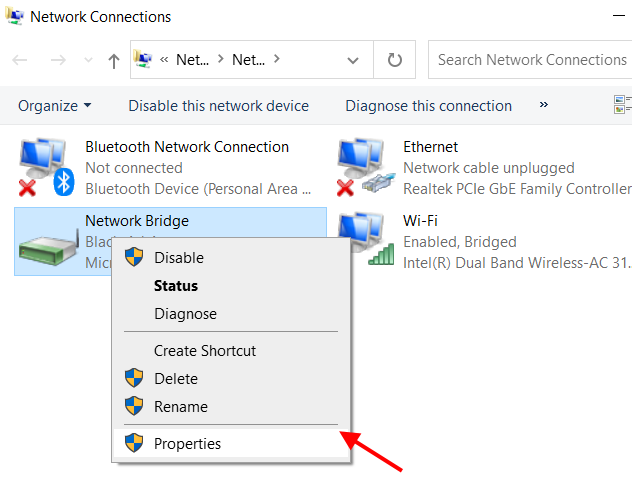
By selecting the Disable option, you can disable the internet connection from Wi-Fi to the Ethernet or LAN port. After disabling the bridge, the device(s) accessing the internet from LAN wire won’t access it anymore.
Through the Status section, you will view the internet connectivity type, the duration of the connection, along with the maximum connection speed. You also get to know about the amount of data sent and received over this connection.
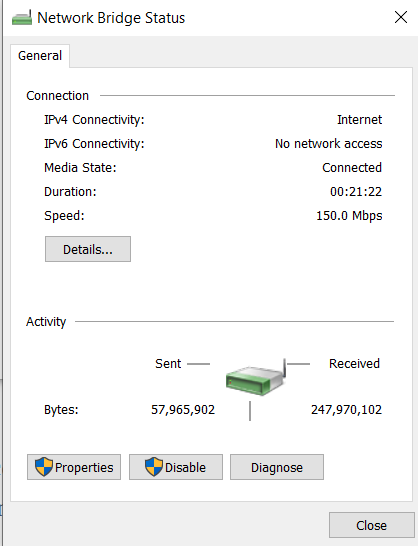
To change the bridge connections settings and properties, you can access the Properties window and make any changes if required.
How to Remove a WiFi to Ethernet Bridge Connection
Now, we already know how to disable WiFi to Ethernet bridge connections, but what if you want to remove the network bridge altogether. Well, it is quite a simple process and involves only a couple of steps. Follow these steps:
Step 1: Select the Network Connections window. You can do it through the Control Panel, as mentioned in the above sections. Here, you will see all the network adapters, including the Network Bridge adapter.
Step 2: To remove the bridge connections between WiFi and Ethernet, make a right-click on the Network Bridge icon. A context menu will open. Here, select the Delete option.
A dialog box will open up to confirm if you want to delete the bridge. Click on Yes to confirm. After the confirmation, the bridge will be deleted from your Windows 10 PC.
Closing Words
Now that you know how to bridge WiFi to Ethernet on Windows 10 PC, we hope you can do it yourself without looking at any tutorials. Of course, you would be, as the steps involved are pretty simple to follow.
Recommended for You:
Johnny Crumley
A self-defined geek, Johnny Crumley comes from the USA. As a kid genius, he started DOS batch files at just five years old and was soon messing with BASIC in kindergarten. He was always into the bits and bytes. As luck would have it, Johnny became a freelance PC technician, something he’s genuinely passionate about. From his teenage years, he started writing about anime and games. He’s also an avid educator, spreading his knowledge and expertise in the tech sector. He has been a professional writer for six years and has written for several emerging tech publications.
Blog.rottenwifi.com is a participant in the Amazon Services LLC Associates Program which means we may get paid commissions on editorially chosen products purchased through our links to retailer sites. All names, logos, brands, and images are trademarks or copyrighted materials of their respective owners. Amazon and the Amazon logo are trademarks of Amazon.com, Inc., or its affiliates.
How to bridge WiFi and Ethernet adapters to share internet on Windows 11 or 10
Everybody is not using a router in their home to connect internet. Nowadays, when the Wifi adapter is almost in every laptop and PC (via Wireless adapter card); the users mostly ad hoc smartphone’s hotspots to share and use the internet. Another reason why the users started using Wifi over the ethernet connection; because nobody wants to run long Ethernet cables in their homes. That’s why Wifi adapters and WiFi hotspots are more popular nowadays. So, in such circumstances, if someone wants to share a computer’s WiFi Internet connection with other Ethernet devices, how will he do that?
You might be thinking, why would we do this? Just imagine you don’t have a router with a LAN ethernet port to connect some old devices. Since there are certain devices in home and offices that still do not offer WiFi connectivity option like smart TVs (old), media players, NAS devices, and more… Such kind of devices needs a wired Ethernet connection to connect to the Internet.
So, if you think without a router, how do you share the internet from a laptop or PC then here is the answer…
We don’t need any Virtual router to share an internet connection in Windows 7, 8, or 10. Just bridge Wifi to ethernet in Windows 10 or whatever Windows version you are on and that’s it. Not only Wifi adapter to Ethernet but also one can use this method for Ethernet adapter to Ethernet adapter too.
How to share internet using wifi adapter to Ethernet cable
Although there are a few software available online those let us create virtual routers on Windows to share the internet from PC to PC via ethernet. But actually, we don’t need them. Just follow the below steps… We are using Windows 10 here but the steps are the same for Windows 8 and Windows 7 too.
- Go to the search bar of Windows 10 or 7.
- Search for Control Panel.
- Click on the Control Panel to open it.
- Select the Network and Internet option.
- You will see View network status and task under Network and Sharing Center, click on that.
- From the left side panel, click on Change adapter settings.
- Now press the Shift button and without releasing it, click on the Wifi adapter and then on the Ethernet adapter for which you want to share the network connection.
- Right-click on any of the adapters and select the Bridge connection option.
Above tutorial steps in detail:
Step 1: As I said in the above-mentioned steps that first you need to connect the ethernet cable to the computer or laptop from where your want to share the wireless network internet connection. For example, I want to share Wi-Fi internet from my PC to a NAS device that doesn’t have a WLAN card. Then, search and open the control panel on Windows 10 or Windows 7. When it appears just click on that.