- How To Install Django and Set Up a Development Environment on Ubuntu 20.04
- Prerequisites
- Step 1 — Installing Django
- Step 2 — Adjusting Firewall Settings
- Step 3 — Starting the Project
- Step 4 — Configuring Django
- Step 5 — Accessing the Django Web App
- Conclusion
- Setting Up a Modern Python Development Environment on Ubuntu 20.04
- Tools
- Tool Explanation
- Pyenv
- Pipx
- Poetry
- Walk Through
- Installing Pyenv
- Installing Pipx
- Installing Poetry
- Final Thoughts
How To Install Django and Set Up a Development Environment on Ubuntu 20.04
Django is a free and open-source web framework written in Python with its core principles being scalability, re-usability and rapid development. It is also known for its framework-level consistency and loose coupling, allowing for individual components to be independent of one another.
In this tutorial, we will set up a Django environment for development purposes on an Ubuntu 20.04 server. For a live website, you will have additional considerations, including connecting to a database, setting up a domain name, and adding layers of security. We have a variety of tutorials on Django that can help support you as you build under our Django tag.
Prerequisites
In order to complete this tutorial, you will need:
- A non-root user account with sudo privileges, which you can achieve by following and completing the initial server setup for Ubuntu 20.04 tutorial.
- Python 3 set up with a virtual programming environment. You can get this set up via our Python 3 installation guide.
Step 1 — Installing Django
There are several ways to install Django, the Python package manager pip within a virtual environment.
While in the server’s home directory, we’ll create the directory that will contain our Django application. Run the following command to create a directory called django-apps , or another name of your choice. Then navigate to the directory.
While inside the django-apps directory, create your virtual environment. We’ll call it the generic env , but you should use a name that is meaningful for you and your project.
Now, activate the virtual environment with the following command:
You’ll know it’s activated once the prefix is changed to (env) , which will look similar to the following, depending on what directory you are in:
Within the environment, install the Django package using pip. Installing Django allows us to create and run Django applications.
Once installed, verify your Django installation by running a version check:
This, or something similar, will be the resulting output:
With Django installed on your server, we can move on to creating a test project to make sure everything is working correctly. We’ll be creating a skeleton web application.
Step 2 — Adjusting Firewall Settings
If you followed our initial server setup tutorial or have a firewall running on your server, we’ll need to open the port we’ll be using in our server’s firewall. For the UFW firewall, you can open the port with the following command:
If you’re using DigitalOcean Firewalls, you can select HTTP from the inbound rules. You can read more about DigitalOcean Firewalls and creating rules for them by modifying the inbound rules.
Step 3 — Starting the Project
We now can generate an application using django-admin , a command line utility for administration tasks in Python. Then we can use the startproject command to create the project directory structure for our test website.
While in the django-apps directory, run the following command:
Note: Running the django-admin startproject command will name both project directory and project package the and create the project in the directory in which the command was run. If the optional parameter is provided, Django will use the provided destination directory as the project directory, and create manage.py and the project package within it.
Now we can look to see what project files were just created. Navigate to the testsite directory then list the contents of that directory to see what files were created:
You will notice output that shows this directory contains a file named manage.py and a folder named testsite . The manage.py file is similar to django-admin and puts the project’s package on sys.path . This also sets the DJANGO_SETTINGS_MODULE environment variable to point to your project’s settings.py file.
You can view the manage.py script in your terminal by running the less command like so:
When you’re finished reading the script, press q , to quit viewing the file.
Now navigate to the testsite directory to view the other files that were created:
Then run the following command to list the contents of the directory:
Output__init__.py asgi.py settings.py urls.py wsgi.py Let’s go over what each of these files are:
- __init__.py acts as the entry point for your Python project.
- asgi.py contains the configuration for the optional deployment to the Asynchronous Server Gateway Interface or ASGI, which provides a standard for apps that are either synchronous and asynchronous, and is considered to be a successor of WSGI (see below).
- settings.py describes the configuration of your Django installation and lets Django know which settings are available.
- urls.py contains a urlpatterns list, that routes and maps URLs to their views .
- wsgi.py contains the configuration for the Web Server Gateway Interface or WSGI, which provides a standard for synchronous Python apps.
Note: Although default files are generated, you still have the ability to tweak the asgi.py or wsgi.py files at any time to fit your deployment needs.
Step 4 — Configuring Django
Now we can start the server and view the website on a designated host and port by running the runserver command.
We’ll need to add your server ip address to the list of ALLOWED_HOSTS in the settings.py file located in ~/test_django_app/testsite/testsite/ .
As stated in the Django docs, the ALLOWED_HOSTS variable contains “a list of strings representing the host/domain names that this Django site can serve. This is a security measure to prevent HTTP Host header attacks, which are possible even under many seemingly-safe web server configurations.”
You can use your favorite text editor to add your IP address. For example, if you’re using nano , run the following command:
Once you run the command, you’ll want to navigate to the Allowed Hosts Section of the document and add your server’s IP address inside the square brackets within single or double quotes.
""" Django settings for testsite project. Generated by 'django-admin startproject' using Django 2.0. . """ ... # SECURITY WARNING: don't run with debug turned on in production! DEBUG = True # Edit the line below with your server IP address ALLOWED_HOSTS = ['your-server-ip'] ... You can save the change and exit nano by holding down the CTRL + x keys and then pressing the y key. Next, we’ll go on to access our web app via a browser.
Finally, let’s create an administrative user so that you can use the Djano admin interface. Let’s do this with the createsuperuser command:
You will be prompted for a username, an email address, and a password for your user.
Step 5 — Accessing the Django Web App
With our configuration completed, be sure to navigate back to the directory where manage.py is located:
Now, run the following command replacing the your-server-ip text with the IP of your server:
Finally, you can navigate to the below link to see what your skeleton website looks like, again replacing the highlighted text with your server’s actual IP:
Once the page loads, you’ll see the following:
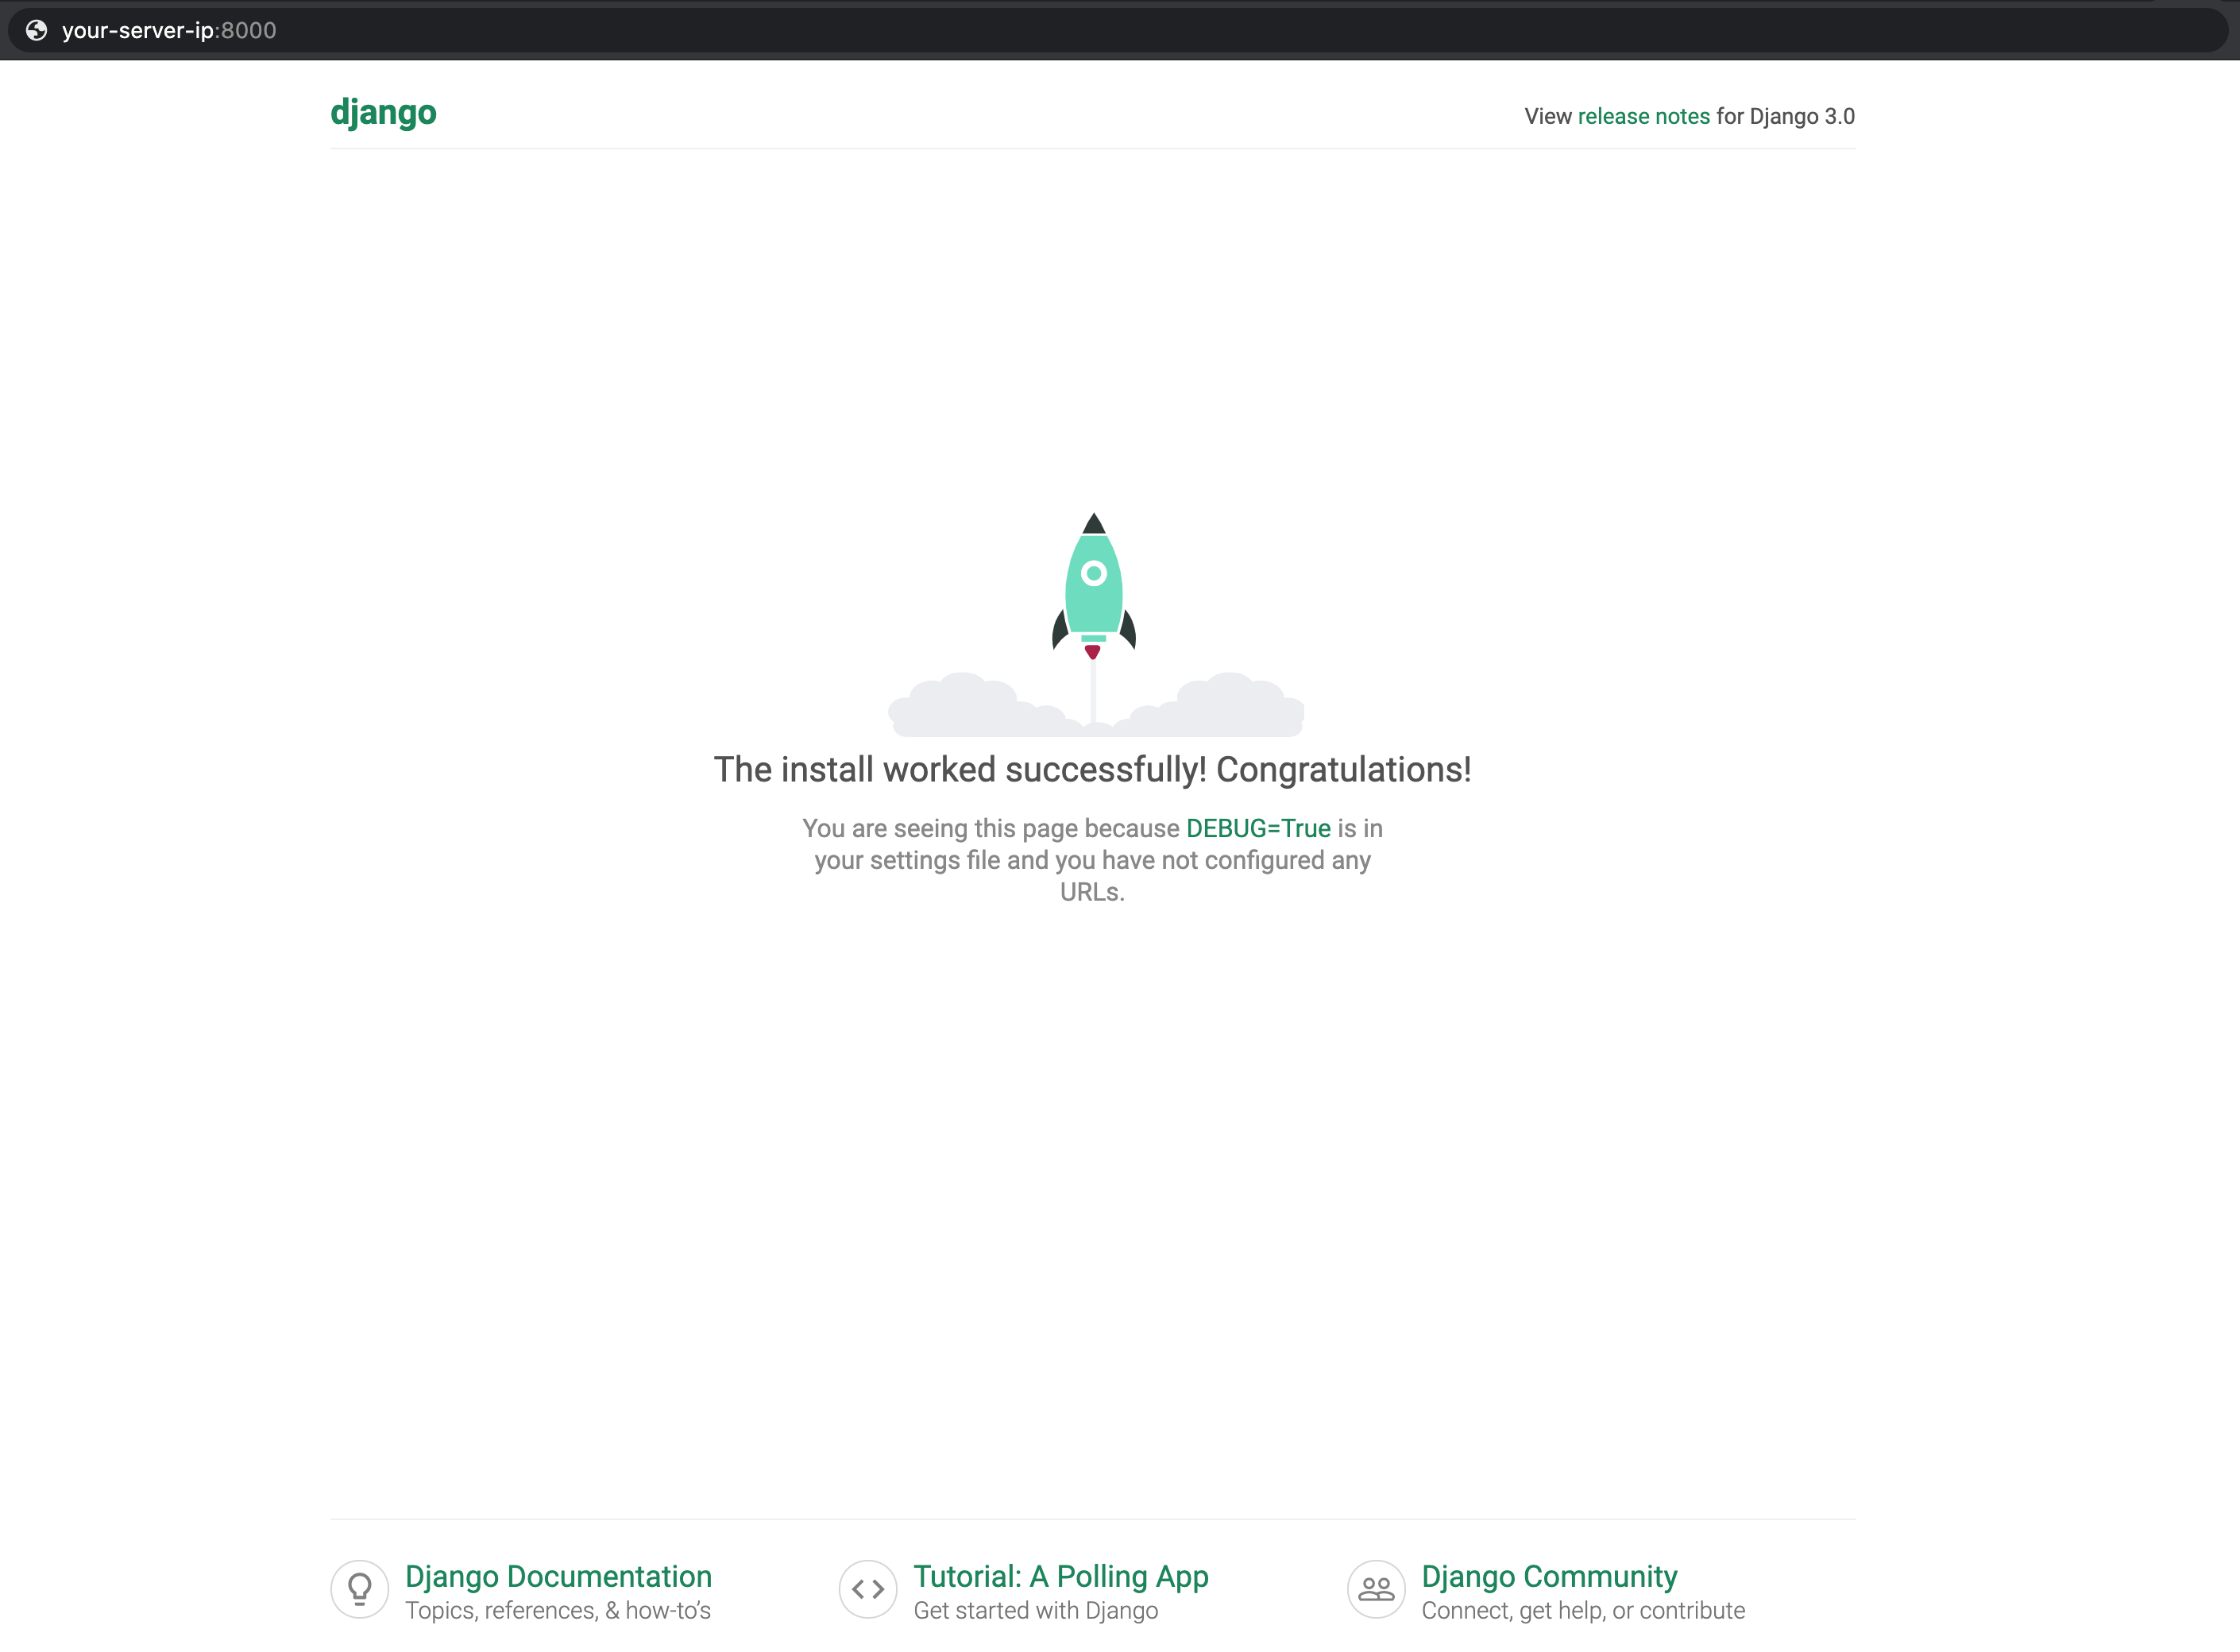
This confirms that Django was properly installed and our test project is working correctly.
To access the admin interface, add /admin/ to the end of your URL:
http://your_server_ip:8000/admin/ This will take you to a login screen:

If you enter the admin username and password that you just created, you will have access to the main admin section of the site:

For more information about working with the Django admin interface, please see “How To Enable and Connect the Django Admin Interface.”
When you are done with testing your app, you can press CTRL + C to stop the runserver command. This will return you to your programming environment.
When you are ready to leave your Python environment, you can run the deactivate command:
Deactivating your programming environment will put you back to the terminal command prompt.
Conclusion
In this tutorial you have successfully installed Django and set up a development environment to begin working on your Django app.
You now have the foundation needed to get started building Django web applications.
Thanks for learning with the DigitalOcean Community. Check out our offerings for compute, storage, networking, and managed databases.
Setting Up a Modern Python Development Environment on Ubuntu 20.04
Setting up a Python development environment can be daunting. For some, this setup will be overkill, but for a professional project, I’ve found these tools work well. The only prerequisite is an installation of Ubuntu 20.04. These instructions could be used on a different operating system or version of Ubuntu, but the specifics might change.
Tools
We’ll install the following tools.
- Pyenv helps us manage the version of our Python interpreters and allows us to change our default Python interpreter to one that is not the system interpreter.
- Pipx allows us to install CLI tools in isolated environments. Instead of installing the tools to the system interpreter or having to switch between various virtual environments, pipx installs the CLI tools in an isolated environment and exposes them for usage.
- Poetry manages our Python dependencies. Poetry ensures that the same versions of our Python packages are installed across environments such as develop, staging, and production. Poetry can also be used to publish Python packages.
Tool Explanation
Let’s start with an example scenario to demonstrate the use for the tools. Suppose that I’m working on a Django web application. The Django project uses Python 3.7 and Django 2.2, however, our project lead wants to upgrade to Python 3.8 and Django 3.1. Additionally, AWS hosts our Django project.
Pyenv
Pyenv helps us by installing Python 3.7 on our Ubuntu 20.04 system. The default system version is 3.8.2 which doesn’t work for our current project. Pyenv allows us to install the latest 3.7 for our Django project’s development environment. Also, once our project upgrades to Django 3.1 and Python 3.8, we use pyenv to install Python 3.8.5 so that we don’t use the system interpreter.
Pipx
As I mentioned, AWS hosts our Django project. Occasionally, we’ll need to interact with AWS via CLI. To do this, we’ll use the awscli package from AWS. The awscli program is a Python CLI utility, and if, after setting up pyenv we pip install awscli , awscli installs into our global pyenv interpreter. This situation is better than installing the awscli to the system interpreter but not ideal. Ideally, we isolate awscli into its own virtual environment. However, we would have to activate that virtual environment every time we want to run the CLI. Instead of doing this, we install pipx and use pipx to install the awscli. This allows us to run the aws command from anywhere and isolates the awscli utility into its own environment.
Poetry
Generally, poetry replaces pip. Instead of pip install , you would poetry add . Poetry gives us a few extra features that pip doesn’t, namely, a record of top level project dependencies, a separate record of top level development dependencies, a lock file which locks all dependency versions, and the ability to publish Python packages. In this case, these features make managing our Django project’s dependencies easier. Poetry automatically pegs our dependencies to the latest major version so that upgrading our dependencies is safer.
Walk Through
Installing Pyenv

- Install the prerequisite packages for Ubuntu here.
- Install pyenv using the installer here.
- Follow the instructions here to update your .bashrc with the pyenv initialization step and environment variable.
- Restart your shell: exec $SHELL .
- Validate the installation: pyenv —version .
- Install your preferred version of Python: pyenv install 3.8.5
- Note: this could take some time.


Installing Pipx
- Install pipx via pip here.
- Once you’ve installed pipx, restart your shell: exec $SHELL .
- Validate the pipx installation: pipx —version .

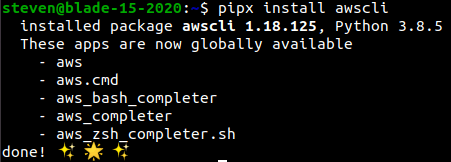
- Let’s install the awscli as a test: pipx install awscli .
- Validate the awscli install: aws —version .


Installing Poetry
Important note: I recommend not installing poetry with pipx. For in depth reasons, see here.
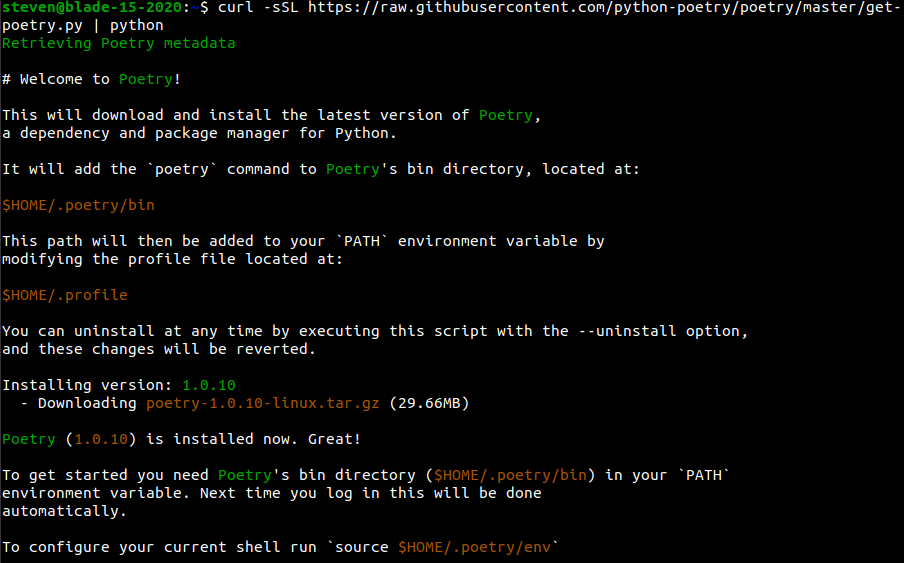
- Install poetry using the recommended installer here.
- Update your shell: source $HOME/.poetry/env .
- Validate the installation: poetry —version .

Final Thoughts
Once again, this tutorial uses Ubuntu 20.04 as the base, but it should be usable for any other operating system or version of Ubuntu as well. The specific commands might change, but the ideas are the same. Some of these tools are newer to the Python world, but they’re gaining adoption. I found that once I understood the purpose of these tools they helped simplify my Python development process.
Steven Pate
Founder
Senior Software Engineer who likes Python and has some social skills