The Best Open Source Home Automation Platform

Home automation software lets you manage, control and monitor smart home appliances from a computer. It is important to choose a home automation system built on open source standard, so that the codebase is properly audited by the community and devices compatible to each other.
This article is a list of the best open source home automation platforms. For a full list, please go to the awesome Wikipedia.
openHAB
OpenHAB (Open Home Automation Bus) is one of the most well-known open source, technology agnostic home automation platform. OpenHAB is capable of integrating with over 1500 devices from some of the biggest names in electronics, like Sony, Pioneer, LG, Samsung, and more. Some of the ZWave devices was better supported by OpenHAB than the ohers.

What I don’t like about OpenHAB is its interface. It was fine but clunky. There were so many different UIs to deal with: SimpleUI for Smarphones, the HABPanel for dashboards, etc.
For the non tech-savvy user, the latest OpenHAB 3 you can do msot of the basic setup through the GUI, zero coding required and no use of extended config files. You’re going to need some basic skills to do the install but there are ready-made Docker images which supports most major platforms. so the installation would be easy regardless of your platform.
One more pros of using OpenHAB is you can take your setup and move it to another platform/host machine. All you need to do is export the configuration backup and restore them on the other machine. If you’re so inclined, you can even integrate multiple OpenHAB instances talking to each other.
Home Assistant

Home Assistant is a free, open-source, and lightweight home automation platform. It runs on top of the Home Assistant Operating System.
Beginners may see the Home Assistant docs intimidating at first. There are no detailed step by step how to tutorial with one light and a sensor. It’s a problem with many other FOSS projects as people like to write code and no one wants to write the documentation for a beginner. Home Assistant documentation is written by people who are intimately familiar with how it works at a very low level, and does not have the necessary practical examples that a beginner need to walk their first step with the platform.
Besides that, Home Assistant is a very powerful platform with many features I like : One-click upgrades, mobile editing, remote control using Nabu Casa, Google Drive Backups, etc. Not to mention a huge ecosystem of Add-Ons that allows for integrating with other systems such as Grafana, AdGuard Home, ZWave JS, etc.
Whereas openHAB provides a comprehensive platform for managing devices and integrating them into a cohesive whole, Home Assistant takes a more open-ended and inclusive approach, incorporating devices from a wide variety of manufacturers and ecosystems.
OpenMotics

OpenMotics is a home automation and control platform that gives you more versatility and control than ever before for the home. With over 500 simple to operate scripts and easy integration with other OpenMotics components, you can have a fully automated home in no time.
- Get the most out of your home with our detailed power measurements, multi-zone heating and automated actions and moods!
- Make your home work for you with our easy-to-use sensor input and open source hardware and software.
- Sensor input.
- Open source hardware and software gives you the freedom to create, adjust and manufacture your own hardware. Licensed under a Creative Commons Attribution-ShareAlike 4.0 International License, this allows you to share and collaborate with others to make the most of your creativity.
Jeedom

Jeedom is a great option for home automation, but its language barrier can be a bit of a hurdle. The Jeedom community is predominantly French, so even if the website is translated into English, their community guidelines and forums are all in French. However, Jeedom offers many languages, including English, Spanish, and German, so it’s not impossible to find help.
Jeedom is known for its compatibility with a variety of protocols, such as ZigBee, Z-Wave, and EnOcean. The plugin system, through Jeedom Market, guarantees compatibility with numerous current and future protocols.
There are many different ways to install Jeedom: on a Raspberry Pi 2, 3 or 4; on a Synology NAS; or on any Linux system based on Debian 10 (Buster) and higher. You can also buy a ready-made box with Jeedom preinstalled, which includes a service pack (more support and services) and plugins. Options include the Jeedom Atlas Z-Wave +, Jeedom Atlas Zigbee, and Jeedom Atlas EnOcean.
Calaos

Calaos is a free software project (GPLv3) that lets you control and monitor your home maintained by an active French community. Although most of the community around it read and write French, the forum and documentation of Calaos are good enough to learn more about all of its features.
There’s also Calaos OS – a full Linux distribution with everything preconfigured that can be used as a standalone system or as the foundation for a custom home automation setup. It is based on Open-embedded build tools and provides pre-configured images for a variety of machines. Calaos Server, Calaos Home and Calaos WebApp and all the tools needed for a full home automation system are already integrated and configured.
Calaos and its software ecosystem can run in multiple platforms, including Web, Android, iOS, Linux, and more.

Calaos features:
- A wide range of supported hardware:
- Wago’s PLC, with digital or analog I/O, DALI or DMX light bus.
- IPX800.
- Eco Device.
- Web API.
- 1Wire.
- X10Zibase I/O.
- GPIO (Linux based GPIO, for direct use of RaspberryPI GPIO header).
- Squeezebox.
- Nabaztag (Karotz).
- CCTV IP (Axis, Mjpeg…).
Pimatic

Pimatic is a framework for home automation that can be extended with 70+ plugins and supports a wide range of hardware. The name comes from the fact that Pimatic is pretty lightweight and intended to run on mini computers like the Raspberry Pi. Pimatic is written in JavaScript and runs on Node.js
- Pimatic configure devices and sensors using an unified schema. Thanks to that, all devices can be controlled uniformly and are available in a common interface.
- Automated operations are defined by using rules in a “if this then that” manner, where the condition and action performed can be fully customized by plugins. You can defined a rule like “If it’s after 6PM and my smartphone is present, then turn the air-conditioner on” and have your room cooled right at the moment you get home.
- Pimatic provides a modern web front-end with sensors overview, device control and rule definition, which you can access from anywhere with proper configuration.
- Huge ecosystem of plugins, developed and maintained by actual users around the world.
Homebridge.io
Homebridge is a NodeJS server that mimics the HomeKit API provided by Apple. In other words, Homebridge allows you to integrate with smart home devices that do not natively support HomeKit by using community developed plugins. There are currently over 2,000 Homebridge plugins which enable support for thousands of different smart accessories.
Homebridge allows you to integrate with smart home devices that do not natively support HomeKit. There are over 2,000 Homebridge plugins supporting thousands of different smart accessories.
- Control your devices using any smartphone application that supports HomeKit, no matter it’s provided by Apple like Apple Home or developed by third-party developers such as Eve for HomeKit.
- Runs cross platform, basically anything that runs Node.js on top of it, namely Linux, Windows, macOS.
- Doesn’t require powerful system resources to run. Even a Raspberry Pi can install Homebridge.
- Free, open-source, security audit provided by the community.
HomeGenie
HomeGenie is another free, open source platform for home automation which connects smart connected devices and applications. It can talk to a wide range of devices and protocols such as X10, Insteon, Z-Wave, Philips Hue, UPnP/DLNA, RFXCom, KNX using either Voice Control or IR/RF Control.
HomeGenie offers a built-in editor which support easy editing for Python, JavaScript, Rubt and C#. It also has an extensible API, allows you to roll your own solution when built-in APIs are not enough. Plus, HomeGenie can be accessed from any device in anywhere using its Web-based interface.
We hope that the information above help you find the perfect open source home automation platform which suits your own scenario.
You may be interested in our Linux software roundups, including 8 Best Open Source CMDB software, Best Linux Video Converters, Best Linux Home Security Software, or best SNES emulator for Linux.
If you have any suggestion, please feel free to leave a comment below.
Просто о сложном. Начало создания беспроводного «умного дома». На основе технологии Linux, Z-Wave и ПО MajorDoMo
Так случилось, что жизнь заставила приступить к частичной автоматизации квартиры, особенно в части её безопасности, краны, газ, вход, электричество, ну а потом уже всё остальное.
Для себя определил следующие критерии:
- Место — квартира, где переделка (существенная переделка чего-либо не планируется).
- Возможность интеграции всех решений в единую систему УД с открытым кодом .
- Возможность постепенного расширения (масштабирования) функционала.
- По-возможности, минимальные затраты.
- По возможности покупка элементов системы в РБ или же в РФ, без всяких заказов с зарубежных сайтов. Пришел, посмотрел, купил.
- По возможности русскоязычный интерфейс, документация, поддержка.
В качестве помощника решил привлечь своего старшего сына (школьника, закончил 8-ой класс). И понял существующая документация довольно сложна для обычного пользователя, не сталкивающегося с настройкой, конфигурированием и программированием.
Вот и решил немного восполнить этот пробел.
Про видеонаблюдение ранее написал небольшую заметку:
Создание загрузочного диска:
Первым делом скачиваем образ системы для дальнейших действий:
Для создания загрузочной флешки я использовал официально рекомендованную программу производителем Raspberry.
На официальном сайте разработчика сайт программы загрузчика.
Сразу же на сайте определяется разрядность ОС, и предоставляется ссылка для скачивания.
Также наглядно показано 3 шага для прожига образа.
1) Выбор образа
2) Выбор диска
3) ПрожигИ создаем загрузочный диск на основе образа, который ранее скачали (предварительно распаковав его).
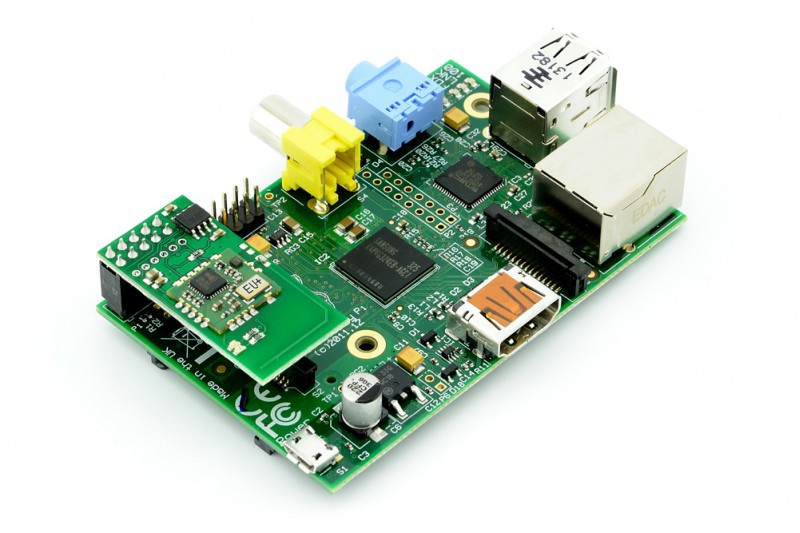
Подключаем Raspberry Pi через кабель HDMI и подключаем клавиатуру.
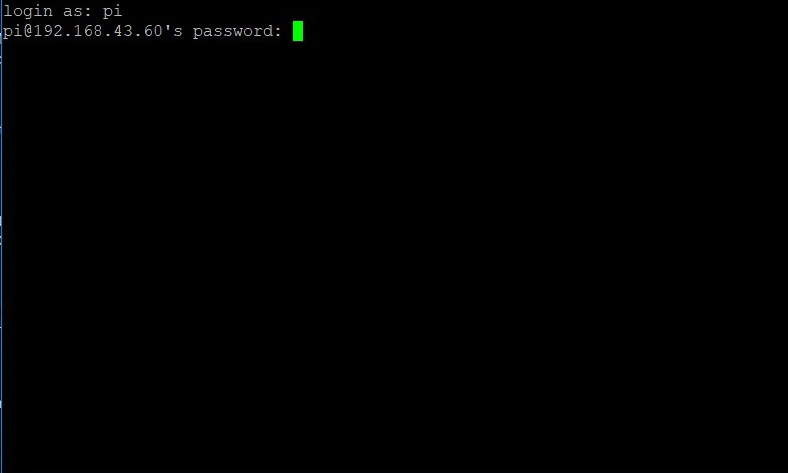
Включаем питание Raspberry.
Идет загрузка системы, после которой запрос логина и пароля.
Используем по умолчанию: логин PI, пароль raspberrymj.
Вводимые символы пароля не отображаются
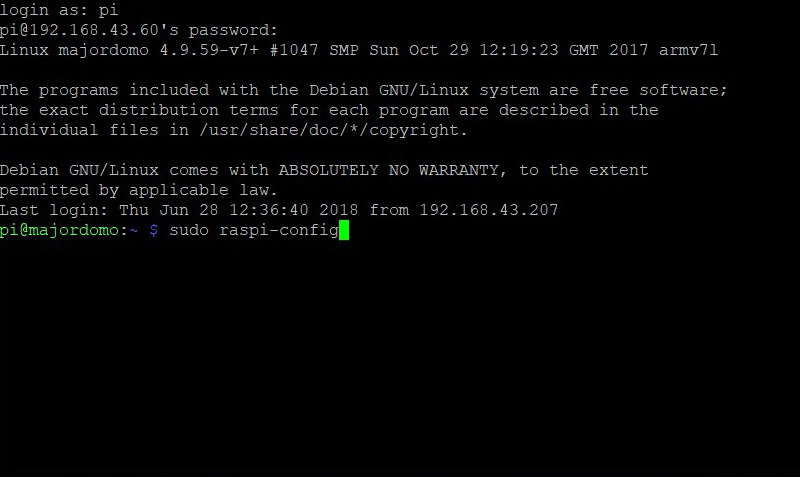
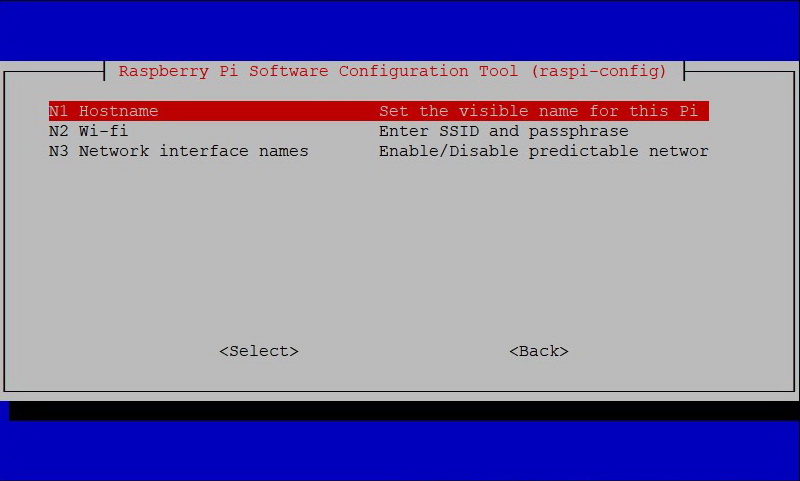
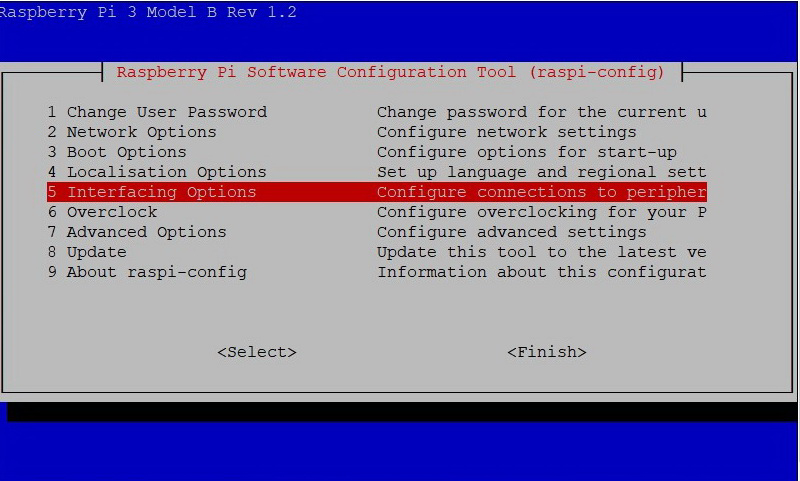
Запускаем утилиту настройки Raspberry
Первым делом я поменял пароль по умолчанию, надоест вводить 11 символов
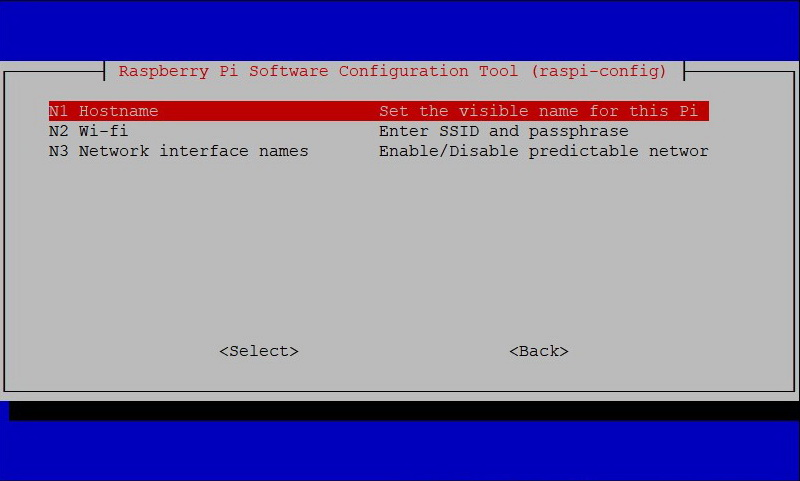
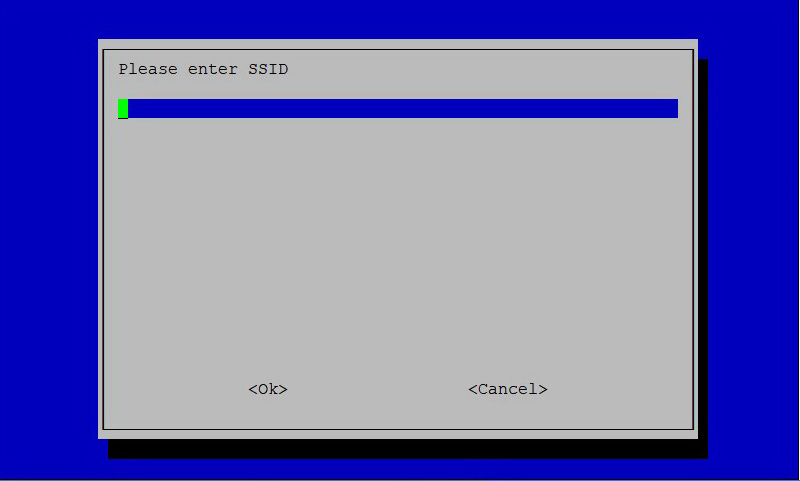
Далее, конфигурируем свою сеть, в моем случае Wi-Fi вводим ssid (имя сети) и пароль к ней.
С базовым образом подключение по SSH уже включено, так что этот шаг можно пропустить. Если не открыт, то открываем доступ для удаленного подключения через SSH >
Более подробная информация о настройках утилиты конфигурирования находится здесь:
немного информации о rasp-config.Перегружаемся выполнив команду:
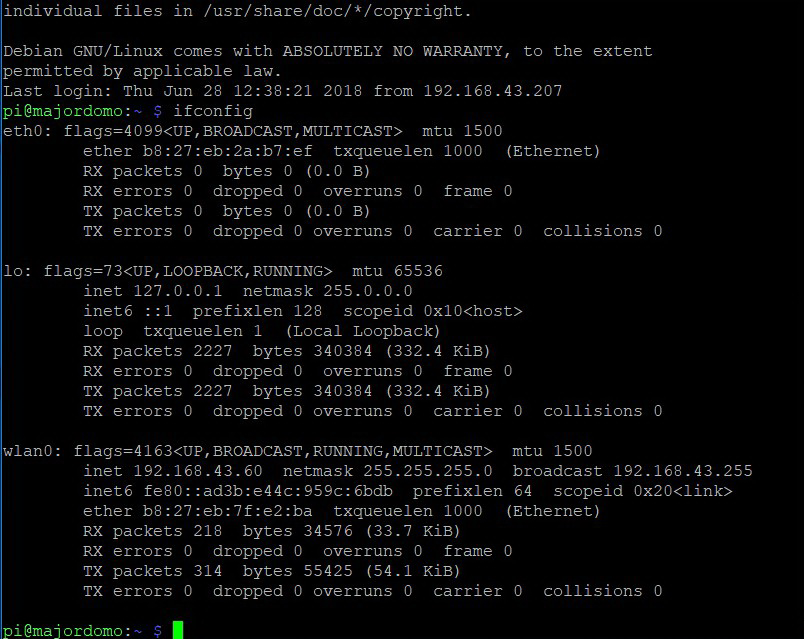
Вновь авторизовываемся, введя логин и пароль.
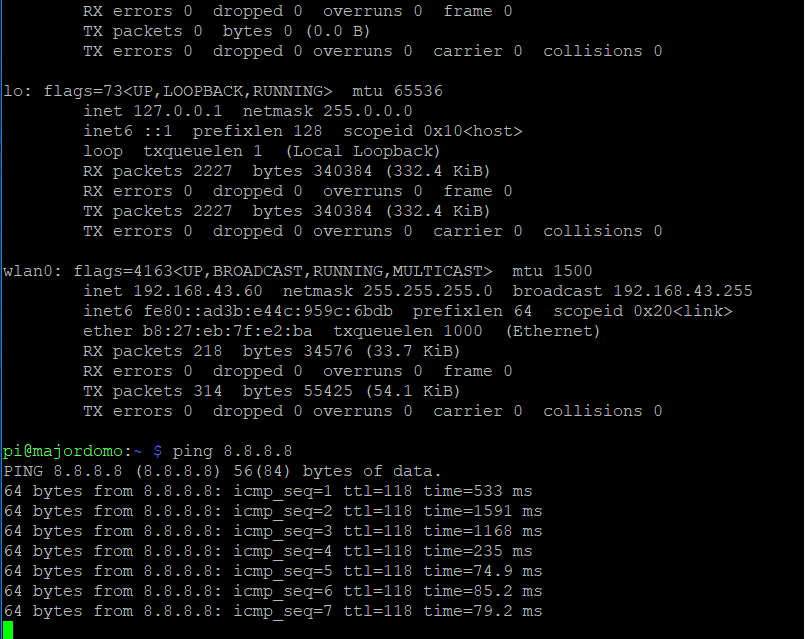
Узнаем IP адрес Raspberry, задав команду:
wlan0, в моем случае и есть беспроводной интерфейс.
Задав команду ping, можем проверить доступ к Internet
Если всё прошло нормально, то видим ответы
Выход из утилиты ping (да и из многих утилит)
ctrl+CПосле этого можем работать под удобной и привычной для себя операционной системой.
Для windows 10 привожу пример:
Скачиваем программу PuTTY, выбирая свою разрядность ОС Windows.
Запускаем программу PuTTY.
Пошаговый запуск PuTTY
Появляется окно подключения:
Указываем IP адресс Raspberry:
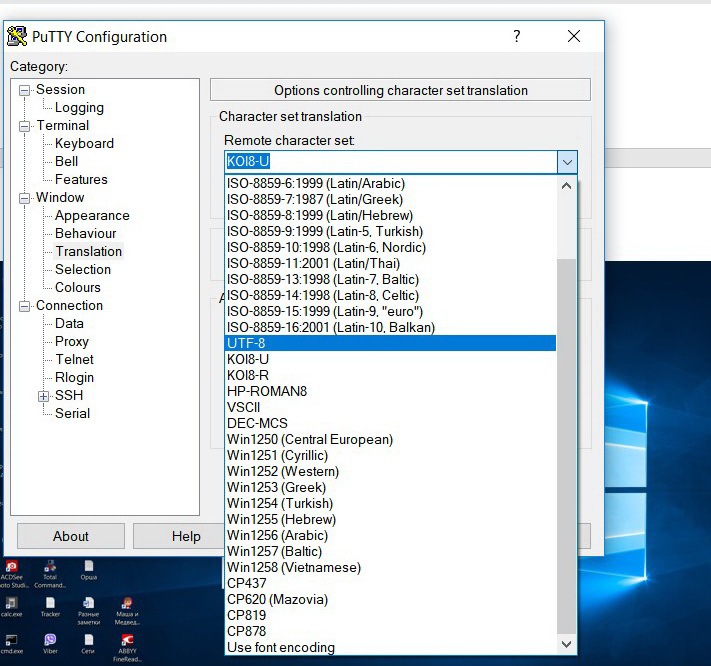
Далее в настройках выставляем Terminal — Keyboard:
Выставляем кодировку utf8, в Window — Translation
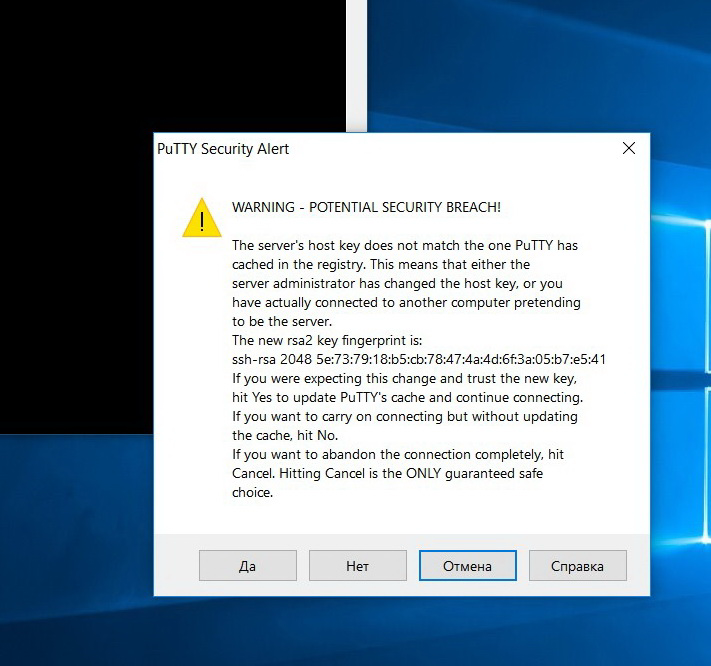
Если подключаемся в первый раз, то появляется запрос безопасности системы нажимаем ДА
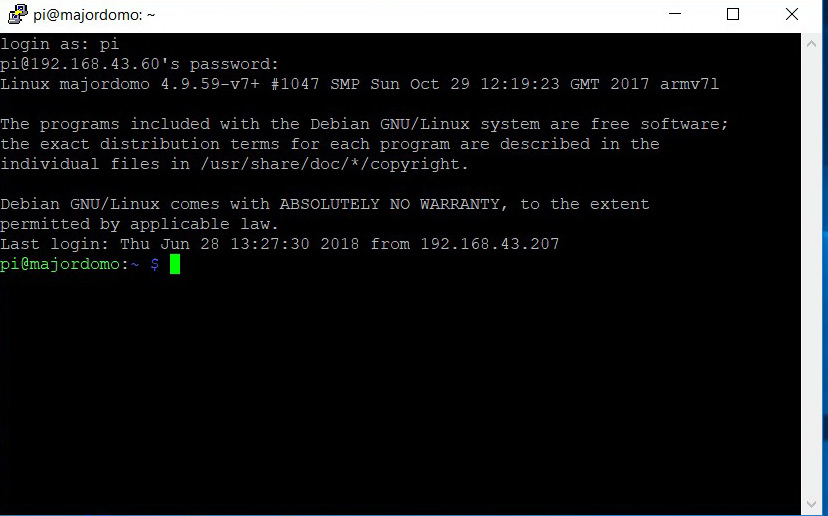
Запрос логина, а потом и пароля. Как и при первом подключении.
При вводе пароля как обычно, символы не отображаются.
Ещё раз проверяем, на всякий случай, свой IP адрес задав команду
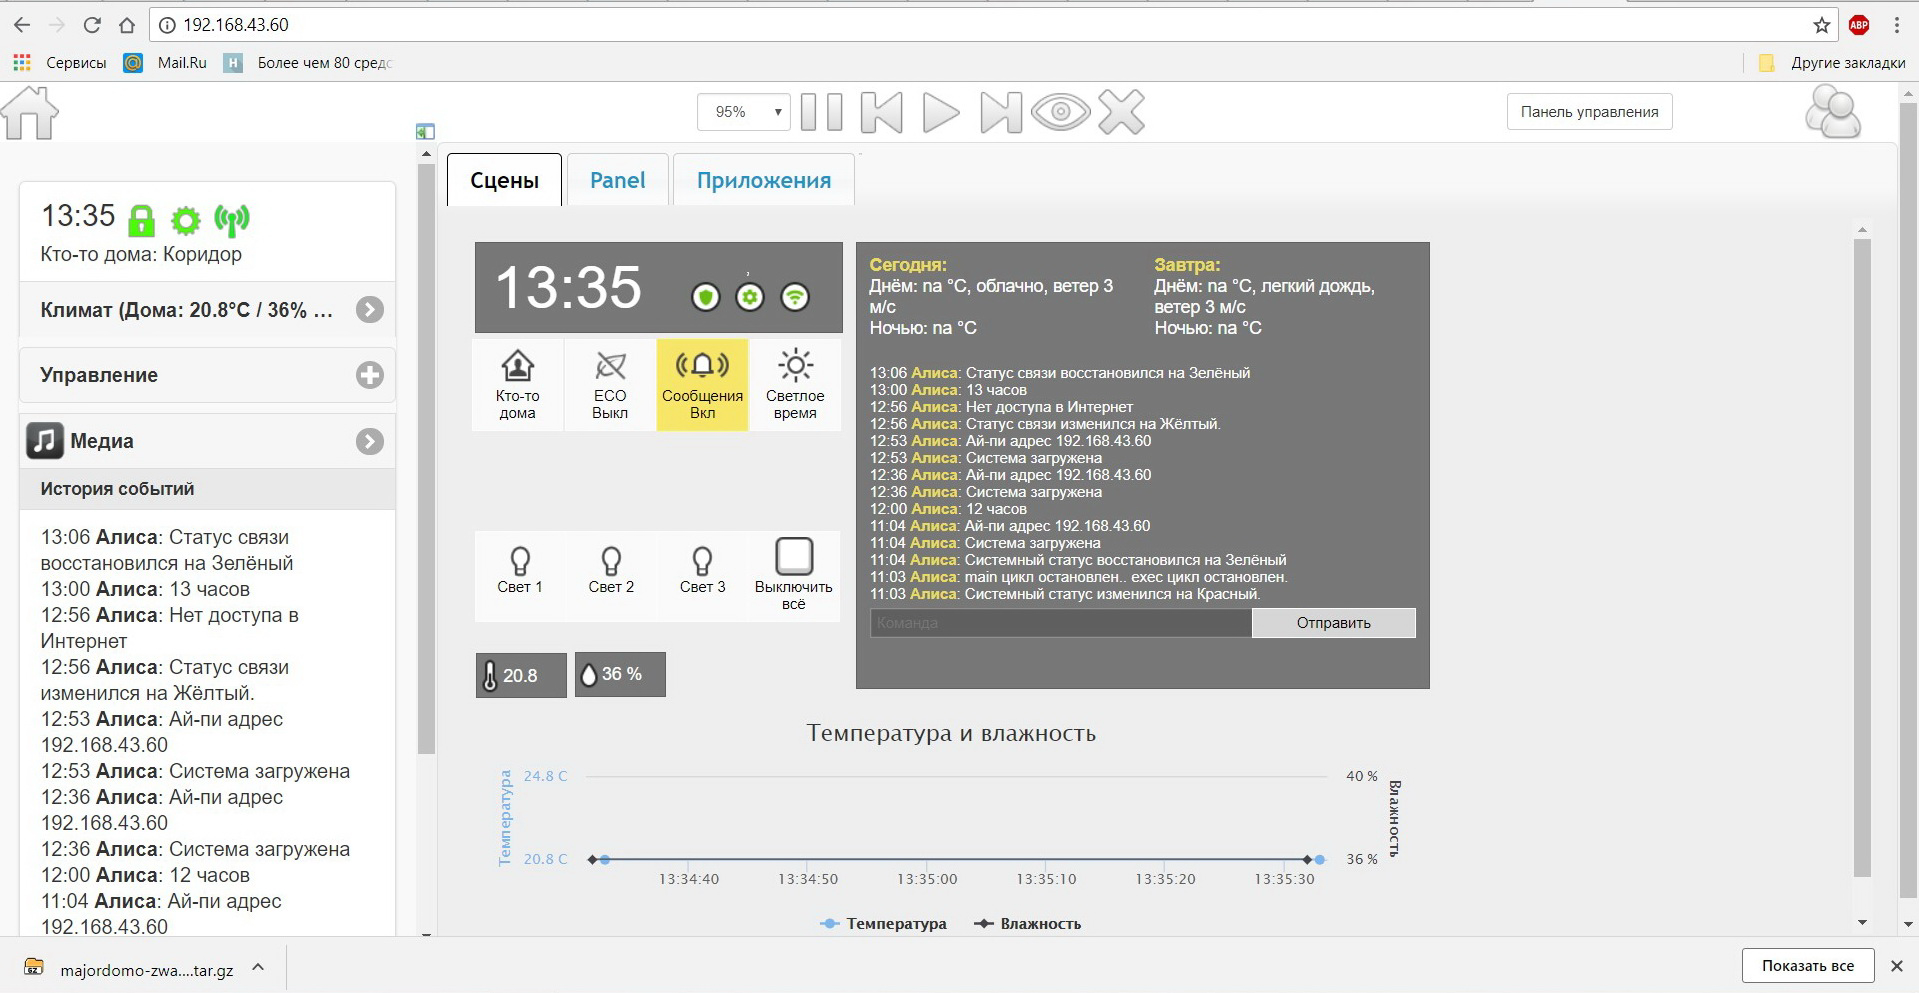
На рабочем ПК, в браузере набираем адрес платы:
Первый шаг сделан. Вы попадаете в окно настроек программы MajorDoMo.
Но радоваться ещё рановато, впереди предстоит установить и настроить сам Z-Wave, разобраться с программой администрирования вашего «умного дома», его программированием и т.д.