- Как в среде Windows получить доступ к файловым системам Ext2, Ext3, Ext4
- 1. Программа DiskInternals Linux Reader
- 2. Плагин для Total Commander DiskInternals Reader
- 3. Плагин для Total Commander ext4tc
- 4. Драйвер поддержки Ext2Fsd
- Mount a Linux disk in WSL 2
- Prerequisites
- Mounting an unpartitioned disk
- Mounting a partitioned disk
- Identifying the filesystem type
- Mount the selected partitions
- Access the disk content
- Unmount the disk
- Mount a VHD in WSL
- Command line reference
- Mounting a specific filesystem
- Mounting a specific partition
- Specifying mount options
- Attaching the disk without mounting it
- Specifying the mount name
- Detaching a disk
- Limitations
- Feedback
Как в среде Windows получить доступ к файловым системам Ext2, Ext3, Ext4
Как в среде Windows сделать возможным доступ к разделу диска или съёмному носителю с файловыми системами Ext2/3/4 ? Если, к примеру, на компьютере есть ещё и вторая система Linux. И с её данными необходимо поработать из среды Windows. Или другой пример – когда внутри Windows смонтированы виртуальные диски с установленными на виртуальные машины системами Linux или Android . С Ext2/3/4 Windows нативно не умеет работать, ей для этого нужны сторонние средства. Что это за средства? Рассмотрим ниже таковые.
***
Тройка первых средств сделает возможным только чтение устройств информации с Ext2/3/4 . Последнее решение позволит и читать, и записывать данные. Все рассмотренные ниже средства бесплатны.
1. Программа DiskInternals Linux Reader
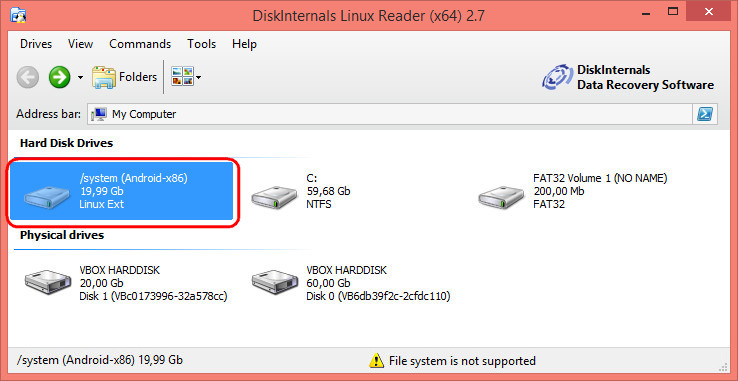
Простенькая программка DiskInternals Linux Reader – это примитивный файловый менеджер, сделанный по типу штатного проводника Windows, с поддержкой файловых систем Ext 2/3/4 , Reiser4 , HFS , UFS2 . В окне программы увидим разделы и устройства с Linux или Android.
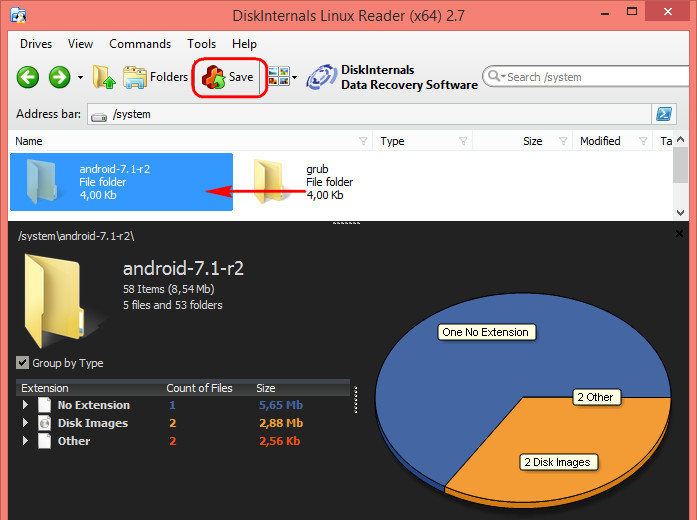
Для копирования необходимо выделить папку или файл, нажать кнопку «Save».
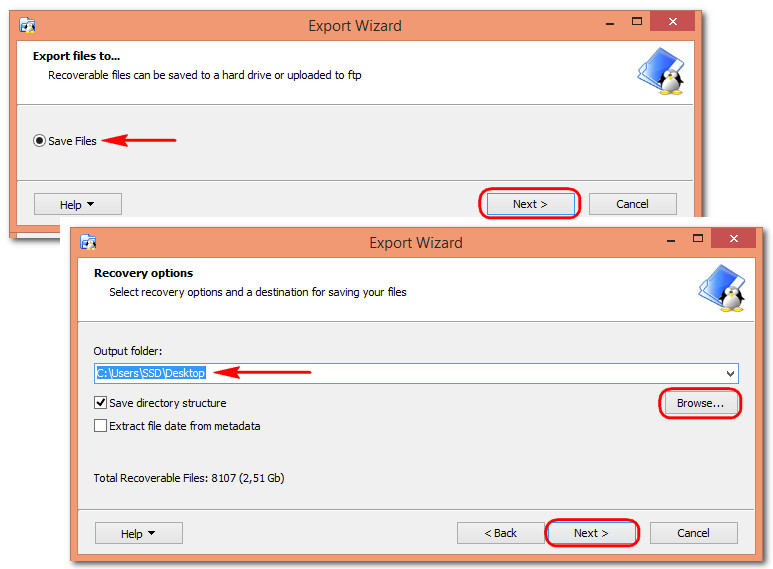
Затем указать путь копирования.
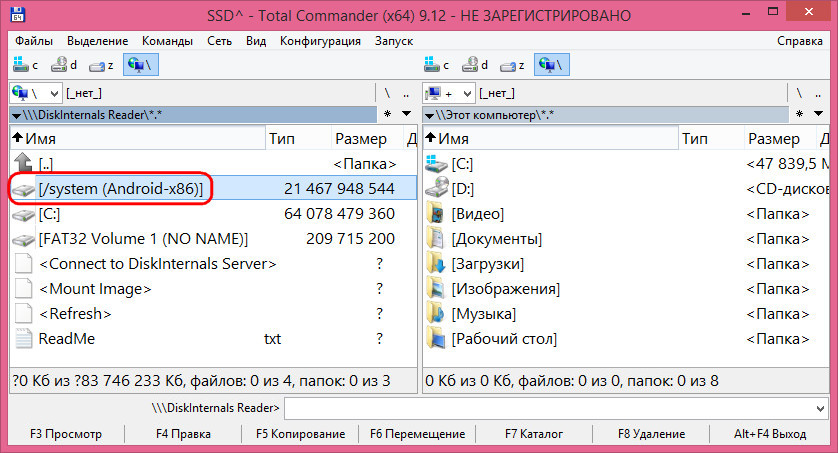
2. Плагин для Total Commander DiskInternals Reader
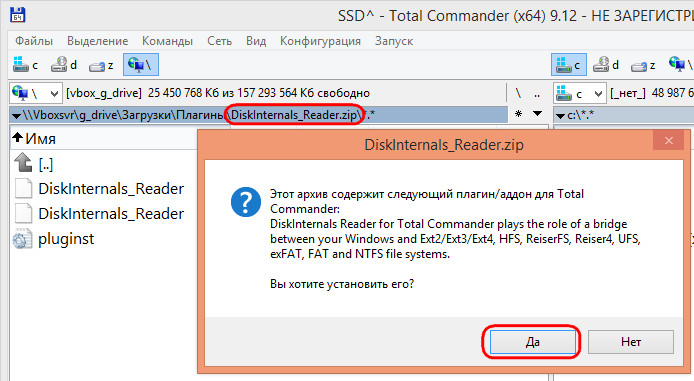
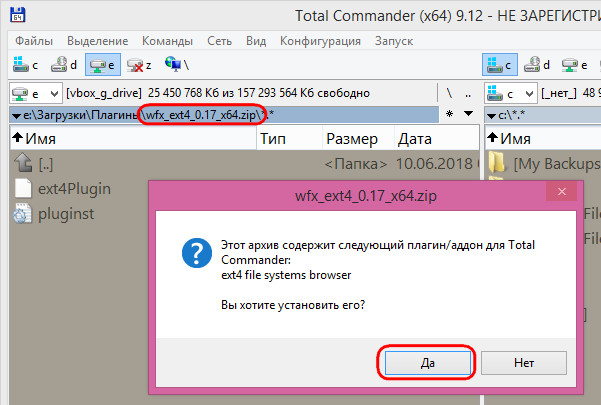
Любители популярного Total Commander могут извлекать данные Linux или Android внутри Windows с помощью этого файлового менеджера. Но предварительно установив в него специальный плагин. Один из таких плагинов — DiskInternals Reader, он умеет подключать и читать устройства информации, форматированные в Ext2/3/4 , Fat/exFAT , HFS/HFS+ , ReiserFS . Загружаем плагин, распаковываем его архив внутри Total Commander, подтверждаем установку.
Запускаем Total Commander (важно) от имени администратора. Заходим в раздел «Сеть / FS плагины». Нажимаем «DiskInternals Reader».

Здесь, наряду с прочими разделами диска и носителями, будет отображаться тот, что с Ext2/3/4 .
Данные копируются традиционным для Total Commander способом – клавишей F5 на вторую панель.
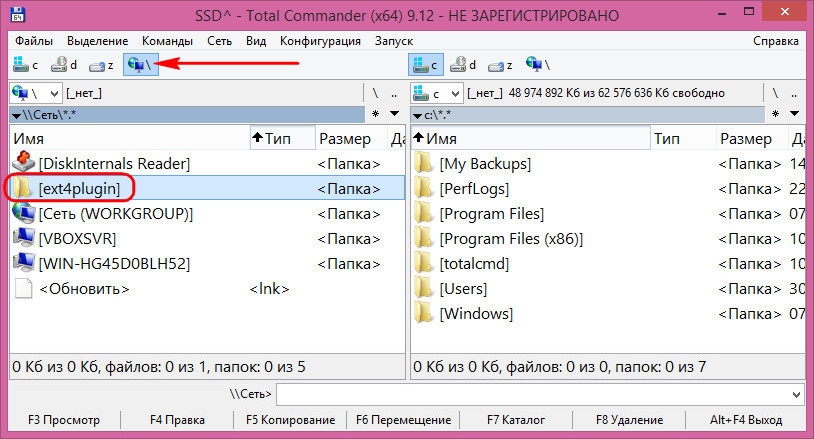
3. Плагин для Total Commander ext4tc
Упрощённая альтернатива предыдущему решению – ext4tc, ещё один плагин для Total Commander. Он может подключать для чтения устройства информации, форматированные только в Ext2/3/4 . Скачиваем плагин, распаковываем его архив внутри файлового менеджера, запускаем установку.
Запускаем Total Commander (важно) от имени администратора. Кликаем «Сеть / FS плагины». Заходим в «ext4plugin».
При необходимости копирования данных используем обычный способ с клавишей F5 .
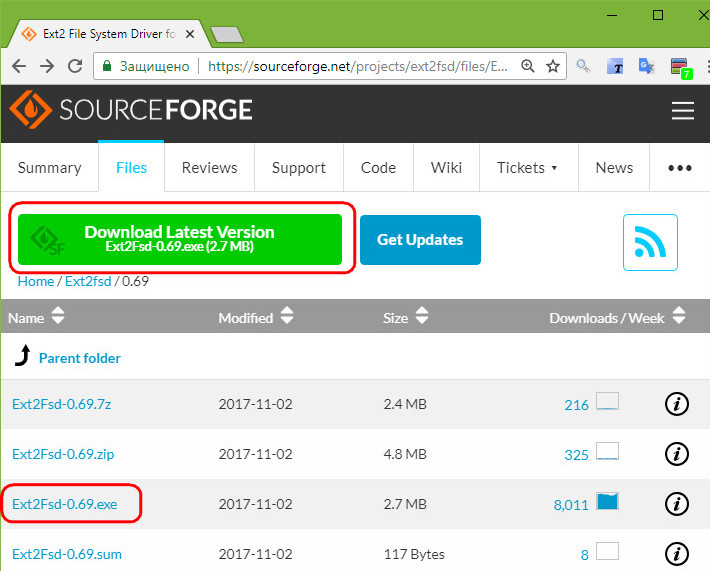
4. Драйвер поддержки Ext2Fsd
Программа Ext2Fsd – это драйвер Ext2/3/4 , он реализует поддержку этих файловых систем на уровне операционной системы. С разделами диска и накопителями, форматированными в эти файловые системы, можно работать как с обычными, поддерживаемыми Windows устройствами информации в окне проводника или сторонних программ. Драйвер позволяет и считывать, и записывать данные.
Скачиваем последнюю актуальную версию Ext2Fsd.
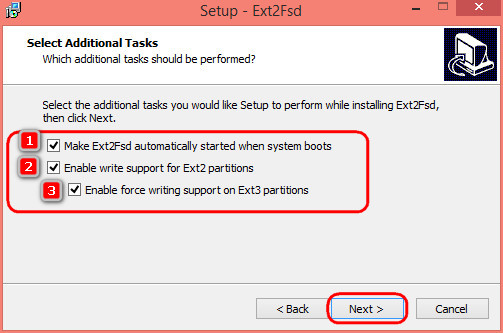
При установке активируем (если для длительной работы) три предлагаемых чекбокса:
• 1 — Автозапуск драйвера вместе с Windows;
• 2 — Поддержка записи для Ext2;
• 3 — Поддержка форматирования для Ext3.
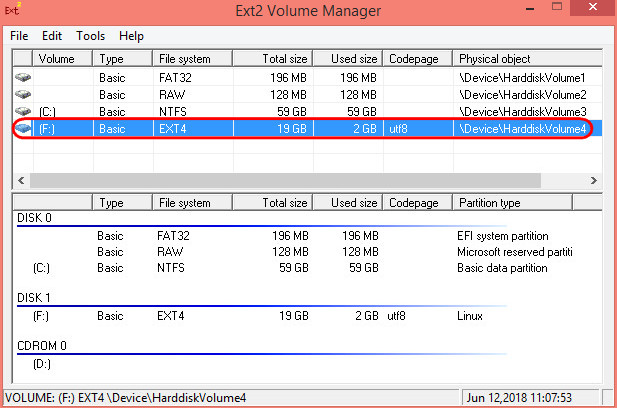
На предфинишном этапе активируем опцию запуска окошка диспетчера драйвера — Volume Manager — с попутным присвоением устройствам информации с Ext2/3/4 буквы диска.

В окошке открывшегося Volume Manager увидим носитель с уже присвоенной буквой. Например, в нашем случае носителю с Ext4 задана первая свободная буква F.
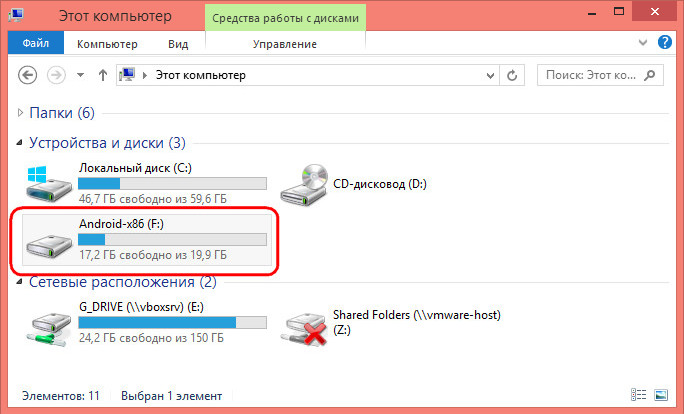
Теперь можем работать с диском F в окне проводника.
Присвоить букву новым подключаемым устройствам с Ext2/3/4 можно с помощью контекстного меню, вызываемого на каждом из отображаемых в окне Volume Manager устройств. Но просто при присвоении буквы диска такое устройство не будет отображаться после перезагрузки Windows, это решение только для одного сеанса работы с компьютером. Чтобы сделать новое устройство с Ext2/3/4 постоянно видимым в среде Windows, необходимо двойным кликом по нему открыть настроечное окошко и установить постоянные параметры подключения. Во второй графе нужно:
• Для съёмных носителей активировать чекбокс, обозначенный на скриншоте цифрой 1, и указать букву диска;
• Для внутренних дисков и разделов активировать чекбокс, обозначенный на скриншоте ниже цифрой 2, и также указать букву диска.
Далее применяем всё только что настроенное: нажимаем внизу «Apply».
Mount a Linux disk in WSL 2
If you want to access a Linux disk format that isn’t supported by Windows, you can use WSL 2 to mount your disk and access its content. This tutorial will cover the steps to identify the disk and partition to attach to WSL2, how to mount them, and how to access them.
If you are looking for guidance on how to connect a USB device (flash drive, SD card reader, etc), see Connect USB devices.
Administrator access is required to attach a disk to WSL 2. The WSL 2 mount command does not support mounting a disk (or partitions that belong to the disk) that is currently in use. wsl —mount always attaches the entire disk even if only a partition is requested. You can’t mount the Windows installation disk.
Prerequisites
You will need to be on Windows 11 Build 22000 or later, or be running the Microsoft Store version of WSL. You can join the Windows Insiders Program to get the latest preview builds.
Mounting an unpartitioned disk
In this simplest case, if you have a disk that doesn’t have any partitions, you can mount it directly using the wsl —mount command. First you need to identify the disk.
- Identify the disk — To list the available disks in Windows, run:
GET-CimInstance -query "SELECT * from Win32_DiskDrive" 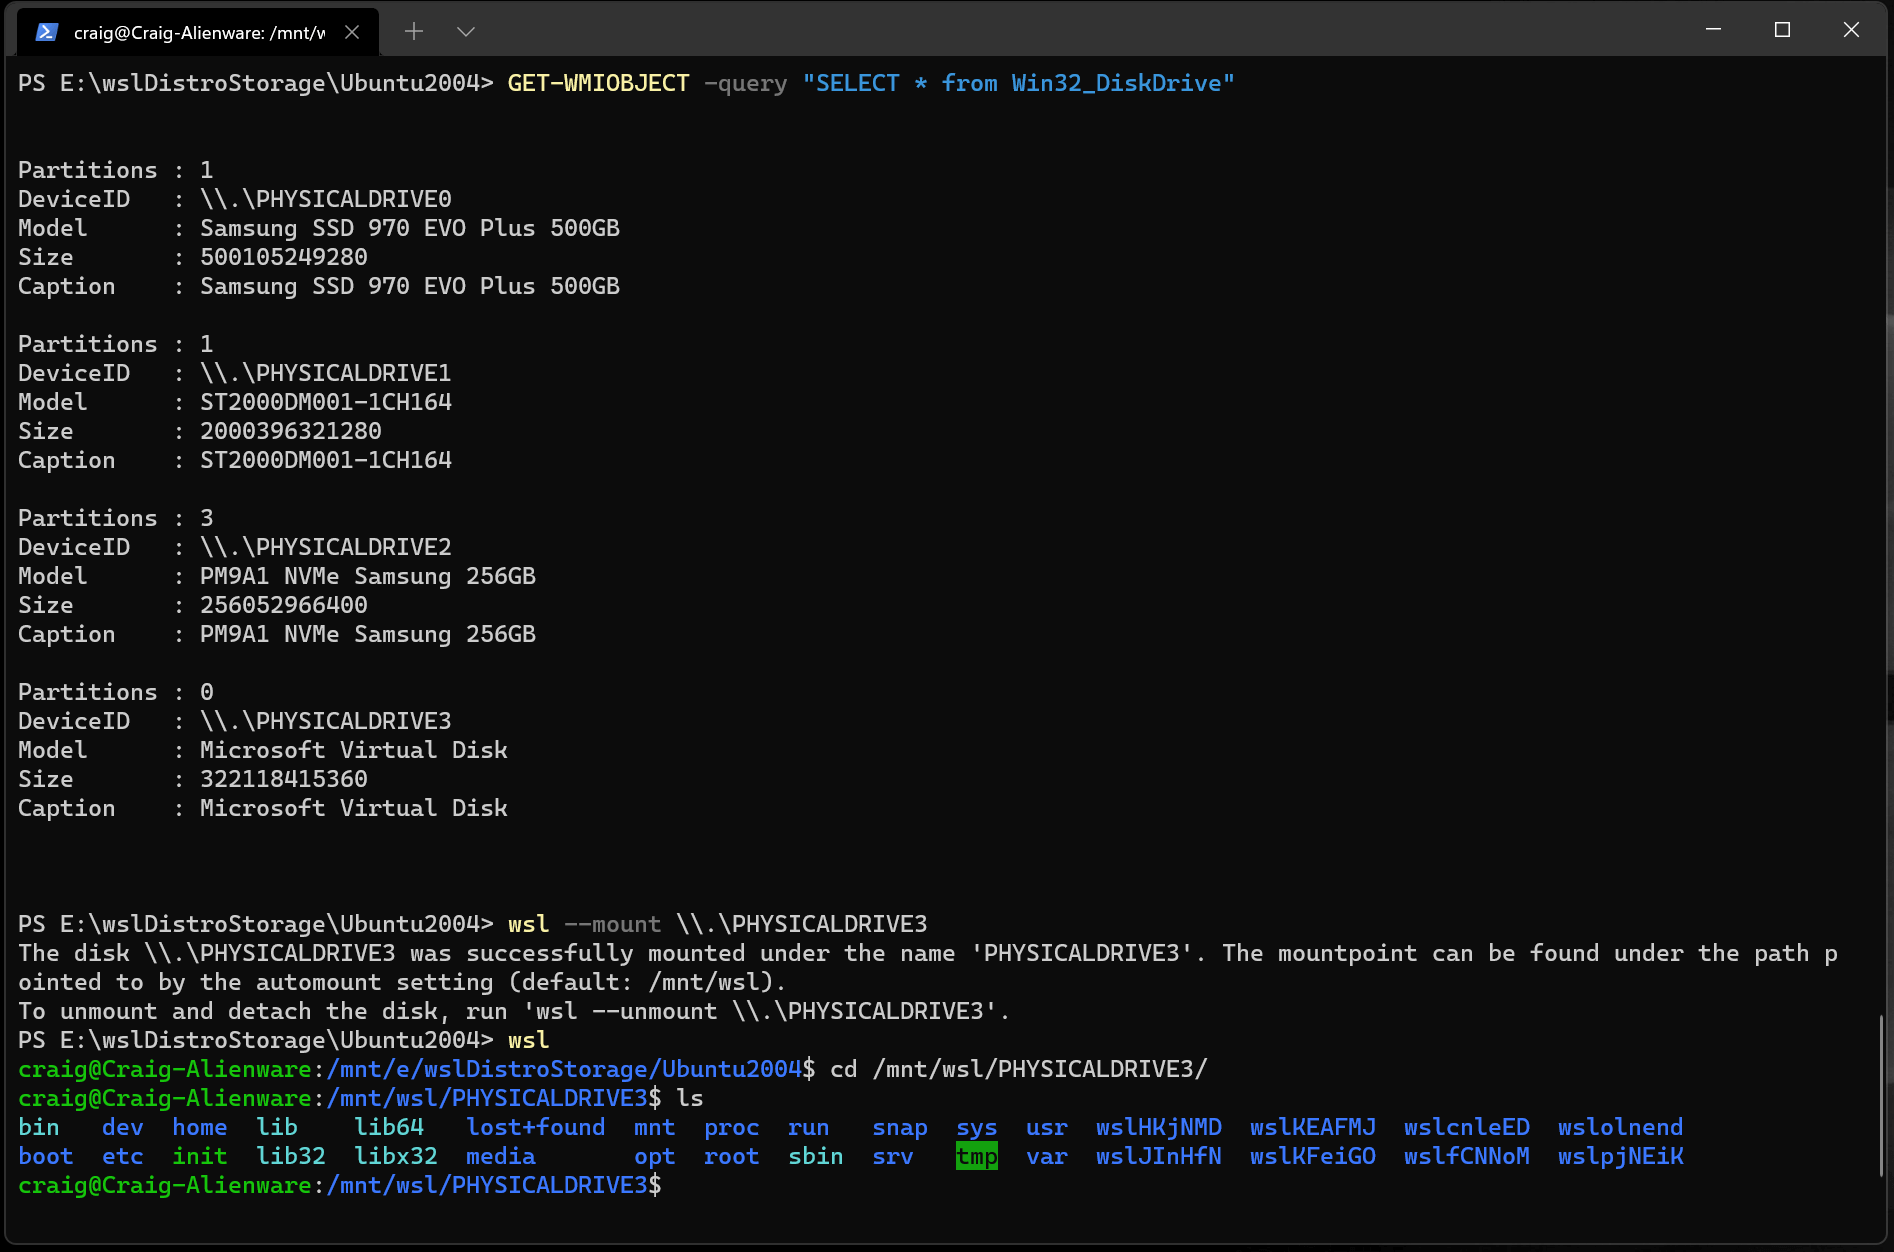
Mounting a partitioned disk
If you have a disk that you aren’t sure what file format it is in, or what partitions it has, you can follow the steps below to mount it.
- Identify the disk — To list the available disks in Windows, run:
GET-CimInstance -query "SELECT * from Win32_DiskDrive" Inside Linux, a block device is identified as /dev/ . For example, /dev/sdb3, is the partition number 3 of disk sdb .
NAME MAJ:MIN RM SIZE RO TYPE MOUNTPOINT sdb 8:16 0 1G 0 disk ├─sdb2 8:18 0 50M 0 part ├─sdb3 8:19 0 873M 0 part └─sdb1 8:17 0 100M 0 part sdc 8:32 0 256G 0 disk / sda 8:0 0 256G 0 disk Identifying the filesystem type
If you don’t know the type of filesystem of a disk or partition, you can use this command:
This will output the detected filesystem type (under the TYPE=»» format).
Mount the selected partitions
Once you have identified the partitions you want to mount, run this command on each partition:
If you wish to mount the entire disk as a single volume (i.e. if the disk isn’t partitioned), —partition can be omitted.
If omitted, the default filesystem type is «ext4».
Access the disk content
Once mounted, the disk can be accessed under the path pointed to by the config value: automount.root . The default value is /mnt/wsl .
From Windows, the disk can be accessed from File Explorer by navigating to: \\wsl$\\\\ (pick any Linux distribution).
Unmount the disk
If you want to unmount and detach the disk from WSL 2, run:
Mount a VHD in WSL
WSL from the Microsoft Store introduces a new argument to directly mount a VHD: wsl —mount —vhd
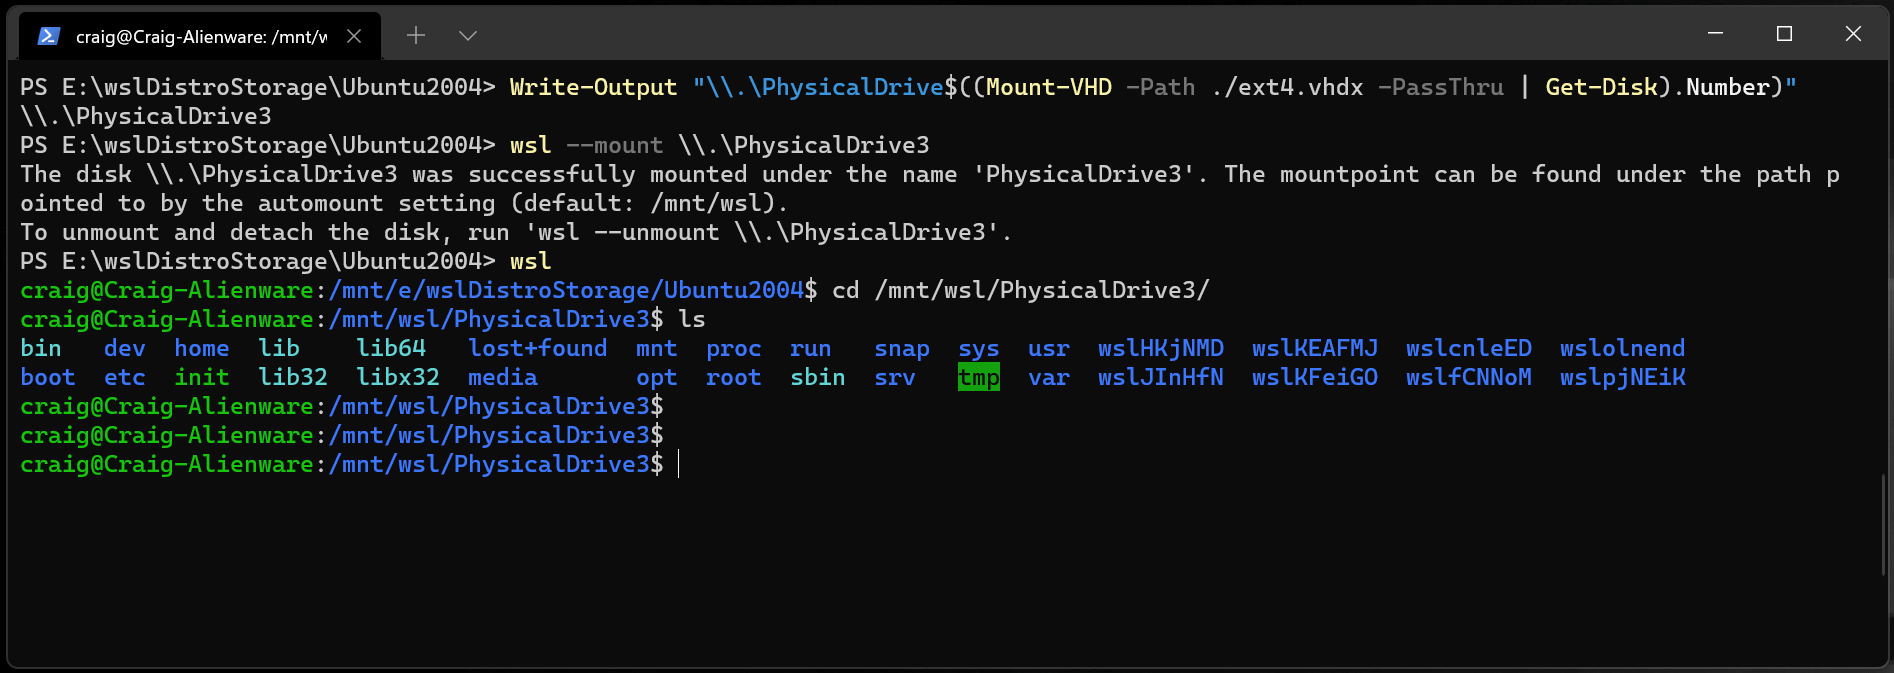
You can also mount virtual hard disk files (VHD) into WSL using wsl —mount . To do this, you first need to mount the VHD into Windows using the Mount-VHD command in Windows. Be sure to run this command with administrator privileges. Below is an example where we use this command, and also output the disk path. Be sure to replace with your actual VHD path.
Write-Output "\\.\PhysicalDrive$((Mount-VHD -Path -PassThru | Get-Disk).Number)" You can use the output above to obtain the disk path for this VHD and mount that into WSL following the instructions in the previous section.
You can also use this technique to mount and interact with the virtual hard disks of other WSL distros, as each WSL 2 distro is stored via a virtual hard disk file called: ext4.vhdx . By default the VHDs for WSL 2 distros are stored in this path: C:\Users\[user]\AppData\Local\Packages\[distro]\LocalState\[distroPackageName] , please exercise caution accessing these system files, this is a power user workflow. Make sure to run wsl —shutdown before interacting with this disk to ensure the disk is not in use.
Command line reference
Mounting a specific filesystem
By default, WSL 2 will attempt to mount the device as ext4. To specify another filesystem, run:
For example, to mount a disk as fat, run:
To list the available filesystems in WSL2, run: cat /proc/filesystems
When a disk has been mounted via WSL2 (Linux file system), it is no longer available to mount via an ext4 driver on the Windows file system.
Mounting a specific partition
By default, WSL 2 attempts to mount the entire disk. To mount a specific partition, run:
This only works if the disk is either MBR (Master Boot Record) or GPT (GUID Partition Table). Read about partition styles — MBR and GPT.
Specifying mount options
To specify mount options, run:
Only filesystem specific options are supported at this time. Generic options such as ro, rw, noatime, . are not supported.
Attaching the disk without mounting it
If the disk scheme isn’t supported by any of the above options, you can attach the disk to WSL 2 without mounting it by running:
This will make the block device available inside WSL 2 so it can be mounted manually from there. Use lsblk to list the available block devices inside WSL 2.
Specifying the mount name
This option is only available with WSL from the Microsoft Store
By default the mountpoint name is generated based on the physical disk or VHD name. This can be overriden with —name . Example:
Detaching a disk
To detach a disk from WSL 2, run:
If Diskpath is omitted, all attached disks are unmounted and detached.
If one disk fails to unmount, WSL 2 can be forced to exit by running wsl —shutdown , which will detach the disk.
Limitations
- At this time, only entire disks can be attached to WSL 2, meaning that it’s not possible to attach only a partition. Concretely, this means that it’s not possible to use wsl —mount to read a partition on the boot device, because that device can’t be detached from Windows.
- Only filesystems that are natively supported in the kernel can be mounted by wsl —mount . This means that it’s not possible to use installed filesystem drivers (such as ntfs-3g for example) by calling wsl —mount .
- Filesystems not directly supported by the kernel can be mounted via a —bare attach and then invoking the relevant FUSE driver.
Feedback
Submit and view feedback for