How to access a usb flash drive from the terminal?
You’ll need to know what the drive is called to mount it. To do that fire off one of the following (ranked in order of my preference):
lsblk sudo blkid sudo fdisk -l You’re looking for a partition that should look something like: /dev/sdb1 . The more disks you have the higher the letter this is likely to be. Anyway, find it and remember what it’s called.
2. Create a mount point (optional)
This needs to be mounted into the filesystem somewhere. You can usually use /mnt/ if you’re being lazy and nothing else is mounted there but otherwise you’ll want to create a new directory:
3. Mount!
sudo mount /dev/sdb1 /media/usb When you’re done, just fire off:
This answer is almost 6 years old and while the core of it still works, things like fdisk -l aren’t the most user-friendly options. There are also new mechanisms in higher stacks for mounting devices in a sane and standard way which might not always be available.
So I’ve added some polish from the other answers. While you’re reading this footnote and you’re doing this on a desktop system, there definitely are arguments for using udisksctl , per wecac’s answer. This mounts in the same way the desktop does —creating your own /media/$USER/device directory— but I think there are still arguments for a static mountpoint, especially when you don’t want the path to change.
Udisks also relies on D-Bus, so might not be available everywhere.
the main disadvantage of this method is that it mounts the device as root. if the device is FAT formatted then the user won’t be able to write to it. the /media/$USER/device mountpoint will also always be the same
All answers assume that there magically appears a /dev/sdX after putting in the USB stick. What if it doesn’t? I see in the logs that it is detected, but no new /dev. lsusb show all the gory details too. Ie sudo lsusb -vs 15:2 | grep id gives idVendor 0x090c Silicon Motion, Inc. — Taiwan (formerly Feiya Technology Corp.) idProduct 0x1000 Flash Drive
@CarloWood I have faced a similar situation. In some logs, i think dmesg or something, I found that the drive was unable to power itself up. I just ended up using a different port for the drive. As far as i know there is not a way to mount a drive, whose device driver hasnt created a device file in /dev/
pmount / pumount
Install pmount . Mounts disks in /media/
pmount /dev/sdb1 pumount /dev/sdb1 Replace «sdb1» with your specific device path. For more information see the manpage:
pmount ("policy mount") is a wrapper around the standard mount program which permits normal users to mount removable devices without a match- ing /etc/fstab entry. pmount is invoked like this: pmount device [ label ] This will mount device to a directory below /media if policy is met (see below). If label is given, the mount point will be /media/label, otherwise it will be /media/device. Thanks, I knew how to do the accepted answer but was looking for something a bit easier that didn’t leave me having to clear up empty folders myself.
Use udisksctl from package= udisks2 (in both Ubuntu and Debian). Procedure is:
- Find the ID of the block device you want to mount, using lsblk :
user@machine:~$ lsblk NAME MAJ:MIN RM SIZE RO TYPE MOUNTPOINT sda 8:0 0 1.8T 0 disk ├─sda1 8:1 0 19.1M 0 part /boot/efi ├─sda2 8:2 0 1.8T 0 part └─sda3 8:3 0 16G 0 part [SWAP] sdb 8:16 0 931.5G 0 disk ├─sdb1 8:17 0 37M 0 part ├─sdb2 8:18 0 15.9G 0 part [SWAP] └─sdb3 8:19 0 915.7G 0 part / sdc 8:32 1 14.4G 0 disk └─sdc1 8:33 1 14.4G 0 part sdd 8:48 0 1.8T 0 disk └─sdd1 8:49 0 1.8T 0 part user@machine:~$ udisksctl mount --block-device /dev/sdc1 ==== AUTHENTICATING FOR org.freedesktop.udisks2.filesystem-mount === Authentication is required to mount Kingston DT microDuo 3C (/dev/sdc1) Multiple identities can be used for authentication: 1. XXXXX. (user) 2. . (YYYYY) Choose identity to authenticate as (1-2): 1 Password: ==== AUTHENTICATION COMPLETE === Mounted /dev/sdc1 at /media/user/USBDRIVELABEL. Addressing Hans Deragon’s comment below: you can also tell udisksctl to do —no-user-interaction . It does not attempt to authenticate the user, which usually «just works»:
user@machine:~$ udisksctl mount --block-device /dev/sdc1 --no-user-interaction # possibly some complaining here about I/O charset or need to run `fsck` Mounted /dev/sdc1 at /media/user/USBDRIVELABEL. In addition to using the standard mount command (which requires root) you can mount drives using udisks and dbus with your standard user.
To do this it is useful (but not required) to know a few things about the drive first:
Knowing these you can use a simple command to mount a drive from the command line.
gdbus call --system --dest org.freedesktop.UDisks --object-path /org/freedesktop/UDisks/devices/ --method org.freedesktop.UDisks.Device.FilesystemMount "" [] this call should echo the path it is mounted at if the mount succeeds.
To unmount drives mounted in this way you can run:
gdbus call --system --dest org.freedesktop.UDisks --object-path /org/freedesktop/UDisks/devices/ --method org.freedesktop.UDisks.Device.FilesystemUnmount [] N.B. the is simply the end of the path to it. So for example if what you want to mount is at /dev/sdb2 then you would put sdb2 in place of .
If you do not know which device it is or what filesystem it uses do not fear. You can easily print out all that information with this little command:
gdbus introspect --system --dest org.freedesktop.UDisks --object-path /org/freedesktop/UDisks/devices --recurse --only-properties | grep -E "(readonly .+ (IdLabel|IdType|Device(IsMounted|IsDrive|File) ).*|\>|.*\<)" This will print out something like this:
node /org/freedesktop/UDisks/devices < node /org/freedesktop/UDisks/devices/sda < interface org.freedesktop.UDisks.Device < readonly s IdLabel = ''; readonly s IdType = ''; readonly s IdUsage = ''; readonly b DeviceIsMounted = false; readonly s DeviceFile = '/dev/sda'; >; >; node /org/freedesktop/UDisks/devices/sda1 < interface org.freedesktop.UDisks.Device < readonly s IdLabel = 'SYSTEM'; readonly s IdType = 'ntfs'; readonly s IdUsage = 'filesystem'; readonly b DeviceIsMounted = false; readonly s DeviceFile = '/dev/sda1'; >; >; node /org/freedesktop/UDisks/devices/sda2 < interface org.freedesktop.UDisks.Device < readonly s IdLabel = 'Windows7'; readonly s IdType = 'ntfs'; readonly s IdUsage = 'filesystem'; readonly b DeviceIsMounted = true; readonly s DeviceFile = '/dev/sda2'; >; >; node /org/freedesktop/UDisks/devices/sda3 < interface org.freedesktop.UDisks.Device < readonly s IdLabel = 'Recovery'; readonly s IdType = 'ntfs'; readonly s IdUsage = 'filesystem'; readonly b DeviceIsMounted = false; readonly s DeviceFile = '/dev/sda3'; >; >; node /org/freedesktop/UDisks/devices/sda4 < interface org.freedesktop.UDisks.Device < readonly s IdLabel = ''; readonly s IdType = ''; readonly s IdUsage = ''; readonly b DeviceIsMounted = false; readonly s DeviceFile = '/dev/sda4'; >; >; node /org/freedesktop/UDisks/devices/sda5 < interface org.freedesktop.UDisks.Device < readonly s IdLabel = ''; readonly s IdType = 'ext4'; readonly s IdUsage = 'filesystem'; readonly b DeviceIsMounted = true; readonly s DeviceFile = '/dev/sda5'; >; >; node /org/freedesktop/UDisks/devices/sda6 < interface org.freedesktop.UDisks.Device < readonly s IdLabel = ''; readonly s IdType = 'swap'; readonly s IdUsage = 'other'; readonly b DeviceIsMounted = false; readonly s DeviceFile = '/dev/sda6'; >; >; node /org/freedesktop/UDisks/devices/sda7 < interface org.freedesktop.UDisks.Device < readonly s IdLabel = ''; readonly s IdType = 'ext4'; readonly s IdUsage = 'filesystem'; readonly b DeviceIsMounted = true; readonly s DeviceFile = '/dev/sda7'; >; >; node /org/freedesktop/UDisks/devices/sdb < interface org.freedesktop.UDisks.Device < readonly s IdLabel = ''; readonly s IdType = ''; readonly s IdUsage = ''; readonly b DeviceIsMounted = false; readonly s DeviceFile = '/dev/sdb'; >; >; node /org/freedesktop/UDisks/devices/sdb1 < interface org.freedesktop.UDisks.Device < readonly s IdLabel = 'USB DRIVE'; readonly s IdType = 'vfat'; readonly s IdUsage = 'filesystem'; readonly b DeviceIsMounted = false; readonly s DeviceFile = '/dev/sdb1'; >; >; node /org/freedesktop/UDisks/devices/sr0 < interface org.freedesktop.UDisks.Device < readonly s IdLabel = ''; readonly s IdType = ''; readonly s IdUsage = ''; readonly b DeviceIsMounted = false; readonly s DeviceFile = '/dev/sr0'; >; >; >; Those that have IdUsage = 'filesystem' may be mounted using the above command.
This means that, for example, if i wanted to mount the device 'USB DRIVE' i would run the command
gdbus call --system --dest org.freedesktop.UDisks --object-path /org/freedesktop/UDisks/devices/sdb1 --method org.freedesktop.UDisks.Device.FilesystemMount "vfat" [] These commands all work using the dbus messaging system, the same way that Nautilus and other file managers auto-mount things. In these commands we are sending various objects (i.e. /org/freedesktop/. messages asking them to mount and unmount certain devices. They might or might not do this depending on the permissions one has been given in PolicyKit .
Using similar commands one can control almost every aspect of ones experience in Ubuntu and simulate most system programs and functions (i.e. shutdown, volume change, etc.).
Как вручную монтировать/размонтировать USB-устройство в Ubuntu
Когда вы подключаете USB-накопитель к нашей системе, он обычно монтируется автоматически, и в папке носителя создается каталог с вашим именем пользователя. Вы также можете получить к нему доступ через файловый менеджер вашей системы. К сожалению, это не всегда так; иногда для доступа к USB-накопителю необходимо вручную смонтировать его в системе.
В этом руководстве мы расскажем, как вручную монтировать и размонтировать USB-накопитель в системе. Команды и шаги, описанные в этой статье, будут работать на любой последней версии Ubuntu, включая Ubuntu 22.04.
Как подключить USB-накопитель в Ubuntu
Давайте выполним следующие шаги, чтобы подключить USB-накопитель вручную к вашей системе:
Шаг 1: Подключите USB-накопитель к свободному порту.
Шаг2: Выполните следующую команду от имени sudo в приложении Terminal, чтобы проверить доступные устройства хранения данных в вашей системе и файловую систему, которую они используют:
![]()
Ваше USB-устройство обычно будет перечислено в конце вывода в основном как sdb-(номер). В нашем случае оно указано как sdb1, работающее с файловой системой FAT32.
Шаг 3: Создайте точку монтирования для вашего USB-устройства с помощью следующей команды:
sudo mkdir /media/[ИмяТочкиМонтирования]Имя точки монтирования не должно содержать пробелов; вы можете разделять слова знаком подчеркивания '_'.
Теперь точка монтирования будет создана.
Шаг 4: Теперь мы смонтируем USB-накопитель в созданную точку монтирования. Мы будем использовать следующую команду для монтирования устройства FAT32:
sudo mount -t vfat /dev/sdb1 /media/USB -o [securityoption]Опция security является обязательной и позволяет вам предоставить/получить доступ к USB, указав одно из следующих значений для разрешения;
uid=1000 gid=1000 Utf8 dmask=027 fmask=137В этом примере я предоставляю контроль доступа пользователю (текущему пользователю), указывая идентификатор пользователя:
sudo mount -t vfat /dev/sdb1 /media/USB -o uid=1000Для NTFS используйте следующую команду:
sudo mount -t ntfs-3g /dev/sdb1 /media/USBШаг 5: Теперь ваш USB смонтирован. Вы можете получить доступ к нему через папку media.
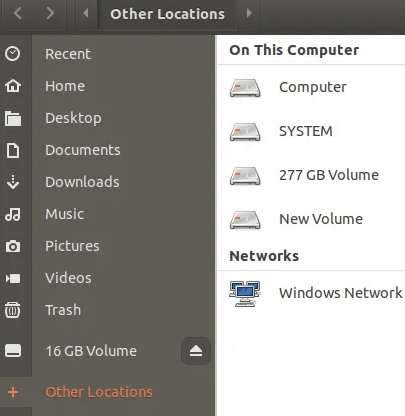
Вы также можете получить доступ к USB через файловый менеджер. На следующем изображении том 16 ГБ, указанный прямо над "Другими местами", является моим смонтированным USB-накопителем.
Как размонтировать USB-накопитель в Ubuntu
Если вы смонтировали USB-накопитель вручную, то лучше всего даже размонтировать его вручную.
Шаг 1: Используйте следующую команду, чтобы размонтировать USB:
В приведенной выше команде укажите точку монтирования, если она отличается от точки монтирования 'USB', которую я использовал.
Шаг 2: Вам нужно будет вручную удалить каталог точки монтирования USB, если вы не планируете использовать его в будущем:
Шаг3: Отключите USB от вашей системы.
После выполнения шагов, описанных в этой статье, вы сможете успешно монтировать и размонтировать USB-накопитель в систему и из системы. Это поможет вам, если ваша система не сможет автоматически сделать USB доступным для доступа и использования.