- How to Connect to Wi-Fi Speakers? (Setup Instructions)
- How Do Wi-Fi Speakers Work?
- How to Connect Wi-Fi Speakers to a Wireless Network Using the WPS Button?
- Connecting Wi-Fi Speakers to an Android Device
- Connecting Wi-Fi Speakers to an iOS Device
- Connecting Wi-Fi Speakers to a Windows PC
- Pros of Wi-Fi Speakers
- Wireless
- Better Range
- Better Sound Quality
- Compatible with Multiple Devices
- Cons of Wi-Fi Speakers
- Connectivity Issues
- Less Portable
- Conclusion
- Bluetooth, WIFI колонка Xiaomi Mi Smart Network Speaker с AirPlay и DLNA
- Характеристики
- Внешний вид
- Начало работы с колонкой
- WIFI
- Теперь о звуке
How to Connect to Wi-Fi Speakers? (Setup Instructions)
From Bluetooth soundbars to Wi-Fi home theaters, wireless speakers have recently become the “in-thing” and are slowly taking over from the dominant wired audio options.
These speakers don’t require wires or cables, effectively decluttering your home from the unsightly connections running below your carpets and along your walls.
Even though wired speakers seemingly deliver better sound quality, Wi-Fi speakers have advanced over the years, narrowing the gap and making it impossible to notice the difference.
The best part is that you can wirelessly connect your smartphone, laptop, tablet, or smart TV to your Wi-Fi speakers for a stimulating audio experience.
You only need to plug your Wi-Fi speakers into a wall outlet and ensure you have an active internet connection to integrate them with your smart entertainment unit.
However, since Wi-Fi speakers are relatively new, connecting them to your device can be challenging.
So, in this tutorial, you will learn how to connect to Wi-Fi speakers to take your entertainment to the next level.
How Do Wi-Fi Speakers Work?
Before setting up your Wi-Fi speakers, you may need to learn how they work and produce sound.
Generally, Wi-Fi speakers work by connecting to your local Wi-Fi network to enable them to receive audio signals from your wireless devices such as smartphones, tablets, laptops, and smart TVs.
These speakers have a built-in wireless adapter that makes them Wi-Fi-compatible for seamless wireless connections.
They connect to your Wi-Fi network like any other Wi-Fi-enabled device and communicate with other connected gadgets within the network.
Audio signals travel from the source device, such as a smartphone or smart TV, to the Wi-Fi speakers via the router .
You can use your Wi-Fi speakers to play audio files without issues so long as the speakers are within the coverage area.
Wi-Fi Speakers Vs. Wired Speakers Vs. Bluetooth Speakers

How to Connect Wi-Fi Speakers to a Wireless Network Using the WPS Button?
You must connect your Wi-Fi speakers to your wireless network before setting it up to play audio files from your source device.
The quickest way to connect your Wi-Fi speakers to your Wi-Fi network is through the Wi-Fi Protected Setup (WPS) button.
Most Wi-Fi speakers and routers have a WPS button for easy connectivity between compatible devices.
WPS is a feature that allows you to create a secure network between devices without requiring a password.
Here are the steps to connect your Wi-Fi speakers to your home network using the WPS button:
- Place your Wi-Fi speakers next to your wireless router.
- Turn on the speakers.
- Press and hold the WPS button on the speakers (usually found on the rear)
- Wait for a beep sound before releasing the WPS button.
- Within 2 minutes, press the WPS button on the wireless router until the status lights start to flash or blink green.
Connecting Pioneer Wi-Fi Speaker to Wi-Fi via WPS Button
Connecting Wi-Fi Speakers to an Android Device
After connecting your Wi-Fi speakers to your home Wi-Fi, proceed to connect it to your Android or iOS device.
- Go to Google Play Store on your smartphone.
- Download and install the appropriate app for your Wi-Fi speakers, such as Play-Fi, Muzo Player, or the proprietary app that came with your speakers
- Turn on your speakers.
- Launch the downloaded app on your Android smartphone or tablet
- Tap the Wi-Fi Setup Wizard on the app
- Enter your Wi-Fi password
- Press the WPS button on the speakers (your speakers will search for a Wi-Fi connection)
- Tap Next on the Wi-Fi Setup Wizard to connect your Android device to your speakers
Setting Up B&O Beoplay M5 Wi-Fi Speaker

Connecting Wi-Fi Speakers to an iOS Device
Connecting your iOS device to your Wi-Fi speakers is equally easy since it follows a similar procedure as connecting them to an Android device.
- Go to Apple App Store on your smartphone.
- Download and install the appropriate app for your Wi-Fi speakers, such as Play-Fi, Muzo Player, or the recommended app for your speakers
- Turn on your speakers.
- Launch the downloaded app on your iOS device
- Tap the Wi-Fi Setup Wizard on the app
- Enter your Wi-Fi password
- Press the WPS button on the speakers (your speakers will search for a Wi-Fi connection)
- Tap Next on the Wi-Fi Setup Wizard to connect your iOS device to your speakers
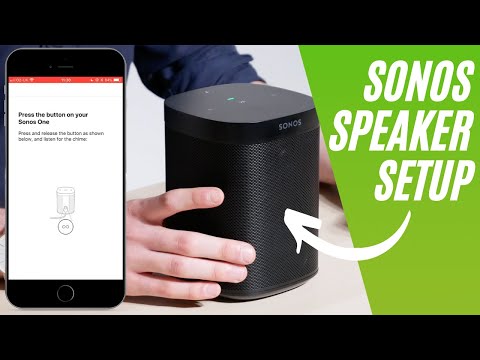
Setting Up SONOS One Wi-Fi Speaker
Connecting Wi-Fi Speakers to a Windows PC
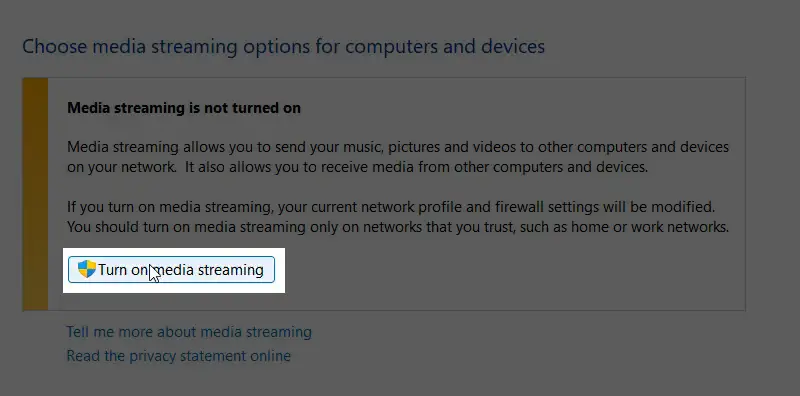
You must enable DLNA casting on Windows and turn on media streaming to connect Wi-Fi speakers to your laptop or desktop.
But first, you must connect your Wi-Fi speakers to your local network, as explained in the previous section.
Once your speakers are on your network, you can proceed to enable DNLA casting and media streaming.
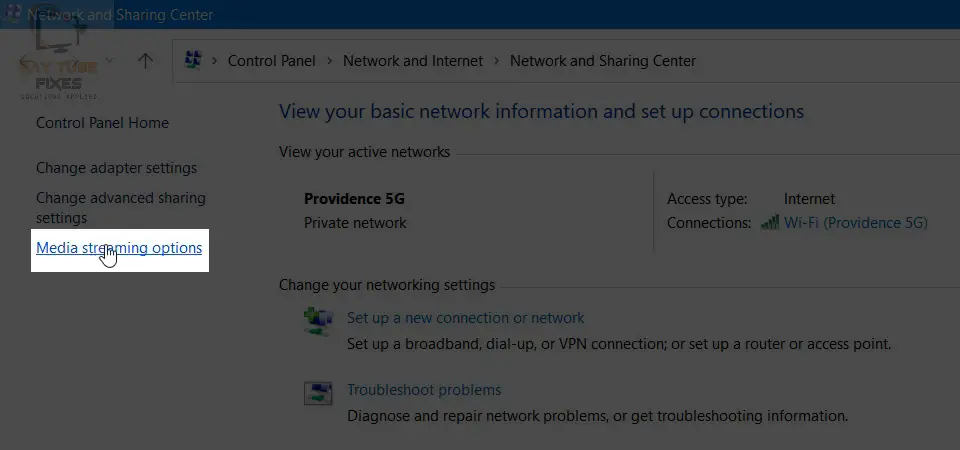
- Your computer will display your Wi-Fi speakers under “show devices on a local network.”
- Click OK to apply the settings.
Pros of Wi-Fi Speakers
Wireless
The main advantage of Wi-Fi speakers is that they don’t require wires or cables, effectively keeping your space neat.
Better Range
Wi-Fi speakers have a better range than other wireless options, such as Bluetooth. You can play and stream content anywhere within your space so long as the speakers are within the coverage area .
Better Sound Quality
Wi-Fi speakers usually produce better sound quality than Bluetooth speakers since they rely on Wi-Fi connections that can handle large data streams.
Compatible with Multiple Devices
Wi-Fi speakers are compatible with multiple devices, such as smartphones, tablets, laptops, and smart TVs.
Cons of Wi-Fi Speakers
Connectivity Issues
Connecting to Wi-Fi speakers can be a long and tedious task if you don’t know what to do.
Less Portable
Wi-Fi speakers are less portable since they must be connected to a wall outlet to remain powered during play.
Conclusion
Connecting to Wi-Fi speakers can be tricky if you don’t know what to do or where to begin.
Fortunately, you can use our handy tips to connect to Wi-Fi speakers with your smartphone, tablet, or computer.

Hey, I’m Jeremy Clifford. I hold a bachelor’s degree in information systems, and I’m a certified network specialist. I worked for several internet providers in LA, San Francisco, Sacramento, and Seattle over the past 21 years.
I worked as a customer service operator, field technician, network engineer, and network specialist. During my career in networking, I’ve come across numerous modems, gateways, routers, and other networking hardware. I’ve installed network equipment, fixed it, designed and administrated networks, etc.
Networking is my passion, and I’m eager to share everything I know with you. On this website, you can read my modem and router reviews, as well as various how-to guides designed to help you solve your network problems. I want to liberate you from the fear that most users feel when they have to deal with modem and router settings.
My favorite free-time activities are gaming, movie-watching, and cooking. I also enjoy fishing, although I’m not good at it. What I’m good at is annoying David when we are fishing together. Apparently, you’re not supposed to talk or laugh while fishing – it scares the fishes.
Bluetooth, WIFI колонка Xiaomi Mi Smart Network Speaker с AirPlay и DLNA
Данная акустическая система может воспроизводить музыку по WiFi, Bluetooth, AUX, USB. Колонка имеет неплохой звук и сравнительно небольшую стоимость. Подробности ниже.
Характеристики
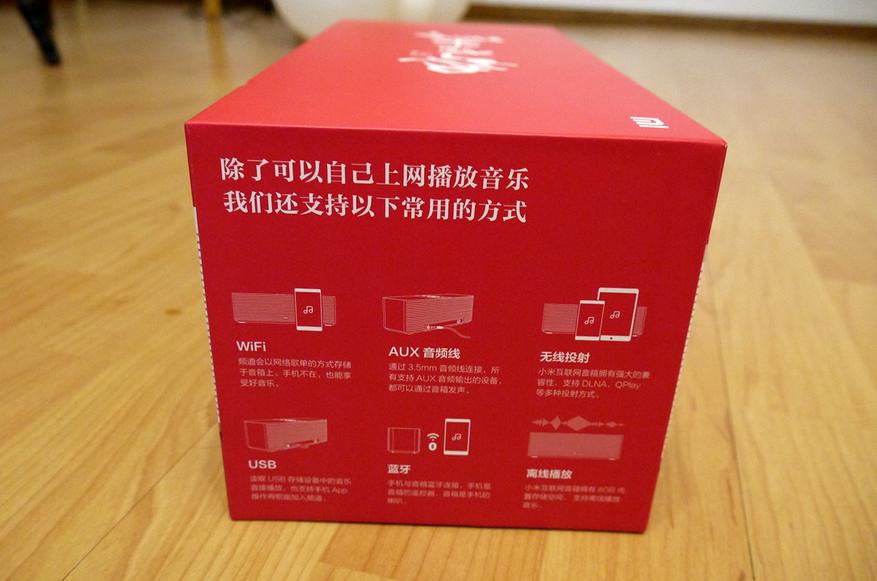
- Воспроизведение звука через: Wi-Fi, Bluetooth, USB, AUX, DLNA, AirPlay
- Выходная мощность: 10 Вт х 2
- Частотный диапазон: 20 ~ 40000Hz
- Динамический диапазон: 60 — 22000Hz (-6dB)
- Отношение сигнал/шум: ≤ — 90dB / ≥ 105dB
- WiFi 802.11 a/b/g/n/ac / 2.4GHz/5GHz
- Bluetooth 4.1
- Процессор: Amlogic 8726M3 Cortex A9
- Внутренняя память: 8GB eMMC
- Питание: 100 — 240V ~ 50/60Hz
- Максимальная потребляемая мощность: 30W
- Габариты: 282 x 90 x 95 мм
- Вес: 1,6 кг
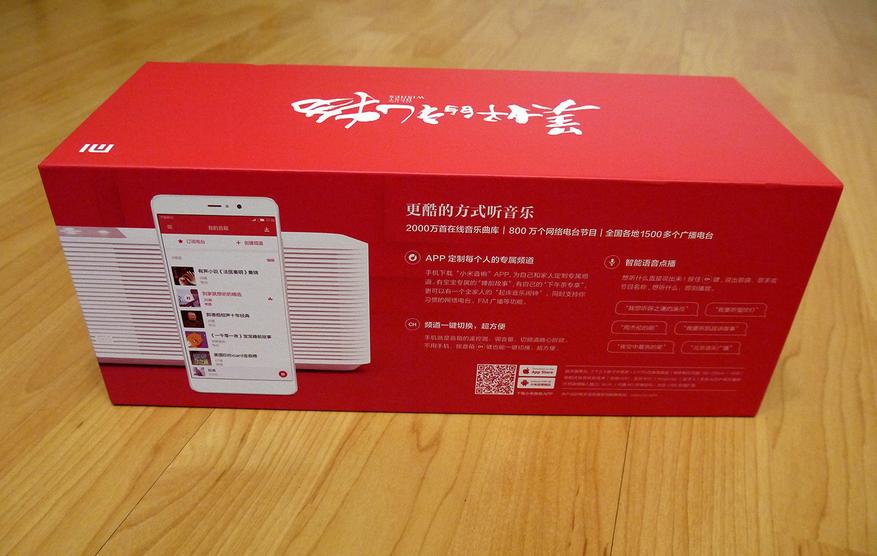
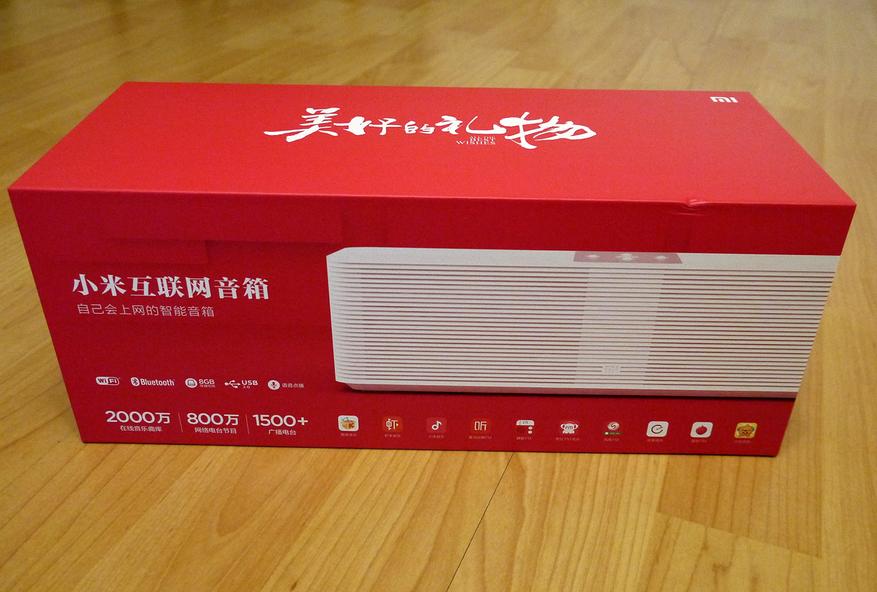
Поставляется колонка в массивной коробке, с кучей надписей на китайском
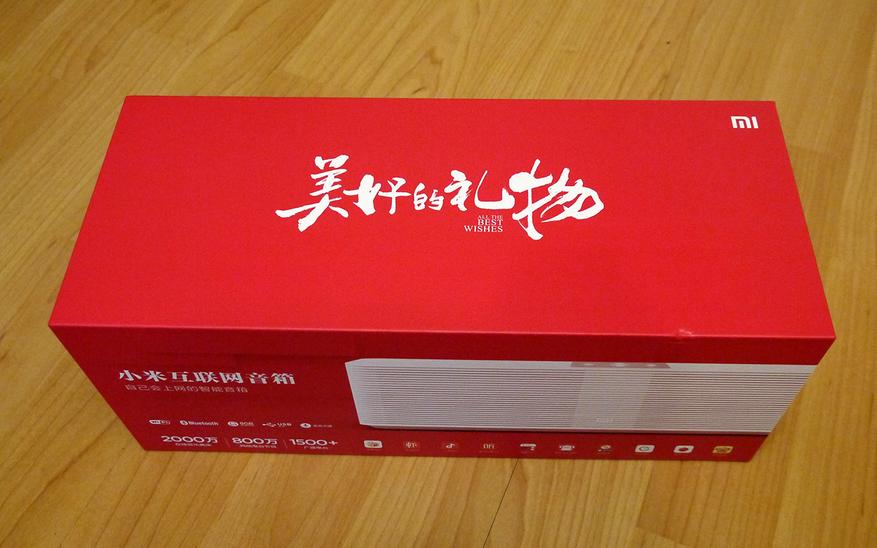
 Компания xiaomi отличается своей экономностью, комплектация любого продукта — минимальна. Не исключением стала и эта колонка, в комплекте только кабель питания, инструкция и собственно сама колонка. Хоть бы AUX кабель положили бы ради приличия 🙂
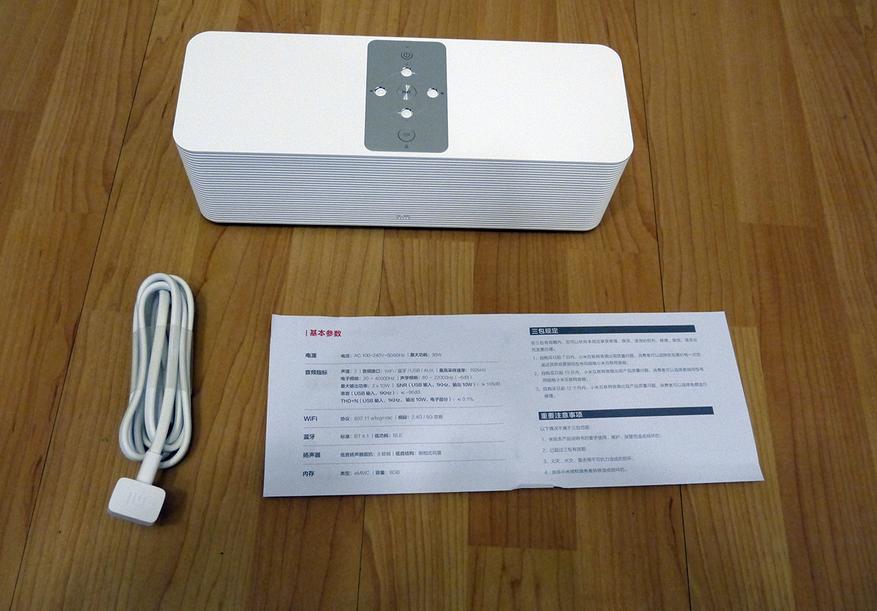 Кабель питания с китайской вилкой
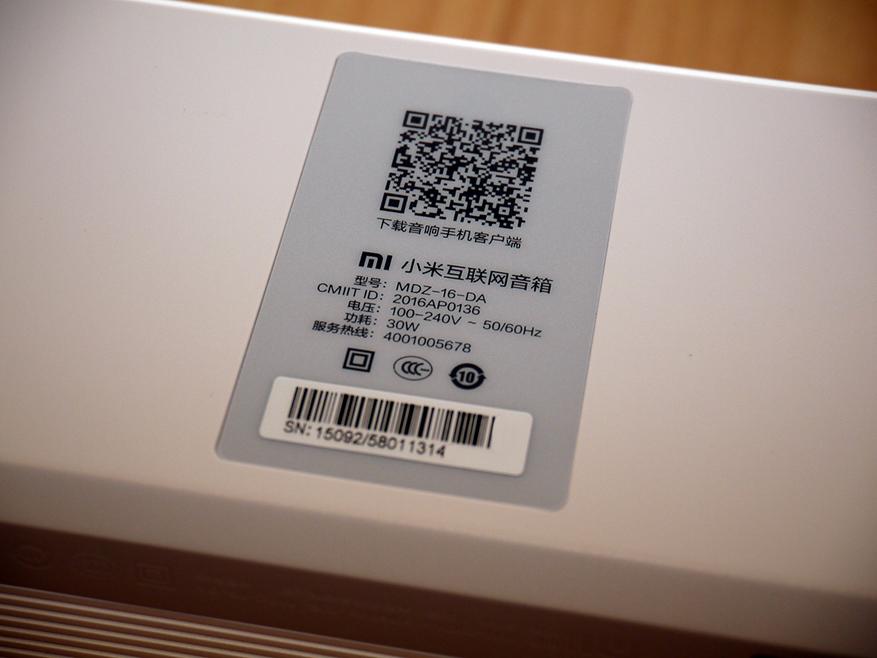
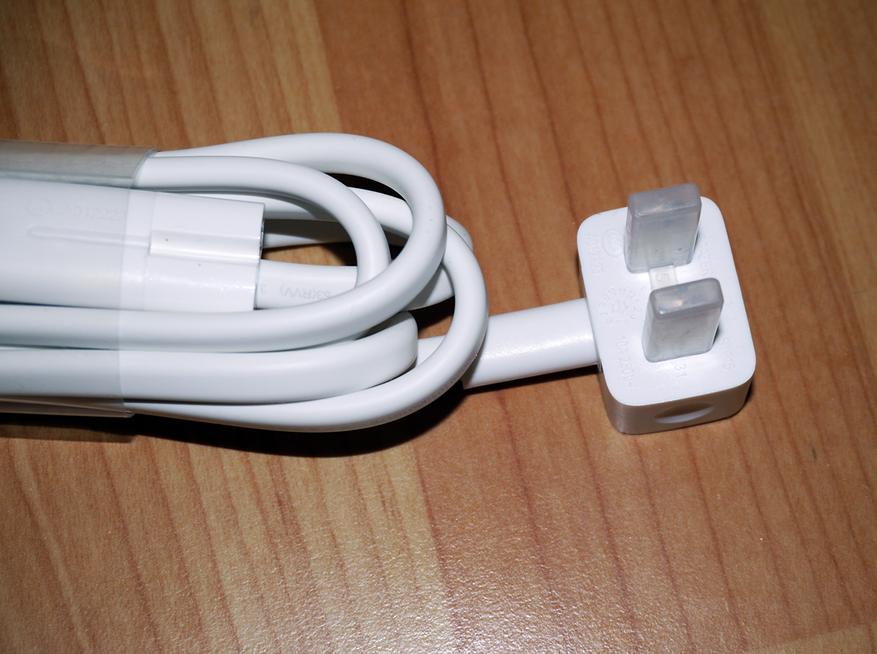 характеристики колонки с инструкции
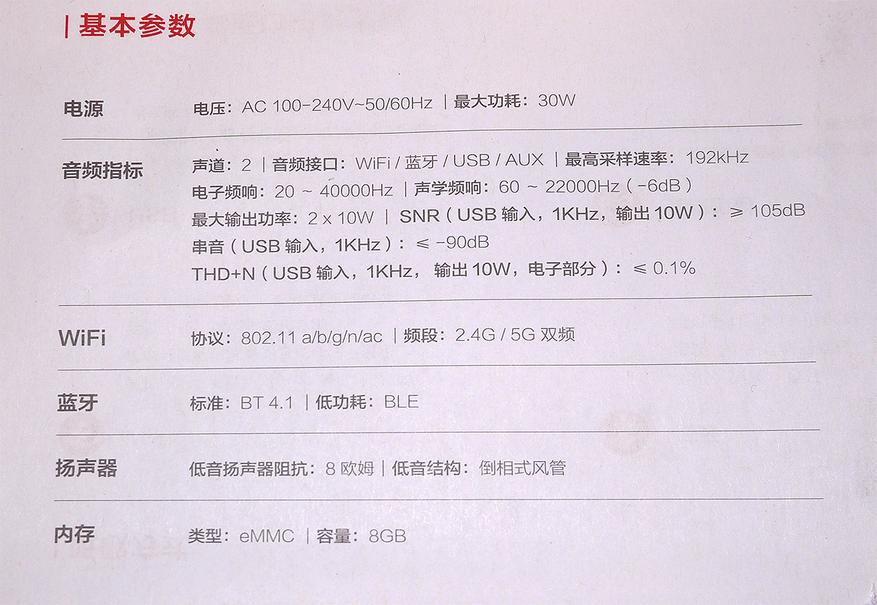
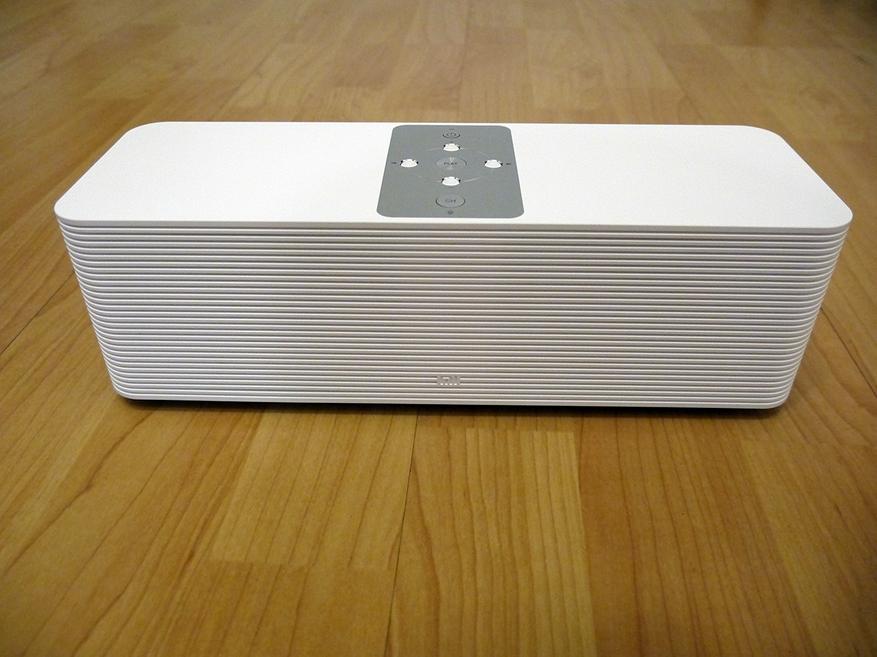
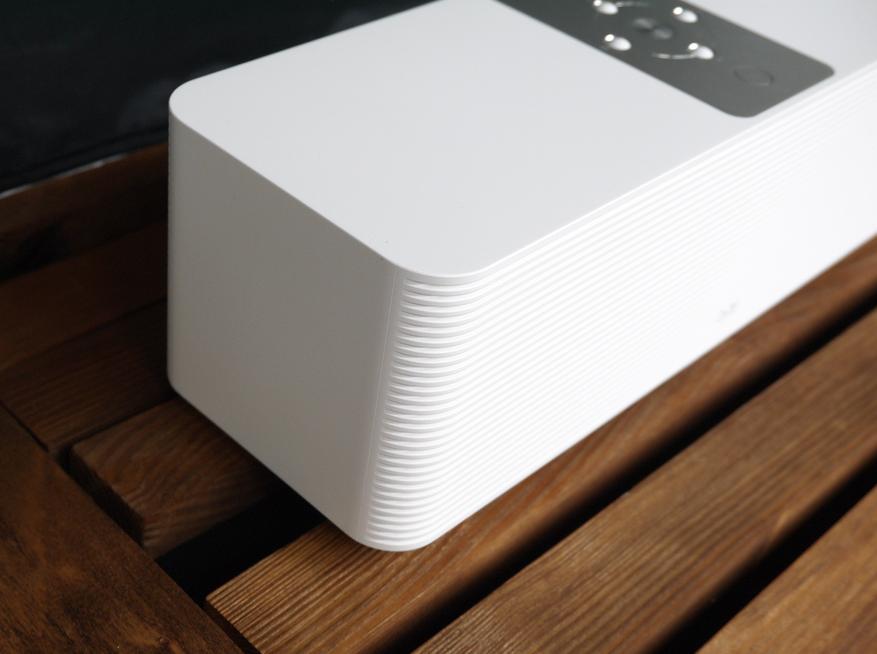
Внешний вид
Корпус изготовлен из белого матового пластика, что очень положительно сказывается на внешнем виде в процессе эксплуатации, на корпусе не видно ни отпечатков пальцев, да и та же пыль не так бросается в глаза как на черном цвете.
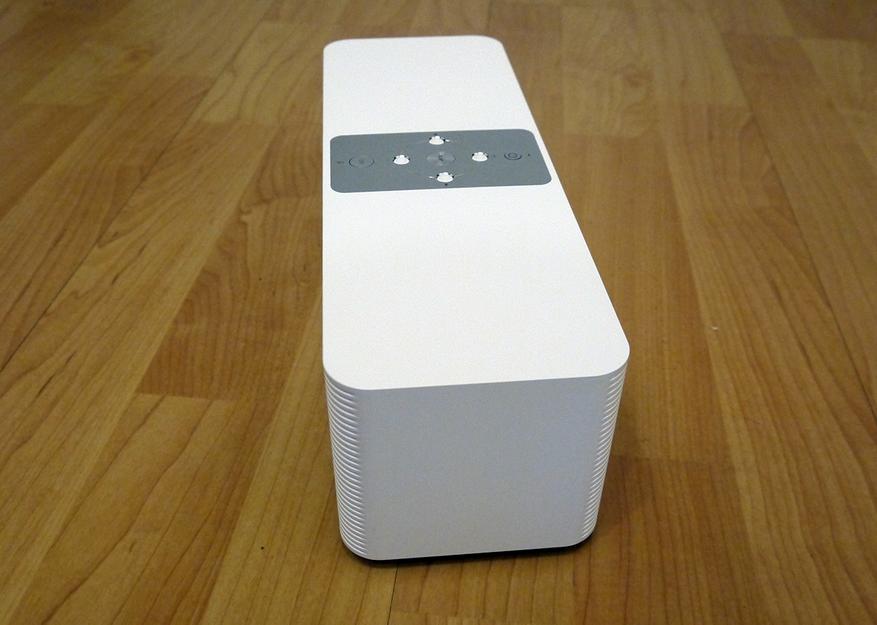
 Сзади расположились AUX, USB и разъем для подключения кабеля питания
 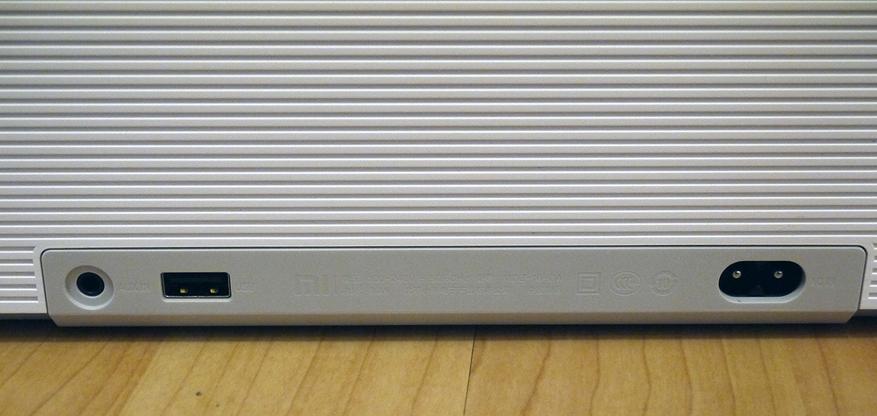 Сверху клавиши управления колонкой и светодиодный индикатор
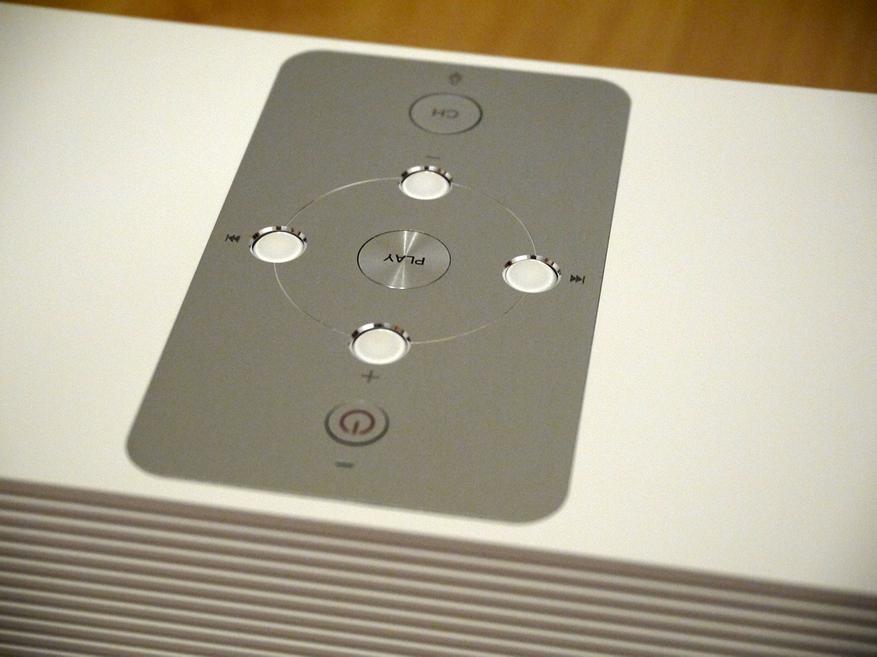
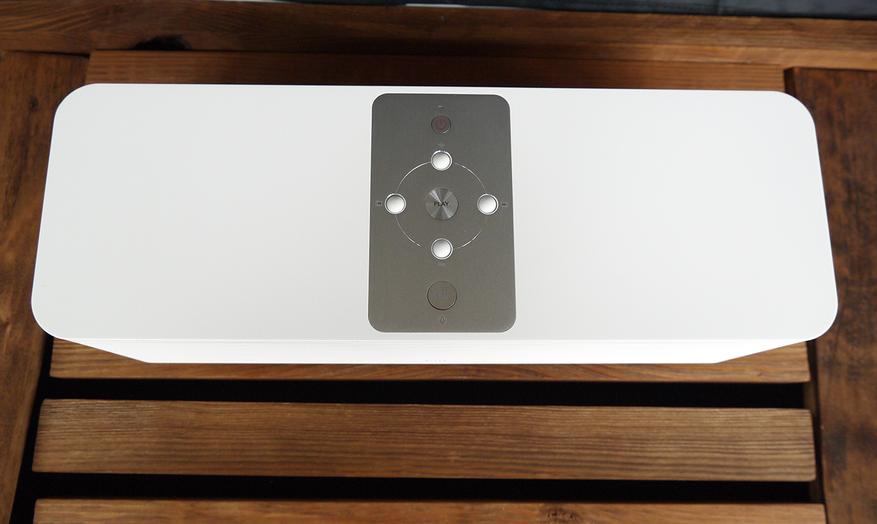
 Снизу резиновые ножки и наклейка с краткими характеристиками
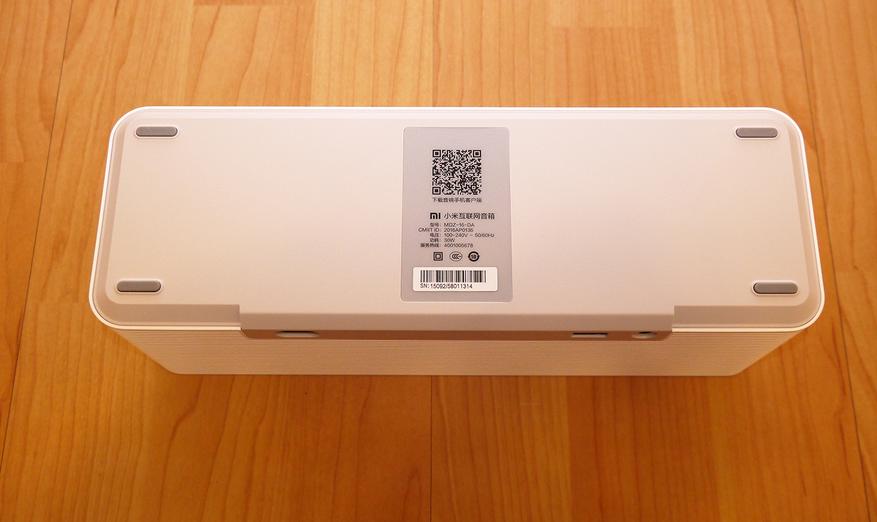
Начало работы с колонкой
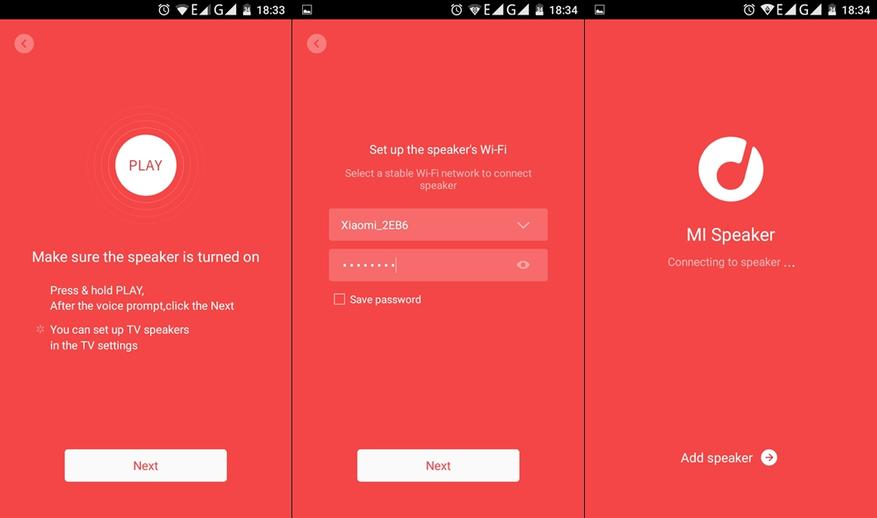
Для работы с колонкой нужно скачать приложение Mi Speaker (можно с маркета, или с 4pda есть переведенное на русский язык). Подключаем колонку к своей сети wifi (поддерживается как 2.4, так и 5Ггц)
 Когда колонка подключилась, приложение предложило обновить прошивку, от чего я конечно не отказался.
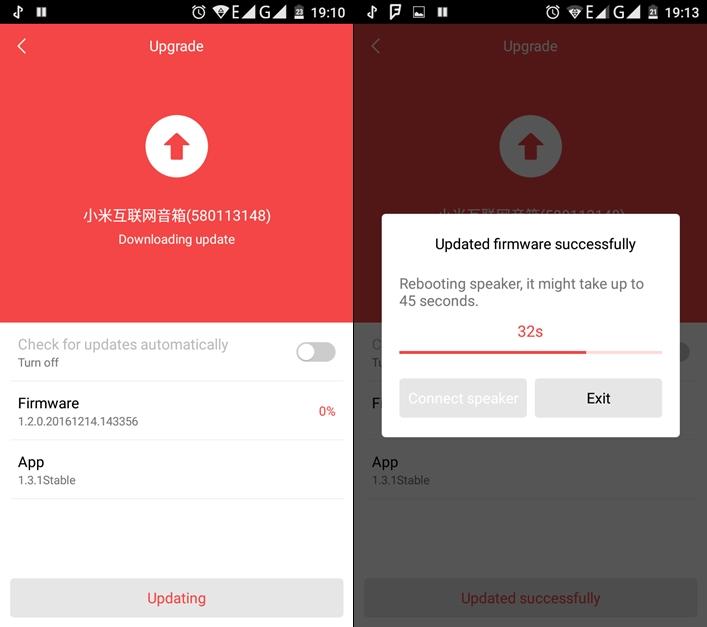 Когда колонка подключена, можно перейти к настройкам
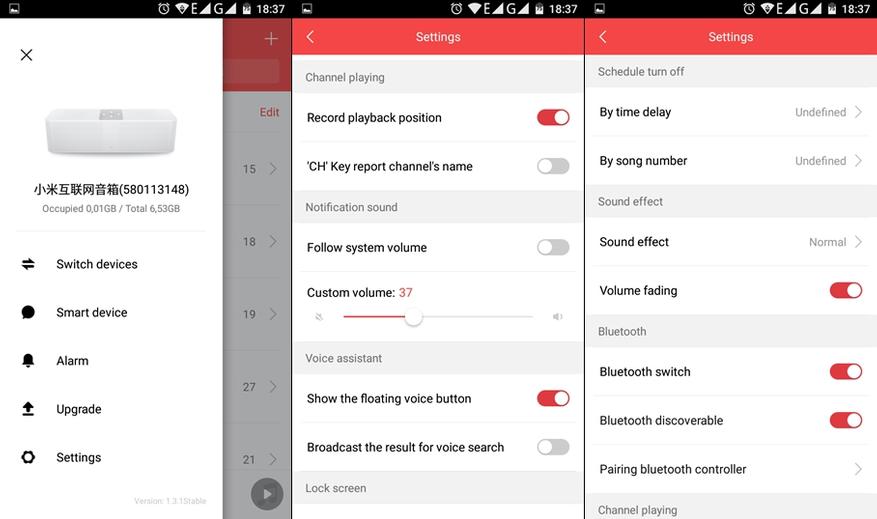 Можно установить таймер отключения колонки, будильник. С будильником правда не все так просто, нужно устанавливать по китайскому времени, тогда все работает. На будильник можно установить свою музыку.
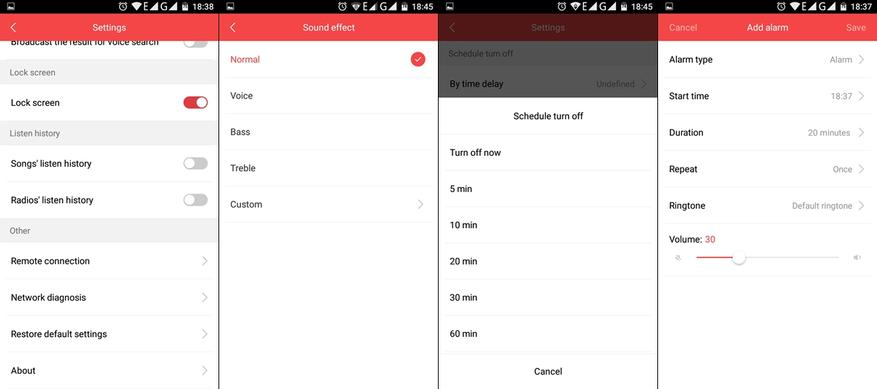
Теперь по поводу воспроизведения музыки.
Помимо того что музыку можно слушать через bluetooth (кстати можно одновременно подключить несколько устройств к колонке), есть AUX, USB и собственный накопитель на 8Гб. Думаю с этим все понятно, ничего нового, все стандартно.
WIFI
Когда-то у меня была небольшая колонка с wifi (за 25$) и к ней было приложение с радио со всего мира, можно было включить со смартфона любую станцию и колонка дальше играла самостоятельно. Выбор радиостанций был насколько большой, что находил даже радио Донецкой народной республики 😉 рок у них был неплохой))
Но в обозреваемой колонке с этим все намного хуже. Радио есть только китайское, своего добавить нельзя, разве что только посылать поток с компьютера.
С музыкой немного попроще. Можно просто закинуть на внутренний накопитель музыку, правда на 8Гб сильно не разгонишься. Закинуть можно с приложения, или через компьютер по wifi
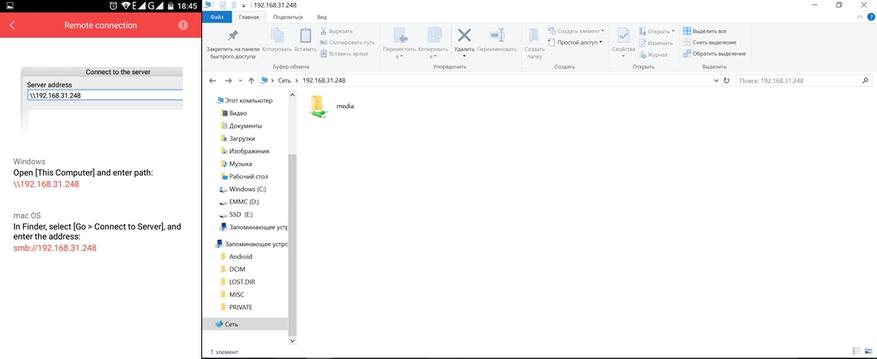
также можно воспроизводить музыку с памяти смартфона или же с USB флешки.
Но оказалось не все так плохо, можно найти много музыки онлайн в приложении Mi Speaker, создать свои плейлисты и наслаждаться своей музыкой без какого либо стороннего устройства.
Сначала ищем нужную музыку
 Добавляем ее в плейлист (у меня Плейлист 1)
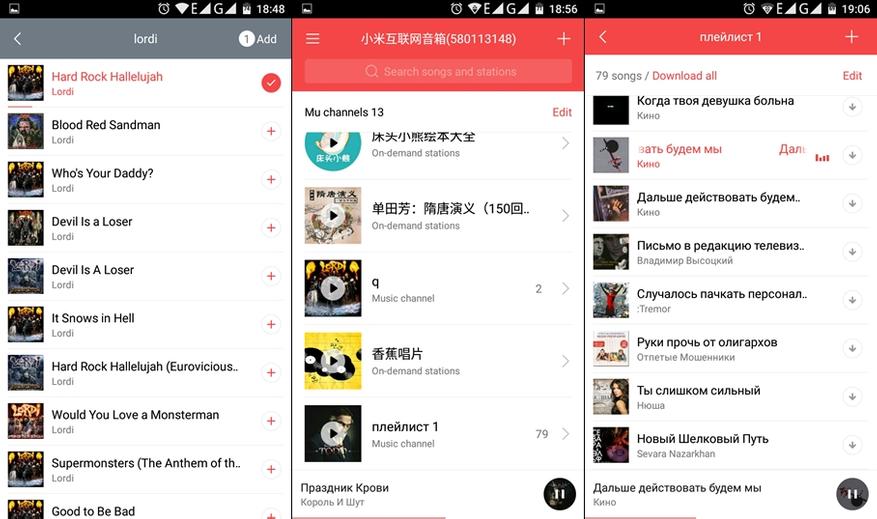 И можно слушать. Кнопкой CH можно переключаться между плейлистами.
Помимо этого можно передавать звук через AirPlay и DLNA, что тоже удобно если вы храните музыку на компьютере итд.
В общем об онлайн-радио скорее всего придется забыть, так как кроме китайского там не найти ничего толкового.
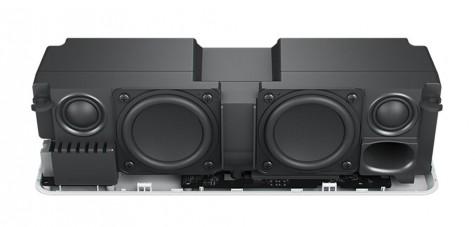
Теперь о звуке
Внутри колонки 4 динамика. Для улучшения качества звука применены 2 среднечастотных динамика диаметром 2.5 дюйма, а также 2 высокочастотных динамика-твиттера.
Номинальная звуковая мощность колонки составляет 2х10 Вт, а максимальная потребляемая мощность 30 Вт.
Колонка выдает хороший детализированный звук, низкие частоты уже ощущаются, не так как в bluetooth колонках по 30-50$. Да и размеры колонки тоже побольше будет.
На максимальной громкости колонка не хрипит, верхние частоты тоже звучат благодаря твиттерам.
Вообще описывать звук это тяжело (лично для меня), но есть хороший сайт http://switcher.oluvsgadgets.net/ на котором можно послушать как звучат разные колонки, а база у него очень большая. Так что берем хорошие наушники и сравниваем с тем что вы слушали раньше.
Лично мне звук нравится, а если еще вспомнить цену, то лучше по качеству звучания нет ничего.
В итоге я получил колонку которую подключил к телевизору через AUX, у которой настроены плейлисты с нужной музыкой, с компьютера тоже легко можно передать звук когда нужно. И все это без лишних движений, воткнул в розетку и забыл.
На этом я хотел бы закончить свой рассказ. Уверен что сказал не все, многое забыл или не знал, по-этому вопросы приветствуются;)
цена на момент написания обзора $64.99