- Spoof with kali linux
- Burpsuite
- Mitmproxy
- Wireshark
- sslstrip
- ARP spoofing using a man-in-the-middle Attack
- Some pre-requisites
- View the network interface configuration
- STEP 1:Obtain the IP configuration from the Victim
- STEP 2:Turn on the packet forwarding in Linux
- STEP 3: Redirect packages to your machine with arpspoof
- STEP 4: Intercept packages from the Router
- STEP 5: Sniffing images from the target’s browser history
- STEP 6: Sniffing URLs information from victim navigation
- Stopping the attack
- Wrapping things up:
- About the author
- Younis Said
Spoof with kali linux
Основная концепция инструментов для снифинга так же проста, как перехват данных. И Kali Linux имеет некоторые известные инструменты для этого. В этой статье вы узнаете об инструментах для снифинга и спуфинга, которые доступны в Kali Linux.
Burpsuite
Burpsuite может использоваться в качестве инструмента для снифигна между браузером и веб-сервером, для поиска параметров, используемых веб-приложением.
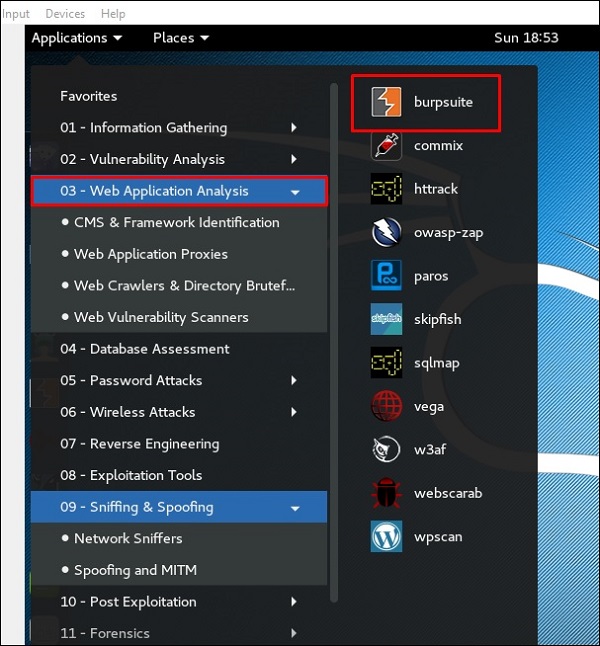
Чтобы открыть Burpsuite, перейдите в Applications → Web Application Analysis → burpsuite.
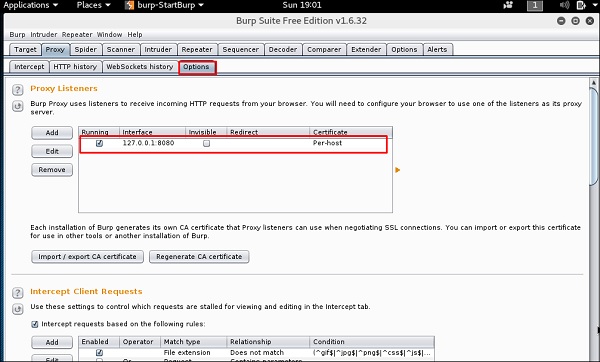
Чтобы настроить снифинг, мы настраиваем burpsuite для работы в качестве прокси-сервера. Для этого перейдите в раздел Options, установите чекбокс, как показано на следующем скриншоте.
В этом случае IP-адрес прокси-сервера будет 127.0.0.1 с портом 8080.
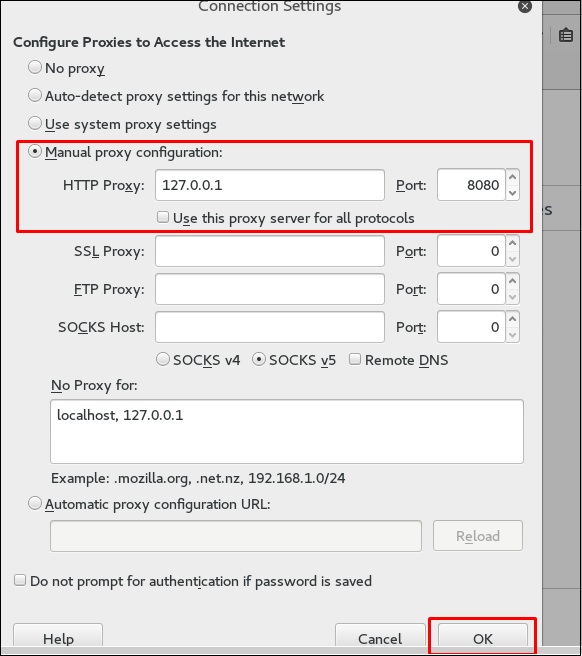
Затем настройте прокси-сервер в браузере, который и есть наш IP-адрес машины с burpsuite и порт, который был указан выше.
Чтобы начать перехват, перейдите в раздел Proxy → Intercept → нажмите “Intercept is on”.
Продолжайте пользоваться веб-страницей (сайтом) на которой вы хотите найти параметр для проверки на наличие уязвимостей.
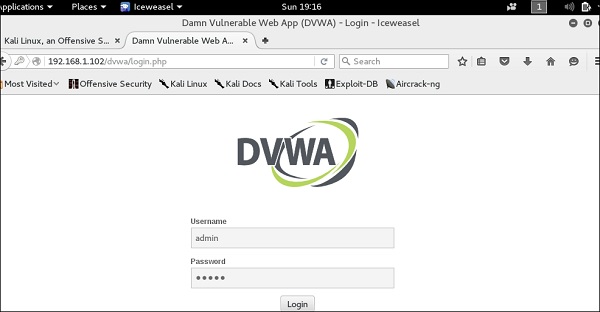
В данном случае это хост с metasploit’ом с IP 192.168.1.102
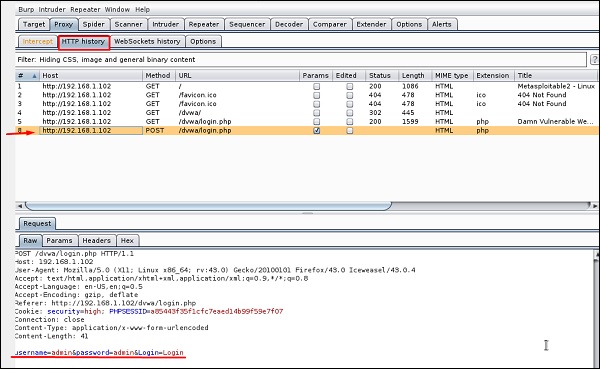
Перейдите в раздел “HTTP History”. На следующем снимке экрана строка (отмеченная красной стрелкой) показывает последний запрос. В закладке Raw (исходный код) видны скрытые параметры: идентификатор сеанса, имя пользователя и пароль (подчеркнуты красным цветом).
Mitmproxy
mitmproxy с поддерживает SSL атаку MITM (человек-в-середине) с помощью прокси-сервера http. Утилита предоставляет собой консольный интерфейс, позволяющий сканировать потоки трафика и редактировать их на лету.
Для запуска, запустите терминал и напишите
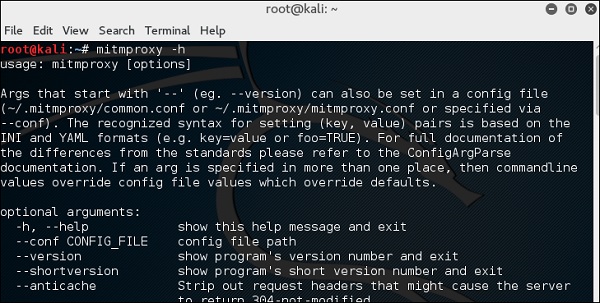
Для получения доступных команд напишите
Для запуска MITM-прокси, напишите
И на порту 80 у нас будет слушать наш прокси.
Wireshark
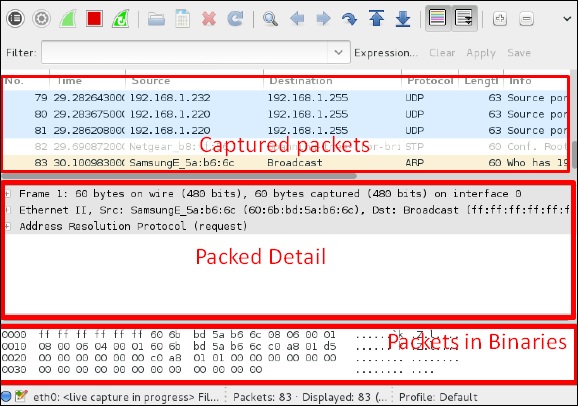
Wireshark является одним из лучших анализаторов пакетов данных. Он анализирует пакеты на уровне кадра. Вы можете получить дополнительную информацию о Wireshark на официальном сайте: https://www.wireshark.org/.
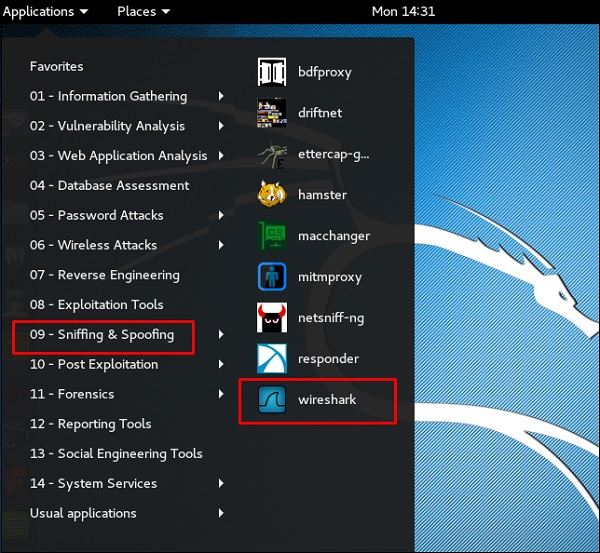
В Kali Linux она находится в Applications → Sniffing & Spoofing → wireshark.
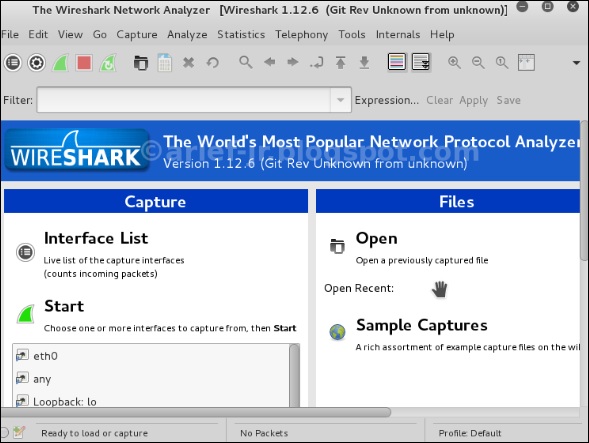
После запуска wireshark, перед нами появляется GUI.
Жмем “Start” и начинается захват пакетов на интерфейсе (показано ниже на скриншоте)
sslstrip
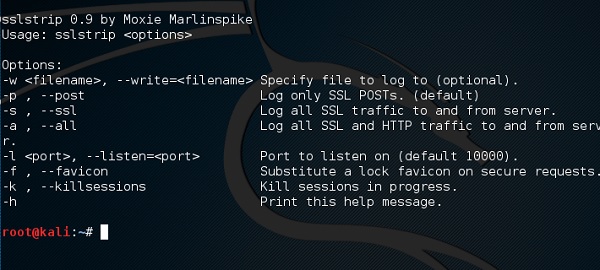
sslstrip это инструмент для MITM атаки это заставляет браузер жертвы общаться plain текстом по HTTP, и прокси изменяет содержимое, которое получено с сервера HTTPS.
https://адрес_сайта подменяется на http://адрес_сайта
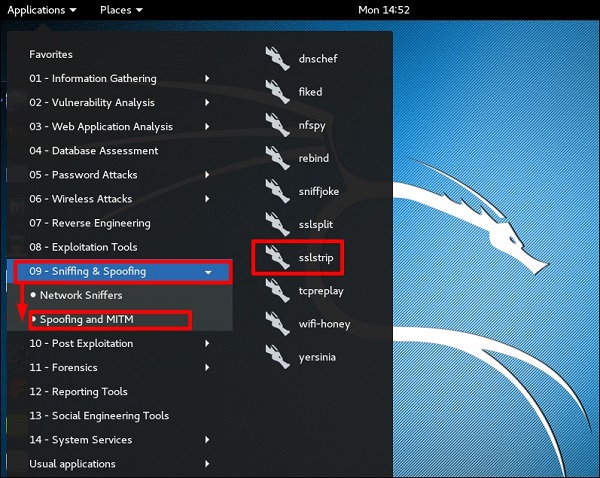
Для открытия, перейдем в Applications → 09-Sniffing & Spoofing → Spoofing and MITM → sslstrip.
Настроим заворачивание трафика так, чтобы переслать все соединения с порта 80 на 8080.
Затем запустим sslstrip на том порту, который нам необходим (8080)
# sslstrip
ARP spoofing using a man-in-the-middle Attack
Man in the Middle attacks is some of the most frequently attempted attacks on network routers. They’re used mostly to acquire login credentials or personal information, spy on the Victim, or sabotage communications or corrupt data.
A man in the middle attack is the one where an attacker intercepts the stream of back and forth messages between two parties to alter the messages or just read them.
In this quick guide, we will see how to perform a Man in the Middle attack on a device connected to the same WiFi network like ours and see what websites are often visited by them.
Some pre-requisites
The method we’re going to use will employ Kali Linux, so it’ll help to have a certain degree of familiarity with Kali before we start.
To start with our attacks, the following are crucial prerequisites:
the network interface installed on our machine
and the IP of the WiFi router that our Victim uses.
View the network interface configuration
Run the following command in the terminal to find out the name of the network interface that you’re using:
You will be displayed a long list of network interfaces, out of which you have to choose one and note it down somewhere.
As for the IP of the Router you’re using, use:
On the terminal and you will be shown the IP of your network router. Now to do further processes, I have logged in to kali root mode.
STEP 1:Obtain the IP configuration from the Victim
Next up, you need to get the IP of your Victim’s Router. This is easy, and there are several different ways you can find it out. For instance, you can use a Network Monitoring Software Tool, or you can download a routers user interface program that lets you list all the devices and their IPs on a particular network.
STEP 2:Turn on the packet forwarding in Linux
This is very important because if your machine isn’t exchanging packets, the attack will result in a failure as your internet connection will be disrupted. By enabling the packet forwarding, you disguise your local machine to act as the network router.
To turn on packet forwarding, run the following command in a new terminal:
STEP 3: Redirect packages to your machine with arpspoof
Arpspoof is a preinstalled Kali Linux utility that lets you expropriate traffic to a machine of your choice from a switched LAN. This is why Arpspoof serves as the most accurate way to redirect traffic, practically letting you sniff traffic on the local network.
Use the following syntax to start intercepting packages from the Victim to your Router:
This has only enabled the monitoring the incoming packets from the Victim to the Router. Do not close the terminal just yet as it’ll stop the attack.
STEP 4: Intercept packages from the Router
You’re doing here the same as the previous step, except it’s just reversed. Leaving the previous terminal open as it is, opens up a new terminal to start extracting packages from the Router. Type the following command with your network interface name and router IP:
You’re probably realizing at this point that we’ve switched the position of the arguments in the command we used in the previous step.
Up till now, you’ve infiltrated to the connection between your Victim and the Router
STEP 5: Sniffing images from the target’s browser history
Let’s see what websites our target like to visit often and what images do they see there. We can achieve this using specialized software called driftnet.
Driftnet is a program that lets us monitor the network traffic from certain IPs and discern images from TCP streams in use. The program can display the images in JPEG, GIF, and other image formats.
To see what images are being seen on the target machine, use the following command
STEP 6: Sniffing URLs information from victim navigation
You can also sniff out the website’s URL that our Victim often visits. The program we’re going to use is a command-line tool known as urlsnarf. It sniffs out and saves the HTTPs request from a designated IP in the Common log format. Fantastic utility to perform offline post-processing traffic analysis with other network forensics tools.
The syntax you’ll put in the command terminal to sniff out the URLs is:
As long as each terminal is functional and you’ve accidentally not closed one of them, things should’ve gone smoothly for you so far.
Stopping the attack
Once you’re satisfied with what you’ve got your hands on, you may stop the attack by closing each terminal. You can use the ctrl+C shortcut to go about it quickly.
And don’t forget to disable packet forwarding that you had enabled to carry out the attack. Type in the following command in the terminal:
Wrapping things up:
We’ve seen how to infiltrate a system through MITM attack and seen how to get our hands on the browser history of our Victim. There’s a whole lot you can do with the tools we’ve seen in action here, so make sure to go about seeing out walkthroughs on each of these sniffing and spoofing tools.
We hope you’ve found this tutorial helpful and that you’ve successfully carried out your first Man In the Middle attack.
About the author
Younis Said
I am a freelancing software project developer, a software engineering graduate and a content writer. I love working with Linux and open-source software.
