- How to start GUI on Ubuntu Linux Machine
- How to Install a desktop and start GUI on Ubuntu
- Pre-requisites
- Update the server
- Install tasksel utility manager
- Install a Desktop Environment on Ubuntu
- Select a Display Manager
- Install display manager
- Verify the default display manager
- Choose a Desktop Environment
- Install GNOME Desktop Environment on Ubuntu
- Reboot the server
- Was this article helpful?
- About The Author
- Ramya Santhosh
- Related Articles
- Comments Leave a Comment
- How to Install a Desktop (GUI) on an Ubuntu Server
- Update Repositories and Packages
- Install and set up Display Manager
- Install GUI on Ubuntu Server
- Ubuntu Desktop
- KDE Plasma
- XFCE
- MATE
- LXDE
- Switching between GUI
- Removing the GUI and Display Manager
- How do I boot into the console and then launch the Ubuntu desktop from it?
- 4 Answers 4
- To return to the login screen
How to start GUI on Ubuntu Linux Machine
Earlier I had written an article on How to start GUI on CentOS 8. After this article was read by one of my readers, he asked me to write a similar article for Ubuntu. Typically any Linux servers (CentOS or Ubuntu) don’t provide Graphical User Interface (GUI) as it adds up in RAM & CPU usage. This article explains how to install a desktop and start GUI on Ubuntu Linux machine.
How to Install a desktop and start GUI on Ubuntu
Pre-requisites
Update the server
Log in to your Ubuntu Linux Server using SSH and update the server.
Install tasksel utility manager
Tasksel is an easy-to-use tool that installs a group of software-related packages as a coordinated “task” onto the system.
root@ubuntu:~# apt-get install tasksel
Install a Desktop Environment on Ubuntu
Select a Display Manager
A display manager is an application responsible for launching a display server and managing user authentication and login session. A few display managers are gdm , gdm3 , lightdm , slim , kdm etc., The default gdm3 is the popular display manager for GNOME desktop environment, however, it is a resource-intensive display manager. To conserve system resources, you can install lighter display managers such as lightdm , slim , etc.,
Install display manager
root@ubuntu:~# apt-get install slim
Verify the default display manager
root@ubuntu:~# cat /etc/X11/default-display-manager /usr/bin/slim
Choose a Desktop Environment
Since Ubuntu 17.10, GNOME is the default desktop environment. With more features and a wider community. GNOME 3.36 has a lot to offer in the latest Ubuntu 20.04. Find out from here the various desktop environments available.
Install GNOME Desktop Environment on Ubuntu
Opens a graphical interface. Use arrow keys to scroll the list and select Ubuntu Desktop (Space key to select).
Click here to know more on Ubuntu GNOME desktop and Ubuntu desktop
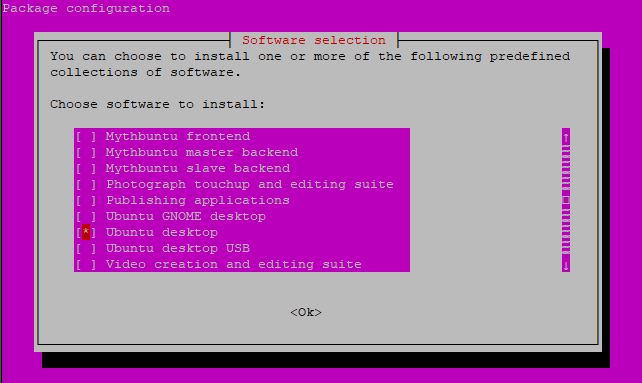
Once selected, press tab to select Ok and press Enter .
Sit back and relax, as the system will take quite a time to install the necessary software (depending on the machine and the internet connection).
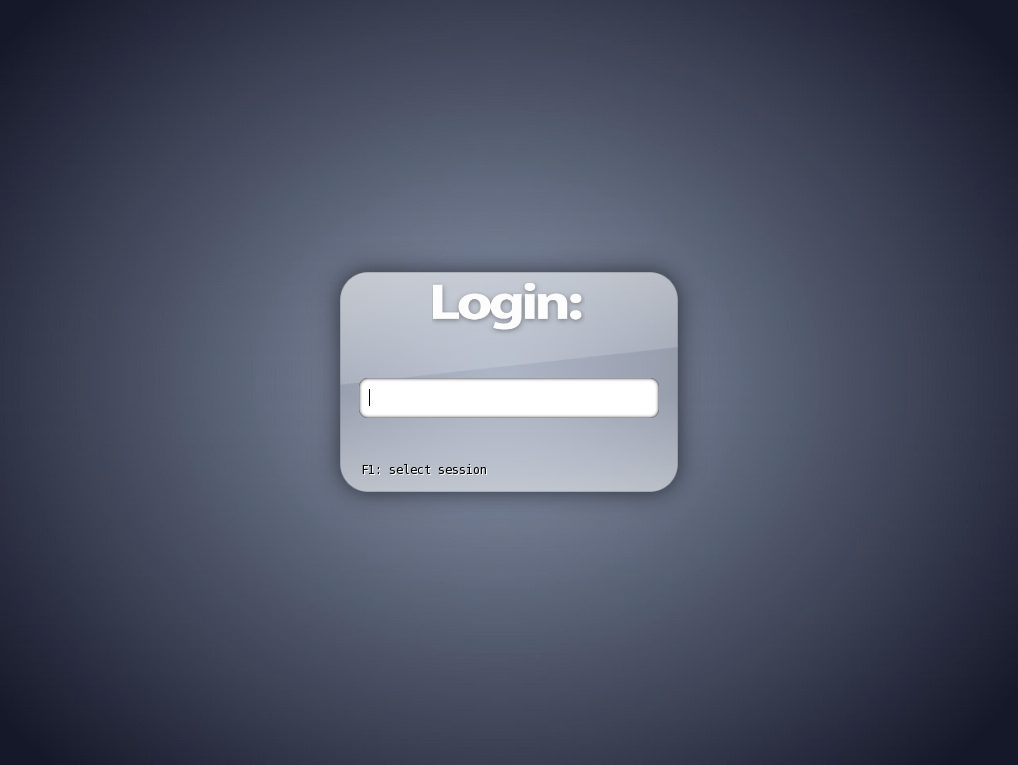
Reboot the server
After the reboot, a graphical login screen will be displayed by the display manager (In our case Slim).
Was this article helpful?
About The Author

Ramya Santhosh
is a Web Designer and content creator. A freelance writer on latest trends in technology, gadget reviews, How to’s and many more.
Related Articles
- How to shrink a qcow2 Windows VM image on Linux
- [Linux]: How to Change Hostname on CentOS/RHEL – 7/8
- No such file or directory c++ Error [CentOS]
- How to configure Open vSwitch bridge for OpenStack
- Too many connections for neutron-db-manage [MySQL]
- How to manually install higher version of PIP for Python v2.7
Comments Leave a Comment
Hi Ramya, for the past one week, my Zorin OS boots to command line only, not to desktop (gnome). Seems my personal files were as they were. What to do the system get booted to desktop by default (am new to Linux).
After rebooting I still do not get the GUI. I am trying to install this on an AWS instance. I am new to this and it is for a school project. Verifying the display manager even after reboot shows gdm3. Tasksel says I have Debian desktop environment and … GNOME installed. I am sure my problem is user error. Thanks for the article, I learned a lot from you.
After I select “gnome” I get the error message: debconf: DBDriver “config” could not write /var/cache/debconf/config.dat-new: permission denied tasksel: debconf failed to run.
How to Install a Desktop (GUI) on an Ubuntu Server
Ubuntu Server is a variant of the Ubuntu OS that does not include a graphical user interface (GUI) by default. GUI applications consume system resources needed for server-oriented tasks, so Linux server distributions usually avoid a GUI in favor of the command-line terminal.
Some tools, however, perform better and are easier to manage with a GUI. If you use a tool with a GUI, installing a desktop environment may improve the experience of working with the server.
This guide will show you how to install a desktop (GUI) graphical interface on your Ubuntu server.

- A server running Ubuntu Linux Server
- A user account with sudo or root privileges
- The apt package manager, included by default
Update Repositories and Packages
Start by ensuring the software on the server is up to date.
1. Refresh the repository and package lists, and perform the necessary upgrades with the following command:
sudo apt update && sudo apt upgrade
2. When prompted, hit Y and press Enter to start the upgrade.
Install and set up Display Manager
A display manager is an application that starts the display server, launches the desktop, and manages user authentication. The default GDM3 is a resource-intensive display manager. To conserve system resources, consider a lighter tool, such as SLiM or LightDM.
This guide uses SLiM to illustrate the rest of the GUI installation process.
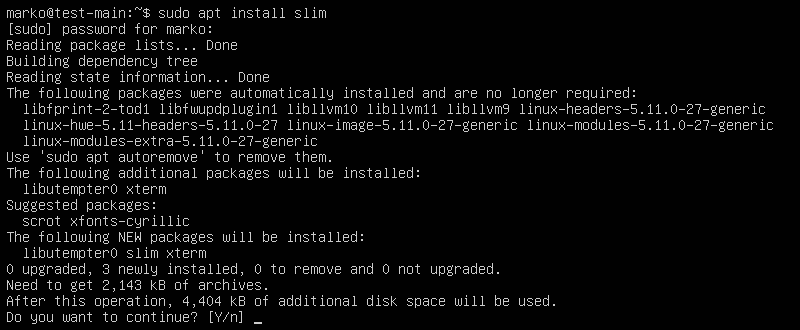
2. Press Y and then hit Enter to start the installation procedure.
Note: If you prefer to install the LightDM display manager instead, type:
Install GUI on Ubuntu Server
With a display manager installed, proceed to install a GUI. The sections below contain instructions for the most common Linux desktop environments.
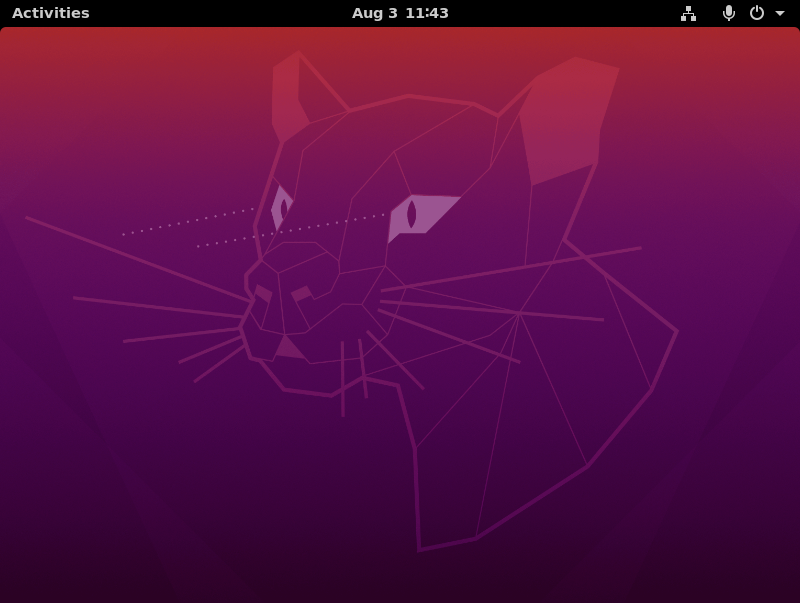
Ubuntu Desktop
The default Ubuntu Desktop is a modified version of the GNOME desktop environment.
1. Install Ubuntu Desktop by running the following command:
sudo apt install ubuntu-desktopNote: if asked, confirm slim as the default desktop manager.
2. Reboot the system when the installation finishes by typing:
Note: If you do not wish to reboot immediately, type the following command to start SLiM:
After the system reboots, a graphical login screen appears. The default display manager generates this screen.
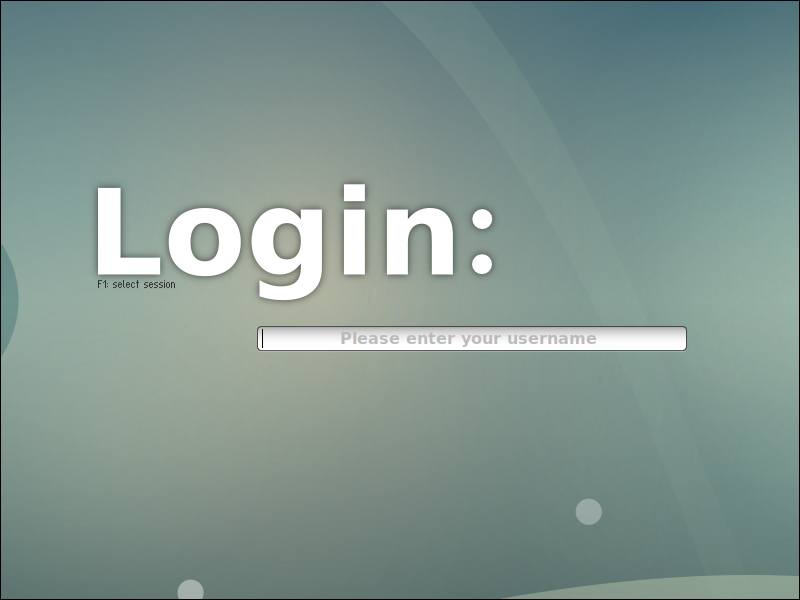
3. Type your username in the field and press Enter to reveal the password field. Enter your password to access the desktop environment.
Note: For the vanilla GNOME experience, install the following packages:
sudo apt install vanilla-gnome-desktop vanilla-gnome-default-settings
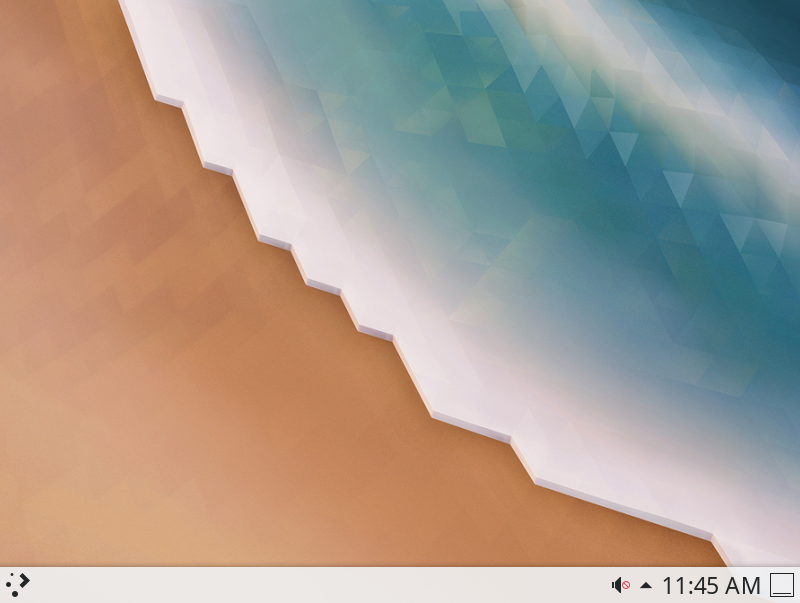
KDE Plasma
KDE Plasma is a flexible and customizable desktop environment that provides visual consistency and style while remaining fast and responsive. To install KDE Plasma, use the following command:
sudo apt install kde-plasma-desktopReboot the system and log in to access the KDE environment.
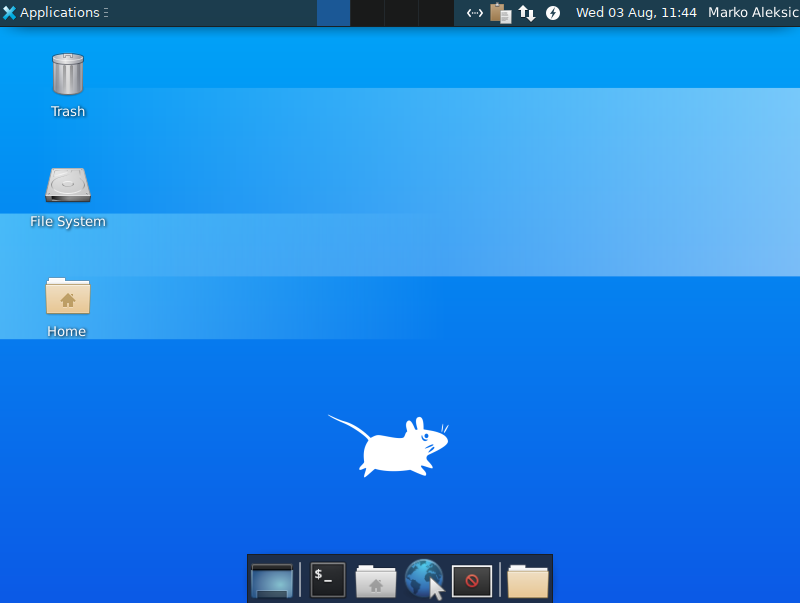
XFCE
The XFCE desktop environment is designed to be lightweight and user-friendly. The main package, xfce4-session , provides a bare-bone environment. If you want the full experience, install the xfce4-goodies package as well.
Install the packages with the following command:
sudo apt-get install xfce4-session xfce4-goodiesAfter you reboot the system and log in, the XFCE desktop appears.
MATE
MATE is a fork of GNOME 2 and a popular graphical interface designed to be light on resource consumption. Install it by executing the following command:
sudo apt install ubuntu-mate-desktop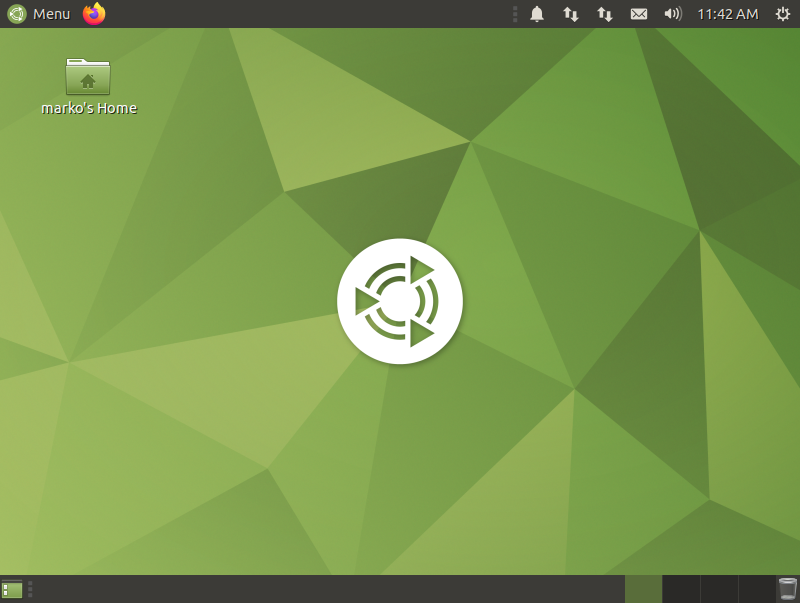
LXDE
LXDE is a desktop environment with a very lightweight GUI. Use LXDE if you need a graphical interface but want to minimize the impact on system memory and CPU.
To install LXDE on Ubuntu, use the following command:

Switching between GUI
If you install more than one desktop environment, you can switch between different GUIs from your display manager screen. SLiM, for example, lets you cycle through the installed environments by pressing F1 repeatedly. The name of the currently toggled environment is visible at the bottom of the screen.
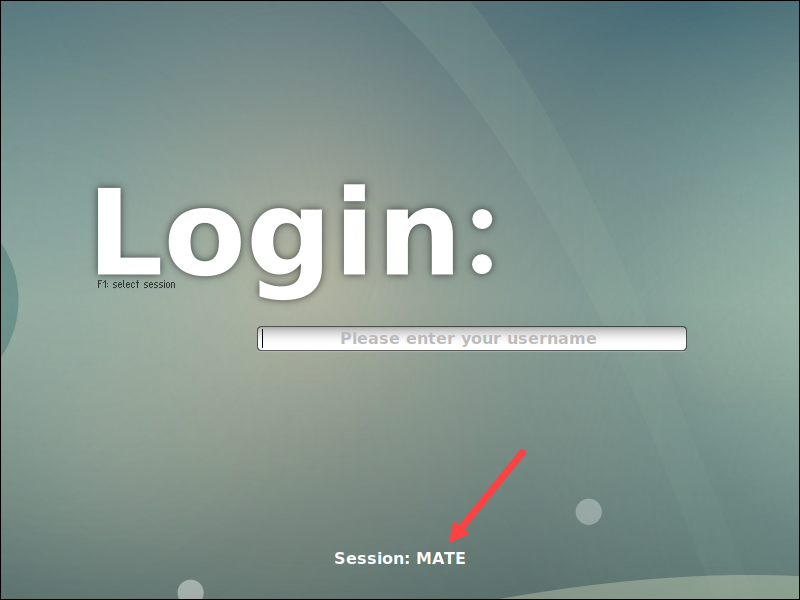
Log in once you toggle the GUI you want to use.
Removing the GUI and Display Manager
To revert to the command line interface and remove the packages related to the display manager and the desktop environments:
1. Open the terminal, and enter:
sudo apt remove [display-manager] [desktop-environment]For example, to remove SLiM and LXDE, type:
sudo apt remove slim lxde2. Reboot the system and log back in.
3. Finish by removing orphaned or unnecessary dependencies with autoremove :
Note: Deploy and manage physical servers in a cloud-like environment with Bare Metal Cloud. To find out more, read about phoenixNAP’s cloud-native dedicated servers.
If you’ve worked extensively with conventional operating systems, it can be challenging to have to work in a command-line interface. Fortunately, Ubuntu — like many Linux systems — is open-source, so there are many available GUIs to install.
After completing this tutorial, you should know how to install a display manager and a desktop environment on your Ubuntu Server.
Marko Aleksić is a Technical Writer at phoenixNAP. His innate curiosity regarding all things IT, combined with over a decade long background in writing, teaching and working in IT-related fields, led him to technical writing, where he has an opportunity to employ his skills and make technology less daunting to everyone.
Remote Desktop is a useful and user-friendly service allowing you to control another computer remotely. It is .
The XAMPP stack is an open-source Apache distribution of a PHP development environment consisting of .
Pip Installs Packages (Pip) is a package management system that simplifies the process of installing and .
In Linux, special tools were developed for managing applications. Application software for Linux typically .
How do I boot into the console and then launch the Ubuntu desktop from it?
At the Ubuntu login page I have to hit Ctrl + Alt + F1 to be able to login as an user using the command line. But how do I get to the command line first and then start the Ubuntu desktop from it?
4 Answers 4
To return to the login screen
Press Ctrl + Alt + F7 to return to the login screen. You can exit your terminal session on tty1 by typing exit before you do that.
Doing startx — :1 will start another X session under terminal tty1, logging you in directly (use :2, etc. for even more displays). Note that logging into multiple sessions as the same user is not recommended and could lead to system instability.
To skip the login screen completely, boot into the console and then start the GUI, you must modify GRUB:
- sudo nano /etc/default/grub
- Change line GRUB_CMDLINE_LINUX_DEFAULT=»quiet splash» to GRUB_CMDLINE_LINUX_DEFAULT=»text»
- Ctrl — X , press Y and then Enter to save and exit.
- sudo update-grub
- Reboot and you should come up directly in tty1 — no need to press Ctrl-Alt-F1.
- Login, and then startx to boot into the default desktop, or
- unity for Unity
- unity-2d-shell for Unity 2D
- gnome-shell for Gnome
- sudo service lightdm start to get the login screen (if you fix it 🙂
But I don’t want to return to the login screen. The reason is that I can’t login at the login screen because the wrong keyboard layout is available. To my idea is: login at the command line and load the ubuntu desktop (or whatever it’s called).
@izs: How can you start another x session by simply typing startx. The default display, :0, is already being used, so you would need to specify a different display to use, wouldn’t you? I remember doing it once in the past as an experiment, but it wasn’t that simple at the time. I just tried it, and it didn’t work for me.
@MartyFried : you’re absolutely correct, thanks for reminding me. You’d need to do start — :DISPLAY to be successful. I edited the answer to reflect this.
You’ll need to wait a bit after seeing the cursor at the top left of the screen until the login appears; or at least I did. I had — out of curiosity I logged out and into a cairo-dock session which left my laptop in an unusable state until I read these instructions.
To skip the login GUI without using Ctrl + Alt + F1 , simply do the following:
- sudo vi /etc/default/grub
- Press i to enter into vi edit mode.
- Change the line that reads GRUB_CMDLINE_LINUX_DEFAULT=»quiet splash» to GRUB_CMDLINE_LINUX_DEFAULT=»text»
- Uncomment the line which reads #GRUB_TERMINAL=console by removing the leading #
- Press Esc to exit vi edit mode.
- Type : w q to save the change made to the /etc/default/grub file and exit vi.
- Update /boot/grub/grub.cfg to have your change apply by running sudo update-grub If your computer uses systemd, you must tell systemd to skip the default login GUI thus:
sudo systemctl enable multi-user.target --force sudo systemctl set-default multi-user.targetNow, the login GUI will never show up.
Once you’re in the terminal, run sudo systemctl start lightdm to start the default desktop.
This works perfectly! The only issue I am seeing is the ‘startx’ command runs a unity that has an «X» instead of a mouse pointer and no desktop, menu or other icons. Will post a separate question for that.
@DaveCollins, thanks for the pointer. I have made a change to the command causing the issue you observed.
I was missing the sudo systemctl enable multi-user.target —force sudo systemctl set-default multi-user.target part. Hope this help others like me.