Stm32 virtual port driver linux
Auto-suggest helps you quickly narrow down your search results by suggesting possible matches as you type.
- Subscribe to RSS Feed
- Mark Topic as New
- Mark Topic as Read
- Float this Topic for Current User
- Bookmark
- Subscribe
- Mute
- Printer Friendly Page
- Mark as New
- Bookmark
- Subscribe
- Mute
- Subscribe to RSS Feed
- Permalink
- Email to a Friend
- Report Inappropriate Content
I search an driver for VPC (Virtual Port Com) for Ubuntu. A Driver STSW-STM32102 work only windows. Is there driver for Linux? If yes how to install it?
- Mark as New
- Bookmark
- Subscribe
- Mute
- Subscribe to RSS Feed
- Permalink
- Email to a Friend
- Report Inappropriate Content
I don’t know of any native driver, and don’t see much motivation for ST to make one.
You might try Wine, perhaps with the whole IDE.
Or instead, use an IDE running under Linux, which comes with native ST-Link support. I’d been using Crossworks for years now for this purpose successfully.
I didn’t try the V2.1 VCP functionality, because this implies newer boards with Cube-only support. And I shun Cube for certain reasons .
How to use STM32 Nucleo serial port

As we have seen in the previous tutorial about this new developing board from ST, the STM32 Nucleo provides an integrated ST Link v2.1 interface. ST Link is mainly designed to allow flashing of target MCU trough the mini-USB interface. But, it provides at least another really useful feature: a Virtual COM port. When you install the ST-Link drivers, a new device appears in your hardware devices list: the ST-Link Virtual COM port.
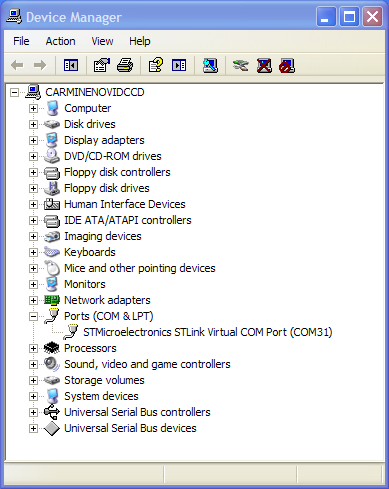
If you use a Linux PC or a Mac, you’ll find a new terminal in the /dev directory. Usually, this device is named something similar to tty.usbmodemXXXX , as shown below.

The serial port is mostly useful for two reasons: if you want to debug your firmware printing messages (not strictly necessary with the ARM architecture, since we can also use ARM semihosting) or if you want to exchange commands and messages between your Nucleo board and your PC (perhaps, using a dedicated application you are building).
In this post I’ll show you how to properly configure and use the integrated virtual COM port of STM32 Nucleo board. But, before we start coding, it could be really useful take a look to the hardware. ST provides the full hardware project of the STM32 Nucleo (the board is designed using the Altium Designer CAD, a professional CAD used in the electronics industry, but you are not required to have a so expensive piece of software to use your Nucleo). I’ll assume the Nucleo-F401RE model, but it should be really easy to rearrange instructions to properly use your specific Nucleo.
First: pinout
A complex yet flexible MCU like the STM32 provides I/Os that have «overloaded» functionalities.This means that, before we can use a peripheral (in our case, the USART), we need to configure the peripherals associated to corresponding pins. Looking to STM32CubeMX tool, we discover that the STM32F401RETx processor has 3 different USARTs: USART1, USART2 and USART6.

[lightbox full=»http://www.carminenoviello.com/wp-content/uploads/2015/01/2015-01-24-08_52_46-STM32CubeMX-uart2.ioc_-STM32F401RETx.png»]
Now we have to take a look to the Nucleo schematics. As we can see in the following picture, the USART_TX and USART_RX ports are connected to PA2 and PA3 pins. This means that the Nucleo board is configured to use the USART2 peripheral of target MCU.

[lightbox full=»http://www.carminenoviello.com/wp-content/uploads/2015/01/stm32-nucleo-usart-pinout.jpg»][/lightbox]
Ok. We’ve grabbed all the necessary information related to the hardware needed to start coding.
Second: the code
Before we start configuring the USART2 peripheral, we need a test project. We’ll generate an empty project using the GCC ARM Eclipse plug-in, as shown in my series about the GCC toolchain for the STM32 platform. When you generate the test project, you can using the following configuration parameters.

If you have followed my previous tutorial about GNU Eclipse plug-in, you already know that the plug-ins generates an incorrect clock configuration for the Nucleo-F4 board. I’ve shown how to use the STM32CubeMX tool to generate the right clock initialization code. For the sake of simplicity, this is the code you have to put inside the _initialize_hardware.c file.
Next, we have to add a function to configure the USART interface. We call it MX_USART2_UART_Init , as shown below.
The function is really self-explaining. huart2 is an instance of UART_HandleTypeDef descriptor. It’s a struct used to configure the UART peripheral. However, this code is still not sufficient to use the UART. We need to configure the hardware part, setting the right pins and initializing the right clocks associated to UART peripheral. This work is done with the following hook function:
Even in this case, the code is really self explaining. First, we need to initialize peripheral clock for PORTA GPIOs. Next, we need to enable the clock associated to UART2 peripheral. Finally, we have to proper configure PIN2 e PIN3 as UART2 TX and UART2 RX.
An important aspect to remark is that we don’t need to explicit call this function in the initialization section. This is an hook function automatically called by the HAL_UART_Init() function which we call inside the function MX_USART2_UART_Init() . The right place to call this initialization function is inside the __initialize_hardware() function in the _initialize_hardware.c file.
Ok. Now we only need to write a simple main() function to test the UART.
The main() is really simple: it simply prints a message on the UART and hangs for ever.
Before we can compile the whole project, we need to do another final operation. By default, the GNU-ARM plugin for Eclipse disables unused STM32 HAL files, in order to speed up compile operation. So, we need to enable the compilation of stm32f4xx_hal_uart.c file.
Go in Project Explorer->system->src->stm32f4-hal and click with mouse right button on the stm32f4xx_hal_uart.c file, as shown in the following picture:

[lightbox full=»http://www.carminenoviello.com/wp-content/uploads/2015/02/Schermata-02-2457080-alle-13.25.27.png» title=»»]
Click on «Properties» and go to C/C++ Build and uncheck «Exclude from build», as shown below.
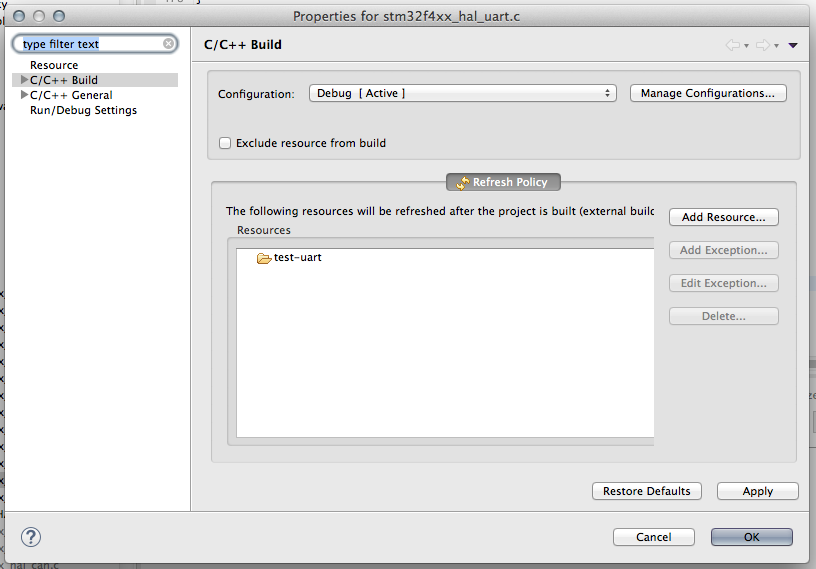
[lightbox full=»http://www.carminenoviello.com/wp-content/uploads/2015/02/Schermata-02-2457080-alle-14.10.44.png» title=»»][/lightbox]
Ok. Now we can compile the test project and upload on our Nucleo board using GDB and OpenOCD.
To see messages on the UART you have several options according the Operating System you use. On the Eclipse Marketplace you’ll find several terminal emulator plug-ins. TCF is one of these. Another option for Windows OSes is to use putty. On Mac and Linux ckermit is a suitable option.

[lightbox full=»http://www.carminenoviello.com/wp-content/uploads/2015/02/Schermata-02-2457080-alle-15.08.19.png» title=»»][/lightbox]
You can download the whole project from my github repository.
In a next article, I’ll show you how to use the others Nucleo UARTs. Stay tuned 😉
Recensione #4: Stazione saldante JBC CD-2B
BlueNRG shield for STM32 Nucleo
You may also like
Upgrading Grove-UART Wifi V2 to latest ESP-AT firmware
Elegoo Car Kit V4
39 comments
I guess there just aren’t any tutorials which touches Eclipse IDE, just aren’t!.
This is due the inconsistency mess that comes with any Java tools.
I consider I am an experienced engineer (coinscode.com)
and I was struggling entire day to get one simple ST Micro
compiled under Linux and I could not. I gave up. Though, the
tutorial is complete but Eclipse screw it up totally, and screws up
any decent programmer.
Hi Marius,
I agree with you: Eclipse can transform every programmer in a serial killer, especially if you have a non so recent PC. I’ve also successfully setup a complete working toolchain based on a Makefile and a simple text editor like VIM. I’ll spend two words about this soon.
But there’s also Code::Blocks which runs much more smoothly than eclipse — and guess what, it’s not Java based 😉
I’ve read about some people using it for gcc arm embedded work, have not tried embedded dev in c::b myself
Hey, just want to say thanks for the post. Clear explanation and great write-up. I’m actually using Keil uvision but it’s still very relevant, thanks
Is it possible for you to add HAL_UART_Receive() function? I tried to look everywhere but can’t find any examples on Receiving from Serial monitor/keybaord.. Thanks!
Hello, thanks for all tips. I’m trying to get UART working for quite some time now and it’s driving me nuts I can’t do it. I’m using CUBE + IAR and HAL. Any tips why instead of getting normal characters I’m receiving garbage? I’m using HAL_UART_Transmit. What I’m missing?
Hi,
to give a better help I need to know the type of your Nucleo board. Moreover, past here the clock and UART configuration routines.
Hi Carmine,
Its a great tutorial I must say. But do you have a an example to interact with the STM32 Nucleo over serial port.I am trying it out using the Serial APIS on windows and can get the data on the STM32 Nucleo (with few glitches).Just wondering if you have a working — clean example for the same.
Eager to hear from your side.!
Rgds,
Rp
Hi RaulP,
Take a look to this repository: https://github.com/cnoviello/mastering-stm32 You should find what you are looking for under the «CH8» examples.
Hi Carmine,
OK , I followed the instructions from your book and able to create the Eclipse Environment. I am able to build and flash the hello-nucleo image and see the LED in action.
Just wondering is it that simple to use the projects you have uploaded on git.I tried with CH8 chapter for f401re to test the serial port application. But I am getting this error : make all
Building file: ../system/src/stm32f4xx/stm32f4xx_hal.c
Invoking: Cross ARM C Compiler
arm-none-eabi-gcc -mcpu=cortex-m4 -mthumb -Og -fmessage-length=0 -fsigned-char -ffunction-sections -fdata-sections -fno-move-loop-invariants -Wextra -g3 -DDEBUG -DOS_USE_SEMIHOSTING -DTRACE -DOS_USE_TRACE_SEMIHOSTING_DEBUG -DSTM32F401xE -I/Users/cnoviello/STM32Toolchain/mastering-stm32/nucleo-f401RE/include -I/Users/cnoviello/STM32Toolchain/mastering-stm32/nucleo-f401RE/system/include -I/Users/cnoviello/STM32Toolchain/mastering-stm32/nucleo-f401RE/system/include/cmsis -I/Users/cnoviello/STM32Toolchain/mastering-stm32/nucleo-f401RE/system/include/stm32f4xx -I/Users/cnoviello/STM32Toolchain/mastering-stm32/nucleo-f401RE/system/include/cmsis/device -std=gnu11 -MMD -MP -MF»system/src/stm32f4xx/stm32f4xx_hal.d» -MT»system/src/stm32f4xx/stm32f4xx_hal.o» -c -o «system/src/stm32f4xx/stm32f4xx_hal.o» «../system/src/stm32f4xx/stm32f4xx_hal.c»
../system/src/stm32f4xx/stm32f4xx_hal.c:54:27: fatal error: stm32f4xx_hal.h: No such file or directory
compilation terminated.
make: *** [system/src/stm32f4xx/stm32f4xx_hal.o] Error 1
system/src/stm32f4xx/subdir.mk:213: recipe for target ‘system/src/stm32f4xx/stm32f4xx_hal.o’ failed Or I may be missing something very minuscule here. While I try to figure it out can you please tell if you have any serial Application running on windows(even a console line will do) which can send a string pattern ( N number of times — different string with different length). C:\STM32Toolchain\projects\nucleo-f401RE\src\ch8 is the file I am referring to currently to test the serial communication (reception part mostly). C:\STM32Toolchain\projects\nucleo-f401RE is the project I am referring to . Thanks and Rgds,
Rp
And yes Merry X-Mas !!
OK I fixed this one by fixing the Include Paths for GNU C and C++.But I am really looking for a way(a windows application which can send data as I said previously) to STM32 and later can also process it.
Thanks in advance !
Rgds,
Rp
Hi,
For the Windows application you can take in consideration to create a simple Python script with pyserial module. It would be really easy to do the app you need.
ok thanks for the info /I will try it out.
can it also send the end of line characters at the end of the line read form the text file?