- Continuous internet speed test tool
- Run test on Android
- Run the internet test tool from command line with a web UI
- Command line arguments
- Reviews
- Change Log
- Roadmap (planned features)
- Stresser .st The best free IP Stresser / Booter, and even better then some paid skid stressers.
- How to Stress test my IP?
- Проводим стресс тест сети Wi-Fi
- Как провести тест беспроводной сети
- 1. Устанавливаем бенчмарк NetStress
- 2. Подключение к ресиверу
- 3. Старт стресс-теста
- 4. Результаты измерений
- 5. Устанавливаем тестовый сервер
- 6. Запускаем тестовый клиент
- 7. Начинаем тестирование сети
- 8. Оцениваем результаты
Continuous internet speed test tool
Screenshots: 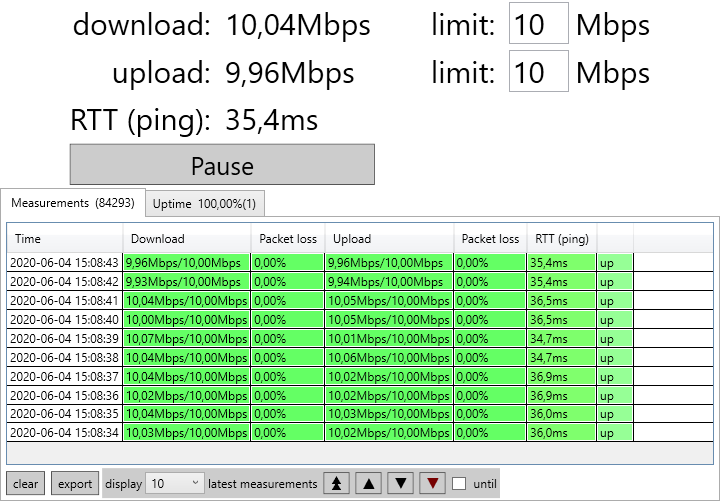

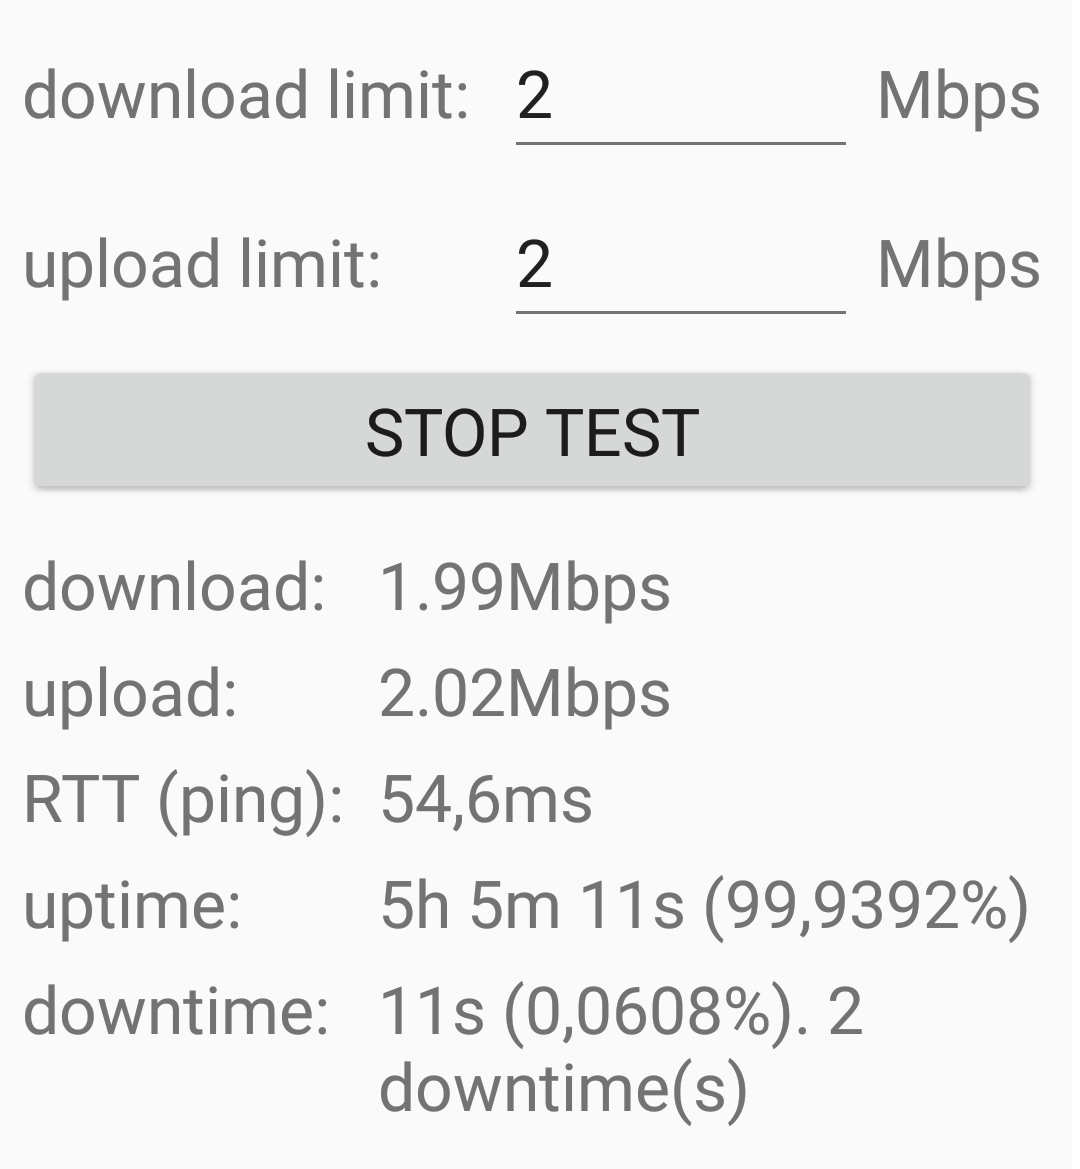
Run test on Android
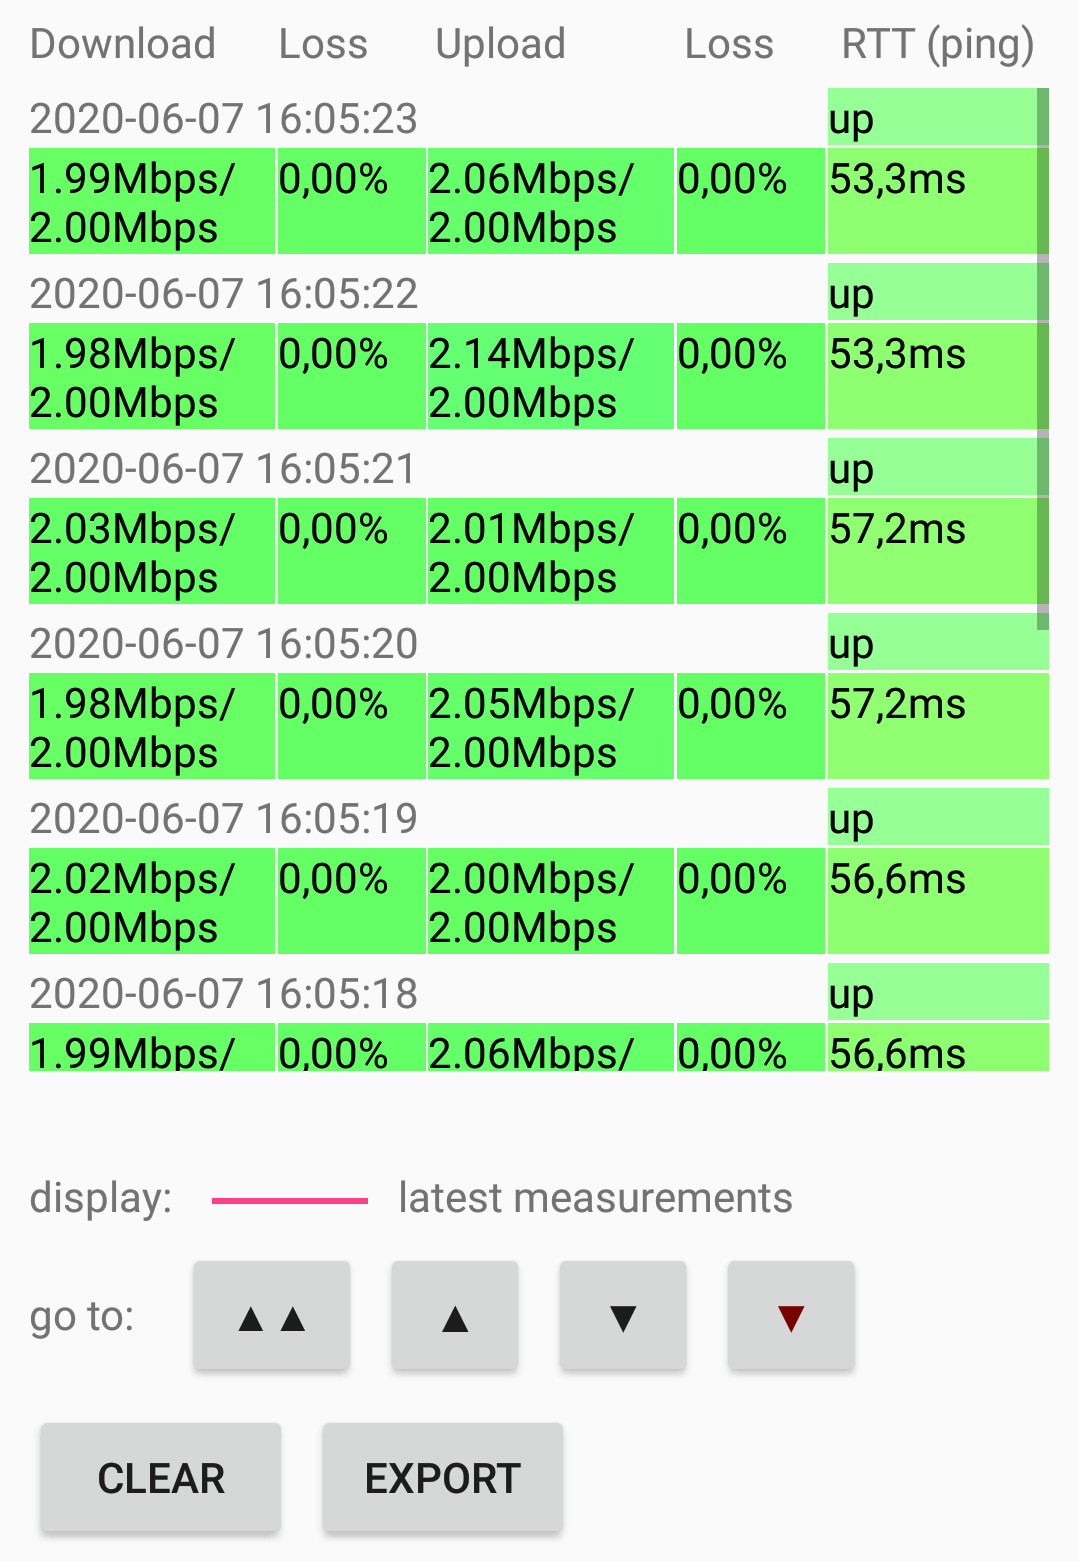

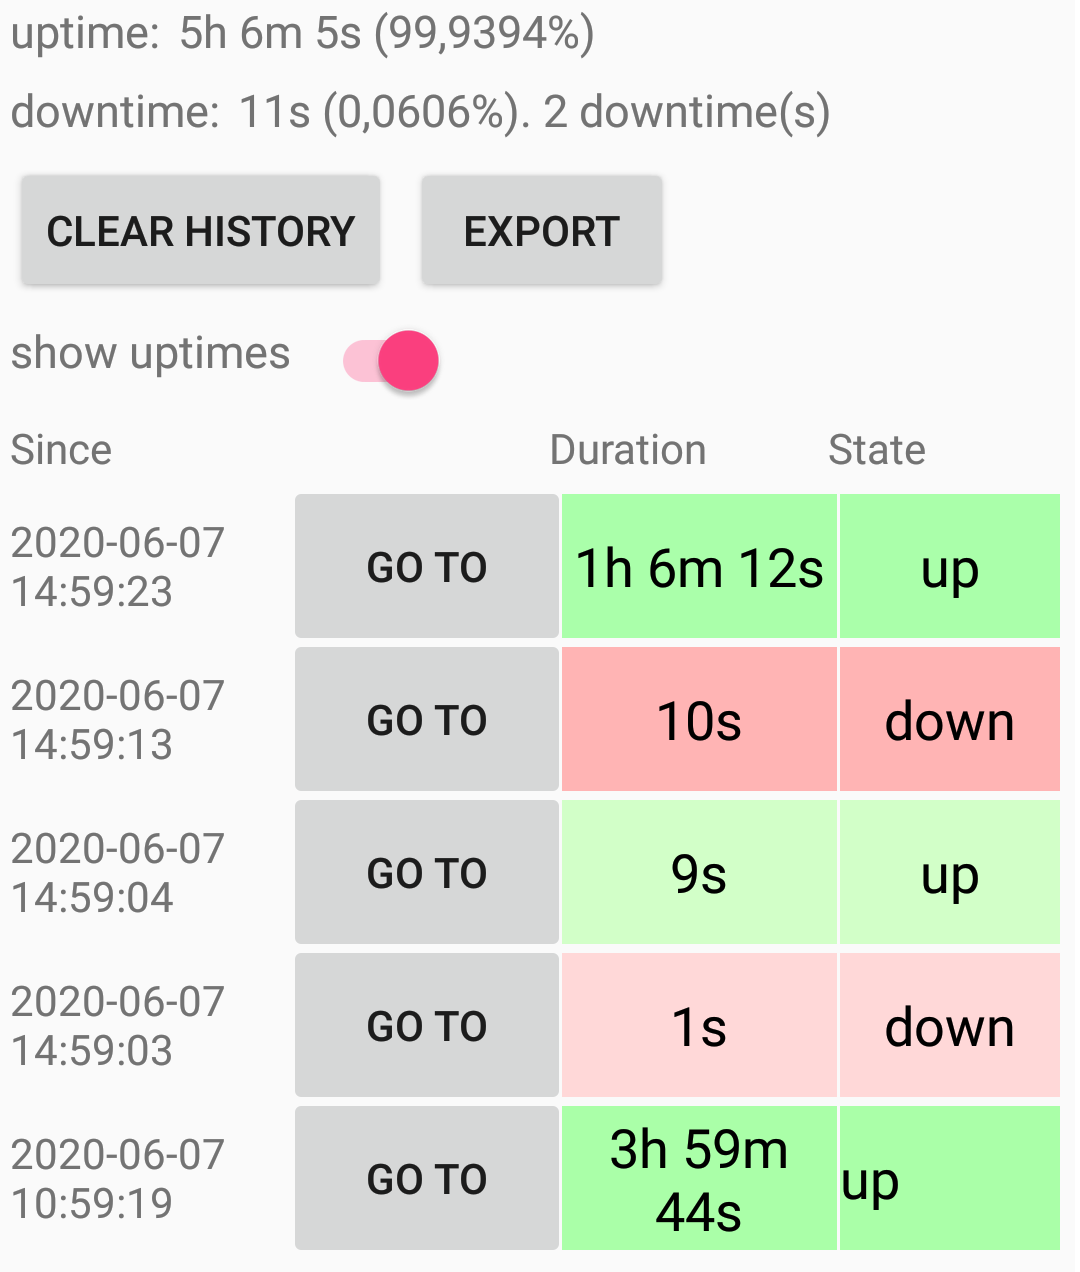
Run the internet test tool from command line with a web UI
Download for Linux x64 (Most desktop distributions like CentOS, Debian, Fedora, Ubuntu, Red Hat Enterprise Linux 6+, and derivatives)
Download for Linux ARM (Linux distributions running on ARM like Raspbian on Raspberry Pi Model 2+)
Download for Linux ARM64 (Linux distributions running on 64-bit ARM like Ubuntu Server 64-bit on Raspberry Pi Model 3+)
Download for MacOS (Minimum OS version is macOS 10.12 Sierra)
Download for Windows x64 (for desktop GUI see another installer)
Download for Windows x86
Note: please download the archive and extract into some clean folder. On Linux set ‘executable’ attribute to extracted file «CST.CrossPlatform» if needed:
# use this if needed for permissions: sudo -i
mkdir /usr/bin/startrinity_cst
cd /usr/bin/startrinity_cst
# if wget is missing on centos/rhel: sudo yum install wget
wget http://startrinity.com/InternetQuality/startrinity_cst_linux_x64.tar.gz
# or startrinity_cst_linux_arm.tar.gz or startrinity_cst_linux_arm64.tar.gz (see above)
tar xzvf startrinity_cst_linux_x64.tar.gz
./CST.CrossPlatform —download-limit 10 —upload-limit 10 —output-measurements
Command line example for Linux: ./CST.CrossPlatform —download-limit 10 —upload-limit 10 —output-measurements
Command line example for Windows: CST.CrossPlatform.exe —download-limit 10 —upload-limit 10 —output-measurements
Command line arguments
- —output-measurements or -om [csv_file_path] — outputs measurements to a CSV file (if specified) or to console (stdout)
- —download-limit or -d — max. download bandwidth in Mbps
- —upload-limit or -u — max. upload bandwidth in Mbps
- —mode or -m — one of the following modes:
- custom-server-as-server or csas — TCP and UDP test, upload and download without pauses, using your own server. This instance runs as server. Example: CST.CrossPlatform.exe —mode custom-server-as-server —server-port 9200 —output-measurements
- custom-server-as-client or csac — TCP and UDP test, upload and download without pauses. This instance runs as ‘client’; you should run the same app on another device as a ‘server’. Example: CST.CrossPlatform.exe —mode custom-server-as-client —server-host 192.168.0.10 —server-port 9200 —output-measurements —download-limit 10 —upload-limit 10
Reviews
This is exactly what I needed to align my 4G outdoor receiver to get the maximum possible speed. Instead of running a speed test or downloading a content after each alignment, this app makes it pretty easy.
Great work! I have used the continuous speed test several times to get my cable company to fix the internet connection.
The Continuous Speed Test helped me narrow down a problem that had been plaguing my system for months. an intermittent failure of a wireless card on one of my computers. The card only failed — and briefly — when a significant amount of data was being transferred through it. So, I set up the Continous Speed Test on the impacted device and on a laptop connected to the same WiFi. The failures on the internet stability test were obvious and helped me trace down the problem. I swapped out the bad card and the problem was fixed! Thank you!
This is the only app I have found that runs continuously while I adjust my cellular modem antenna for not only the best speed but the best quality. Since I live in an area with low cellular signal, this is important to me. other apps just tell me the speed at a single moment. Thanks for the great app!
Great program. Used it to diagnose a connection issue, and it worked great. I bookmarked the site and will install it again in the future if I need it.
I love your test tool, it is helping me to understand the real issues with my internet connection. I have a VDSL connection with approx. 18Mbps down and 1Mbps up.
First Review: App is good, You can check your internet connection speed in different areas of your room or any other place and know downtime and uptime for a specific speed as you set, I liked this new concept.
Edit: One problem I found is speed is not accurate, When my net speed is 100kbps it shows 200-250 kbps.Change Log
2019-06-18 easy GUI to run the tool as your own server, to test your LAN and wifi routers
2020-05-12 improved CPU performance
2020-05-23 fixed «false downtime» issue
2020-06-02 added TCP download and upload tests
2020-06-02 published binaries for Linux (Ubuntu, CentOS, Red Hat, Raspberry Pi): now the tool runs with command line interface and it also opens a HTTP port for web UI
2020-08-08 new test mode: only continuous ICMP ping, without any download/upload
2020-08-23 improved performance for low bandwidths (20kbps)
2020-09-06 measuring jitter and packet loss burst length
2020-09-25 published binaries for «Center» and tutorial how to set up monitoring with custom server(s), center and MySQL databaseRoadmap (planned features)
- Charts to display the measurements
- Measure jitter
- Measure ping to default gateway to see difference between LAN/WAN issues
- Traceroute statistics to detect problematic hop
- Display RTT statistics towards multiple servers, with server’s IP geolocation
- Need something else? Please contact us to request new features, or to express your interest in already planned features.
Stresser .st
The best free IP Stresser / Booter, and even better then some paid skid stressers.Amplification (DrDoS) — This attack technique uses public servers to reflect and amplify data by sending a small trigger query and spoofing the source IP as the victim, resulting in a much larger response directed at the victim. Amplification attacks are typically 1-10Gbps, but they have been recorded at over 1Tbps if executed correctly. NTP, DNS, Memcached, and SNMP are examples of vulnerable DrDos protocols.
SYN Attack — SYN Attacks (TCP protocol) take use of the target’s CPU, RAM, and other resources, forcing the server to respond with continual SYN+ACK answers as the target tries to finish a false handshake. SYN attacks use small packets with high PPS (packets per second) instead of large packets. To prevent such attacks, SYN Cookies are often used.
UDP Attack — UDP Attacks send random junk data to random ports, causing ICMP port unavailable replies if the ports are not in use by the system.
Browser Emulation — Browser emulation attacks use public libraries to interpret javascript, web services like cloudflare and other protections rely on javascript challenges to authenticate clients, this type of attack bypasses all javascript protections, and sometimes even solves captchas. Once the cookie is stored it can be used with regular GET/POST attacks without browser emulation.
How to Stress test my IP?
Easy, no login/account is necessary; simply input your IPv4 address, your port (53 works nicely, but any port between 0-65535), the length of time you want the stress test to run, and then complete the captcha. Your IP will instantly receive data from our stress testing servers, since we are a free service the flood is relatively small and may not always result in a DDoS attack, but it will provide enough information to assist you design your firewall more successfully in the event of a similar, much larger attack in the future. If our free service isn’t powerful enough for you, I recommend using a premium IP stresser listed on our website.
Проводим стресс тест сети Wi-Fi


Насколько ваша беспроводная сеть быстрая? Определить это вам помогут две бесплатные программы для измерения производительности WLAN.

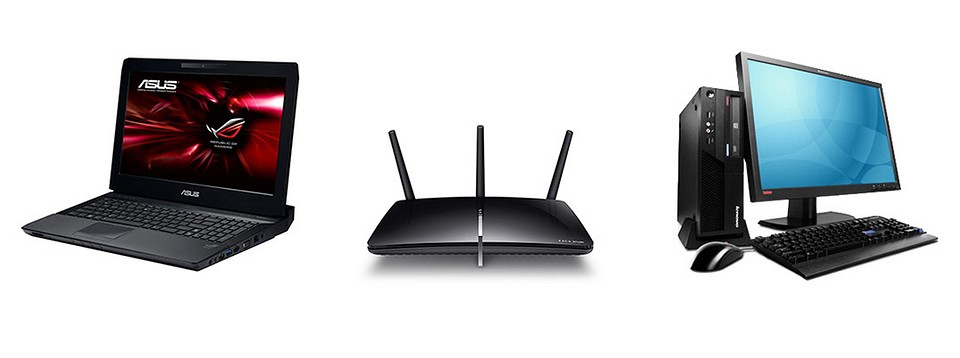
Стандартные инструменты для определения мощности сигнала и расстояния до передающей антенны, как правило, предоставляют ограниченную информацию. Гораздо важнее узнать, какое количество данных в секунду передается по беспроводному каналу вашей домашней сети. Чтобы выяснить это, нам потребуется два ПК, находящихся в одной локальной сети, и два приложения, с помощью которых мы выполним требуемые измерения.
В пунктах с первого по четвертый мы выясним, какова пропускная способность нашей беспроводной сети. Если измерения покажут минимум 40% от максимального значения — это превосходный результат. В противном случае мы проведем дополнительный тест пропускной способности (этапы 5–8), который позволит подробно разобраться, в чем заключается проблема.
Как провести тест беспроводной сети
1. Устанавливаем бенчмарк NetStress
Установите утилиту для тестирования NetStress (nutsaboutnets.com) на обоих компьютерах. Как правило, после запуска программа автоматически распознает доступные сетевые подключения LAN или WLAN. Выберите на обоих ПК верный вариант подключения. Так как приложение проверяет все сетевые протоколы, то NetStress откроет до четырех соединений, которые вы должны разрешить в Windows Firewall.
2. Подключение к ресиверу
В окне программы на вкладке Transmitter нажмите на пункт Remote Receiver IP, который расположен в верхнем меню. Практически наверняка NetStress сразу покажет правильный IP-адрес. В противном случае введите адрес второго компьютера вручную.
3. Старт стресс-теста
В меню «Settings | Display Units» выберите пункт «Mbps», нажмите «ОК», а потом кнопку «Start», чтобы начать измерение. Пусть пробный запуск продлится пару минут. На правой стороне графика NetStress выведет числовые значения.
4. Результаты измерений
Для нашего ноутбука ASUS NetStress определила среднюю скорость передачи данных, равную 50,3 Мбит/с. Если ваш роутер показывает, с какой максимальной скоростью передачи функционирует ваше устройство, то вы можете оценить, является ли соединение быстрым или же медленным. В нашем тесте скорость соединения роутера с ноутбуком составила 150 Мбит/с. Это означает, что наш ноутбук задействует только лишь 33% от максимальной скорости. Конечно, до 150 Мбит/с скорость никогда не поднимется, однако добиться хотя бы 60 Мбит/с — это вполне реальная задача.
5. Устанавливаем тестовый сервер
Чтобы выявить проблемы с пропускной способностью, установите программу TamoSoft Throughput Test (tamos.ru) на ПК, выступающий в роли сервера, и ноутбук, который будет представлять из себя клиент. Затем на ПК нажмите «Пуск | Все программы | TamoSoft», правой кнопкой мыши кликните по «Run Server» и выберите «Запуск от имени администратора». В нижнем поле окна вы увидите IP-адрес компьютера.
6. Запускаем тестовый клиент
Теперь на ноутбуке нажмите «Пуск | Все программы | TamoSoft» и выберите ярлык «Run Client». Запустите приложение от имени администратора и в поле «Server IP or IPv6 address» введите полученный выше IP-адрес.
7. Начинаем тестирование сети
В открытом окне клиента нажмите «Connect» и подождите некоторое время. Программа будет посылать TCP- и UDP-потоки данных по сети, а также отображать текущую скорость передачи данных, потерю пакетов и двусторонние задержки (RTT — Round-Trip Time).
8. Оцениваем результаты
Нажмите кнопку «Disconnect» для остановки измерений. Теперь посмотрите значения на графике. Так, наш ноутбук при загрузке по протоколу TCP достиг скорости только лишь 50 Мбит/с. Для увеличения пропускной способности попробуйте отрегулировать положение маршрутизатора. Часто прохождению сигнала мешает именно окружающая устройство мебель. Также убедитесь, что какие-либо объекты не загораживают роутер и не стоят к нему вплотную.
Читайте также: