- Как добавить репозиторий в Debian
- Как добавить репозитории в Debian
- 1. Файл /etc/apt/sources.list
- 2. Папка /etc/apt/sources.list.d/
- 3. Команда apt-add-repository
- Выводы
- How to Add a Package Repository to Debian, Ubuntu and Mint
- Understanding APT Repository on Debian and Ubuntu
- Automatic APT Repositories
- Non-Automatic or Trivial APT Repositories
- Manually Adding APT Repository on Debian and Ubuntu
- Adding APT Repository Using apt-add-repository Command
- Adding Personal Package Archives (PPAs)
- Removing a PPA Repository
- Adding a Package Repository Using GUI Utilities
Как добавить репозиторий в Debian
Репозитории — это сетевые хранилища программного обеспечения. Они используются в дистрибутивах Linux, и в том числе в Debian для быстрой установки программного обеспечения с помощью пакетного менеджера. Более подробно о том какие репозитории бывают и зачем они нужны написано в статье Репозитории Debian.
В этой же статье мы поговорим о том как добавить репозитории в Debian различными способами. Самый простой и часто используемый вариант — настройка репозиториев вручную, с него мы и начнём.
Как добавить репозитории в Debian
Новички часто сталкиваются с проблемой, что после установки новой системы пакетный менеджер не может найти ни одного пакета. Это связано с тем, что по умолчанию основные репозитории Debian в систему не добавлены, там есть только репозитории из DVD дисков с помощью которых вы устанавливали систему. Эта проблема очень просто решается. Системные репозитории находятся в файле /etc/apt/sources.list. Давайте сначала посмотрим на содержимое этого файла по умолчанию:
sudo vi /etc/apt/sources.list
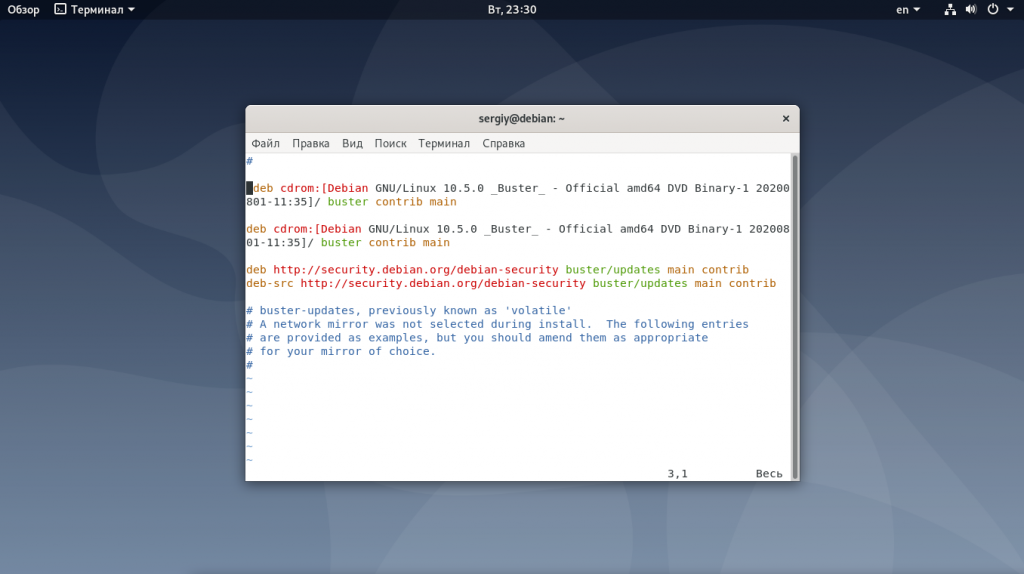
Синтаксис строки репозитория такой:
тип адрес дистрибутив ветка_1 ветка_2
Типов репозиториев может быть два. Это deb и deb-src. Первый — для бинарных файлов, второй — для файлов исходных кодов. Дистрибутив указывает кодовое имя дистрибутива, например, для Debian 10 — это buster, для девятой версии stretch. Для стабильных обновлений есть еще один репозиторий, где вместе с кодовым именем дистрибутива указывается слово updates, например: buster-updates.
Веток есть всего три, вот они:
- main — полностью свободные пакеты, это основа дистрибутива Debian;
- contrib — свободные пакеты, которые могут зависеть от несвободных;
- non-free — все остальные несвободные пакеты.
Основы разобрали, теперь давайте посмотрим как добавить репозитории.
1. Файл /etc/apt/sources.list
Именно в этот файл репозиториев Debian надо добавлять системные репозитории. Чтобы получить доступ ко всем системным пакетам надо добавить репозиторий stable, со стабильной версией Debian, и репозиторий стабильных обновлений. Вот так будут выглядеть их строчки:
deb http://deb.debian.org/debian/ buster main contrib non-free
deb http://deb.debian.org/debian/ buster-updates main contrib non-free
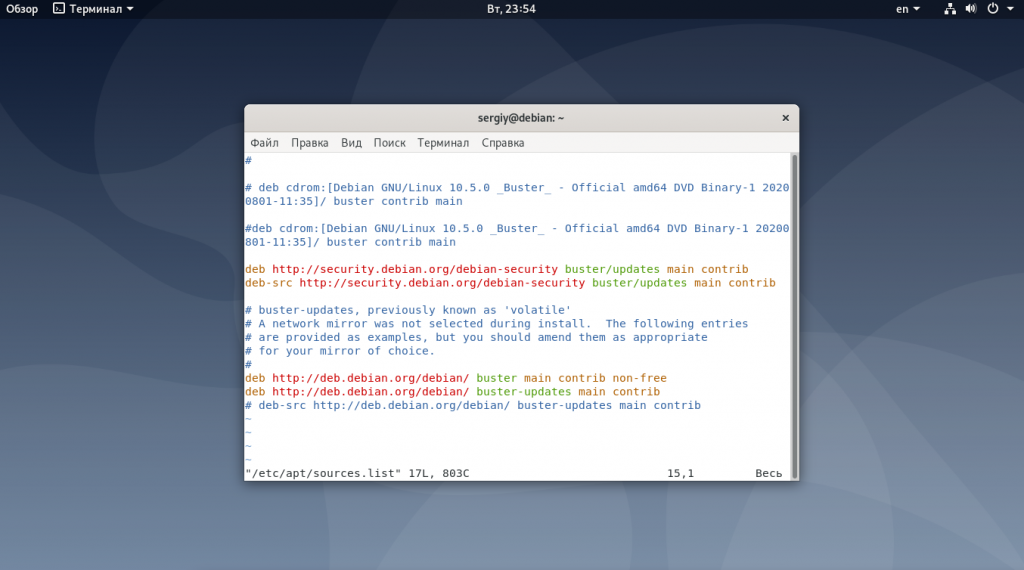
Просто добавьте их в конец файла /etc/apt/sources.list. Вы уже знаете какая часть за что отвечает и сможете разобраться. Если вы захотите добавить репозиторий Backports или Testing, то вам тоже следует использовать этот файл.
2. Папка /etc/apt/sources.list.d/
Сторонние репозитории тоже можно добавить в основной системный файл, но этого делать не следует, чтобы не засорять его лишними строками. Для сторонних репозиториев была придумана директория /etc/apt/sources.list.d/. В ней надо создать файл с именем репозитория и расширением .list, а затем добавить в неё репозиторий, как это делалось с основным конфигурационным файлом. Например, для браузера Chrome:
sudo vi /etc/apt/sources.list.d/google-chrome.list
deb http://dl.google.com/linux/chrome/deb/ stable main
Касательно сторонних репозиториев, есть ещё один момент. По умолчанию система не может им доверять, и для того чтобы это исправить нужно импортировать ключ репозитория. Обычно ключи можно найти на сайте, где вы нашли сам репозиторий, для того же Google Chrome ключ можно импортировать командой:
wget -q -O — https://dl-ssl.google.com/linux/linux_signing_key.pub | sudo apt-key add —
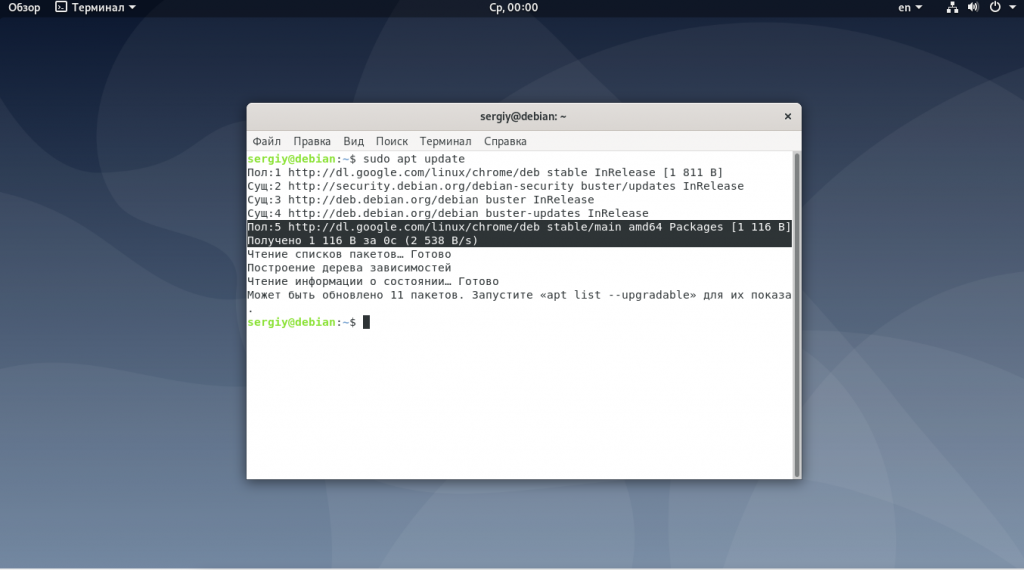
После добавления репозитория, прежде чем вы сможете установить пакет, необходимо обновить списки пакетов. Для этого выполните:
3. Команда apt-add-repository
Эта команда делает то же самое, что мы делали вручную на первом шаге. Она добавляет репозиторий в /etc/apt/sources.list. Отлично подходит для добавления системных репозиториев. Для сторонних репозиториев её можно использовать не всегда, поскольку она добавляет кодовое имя дистрибутива в строку репозитория, а это может её сломать, если владельцами репозитория такое явно не было задумано. Например, с помощью этой команды вы можете добавить testing репозиторий:
sudo apt-add-repository ‘deb http://ftp.ru.debian.org/debian/ testing main non-free contrib’
А потом удалить, если он больше не нужен:
sudo apt-add-repository —remove ‘deb http://ftp.ru.debian.org/debian/ testing main non-free contrib’
Выводы
В этой небольшой статье мы рассмотрели добавление репозиториев Debian на примере операционной системы Debian 10. Как видите, для этого есть несколько способов и какой из них вы будете использовать зависит от вас. А как добавляете репозитории вы? Напишите в комментариях!
Обнаружили ошибку в тексте? Сообщите мне об этом. Выделите текст с ошибкой и нажмите Ctrl+Enter.
How to Add a Package Repository to Debian, Ubuntu and Mint
A package repository (repo in short) is a location where software packages are stored and can be retrieved from. It is organized in a special directory tree, and usually contains an index file and the metadata needed by Linux package managers to access the packages in the repo and their dependencies.
Package managers such as APT (Advanced Packaging Tool – the default on Debian-like systems) enable you to automatically install and upgrade packages from a configured repo.
They also feature dependency resolution capabilities and software update checking. Besides, all package managers if not most, enable removing a package that is no longer needed.
Attention: Before we proceed, remember to only add software repositories from sources that you trust!
This guide shows how to add a package repository in Debian and Ubuntu Linux, as well as their derivatives such as Linux Mint.
Understanding APT Repository on Debian and Ubuntu
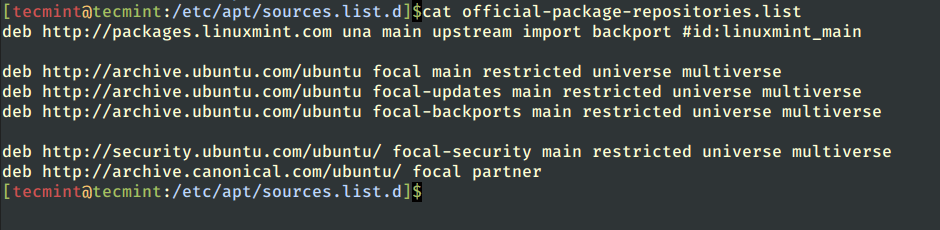
The APT package manager fetches packages from various repositories. A repository can be binary or source, and automatic or trivial. It can also be online or offline (for example on a CD-ROM) but the former is the more common use. Additionally, a repo can be official (maintained by Debian or Ubuntu/Canonical) or unofficial (third party).
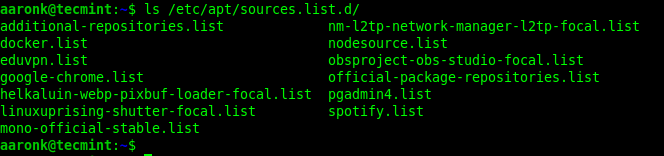
A repository is defined in the /etc/apt/sources.list configuration file or in a file stored under the /etc/apt/sources.list.d directory. Every repo file must end with the .list extension.
In a repository file, each line has the following syntax.
deb URI distribution component1 component2 … componentN OR deb-src URI distribution component1 component2 … componentN
The first parameter specifies the archive type (deb – for binary or deb-src – for source files), next is the URI – the root of the repository, then the distribution, and one or more components.
Automatic APT Repositories
To define an automatic repository, you must specify one distribution and one or more components and the distribution must not end with a slash.
The following are examples of automatic repo definitions:
deb http://repository.spotify.com stable non-free deb https://ftp.postgresql.org/pub/pgadmin/pgadmin4/apt/focal pgadmin4 main deb https://download.mono-project.com/repo/ubuntu stable-focal main
Non-Automatic or Trivial APT Repositories
For non-automatic repos, the distribution specifies the relative path to the index files and it must end with a slash. Besides, no components may be specified.
deb http://cloud.r-project.org/bin/linux/debian bullseye-cran40/ deb file:///home/tecmint/rep-exact binary/
Importantly, APT relies on the local package index, a database of available packages from the repositories defined in the /etc/apt/sources.list file and files under the /etc/apt/sources.list.d directory. You can find the package index files under the /var/lib/apt/lists/ directory.
After making changes to the repo configurations, you must always update the local package index before installing or updating packages.
$ sudo apt update OR $ sudo apt-get update
Note: Usually, software owners or maintainers will provide a means either manually or automatically to add the required repository from which you can install their package(s) on your Linux system.
Let’s look at how to add the apt repository, as explained below.
Manually Adding APT Repository on Debian and Ubuntu
To add a repository manually, simply create the repo file under the /etc/apt/sources.list.d directory. We don’t recommend adding all repositories in the /etc/apt/sources.list file.
This example shows how to add the R software environment packages repository.
$ sudo vim /etc/apt/sources.list.d/r-packages.list
Copy and paste the repo configuration into the file and make sure that the parameters such as URI and distribution and components match what is defined in the repository:
deb https://cloud.r-project.org/bin/linux/ubuntu focal-cran40/

Then add the repository key using the following wget command.
$ wget -qO- https://cloud.r-project.org/bin/linux/ubuntu/marutter_pubkey.asc | sudo tee -a /etc/apt/trusted.gpg.d/cran_ubuntu_key.asc
Alternatively, you can also add the repo using the echo and tee commands as follows:
$ echo "deb https://cloud.r-project.org/bin/linux/ubuntu focal-cran40/" | sudo tee /etc/apt/sources.list.d/r-packages.list $ wget -qO- https://cloud.r-project.org/bin/linux/ubuntu/marutter_pubkey.asc | sudo tee -a /etc/apt/trusted.gpg.d/cran_ubuntu_key.asc
Next, you need to update the local package index with the latest changes made in the repositories and then install a package from the repository, as follows:
$ sudo apt update $ sudo apt install --no-install-recommends r-base
To disable an apt repository, simply comment it out in the repository configuration file as shown in the following screenshot.

Adding APT Repository Using apt-add-repository Command
The add-apt-repository command-line utility is used to add a repository into the /etc/apt/sources.list file or /etc/apt/sources.list.d directory. If a repository already exists, it can remove it using the -r flag.
If the add-apt-repository utility is not available on your system, you can install the software-properties-common package which provides it:
$ sudo apt update $ sudo apt install software-properties-common
Let’s look at the following example. The first command adds the repo and the second one retrieves the repo key using the wget utility and saves it to the specified file using the tee utility:
$ sudo add-apt-repository "deb https://cloud.r-project.org/bin/linux/ubuntu $(lsb_release -cs)-cran40/" $ wget -qO- https://cloud.r-project.org/bin/linux/ubuntu/marutter_pubkey.asc | sudo tee -a /etc/apt/trusted.gpg.d/cran_ubuntu_key.asc
If you try to add a repo that already exists, the add-apt-repository command will show the message “Repository already exists” as shown in the following screenshot.

The next step is to update the apt package index and install a package from the repository, as shown before:
$ sudo apt update $ sudo apt install --no-install-recommends r-base
Adding Personal Package Archives (PPAs)
PPAs are software repositories for publishing user-contributed software packages via Launchpad. This example shows how to add the Shutter screenshot tool’s official PPA.
$ sudo add-apt-repository ppa:shutter/ppa $ sudo apt-get update $ sudo apt install shutter
Removing a PPA Repository
To remove a repo using the apt-add-repository utility, use its -r or —remove flag as mentioned earlier:
$ sudo add-apt-repository -r "deb https://cloud.r-project.org/bin/linux/ubuntu $(lsb_release -cs)-cran40/"
Adding a Package Repository Using GUI Utilities
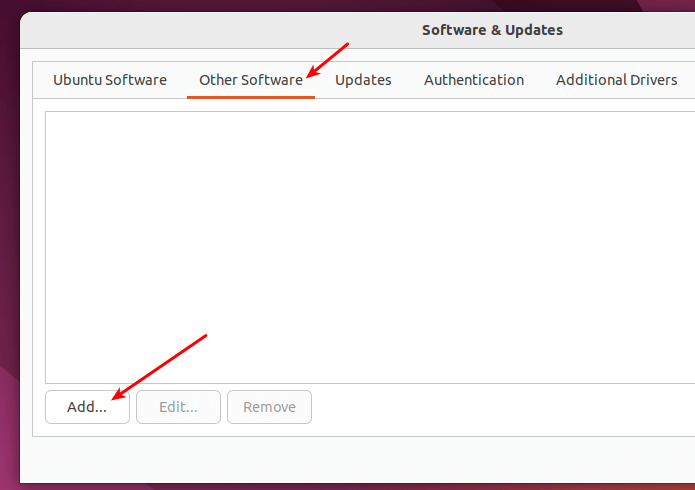
Last but not least, you can also add a repo to your system using a GUI application. On Ubuntu, open Software & Updates via the Activities search bar.
Then switch to the Other Software tab as highlighted in the following screenshot. Next, click Add and enter the repo configuration and follow the prompts.
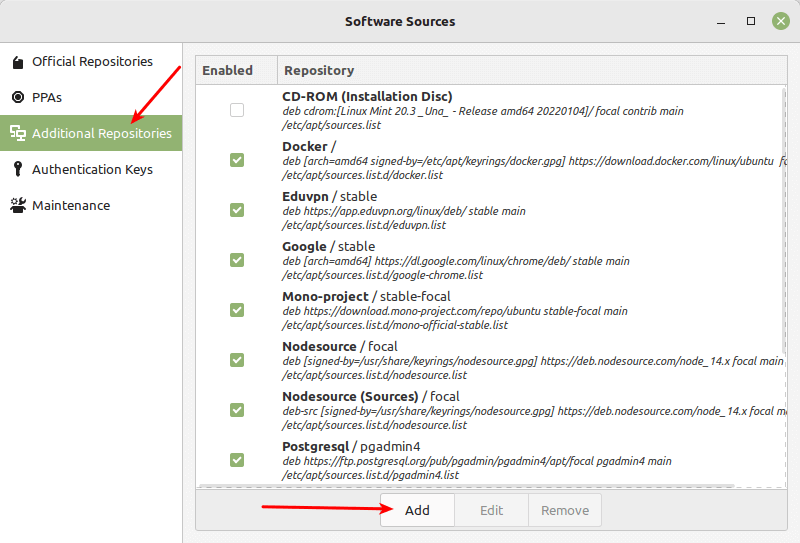
On Linux Mint, open your system menu and search for Software Sources, then open it. When asked to authenticate, enter your password to invoke the application with root privileges.
Next, click on the Additional Repositories tab, then click the Add button.
In the pop window, add the repo and click OK.
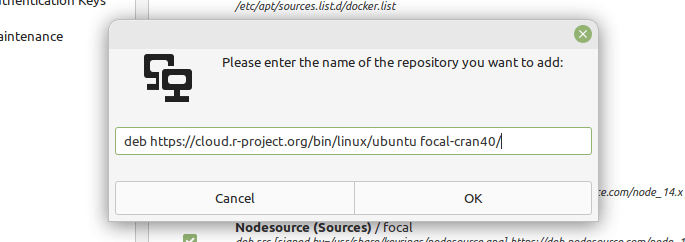
Once the repo has been added successfully, a message will display at the bottom of the window. Click OK to proceed.

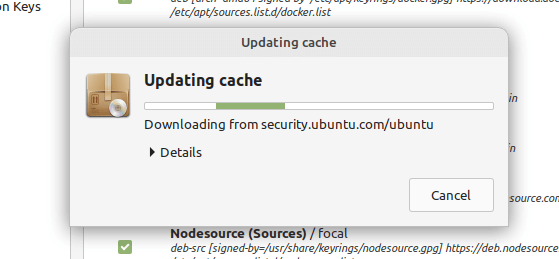
Then wait for the local package index to update. Once it is OK, you can proceed to install packages from the just added repo.
That’s it for now! In this guide, we have shown different ways to add a package repository in Debian and Ubuntu Linux, and their derivatives such as Linux Mint. For any comments or questions, reach us via the feedback form below.