- Supermicro — два способа настроить RAID
- RAID в Legacy
- RAID в UEFI
- Thread: RAID on supermicro
- RAID on supermicro
- Re: RAID on supermicro
- Re: RAID on supermicro
- Re: RAID on supermicro
- Re: RAID on supermicro
- Re: RAID on supermicro
- Re: RAID on supermicro
- Управление встроенным RAID на Supermicro X9SCL-F
- RAID на Supermicro X9SCL-F
Supermicro — два способа настроить RAID

Во многих материнках Supermicro есть встроенный RAID контроллер на чипе Intel. Показываем два способа настройки RAID массива, для Legacy и для UEFI. Работы будем проводить на примере сервера Supermicro GPU SuperWorkstation 7049GP-TRT.
Конфигурация простая, в сервер установлено два SATA SSD диска, нужно собрать из них RAID1 под систему. Включаем сервер.
Входим в BIOS с помощью кнопки Del.
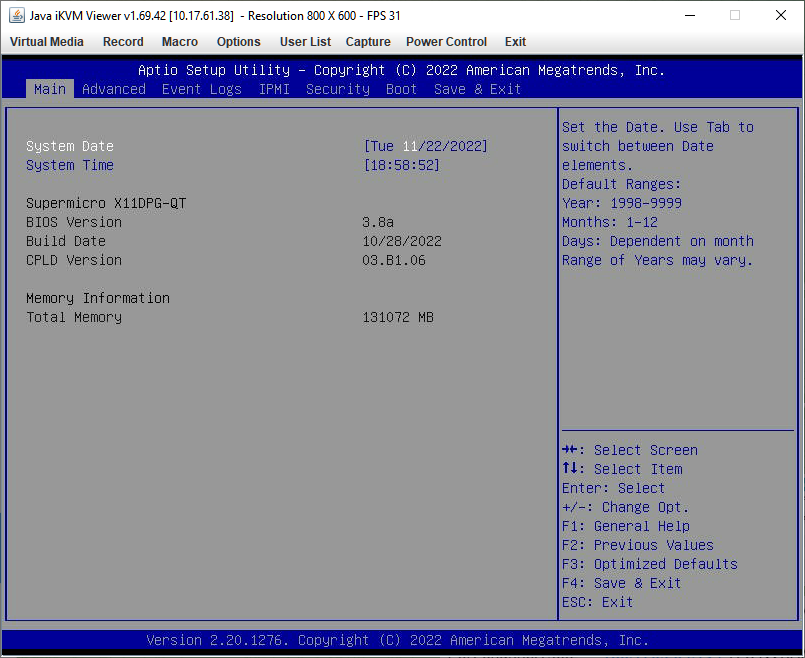
Переключаемся на вкладку Advanced.
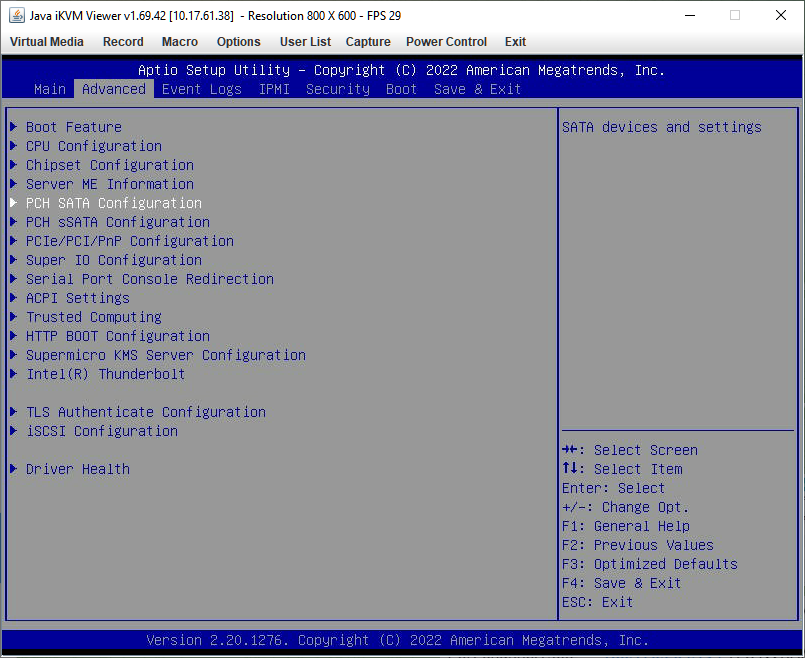
На материнской плате есть два контроллера на базе семейства микросхем PCH — Platform Controller Hub:
Входим в PCH SATA Configuration.
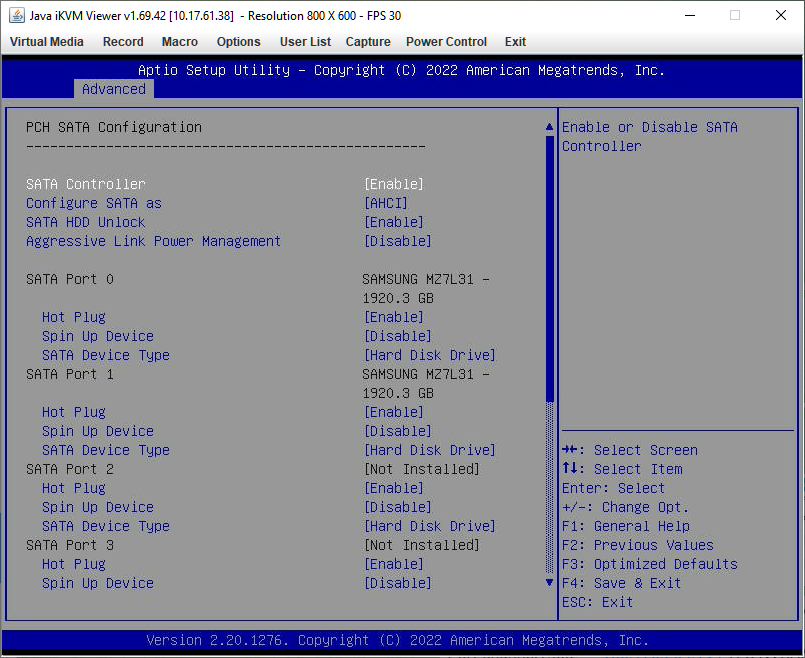
Вот как раз здесь и есть наши диски Samsung MZ7L21 на 2 ТБ каждый. SATA контроллер у меня включён. Если у вас не включён, то устанавливаем SATA Controller Enabled.
Вернёмся назад Esc и переключимся на PCH sSATA Configuration.
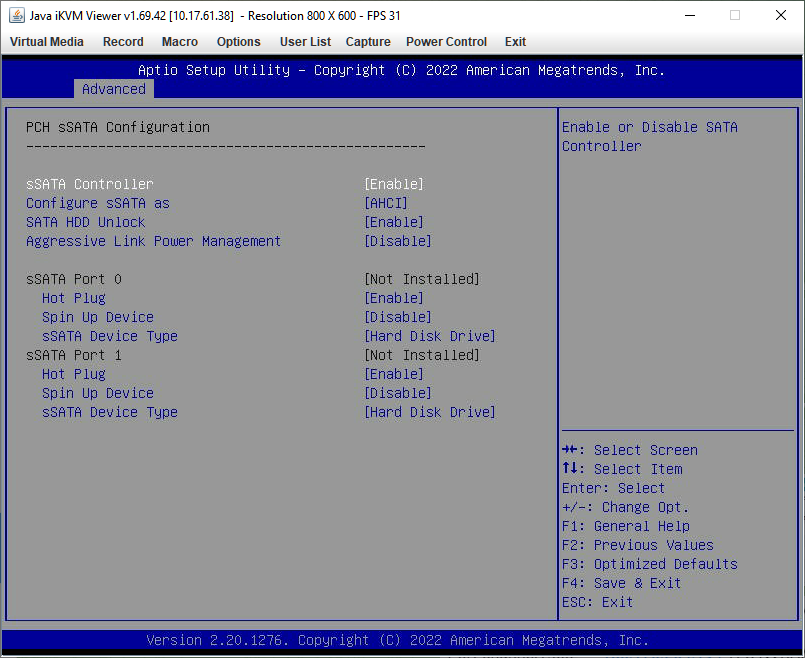
Второй контроллер нам не нужен, к нему не подключены диски.
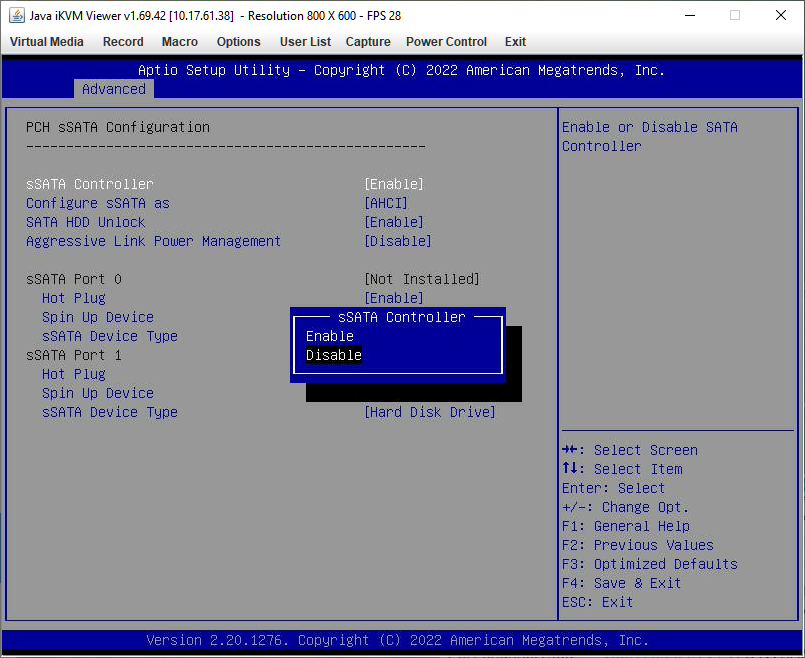
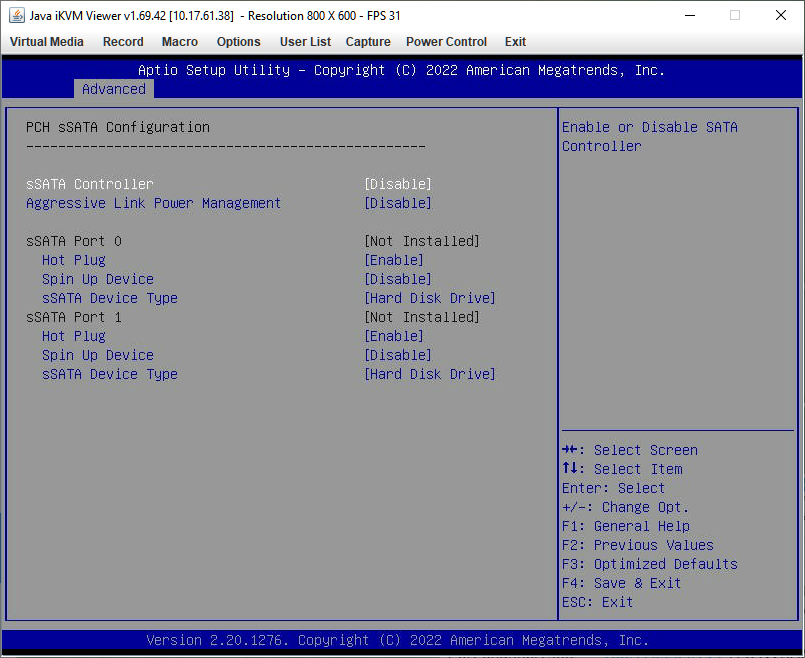
Отключаем его: sSATA Controller Disable.
Возвращаемся назад и переключаемся на вкладку Boot.
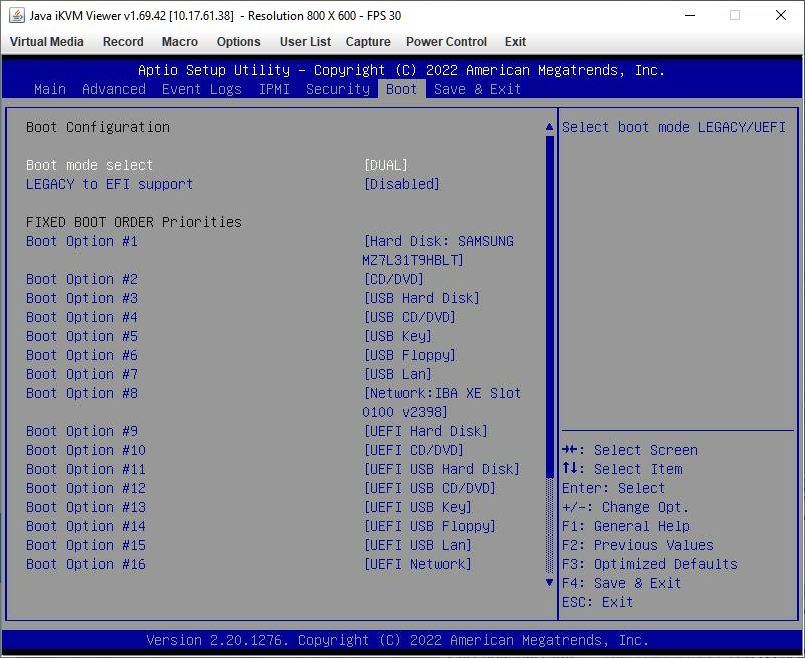
Указываем метод загрузки Boot mode select DUAL. Мы будем показывать способы настройки RAID и для Legacy и для UEFI, поэтому этот способ предпочтителен.
RAID в Legacy
Для начала рассмотрим вариант настройки RAID в режиме Legacy. В этом режиме не поддерживаются диски объёмом более 2 ТБ, имейте в виду.
Снова переходим к Advanced → PCH SATA Configuration.
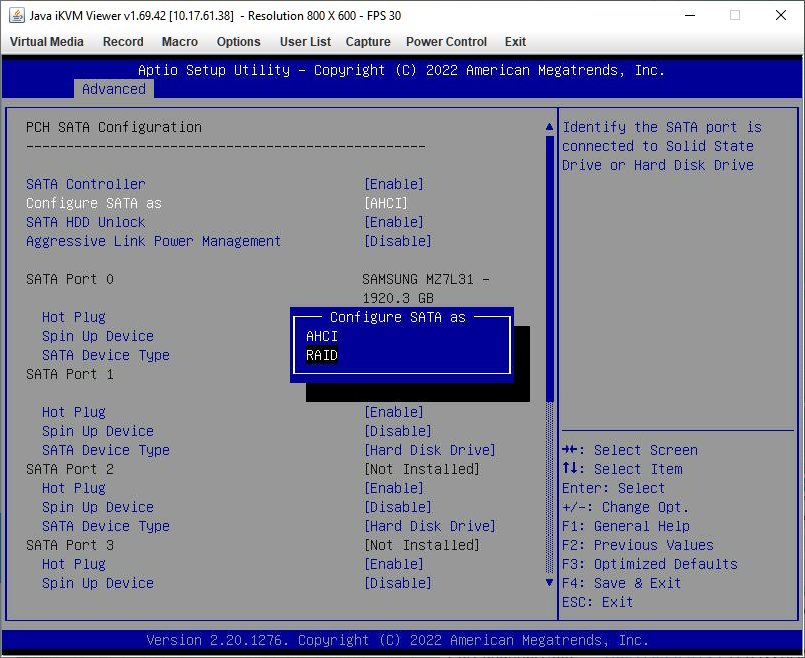
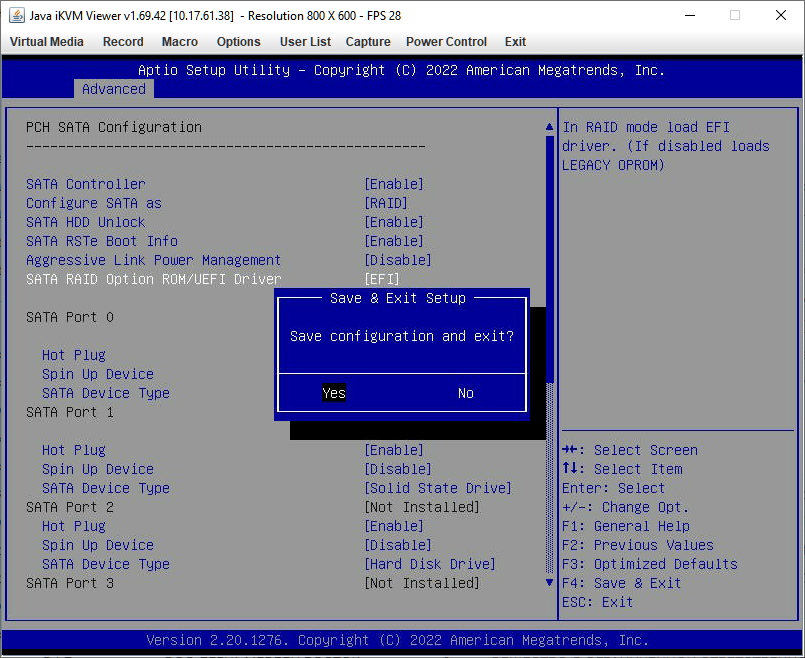
Configure SATA as RAID.

SATA RAID Option ROM/UEFI Driver Legacy.
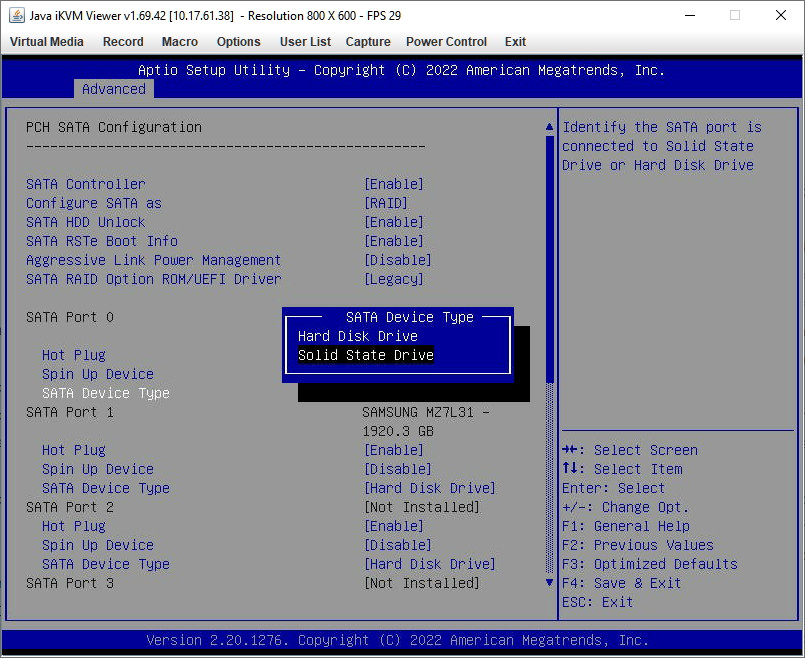
Диски меня SSD, для каждого указываю SATA Device Type Solid State Drive.
Сохраняем конфигурацию F4 и перезагружаем сервер.
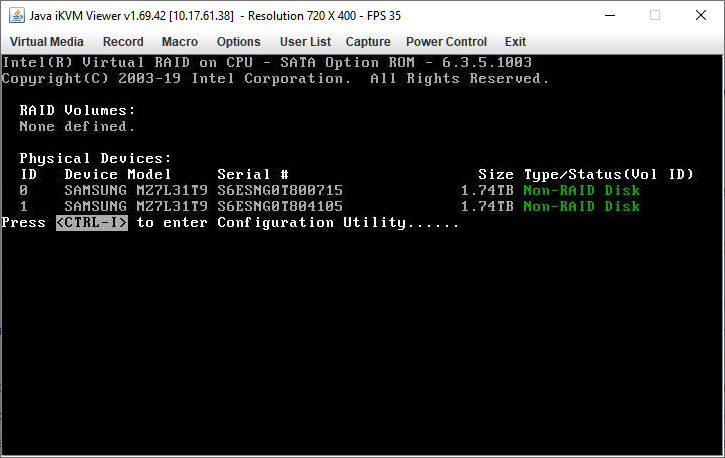
При загрузке нажимаем Ctrl + I и попадаем в утилиту настройки RAID массивов. Дальше не интересно.
RAID в UEFI
Теперь рассмотрим вариант настройки RAID в режиме UEFI. Входим в BIOS.
Advanced → PCH SATA Configuration.
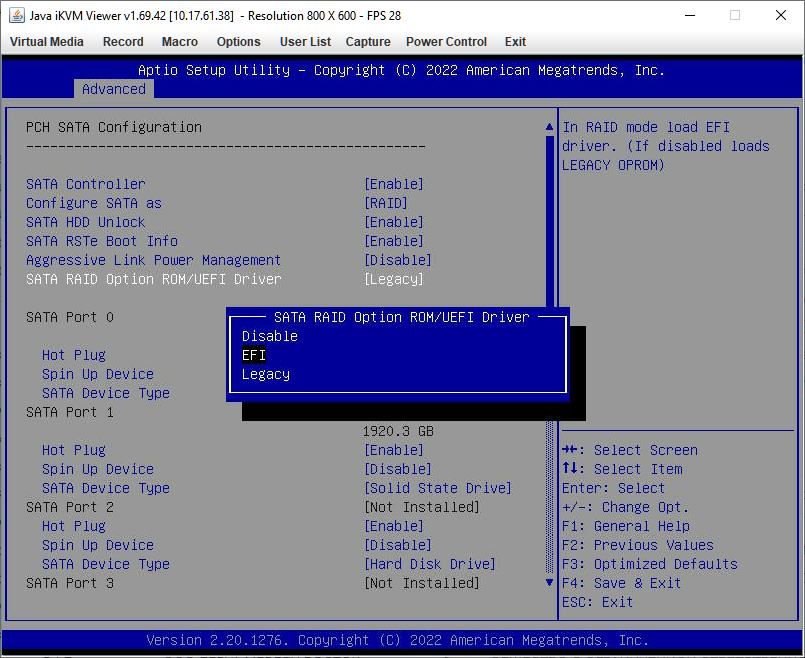
SATA RAID Option ROM/UEFI Driver EFI.
F4 — сохраняем изменения и перезагружаем сервер. Снова входим в BIOS в раздел Advanced.
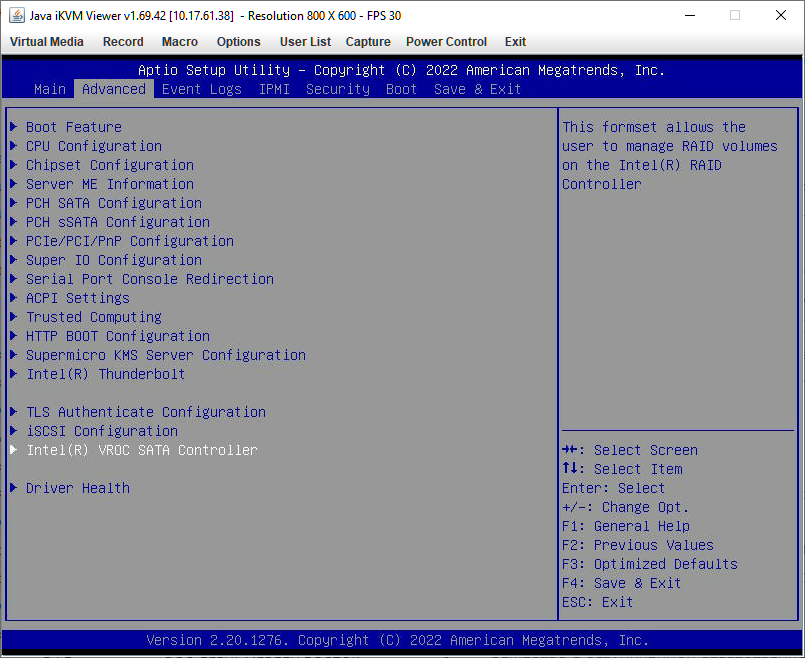
А здесь у нас появляются дополнительные пункты меню. Среди них есть Intel(R) VROC SATA Controller.

И здесь можно настроить наш RAID массив.
Thread: RAID on supermicro
 First Cup of Ubuntu
 ![]()
RAID on supermicro
I’m have a Supermicro 6016T-MT barebone server. I’m running 4 250gig sata drives. I’ve never set raid up before, and I was having problems. To give you an idea of what the server has the manual had this to say about the raid controller:
Serial ATA
An on-chip (ICH10R) SATA controller is integrated into the X8DTL-i to provide a
six-port, 3 Gb/sec SATA subsystem, which is RAID 0, 1, 5 and 10 supported. The
SATA drives are hot-swappable units.
I ran the BIOS, selected adaptec raid controller bios (it was between intel and adaptec). I ran that utility and made a raid 10 setup for the 4 drives.
I ran the ubuntu server edition 9.10 installer
During the install I get the following prompt:
One or more drives containing Serial ATA RAID configurations have been found. Would you like to activate these RAID devices. Activate Serial ATA raid devices?
Then I get the partition discs menu
This is an overview of your currently configured partitions and mount points. Select a partition to modify its settings (file system, mount point, etc.), a free apce to create partitions, or a device to initialize its partition table. Configure iSCSI volumes Undo changes to partitions Finish partitioning and write changes to disk
I opt «Finish partitioning and write changes to disk» and I get the following message
No root file system is defined. Please correct this from the partitioning menu.
Where do I go from there? I normally would try some things out. but there aren’t any options to play around with. If someone can help me, don’t talk to fast please. I’m still fairly new to linux/servers, and totally new to RAID setup. Only thing I’ve got going for me at this point is cool hair.
First Cup of Ubuntu ![]()
Re: RAID on supermicro
Has this issue ever been resolved? I am working with a similar Supermicro server, a 6025B-T which has an Adaptec AIC 7902 card. I previously had the server running FreeBSD with 3x 320gb disks in RAID 5 but after a recent crash (not disk related, more or less my fault) I have decided I want to switch to Ubuntu.
When I try to install the latest versions of Ubuntu (tried Server and Desktop) I’m assuming it isn’t recognizing the RAID array. I think I have to add a boot option to specify the adapter I’m using, so I found this page http://lxr.linux.no/linux+v2.6.22/Do. parameters.txt which lists all the parameters and noticed my card is listed with options as shown here, http://lxr.linux.no/linux+v2.6.22/Do. si/aic79xx.txt . The problem is, I just simply don’t know which options I should use to get this going. I selected install with the option aic79xx.aic79xx=no_reset but nothing really happened with that. If someone could lead me in the right direction, that would be great, Thanks!
As a disclaimer, I think I should add that I’m a new comer to Ubuntu and fairly new to the *nix scene in general
First Cup of Ubuntu ![]()
Re: RAID on supermicro
I forgot I was using the Intel option in the bios, not adaptec, so when I ran lspci from the Ubuntu server x64 disc, it mentioned:
00:1f.2 RAID bus controller: Intel Corporation 631xESB/632xESB SATA RAID Controller (rev 09)
I’m thinking I have to add a kernel module manually using modprob, but now I’m not sure which module to add. It seems like in that kernel-paramters.txt there’s nothing I could use. What should I do?
update: I found this page, and I think should show me which modules to add: http://cateee.net/lkddb/web-lkddb/SATA_AHCI.html . Problem is, it lists ‘ahci’ and ‘libahci’. ahci is already loaded as it was listed when I ran lsmod, but when I tried ‘modprobe libahci’, i got the message:
WARNING: Deprecated config file /etc/modprobe.conf, all config files belong to /etc/modprobe.d/. FATAL: Module libahci not found.
Where should I go from here? Or should I be looking at this? http://lxr.linux.no/linux/drivers/ata/Kconfig ?
I should mention that I have the intent of keeping at least one existing partition intact on the existing raid 5 array. So messing with the array at this point is out of the question.. But if it really is the only way, I suppose I could attempt to back it up somewhere, just would be a hassle to do so in my case considering I don’t have a single drive large enough to store it all.
Just Give Me the Beans! ![]()
Re: RAID on supermicro
First Cup of Ubuntu ![]()
Re: RAID on supermicro
well I’m already using it I just need to know how to have Ubuntu recognize it properly.. What should I try next ?
First Cup of Ubuntu ![]()
Re: RAID on supermicro
Ubuntu addict and loving it ![]()
Re: RAID on supermicro
first of, don’t let the OP in this thread throw you off.
This is a harware raid controller. What you need to do first, is configure a RAID with the dedicated config utility that should be accessible while the machine boots (you’ll have to press a certain key during the POST)
The ‘volumes’ or ‘LUNs’ that you configure their, will present themselves as disks/partitions to the operating system later on, so you can thread them as ordinary disks — i.e. mkfs and be done with it, or use the partitioner during the install to create filesystems. This is probably where the OP went wrong.
What you do need is a driver/module that supports the Adaptec RAID controller, otherwise your operating system won’t see the volumes you created (as they are controlled and managed by the adaptec controller)
the module you’re looking for is * aic79xx
according to this page http://hardware4linux.info/component/34851/
On a running system, you could try ‘insmod’. When installing, the (Debian) installer offers an option to load additional modules, somewhere.
Unless all of that has been changed recently in Ubuntu. Then you need to go find a manual.
Управление встроенным RAID на Supermicro X9SCL-F

Встроенный RAID на Supermicro X9SCL-F не так плох, как может показаться изначально, несмотря на то, что это все-таки серверная материнская плата начального уровня . Тем не менее X9SCL-F — рабочая лошадка на многих серверах, ведь имея небольшую стоимость, у неё есть все необходимое — встроенный RAID-контроллер, два сетевых интерфейса, IPMI.
В этой статье я как раз собираюсь заняться настройкой массива на встроенном RAID-контроллере (внешний не поместился в корпусе в связи с установкой доп. сетевой платы) с целью использования сервера для нужд тестирования работы интернет-, voip- шлюзов, vpn-сервера.
Если вам интересны raid-технологии и задачи администрирования raid-контроллеров, рекомендую обратиться к рубрике RAID на моем блоге.
RAID на Supermicro X9SCL-F
Во время загрузки нажимаем CTRL+M и заходим в утилиту управления RAID-массивами LSI Software RAID Configuration Utility. Название прямо намекает на производителя RAID-контроллеров LSI, но на официальном сайте Supermicro мне не удалось найти информацию о конкретной модели чипа на данной материнской плате:


Наша задача — создать RAID-массив 1 (зеркало) из двух имеющихся дисков. Сделать это можно из основного меню — Configure\New Configuration — Yes. Если у вас уже были массивы и вы хотите от них избавиться, то в этом же меню выберите Clear Configuration.

Далее откроется меню выбора дисков. Выделить нужные диски можно пробелом, как и на многих других контроллерах разных производителей:

Как только диски выбраны, можно переходить к дальнейшей настройке, нажав F10. Нас попросят выбрать настраиваемый массив, нажимаем Enter.

После этого откроются свойства массива:

Тут надо быть немного повнимательнее. Например есть смысл отключить функцию DWC, которая является ни чем иным, как кэшем записи. Этот кэш в большинстве случаев увеличивает производительность, но создает риск потери данных в случае аварийного завершения работы сервера. В более серьезных решениях, чаще всего не встроенных, в внешних, имеется отдельный чип с флеш-памятью и подключенной к нему батарейкой (более продвинутый вариант — высокоемкостной конденсатор как на любых контроллерах Adaptec — Управление массивами RAID Adaptec 6405).
Как только вы все настроили, ставим курсор на Accept и нажимаем Enter. Вылезет вопрос о сохранении конфигурации:

Подтверждаем его и на этом создание массива завершено. Дальше нужно его инициализировать и для этого идем в Objects\Virtual Drive\Initialize — Yes.


Последняя задача — сделать массив загрузочным. В меню идем Configure\Select Boot Drive\ — выбираем наш единственный массив, нажимаем Enter.

Все готово. Выходим из утилиты конфигурации (Esc, Esc — Yes — ALT+CTRL+DEL) и перезагружаем сервер.
Во время перезагрузки у вас будет возможность увидеть состояние вашего массива и немного другой служебной информации:

Во время создания массива не рекомендую экспериментировать с произвольными настройками (кроме отключения кэша), за вас оптимальным образом уже все настроили производители железа. Если вы не знаете точно для чего вам нужно то или иное значение параметра, то его вообще лучше не трогать и на высокопроизводительных внешних контроллерах, не говоря уже о встроенных решениях. В противном случае вы можете получить падение производительности и головную боль в будущем.