- How to Sync Android with the Linux Desktop
- Contacts and Calendars
- Files and photos
- Saved searches
- Use saved searches to filter your results more quickly
- License
- Licenses found
- rootkiwi/an2linuxserver
- Name already in use
- Sign In Required
- Launching GitHub Desktop
- Launching GitHub Desktop
- Launching Xcode
- Launching Visual Studio Code
- Latest commit
- Git stats
- Files
- README.md
- About
- Resources
- License
How to Sync Android with the Linux Desktop
It’s well known that the Android platform relies heavily upon Linux. With this in mind, it makes perfect sense that Android and Linux should be able to seamlessly communicate on the desktop layer. For the most part … it does. You can easily drag and drop files between your desktop and the Android device. However, when it comes to syncing things like contacts and calendars ─ if you’re not ready to do a bit of work, your best bet is to keep your head (and your desktop) in the cloud.
How much work? Not really all that much. In fact, extending your Android device to your Linux desktop is really just a matter of installing a few extra apps and understanding the difference between MTP and PTP connections.
First and foremost, we need to understand what is the best practice scenario here. Ideally, you would be using Google services ─ such as Gmail and Google Calendar as both your desktop and mobile solutions. This is the most seamless method of getting your Android and Linux desktops to meet.
Of course, not everyone wants to limit themselves to a browser on the desktop. To that end, what do you do? The best method around this is by employing Thunderbird. Using Thunderbird, you can sync both your contacts and your calendars. There is, of course, a caveat to this method ─ you will still be syncing Thunderbird to your Google account. That’s not a problem, seeing as how you will already be using a Google account on your Android device. So first, let’s take care of the Contacts/Calendar side of things and then we’ll deal with files.
Contacts and Calendars
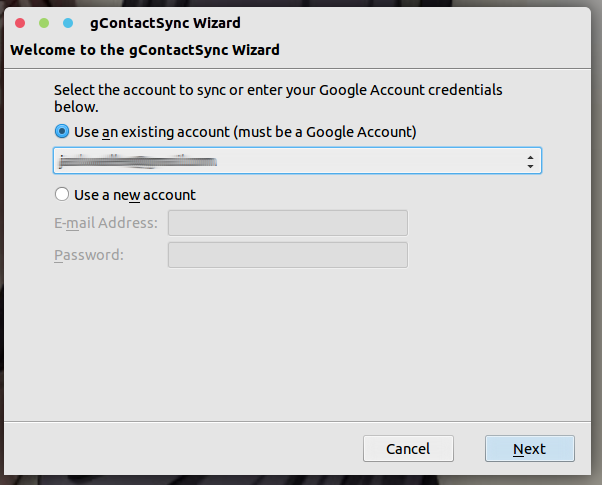
The first thing you want to do is install gContactsSyn addon for Thunderbird. Once you’ve installed this (and restarted Thunderbird), you will be prompted to select the account you want to use for the sync, or use a new account (Figure 1).
Click Next and then select which Address Book to use for the synchronization, the Groups and Contacts to sync, and pick the direction for the sync.
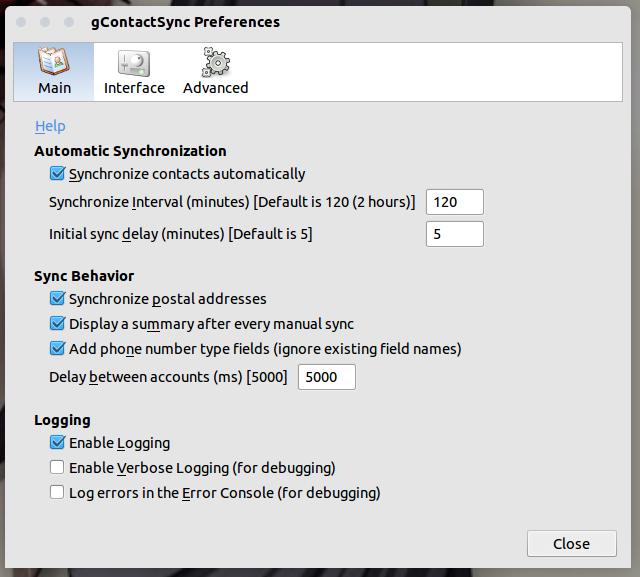
Click the Finish button and the syncing should begin. Once the sync is complete, you should see a popup indicating what was added. By default, gContacsSync is set up to autosync every 120 minutes. You can change that by clicking the gContactsSync menu (within Thunderbird) and then clicking Preferences. From the preferences window (Figure 2), change the autosync time to best fit your needs. Your Contacts are now syncing between your Linux desktop, your Google account, and your Android device.
Now that you have your Contacts in sync, what about the calendar? This is just a simple means of installing the Lightning extension and configuring it to sync with your Google Calendar. If you need both read/write access to the Google Calendar, you will also have to install the Provider for Google Calendar addon.
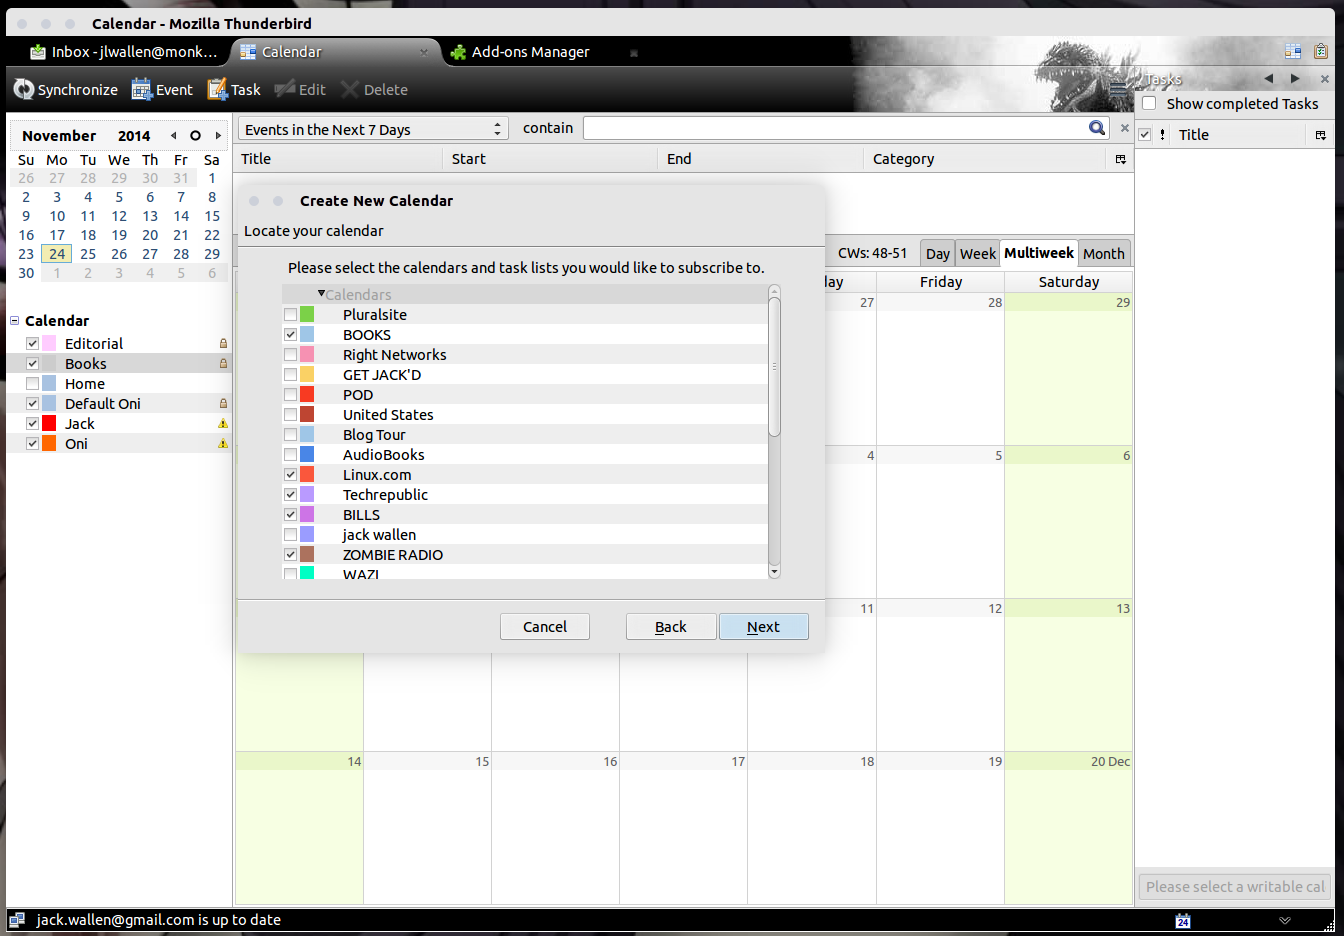
Once that is installed, open up Lightning and right-click a blank space in the Calendar listing, select New Calendar, select On the Network, select Google Calendar, and walk through the remainder of the wizard. Even if you have two-step verification, this process will work without a hitch. In the end, you can select all of the calendars you want to sync (Figure 3) and start working with your Google Calendar ─ which will then sync with your Android device.
Files and photos
This is actually where there is little work to be done (outside of the installation of an optional app). When you connect your Android device to your Linux desktop (via USB), your file manager should open to the available Android directory. What directory appears will depend upon if you have Android set up to connect via MTP (Media Transfer Protocol) or PTP (Picture Transfer Protocol).
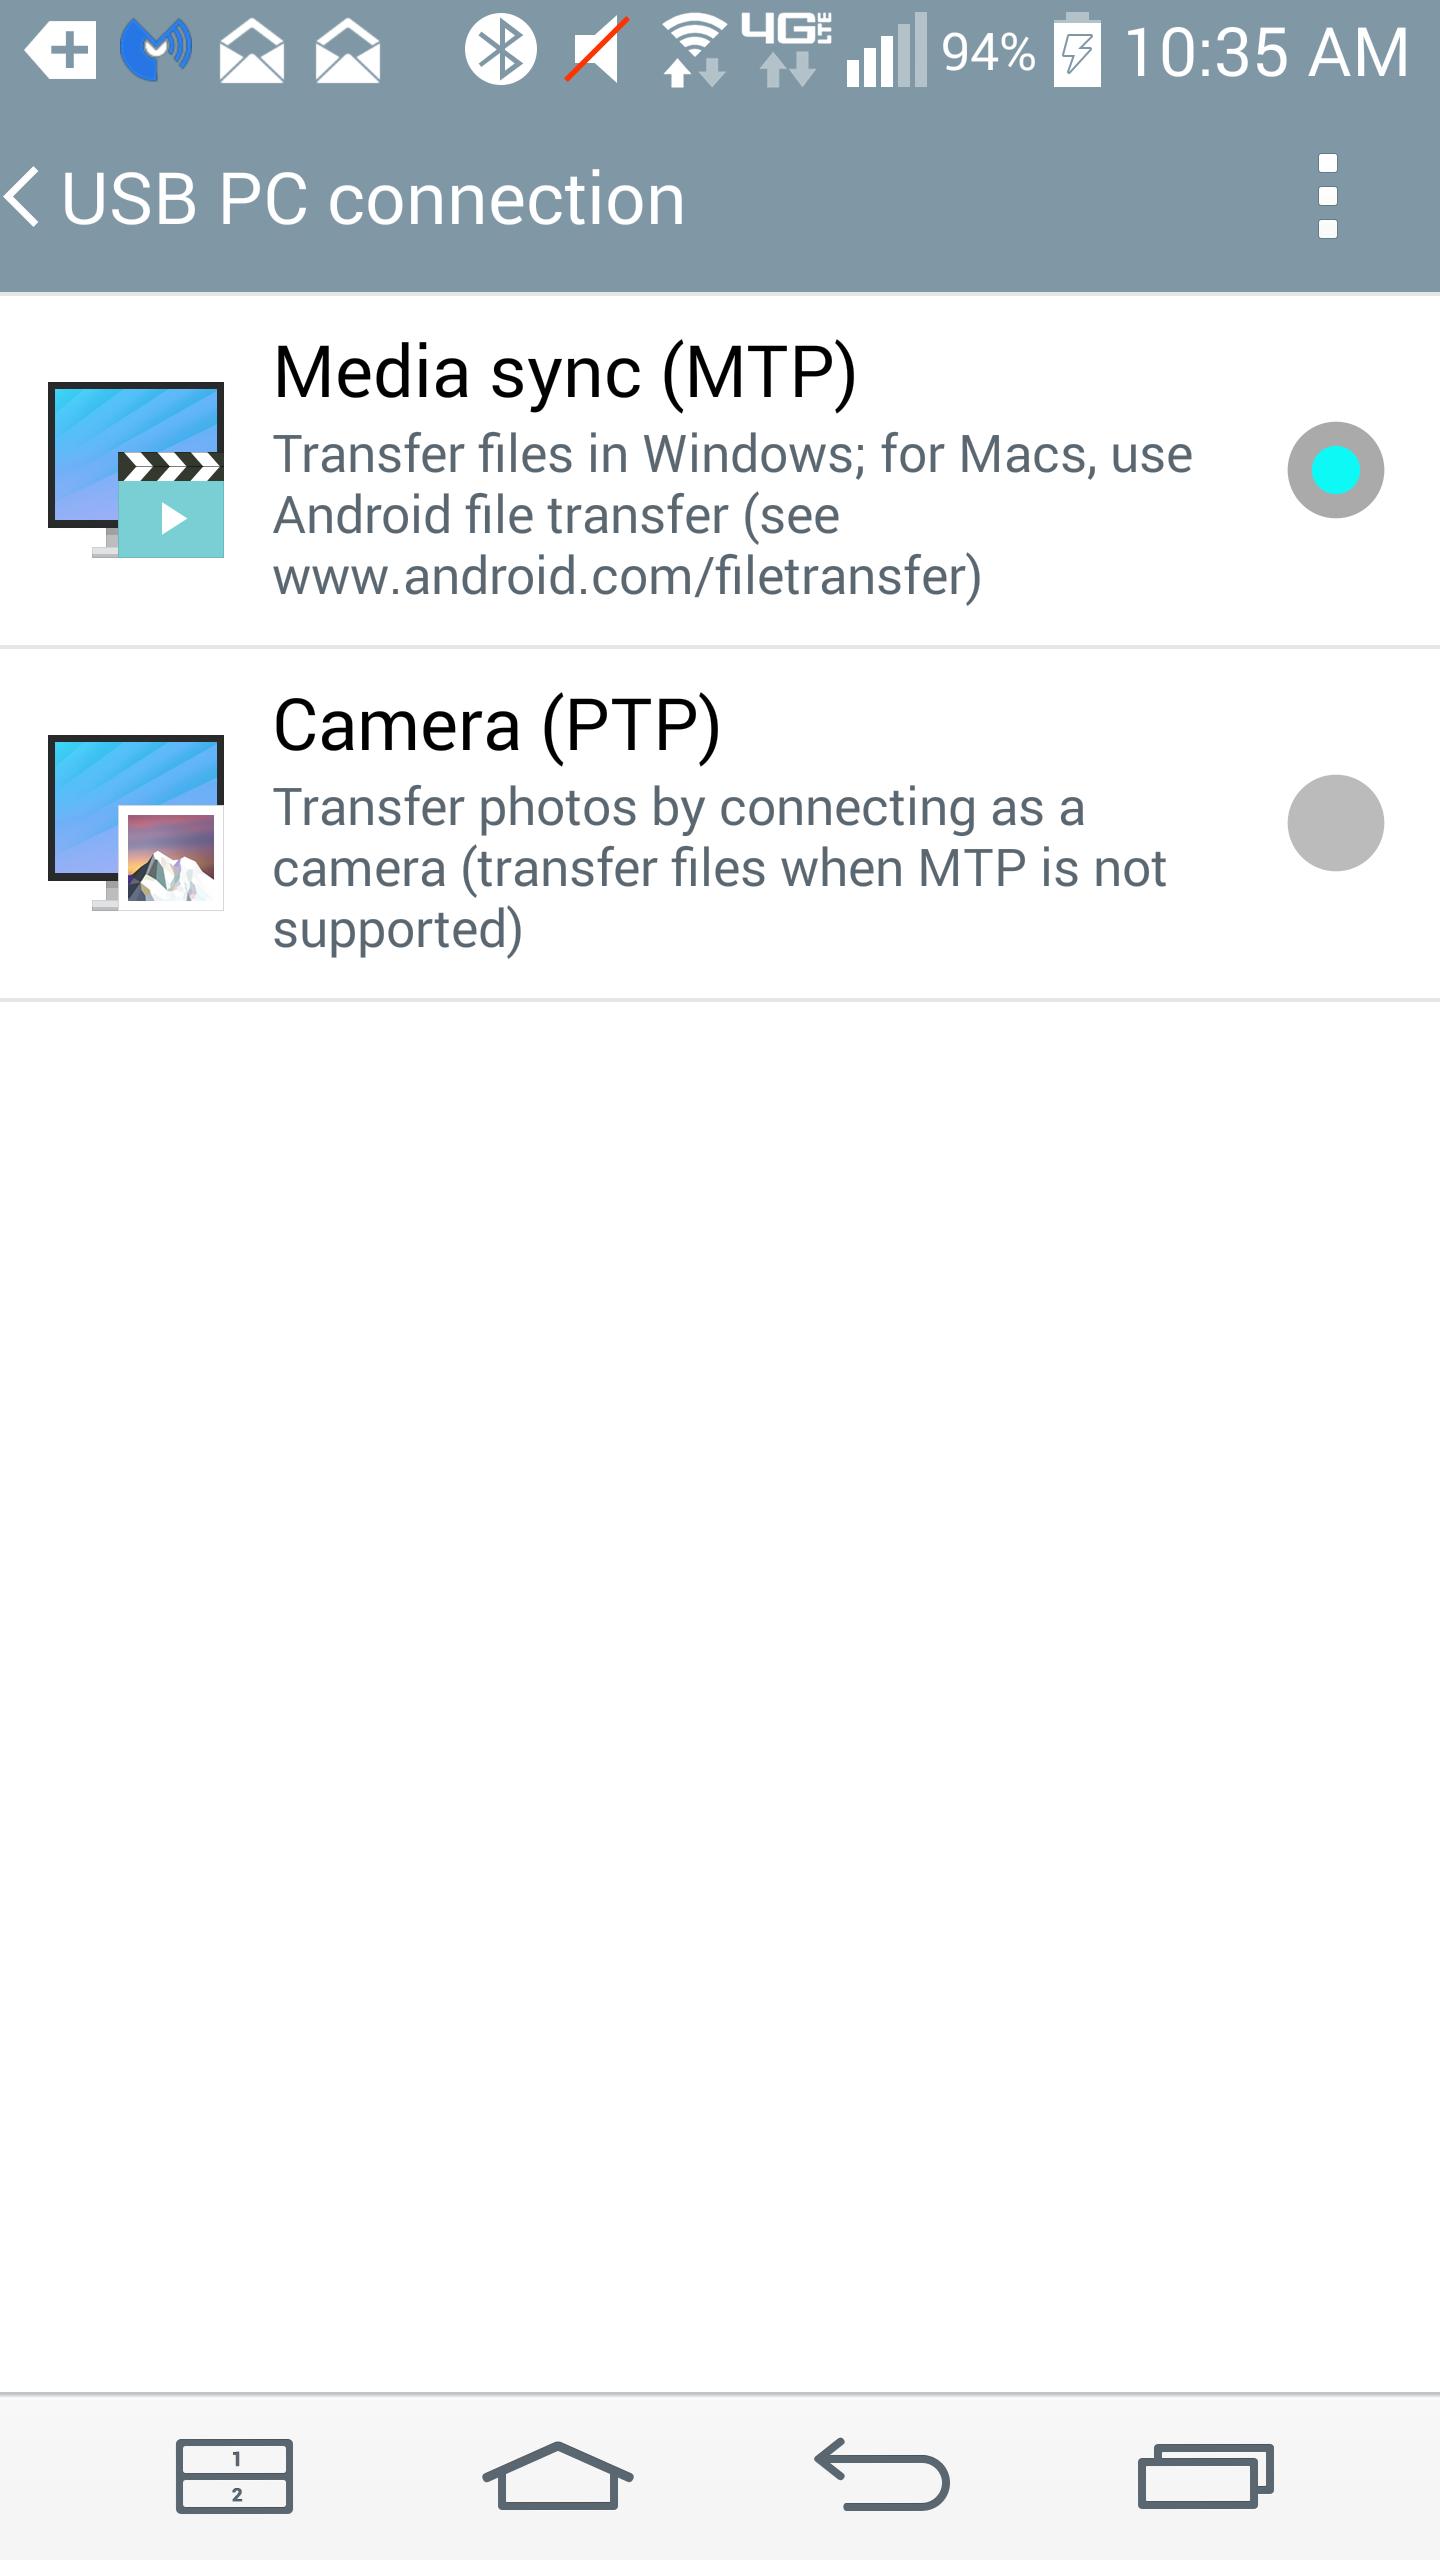
If configured for PTP, your Android device will connect as if it is a camera only and the DCIM and Pictures folders will appear. You can then click the Shotwell button (if available) and import all of those photos onto your desktop. Switching between MTP and PTP is quickly done by dragging down the Android notification bar, tapping the USB indicator, and then switching between the two (Figure 4).
If, however, your device is set up for MTP, Internal (phone) and External (microSD card) storage folders will appear. You can then drag and drop files to and from the Android device.
What if you want be able to transfer files to and from a Samba share on your Linux desktop? With the help of the Astro File Manager (with Astro SMB Module), you can easily access those Samba shares from Android.
To install the Android apps, do the following:
- Open Google Play Store on your Android device.
- Search for Astro File Manager.
- Locate and tap the entry by Metago.
- Tap Install.
- Read through the permissions listing.
- If the permissions listing is acceptable, tap Accept.
- Allow the installation to complete.
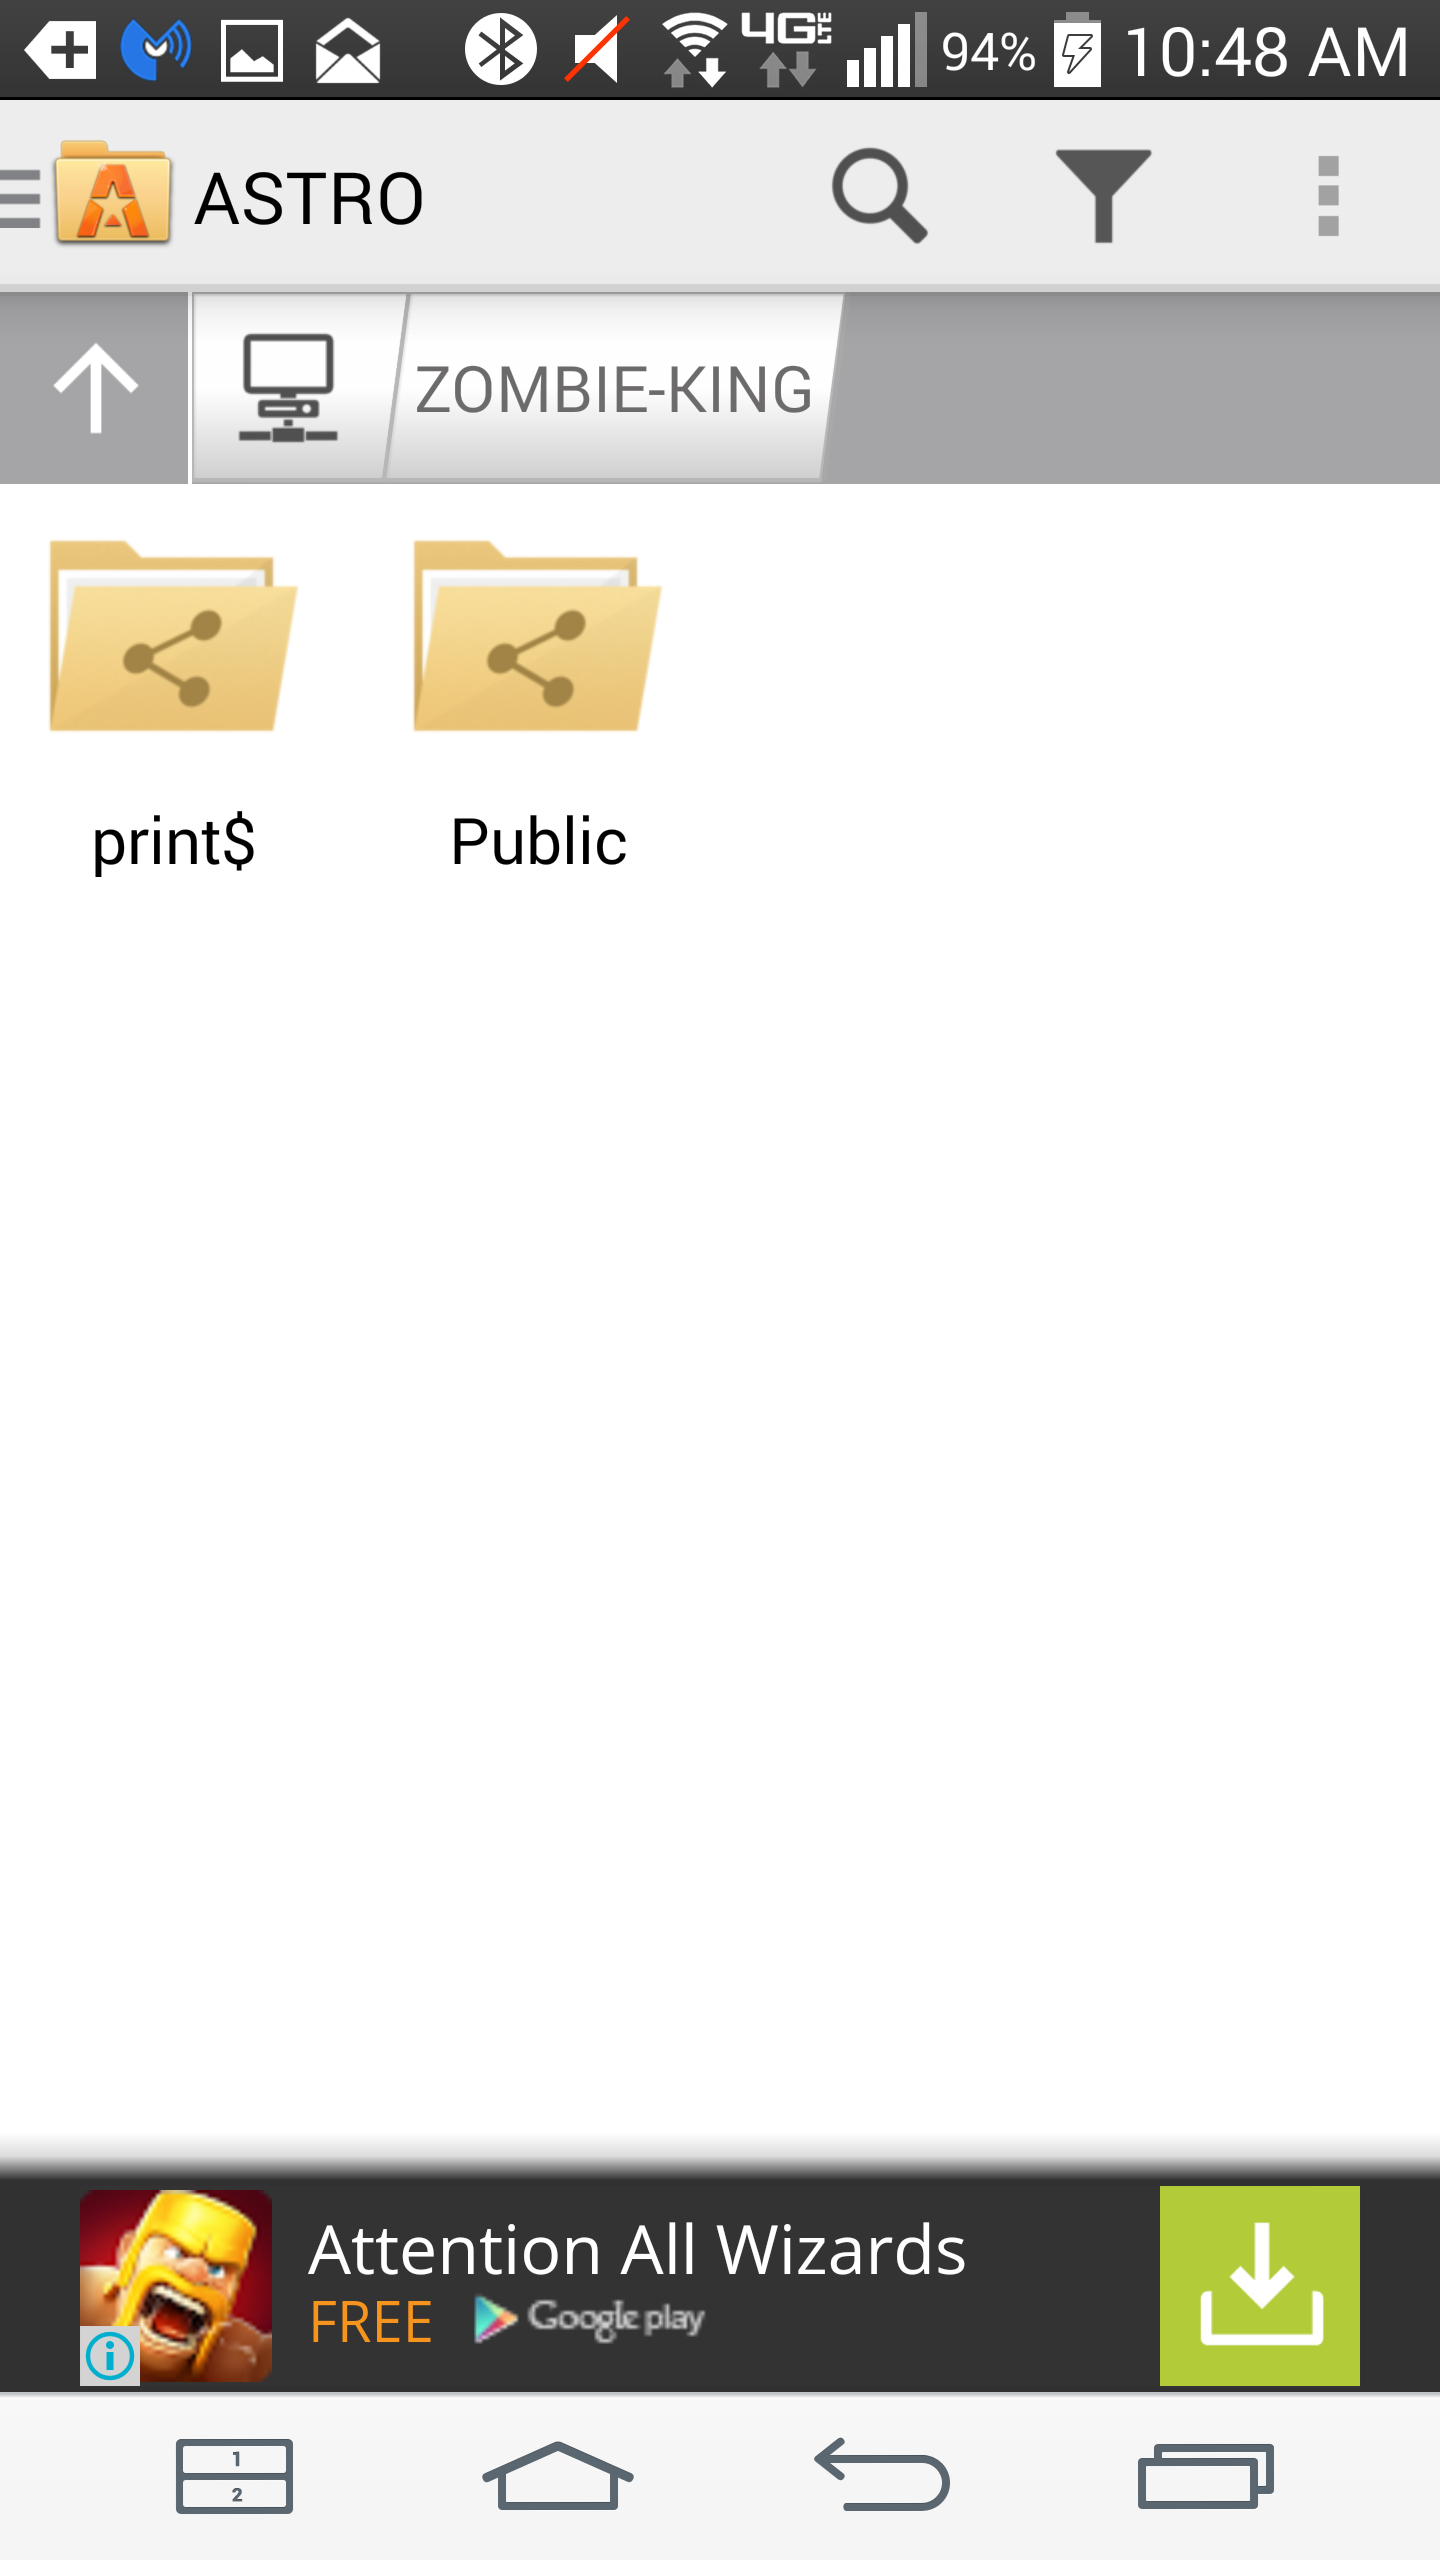
Follow the above steps for the Astro SMB Module and you’re ready to set up the connection. The Android device must be connected to the same network as is the Linux desktop that holds the Samba-shared folder. Here’s how to connect through Astro File Manager:
- Open Astro File Manager on the Android device.
- Swipe right from the left edge of the screen.
- Tap Locations.
- Tap Local Network.
- Tap WORKGROUP.
- Tap the machine you want to access.
- Tap the shared folder (Figure 5).
You should be able to copy, paste, and move files (assuming the folder is shared with the proper permissions).
At this point, you can now keep your files, folders, photos, calendars, and contacts in sync between your Android device and Linux desktop. It’s not quite plug and play, but it’s nothing any Linux use should have trouble taking care of.
Saved searches
Use saved searches to filter your results more quickly
You signed in with another tab or window. Reload to refresh your session. You signed out in another tab or window. Reload to refresh your session. You switched accounts on another tab or window. Reload to refresh your session.
Sync Android notifications encrypted to a Linux desktop
License
Unknown, Unknown licenses found
Licenses found
rootkiwi/an2linuxserver
This commit does not belong to any branch on this repository, and may belong to a fork outside of the repository.
Name already in use
A tag already exists with the provided branch name. Many Git commands accept both tag and branch names, so creating this branch may cause unexpected behavior. Are you sure you want to create this branch?
Sign In Required
Please sign in to use Codespaces.
Launching GitHub Desktop
If nothing happens, download GitHub Desktop and try again.
Launching GitHub Desktop
If nothing happens, download GitHub Desktop and try again.
Launching Xcode
If nothing happens, download Xcode and try again.
Launching Visual Studio Code
Your codespace will open once ready.
There was a problem preparing your codespace, please try again.
Latest commit
Git stats
Files
Failed to load latest commit information.
README.md
Sync Android notifications encrypted using TLS to a Linux desktop over WiFi, Mobile data or Bluetooth.
This is the server part of AN2Linux which will run on your computer.
I’m using archlinux but I’ve added here what I think to be the package names for debian/ubuntu as well.
Arch: python Debian / Ubuntu: python3 Arch: libnotify Debian / Ubuntu: libnotify4 gir1.2-notify-0.7 gir1.2-gdkpixbuf-2.0 Arch: python-gobject Debian / Ubuntu: python3-gi Dependencies for bluetooth
Arch: bluez-libs Debian / Ubuntu: libbluetooth-dev Arch: python-pybluez Debian / Ubuntu: python3-bluez Arch: python-pip Debian / Ubuntu: python3-pip pip3 install pybluez First time just run an2linuxserver.py and follow the instructions.
AN2Linux uses TLS for encryption with both client and server authentication. That means that the client (android) and the server (your computer) need to exchange certificates first.
To initiate pairing you must have an2linuxserver.py running and then in the android app press initiate pairing when in the process of adding a new server.
First you need to pair your phone and computer with each other (the normal bluetooth pairing), and then do the certificate exchange as explained above.
Why use TLS over bluetooth when bluetooth is already encrypted?
Well, firstly, because I wanted to try 🙂
And secondly, from the little I’ve read about bluetooth it seems that the encryption key size negotiated can be very small.
I’m using archlinux so I’m going to tell you how it works for me, I have no idea how it works on other distros. It may work out of the box or it may not, just try it.
This is the error I get without the fixes below:
bluetooth.btcommon.BluetoothError: (13, ‘Permission denied’)
So, if you’re not using archlinux but still are using systemd and get an error like that maybe you should try something similar.
Edit bluetooth.service in an override file
systemctl edit bluetooth.service [Service] ExecStart= ExecStart=/usr/lib/bluetooth/bluetoothd -C ExecStartPost=/bin/chmod 662 /var/run/sdp systemctl daemon-reload systemctl restart bluetooth.service First time when running an2linuxserver.py it will create the directory: $XDG_CONFIG_HOME/an2linux/ .
If $XDG_CONFIG_HOME is not set it defaults to: $HOME/.config/an2linux/ .
In this config directory a few files will be created.
A default config file named config will be created with the settings:
Open that config file for more detailed info about every setting.
Server RSA key and certificate
AN2Linux will generate a 4096 bit RSA key rsakey.pem and a self-signed certificate certificate.pem .
Just delete those and restart AN2Linux if you want to generate a new key and certificate.
After a successful certificate exchange AN2linux will create a file named authorized_certs .
Every line in that file will represent a trused certificate.
That first part SHA256. is not used by AN2linux at all, it’s just added as a convenience to the user to help distinguish between multiple certificates.
If the setting bluetooth_support_kitkat is turned on AN2linux will also generate a file named dhparam.pem .
That is because SSLEngine does not support any ECDHE cipher suites until from API 20+ (Android 5.0+).
Run AN2Linux as a service
a popular easy-to-use firewall for Linux is Uncomplicated Firewall (ufw)
- install it:
- on Arch: $ sudo pacman -S ufw
- on Debian/Ubuntu: $ sudo apt-get install ufw
- start and enable ufw’s systemd unit:
- $ sudo systemctl start ufw; sudo systemctl enable ufw
- set your mobile device’s LAN ip to a static ip
- in the WiFi settings, long press the network you’re connected to and tap «modify network»
- if authentication is required (it should) and you’re authenticated already leave the password feild empty
- (Google it for the rest of steps, which depend on your region/router for the Gateway address)
- allow traffic limited to one port, from your mobile device’s LAN static ip
- $ sudo ufw allow from to any port
GNU General Public License 3, with the additional special exception to link portions of this program with the OpenSSL library.
About
Sync Android notifications encrypted to a Linux desktop
Resources
License
Unknown, Unknown licenses found