- How to install Ubuntu on Synology
- Downloading an installation image
- Creating Virtual Machine
- Choose Operating System
- Select Storage
- General Configuration
- Storage
- Network Configuration
- Other Settings
- Assign Permissions
- Summary
- Installation of a system
- Post-installation recommendations
- Mount Synology NAS in Linux
- SMB/CIFS
- NAS configuration
- System configuration
- How To Install Linux Ubuntu on Synology NAS
- Install Ubuntu on Synology NAS
- Step 1. Set Up Your Synology NAS (Compatible With Ubuntu)
- Step 2. Download an Ubuntu ISO Image
- Step 3. Download and Install Virtual Machine Manager
- Step 4. Create a System Image and Configure
- Step 5. Create a Virtual Machine and Configure
- Step 6. Install Your Ubuntu OS on Synology NAS
- Step 7. Install a Guest Agent
- Bonus Tip — Secure Your Synology Data With a Data Recovery Tool
How to install Ubuntu on Synology
This post is about installing an Ubuntu desktop on your Synology NAS. You are able to install any other Linux distribution using this recipe, it does not matter whether desktop or server type of any distro.
To install any virtual machine to your Synology, you need to install Virtual Machine Manager to your NAS. Your model must be supported:
19 series: RS1219+ 18 series: FS1018, RS3618xs, RS818RP+, RS818+, RS2818RP+, RS2418RP+, RS2418+, DS3018xs, DS918+, DS718+, DS218+, DS1618+ 17 series: FS3017, FS2017, RS3617xs, RS3617RPxs, RS4017xs+, RS3617xs+, RS18017xs+, DS3617xs, DS1817+, DS1517+ 16 series: RS2416RP+, RS2416+, RS18016xs+, DS916+ 15 series: RS815RP+, RS815+, RC18015xs+, DS3615xs, DS2415+, DS1815+, DS1515+ 14 series: RS3614xs, RS3614RPxs, RS3614xs+ 13 series: RS3413xs+, RS10613xs+ 12 series: RS3412xs, RS3412RPxs, DS3612xs 11 series: RS3411xs, RS3411RPxs, DS3611xs (source, last updated 2018-08-13)
We can summarize a recipe into the following steps:
- Downloading an installation image
- Creating a virtual machine
- Installation of a system
- Post-installation recommendations
Downloading an installation image
You can install your favourite image (ISO) of your distro. I have used an Ubuntu Desktop because it is very popular with most people (actually I do not know why :)).
Download ubuntu-xxx-desktop-amd64.iso and save it to your NAS.
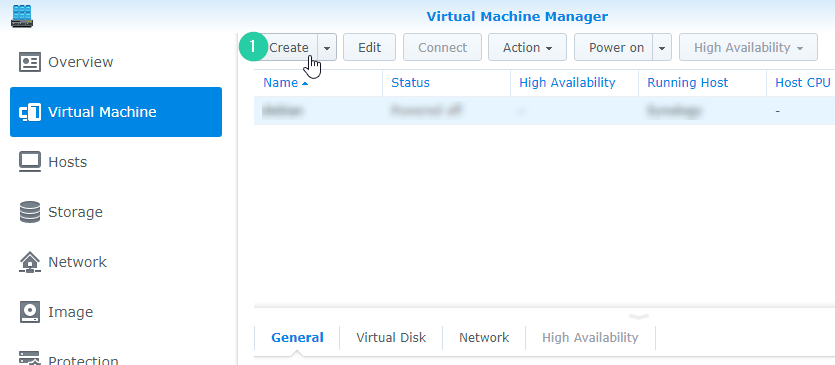
Creating Virtual Machine
Creating your own Virtual Machine is the most important step, but Synology has its own wizard which is very helpful and I think is very easy to understand. So run Virtual Machine Manager, select Virtual Machine on the left menu a click to create.
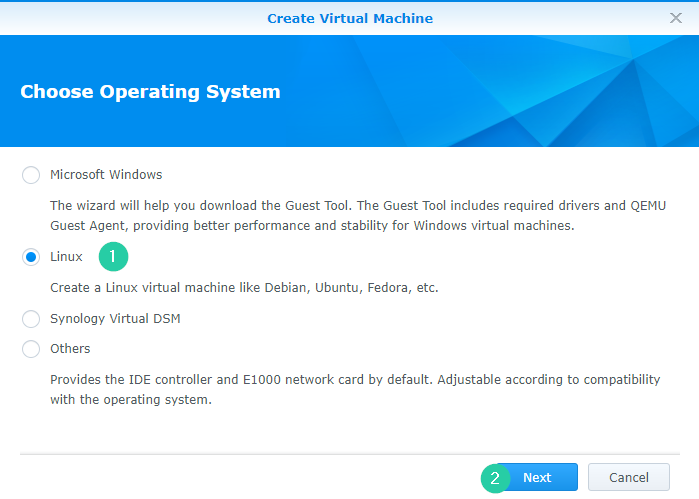
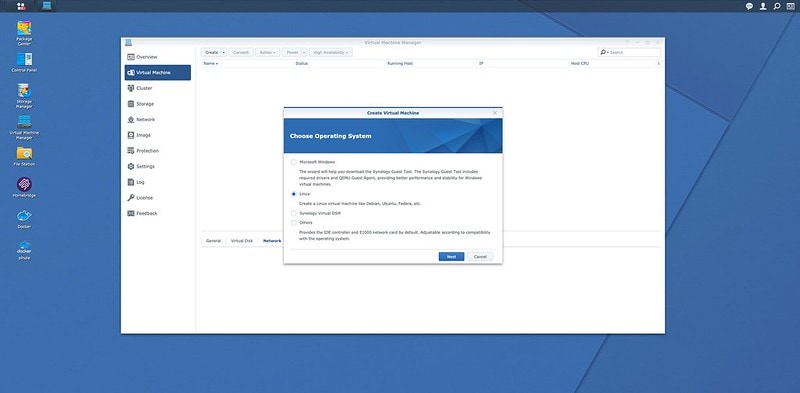
Choose Operating System
In the first step of the wizard, select the Linux choice. Option Other may be helpful for some exotic or old distros.
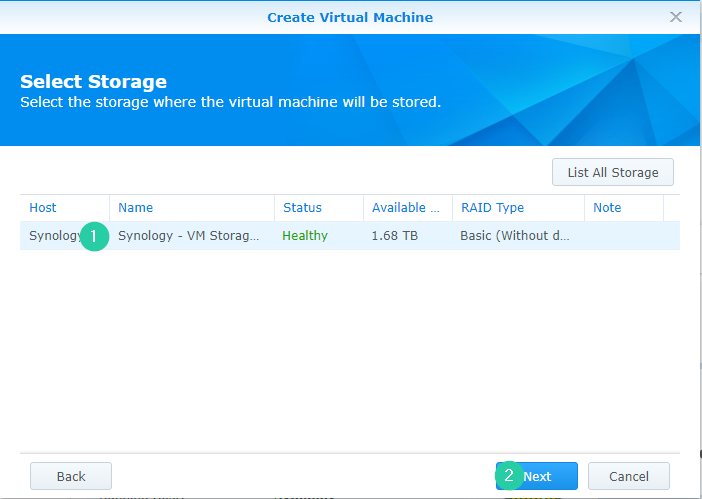
Select Storage
The step 2 is related to storage, where your machine will physically be installed. If it is your first install, you will be prompted to create a new one. Your data on NAS will not be affected, all ubuntu files will be separated.
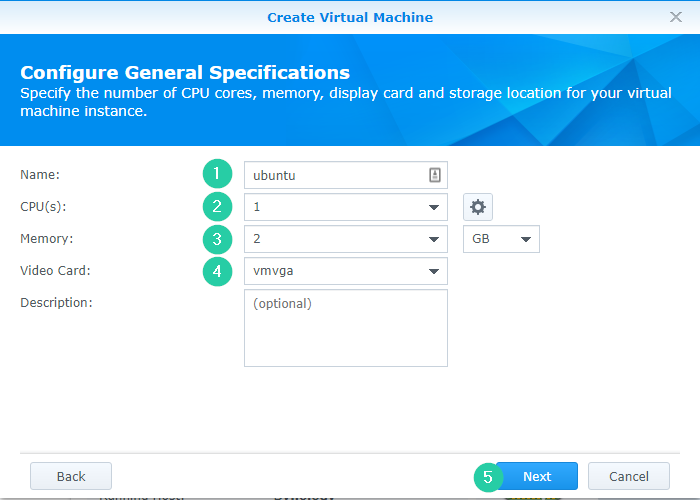
General Configuration
The step 3 is related to general configuration. As you maybe noticed, you are creating a new virtual machine, so you need to assign CPU (2), RAM (3), video card (3) etc. A number of assigned RAM is related to your available memory, but you need to know, that the DSM system needs memory for its run as well so you cannot count with 4 virtual machines (4 x 1GB), when your NAS has 4 GB in total.
Actually, exactly one virtual machine consumes memory assigned by you plus 256 MB + 80 MB (resources for the hypervising: Each VM requires 256 MB; each vCPU requires 80 MB), so 1GB assigned to your Virtual Machine needs 1360 MB in total.
Storage
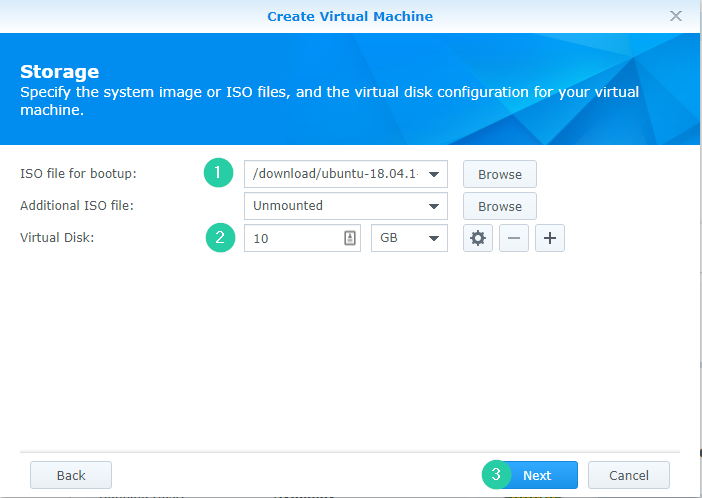
The 4th step is related to storage. Now you need to set up your previously downloaded ISO image for bootup (1) and setup capacity of the virtual disk (2). As you noticed, I set 10 GB what is quite sufficient for showing Ubuntu (after installing it takes about 5 GB)
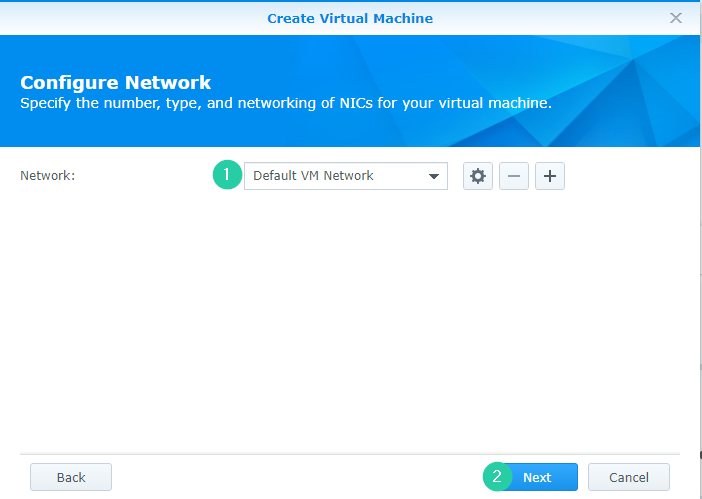
Network Configuration
The step number 5 is related to network configuration. If you do not have any special requirements, you can leave it as it, or you can disable network inside your Ubuntu, so no internet access.
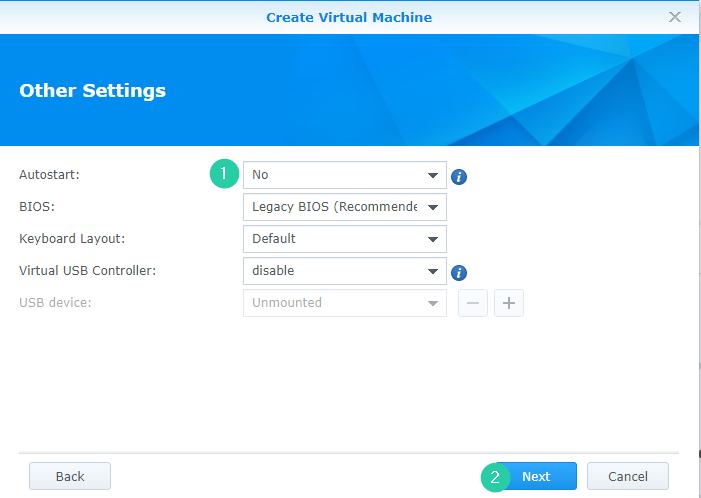
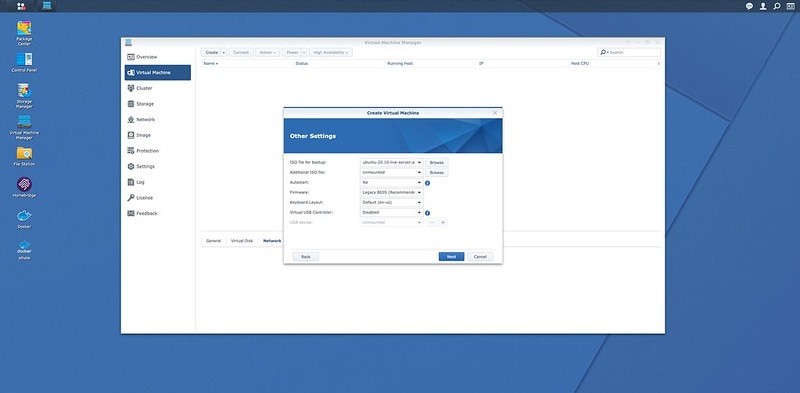
Other Settings
The last but one step is not so important, all default choices are sufficient. Maybe you can set autostart to yes.
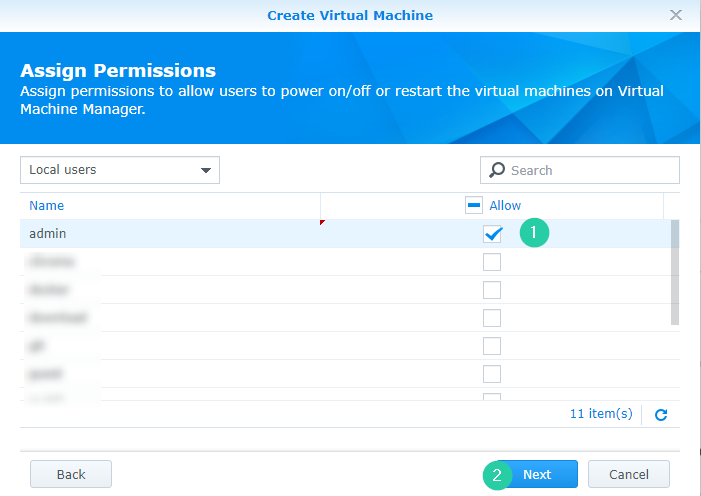
Assign Permissions
The last step is about assigning permissions to power on/off or restart a virtual machine, I checked admin only.
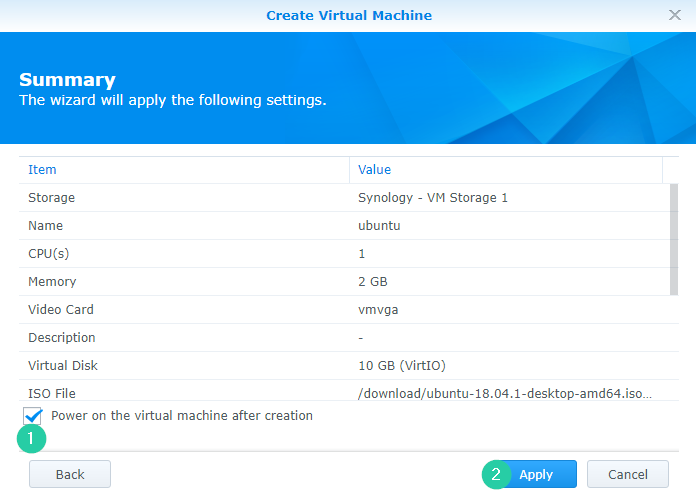
Summary
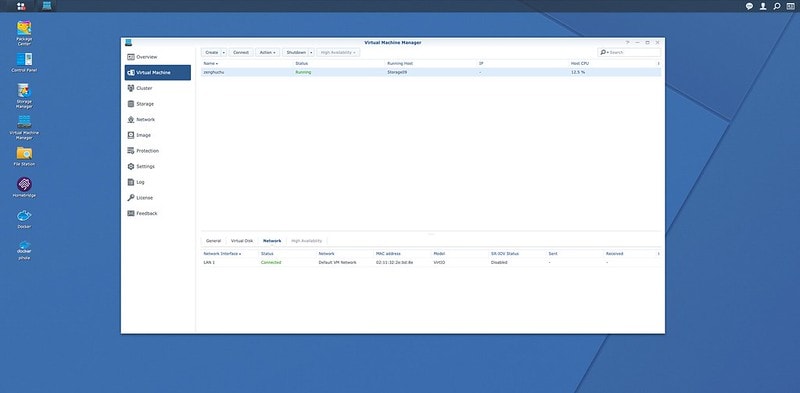
After submitting the summary page, your virtual machine will be running (please, check Power on the virtual machine after creation).
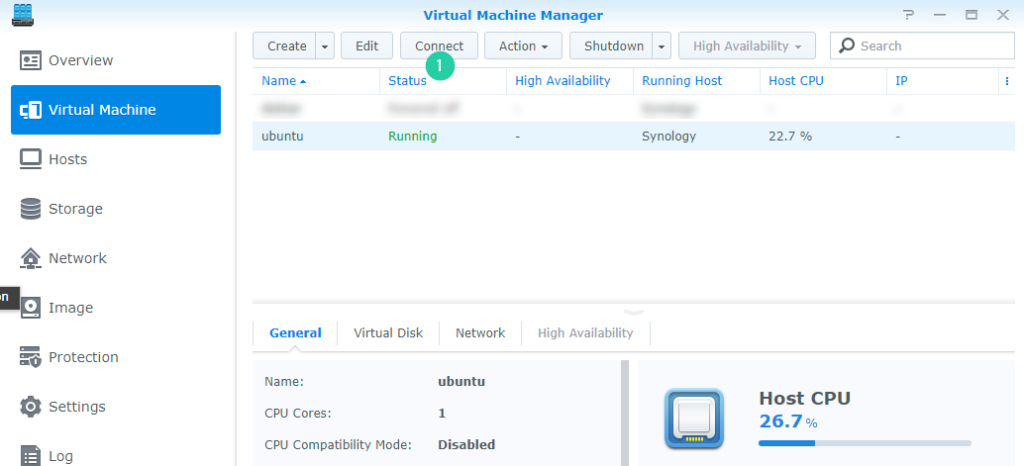
On the Virtual Machine page, select your previously created machine and click to Connect (1).A new tab with vnc session to your machine will be created. Please follow steps depending on your needs and an installing system.
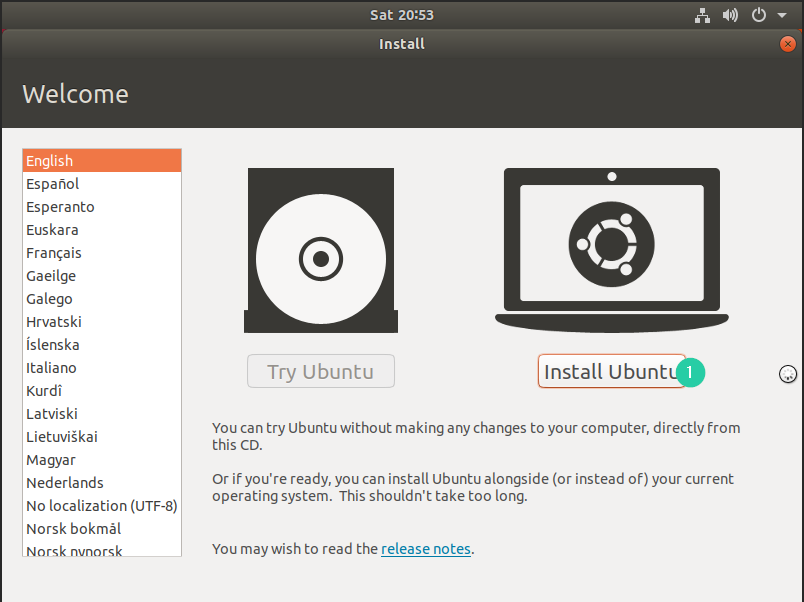
Installation of a system
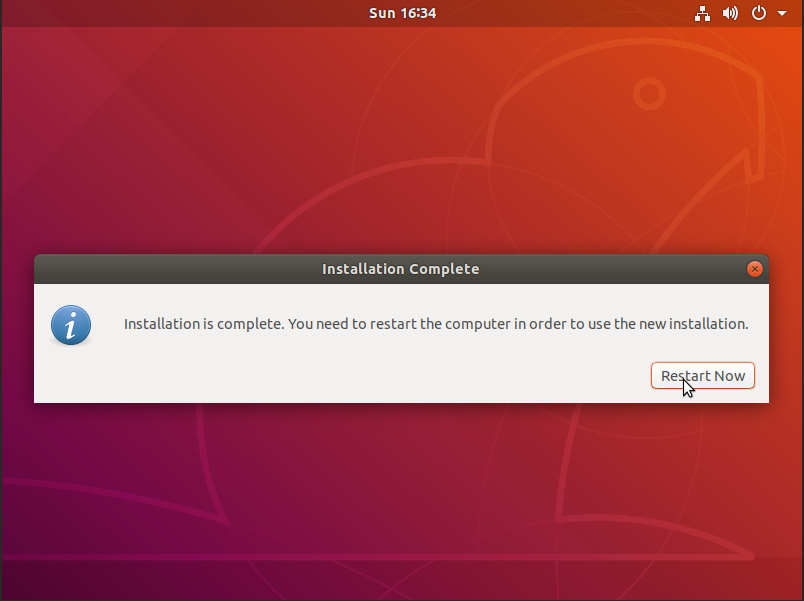
Your installation process has been completed.
Post-installation recommendations
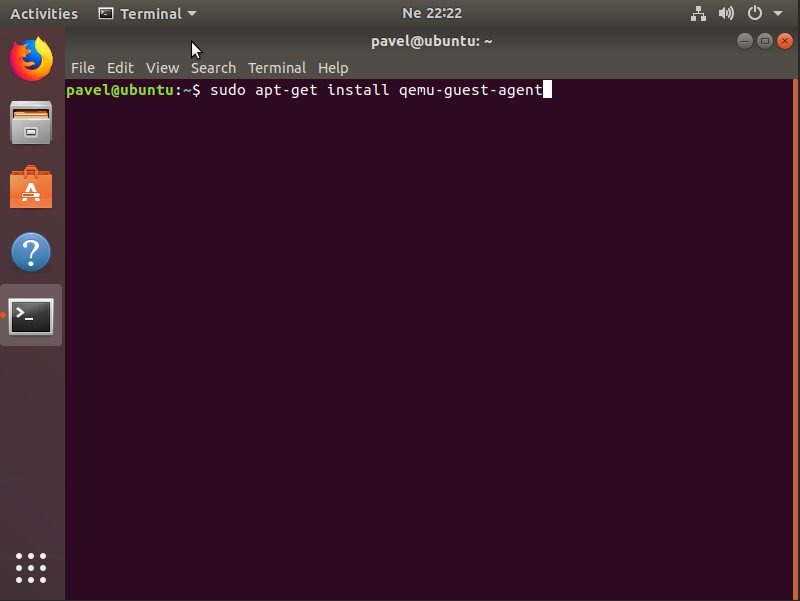
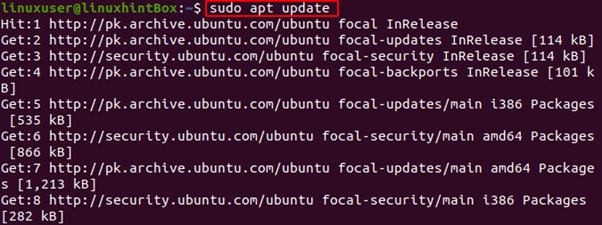
When the installation process is done, it is strongly recommended to install a guest agent. It is used to exchange information between the host and guest, and to execute a command in the guest, allowing properly shut down or restart your machine from the Virtual Machine Manager application.
sudo apt-get install qemu-guest-agent
And it is all, enjoy your new virtual machine.
Mount Synology NAS in Linux
From some time I am happy user of Synology DiskStation DS218j. I recommend it to all who would like to cut themselves off from the cloud solutions of popular suppliers like Dropbox, Google Drive or Onedrive.
By setting up your private NAS, you have full control over your data, you gain access to your data from each device and additional features such as VPN, web server, backup of your devices, calendar, office package, group work, chat, audio server, video server and many other functions which description can be found on the manufacturer’s website. A one-off expense at the beginning may seem quite large, however, it returns from the first day of use. Personally, I use the Synology solution but there are more companies on the market that produce this type of equipment for home and professional use. If you are interested in such a solution, look for something that will meet all your requirements.
Mounting and mapping shared resources from a NAS server in Windows should not cause major problems. In the Linux system it requires a bit more knowledge but it is possible and with the description below it will become trivial for every intermediate Linux user.
You can mount shares in two ways via SMB/CIFS and NFS. Both solutions are good and fast. It seems to me that the first way is less complicated and requires less configuration. Additionally, it works in any environment with variable configuration of computer IP addresses.
SMB/CIFS
NAS configuration
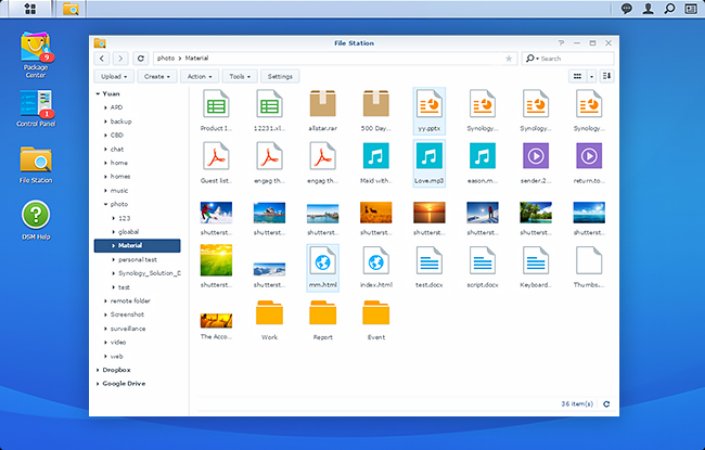
Log in to your Synology Disk Station Manager and go to Control Panel. Choose File Services in tab SMB/AFP/NFS and select SMB service. Provide name of your Workgroup. Remember name of field Mac (Finder): smb://nas_name. In Advanced Settings you can choose maximum and minimum SMB protocol (if are not sure what to select choose maximum version to SMB3 and minimum to SMB2 — Do NOT use SMBv1. SMB1 lacks encryption, is inefficient, and has been exploited in the wild by ransomware attacks). Additionally switch Transport Encryption Mode to Auto and select Enable Opportunistic Locking. Now you are ready to mount folders on Linux.
System configuration
and add line with IP and name of your NAS.
How To Install Linux Ubuntu on Synology NAS
If you have been tirelessly trying to install Linux on Synology NAS without satisfying results, know that you’re not the only one to experience this issue. Although it may seem like an easy step-by-step process, there are some nuisances that puzzle most people, especially those who aren’t tech-savvy or familiar with Synology Ubuntu.
Luckily, this guide should help you address such problems and learn the best ways to build your Synology virtual machine Ubuntu powerhouse.
First, you’ll need a compatible Synology NAS and Ubuntu ISO image. Once you have these readily available, we can move to the hard part of Installing Ubuntu on Synology NAS.
Install Ubuntu on Synology NAS
Step 1. Set Up Your Synology NAS (Compatible With Ubuntu)
Before you install Linux on Synology NAS, you should ensure compatibility with Ubuntu. You can do that by connecting the Synology Diskstation with the Ubuntu server.
Setting up this connection will also require a successfully configured DiskStation and shared folder for saving your content to the Ubuntu server.
Follow these steps to connect Synology NAS to Ubuntu:
- Open the Diskstation Web Application;
- Navigate to Control Panel > Shared Folder;
- Select NFS-Access;
- Create a new connection and open a shell on your Ubuntu server.
There, you just connected a Synology NAS to your Ubuntu server. Now, set up your NAS using Web Assistant by following these tips:
- Select Set Up;
- Click Install Now to install the DiskStation Manager;
- Complete the installation process and allow the NAS to restart;
- Create a new admin user account by following the instructions on display;
- Select Go to get to the Synology Web GUI.
Once you complete these steps, your Synology NAS should be ready for Ubuntu. The recommended practice is to use a Synology NAS with 8GB or more memory to ensure successful Linux Ubuntu installation.
Step 2. Download an Ubuntu ISO Image
Run your Synology NAS and visit the official Ubuntu website to download the ISO image. Navigate the site to the Ubuntu Desktop tab and select Download. You’ll see the latest available version of the image. Download the image file and choose the destination where you want to save it.
Step 3. Download and Install Virtual Machine Manager
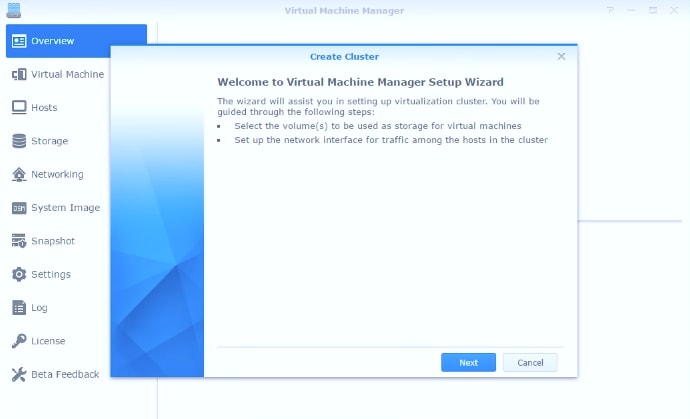
The following steps and images will take you through the process of downloading and installing the Virtual Machine Manager:
- Open Synology DiskStation web interface;
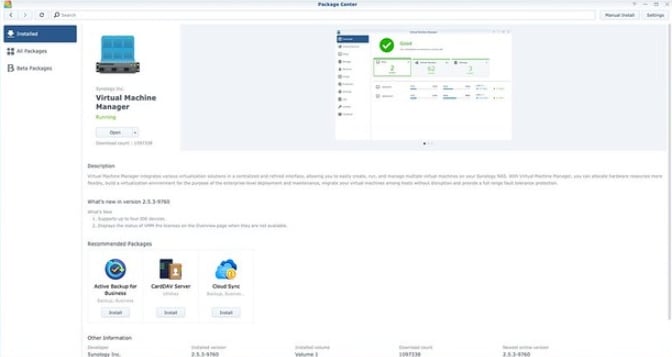
- Select the Package Center from the top menu on the left;
- Sign up for the Beta Program by visiting the Beta section and checking the “Yes, I want to see beta versions” tab;
- Find the Utilities section and navigate it to the Virtual Machine Manager tab;
- Select Install.
You should see the Virtual Machine Manager icon in the DiskStation menu if the installation process was successful.
Step 4. Create a System Image and Configure
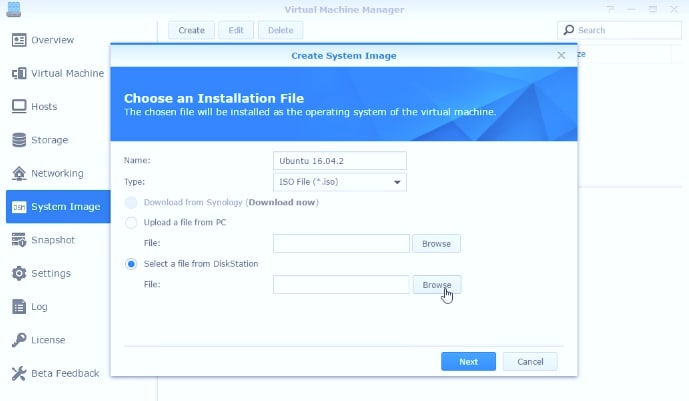
Navigate the Virtual Machine Manager user interface to the System Image section to set up the Ubuntu ISO image by doing the following:
- Select Create;
- Choose the name of your System Image in the Name section;
- Choose ISO File in the Type section;
- Click on the Select a file from DiskStation section, select Browse to upload the Ubuntu image, and click Next;
- Choose Your NAS and hit Apply.
It will take a while for your system to create the image. Once the system creates the image, configure your system by selecting the storage option for saving system images.
Step 5. Create a Virtual Machine and Configure
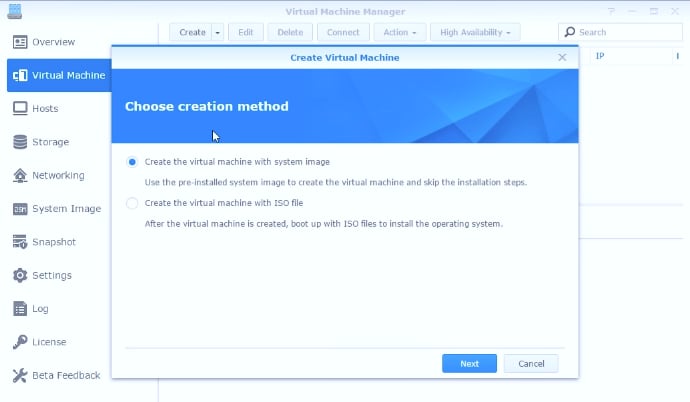
Here are the instructions to create and configure your virtual machine:
- Run the Virtual Machine Manager app and click on the Virtual Machine tab;
- Select the “Create the virtual machine with system image” option;
- Click Create > Next.
Once the system creates a Virtual Machine, proceed to configure your new setup by fine-tuning all the specifications:
- Name your VM in the Name tab;
- Choose how many CPU cores you want to use (a friendly piece of advice is to opt for at least two CPUs to ensure smooth running and maximum efficacy);

- Boot up your ISO system file by selecting System Image in the “ISO file for bootup” section;
- Choose the required amount of space for your Virtual Machine (25-30GB);
- Click Next > Apply.

Step 6. Install Your Ubuntu OS on Synology NAS
Here is how to install your Synology NAS Ubuntu system:
- Run the Virtual Machine app;
- Select Action > Power On;
- Select Synology NAS > Apply;
- Click Install Ubuntu in the Welcome window;
- Opt for Install Updates > Install Third Party Software While Ubuntu is Being Setup > Continue;
- Follow the instructions in the User Account section and click on Continue;
- After the installation process, run DiskStation and choose Edit;
- Change the ISO file for bootup setting to Unmounted.
Restart your Virtual Machine to ensure Linux Ubuntu is successfully installed on your machine.
Step 7. Install a Guest Agent
Choose your Synology Ubuntu virtual machine and click Connect to install a Guest Agent on Linux. Follow these steps:
- Type in sudo -i to access the administrator’s permissions;
- Use the apt-get install qemu-guest-agent command for the Ubuntu operating system;
- Enable the Ubuntu Guest Agent using the systemctl enable qemu-guest-agent command;
- Verify the Guest Agent using the systemctl status qemu-guest-agent
The Guest Agent allows your Synology NAS to connect with the Virtual Machine, exchange information, and enable you to restart or shut down the virtual setup.
Bonus Tip — Secure Your Synology Data With a Data Recovery Tool
You’ve probably experienced the pain of deleting valuable and important data by mistake or due to virus infection, disk damage, or power outage. If you don’t want to go through this nightmare again, you should secure your data with a user-friendly NAS data recovery tool.
One highly recommended NAS recovery software is Wondershare Recoverit. You can use it to recover deleted files from Synology NAS quickly and safely. The best part about Recoverit – it can recover files from Linux, Windows, and Mac systems.