- Как распаковать файл tar bz2 в Kali Linux?
- Как распаковать и установить файл Tar gz в Kali Linux?
- Как распаковать файл tar bz2 в Windows?
- Как создать файл tar bz2?
- Как открыть tar-файл без распаковки в Linux?
- Как открыть файл tar?
- Как использовать команду tar?
- Может ли 7zip открывать файлы bz2?
- Как установить файл Tar GZ?
- Как мне установить файл tar XZ?
- Linux tar Command
- Syntax of the tar command
- tar command options
- Creating an archive file
- List the contents of an archive file
- Extracting an archive file
- Extract to current directory
- Extraction in separate directory
- Extract specific files from an archive
- Adding a File to a .tar Archive
- Deleting a file from a .tar file
- Compress an archive
- unzip a archive
- Conclusion
- How to Install Tar.gz
- How to Install Tar.gz
- How to Extract Tar.gz Files
- Extract Tar.gz Files Using Archive Manager (Ubuntu/kali Linux/ Mint/ Debian)
- Extract Tar.gz Using the Command Line (All Linux Flavours + Macos Any Version)
- How to Extract Tarfile in Windows
- How to Install Tar.gz File
- FAQs
- What is Dependency Error When Trying to Run cmake or configure?
- What Error Do We Get When Using cmake?
- Error When Using ./configure?
Как распаковать файл tar bz2 в Kali Linux?
Как распаковать и установить файл Tar gz в Kali Linux?
gz, в основном вы бы сделали:
- Откройте консоль и перейдите в каталог, где находится файл.
- Введите: tar -zxvf file. деготь. gz.
- Прочтите файл INSTALL и / или README, чтобы узнать, нужны ли вам какие-либо зависимости.
См. Также Вопрос: Как я могу подключить компьютер к Интернету на моем мобильном устройстве Android через USB в Windows 10?
Как распаковать файл tar bz2 в Windows?
Как открыть файлы TAR-BZ2
- Сохраните файл. …
- Запустите WinZip из меню «Пуск» или из ярлыка на рабочем столе. …
- Выберите все файлы и папки внутри сжатого файла. …
- Щелкните «Распаковать» одним щелчком мыши и выберите «Распаковать на ПК» или «Облако» на панели инструментов WinZip на вкладке «Распаковать / Поделиться».
Как создать файл tar bz2?
Как создать tar. gz файл в Linux с использованием командной строки
- Откройте приложение терминала в Linux.
- Запустите команду tar, чтобы создать заархивированный файл с именем. tar. gz для данного имени каталога, запустив: tar -czvf file. tar. gz каталог.
- Проверить tar. файл gz с помощью команды ls и tar.
Как открыть tar-файл без распаковки в Linux?
Используйте переключатель -t с командой tar для вывода списка содержимого архива. tar файл без фактического извлечения. Вы можете видеть, что вывод очень похож на результат команды ls -l.
Как открыть файл tar?
Как открывать файлы TAR
- Загрузите и сохраните файл TAR на свой компьютер. …
- Запустите WinZip и откройте сжатый файл, щелкнув Файл & gt; Открытым. …
- Выберите все файлы в сжатой папке или выберите только файлы, которые вы хотите извлечь, удерживая клавишу CTRL и щелкая по ним левой кнопкой мыши.
Как использовать команду tar?
Как архивировать файл в Linux с помощью командной строки
- Откройте приложение терминала в Linux.
- Сжать весь каталог, запустив tar -zcvf file. деготь. gz / path / to / dir / command в Linux.
- Сжать отдельный файл, запустив tar -zcvf file. деготь. …
- Сжать файл из нескольких каталогов, запустив tar -zcvf file. деготь.
Может ли 7zip открывать файлы bz2?
После загрузки файла дважды щелкните по нему, чтобы установить 7-Zip. Когда откроется файловый менеджер 7-Zip, перейдите к файлу BZ2, выберите его и щелкните значок «Извлечь».
Как установить файл Tar GZ?
Для этого выполните следующие действия:
- Откройте свой каталог и перейдите к своему файлу.
- Используйте $ tar -zxvf program.tar.gz. для извлечения файлов.tar.gz или $ tar -zjvf program.tar.bz2. извлекать. tarbz2s.
- Затем смените каталог на распакованную папку:
Как мне установить файл tar XZ?
Как вы компилируете программу из исходного кода
- Откройте консоль.
- Используйте команду cd, чтобы перейти к нужной папке. Если есть файл README с инструкциями по установке, используйте его.
- Извлеките файлы с помощью одной из команд. …
- ./configure.
- сделать.
- sudo make install (или с помощью checkinstall)
Linux tar Command
The tar command in Linux is one of the most essential commands when it comes to file management. It is short for Tape Archive and is used to create and extract archive files. An archive file is a compressed file that contains one or more files bundled together for more accessible storage and portability. In this guide, we’ll demonstrate, through examples, how to create, list, edit, and extract tar archive files, and cover some of the more commonly used tar command options.
Syntax of the tar command
The tar command accepts the following syntax −
$ $ tar [options][archive-file] [file or dir to be archived]
Let’s look at some of the options provided with the tar command.
tar command options
The tar command provides the following options −
- -c − This creates an archive file.
- -x − The option extracts the archive file.
- -f − Specifies the filename of the archive file.
- -v − This prints verbose information for any tar operation on the terminal.
- -t − This lists all the files inside an archive file.
- -u − This archives a file and then adds it to an existing archive file.
- -r − This updates a file or directory located inside a .tar file
- -z − Creates a tar file using gzip compression
- -j − Create an archive file using the bzip2 compression
- -W − The -w option verifies an archive file.
Creating an archive file
The tar utility allows you to create archive files using various compression algorithms such as xz, gzip and bzip2. The accepted convention is to add the compression suffix to the compressed file.
For example, when using gzip compression (using the “-z” option), the file must have the suffix “.tar.gz”.
$ tar -czvf sales.tar.gz sales1.pdf sales2.pdf sales3.pdf
In this example, the command creates a file named “sales.tar.gz” from the three PDF files.
Similarly, when using bzip2 compression (using the “-j” option), the archive file must have the extension “.tar.bz2” as a suffix.
$ tar -cjvf sales.tar.bz2 sales1.pdf sales2.pdf sales3.pdf
Besides archiving files, you can also compress directories. For example, the following command creates a simple home directory tarball.
$ tar -cvf home.tar /home/james
List the contents of an archive file
The “-t” option can be used to list the contents of an archive file without extracting it.
This command lists all files within the “sales.tar.gz” archive.
Extracting an archive file
There are several ways to extract a compressed file using the tar command.
Extract to current directory
To extract an archive into the current working directory, use the “-x” option as shown below.
In this example, we are unzipping or extracting the “documents.tar.gz” file, which contains three text files.
Extraction in separate directory
To extract an archive to a different directory, the ‘-C’ option is followed by the destination path, as shown in the following example.
$ tar -xvf documents.tar.gz -C /tmp/files
This command extracts the contents of the “documents.tar.gz” archive file into the /tmp/files directory.
Extract specific files from an archive
You can extract certain specified files by listing them one by one on the command line.
$ tar -xvf documents.tar.gz file1.txt file2.txt
In this example, we are extracting the files “file1.txt” and “file2.txt” from the “documents.tar.gz” archive.
Adding a File to a .tar Archive
To add or append a ‘.tar’ archive file, use the ‘-r’ option as shown.
$ tar -rvf files.tar file3.txt
In this example, we are adding the file3.txt file to the archives.tar file.
Deleting a file from a .tar file
To remove a file from a ‘.tar’ archive, use the —delete option as shown.
$ tar --delete -f archives.tar file3.txt
In this example, we are removing the “file3.txt” file from the archives.tar file.
Compress an archive
The tar command can also be used to compress an archive using gzip or bzip2 compression. To create a compressed file, the -z or -j option can be used in conjunction with the -c option.
$ tar -zcvf archive.tar.gz files_to_compress
This command creates a “.tar.gz” archive of the specified files.
$ tar -jcvf archive.tar.bz2 files_to_compress
This command creates a “.tar.bz2” archive of the specified files.
unzip a archive
To decompress a ‘.tar.gz’ file −
To decompress a ‘.tar.bz2’ file −
Conclusion
The tar command is a versatile and powerful tool for managing files on Linux. It can be used to create, extract, and modify archives in a variety of formats and provides a wide range of options to suit different needs. By understanding the syntax and options of the tar command, you can easily create, manage, and extract archives in your workflows. With the knowledge of the tar command, you will be able to handle your file archives more efficiently and effectively.
How to Install Tar.gz

Tar files are a collection of files wrapped up into a single file. Tar.gz files use the standard gnu zip(gzip) compression. Due to their portability, you don’t need any extra software to unbundle them in Linux/macOS.
Because of this, the source code of open-source software is generally packaged as tar.gz files. Using system-provided package managers is an easier way for installation. But, not all software is available across all Linux systems. Also, the type of licensing may prevent some applications from being available altogether. This is where the tar.gz build system comes in.
How to Install Tar.gz
How to Extract Tar.gz Files
You can decompress a tarball in one of two ways. Most Ubuntu-based distros come with the Archive Manager application. Use either one of these approaches as you see fit.
Extract Tar.gz Files Using Archive Manager (Ubuntu/kali Linux/ Mint/ Debian)
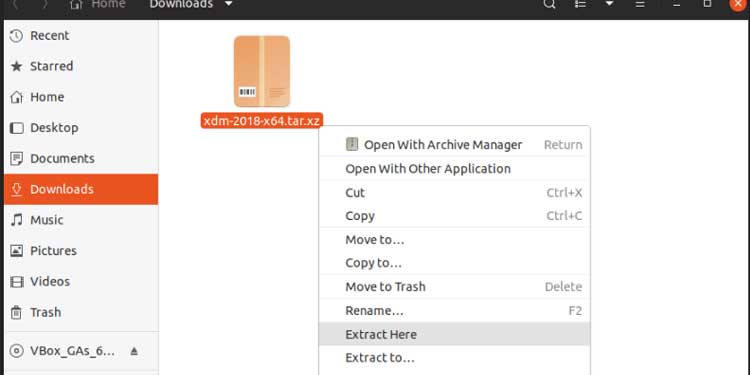
- Use your File Manager to get to the location of the file.
- Right Click on the file and click on Extract Here. You should see the Archive Manager extraction progress.
- After completion, you will notice a new folder created along with the tar.gz files.
- Open this folder in the terminal.
Extract Tar.gz Using the Command Line (All Linux Flavours + Macos Any Version)

- Open the terminal.
- cd /home/foo/Downloads
- Takes you inside the downloaded location.
- ls *tar.gz*
- Finds any tar.gz files and displays the full filename.
- tar -xzf keepassx-2.0.3.tar.gz
- Extracts from the tarball keepassx-2.0.3.tar.gz and creates a new folder with the same name.
- Extracts (x) using the Gzip algorithm (z) of the file (f) named ‘keepassx-2.0.3.tar.gz’.

- Takes you inside the now extracted folder.
- To confirm if the extraction completed successfully and to Check if you have a configure.ac file or Cmakelists.txt file in this folder.
How to Extract Tarfile in Windows
If you are using Windows 10 or newer, you can use tar utility from Powershell. If using an older version, you need to install extraction software to get files from tar.gz. This article lists some of the popular software used in Windows PC.

- Type Powershell in Start Menu to open Windows Powershell.
- tar -xzf keepassx-2.0.3.tar.gz
- Extracts (x) while being verbose (v) using the gzip algorithm (z) of the file (f) named ‘keepassx-2.0.3.tar.gz’.
How to Install Tar.gz File
For our purposes, we will examine the steps by installing a free application. The name of this application is KeePassX. Check their website for more information.
After following the above steps, we have the files we need under /home/foo/Downloads/keepassx-2.0.3.
The concept of this process is easy to follow.

First, we build our configuration, and then we compile it for our Operating System. This process applies to any distro or any flavor of Linux with all tarball applications. Of course, every application has different config files. But they all follow the above general pattern for the installation process.
- cd /home/foo/Downloads/keepassx-2.0.3
- Takes you inside the extracted folder
- ls
- To look for an INSTALL/README file that contains detailed instructions.
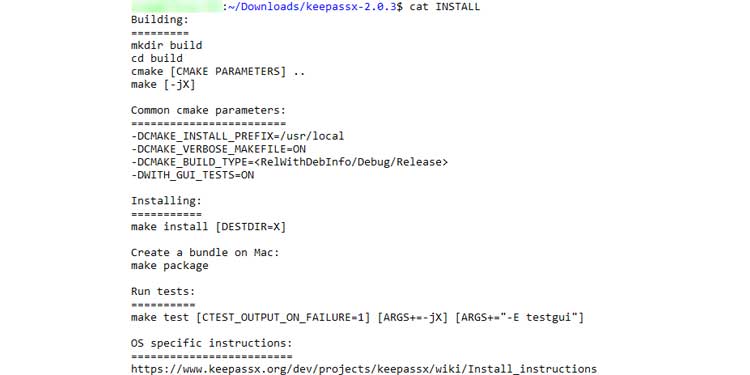
- cat INSTALL
- To read the contents of the file INSTALL. You can do the same for README too.


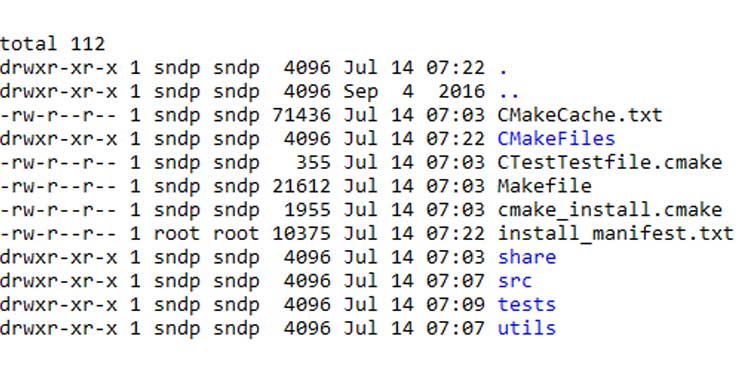
ls configure.ac
- To check if you have a configure.ac file or cmake files/folders here.
- To make a separate build folder
- Go into the build folder
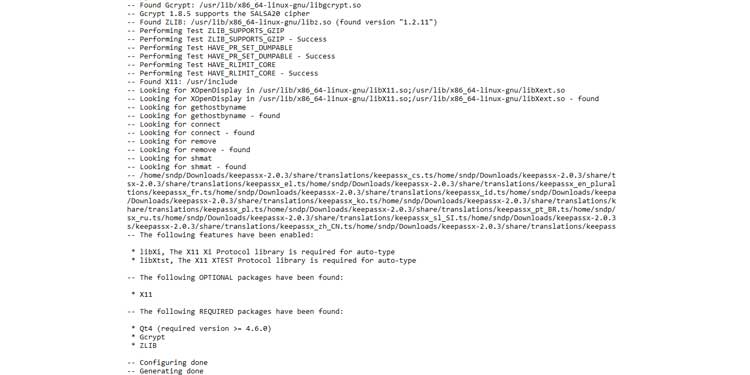
- Configure using CMakeLists.txt file from directory one-level up into the current build folder.

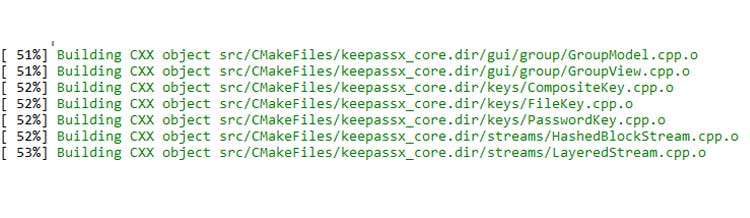
make
- Starts building using the freshly generated config files.
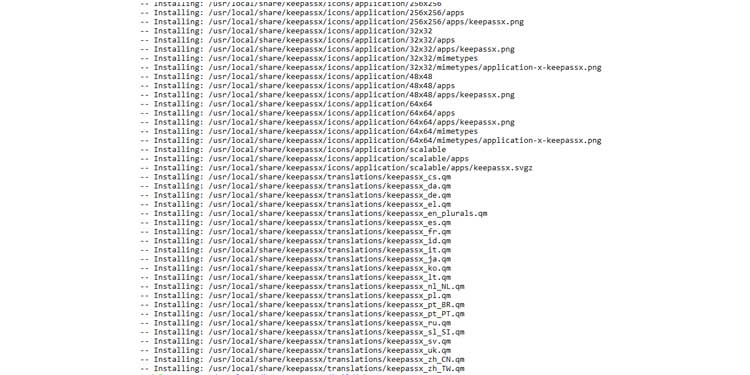
sudo make install
- Install into the system using the freshly built files from step 10.
FAQs
What is Dependency Error When Trying to Run cmake or configure?
This means you don’t have the required dependencies installed in your system. If you look at the INSTALL file, you will be able to see the list of dependencies. For Ubuntu-based systems, use apt-get install to install dependencies as shown below.
What Error Do We Get When Using cmake?
Cmake stores errors in CMakeError.log. This can happen when one or more dependencies are installed but don’t have the required versions. Refer to this article to install the correct versions of packages.
Error When Using ./configure?
Autoconf application is missing. Newer Ubuntu versions don’t ship autoconf utility by default. This can be solved by installing it as sudo apt-get install autoconf.
If you want to read more about the source installation process, follow this website.
Tech enthusiast. Windows. Linux. Security. Networking.