- Загрузить последнюю версию TeamViewer для Linux
- TeamViewer Full Client
- TeamViewer QuickSupport
- TeamViewer Host
- Как установить TeamViewer на Ubuntu и Linux Mint
- Установите TeamViewer на Ubuntu
- How To Install TeamViewer on Linux Mint 20 / Linux Mint 19
- Install TeamViewer
- Start TeamViewer
- Conclusion
- How to Install TeamViewer on Ubuntu & Linux Mint
- Install TeamViewer on Ubuntu
Загрузить последнюю версию TeamViewer для Linux
Устанавливая и используя TeamViewer, вы принимаете наши Условия и положения и Политику конфиденциальности.
TeamViewer Full Client
- Устанавливайте входящие и исходящие подключения к устройствам
- Удаленный доступ и техническая поддержка в реальном времени
- Мониторинг, исправление и защита ваших устройств
Ubuntu/Debian
15.43.7
Red Hat, CentOS, Fedora
15.43.7
Suse
15.43.7
Other Systems (not officially supported)
15.43.7
TeamViewer QuickSupport
Получите мгновенную удаленную поддержку. TeamViewer QuickSupport — это небольшой клиентский модуль, который не требует установки или прав администратора — просто загрузите файл, дважды щелкните по нему и присоединитесь к удаленному сеансу, введя код сеанса, предоставленный вам экспертом. Вы также можете напрямую перейти по отправленной вам ссылке на сеанс.
15.43.7
TeamViewer Host
TeamViewer Host используется круглосуточно семь дней в неделю для доступа к удаленным компьютерам, что делает его идеальным решением для таких целей использования, как удаленный мониторинг, техобслуживание сервера или подключение к ПК, устройствам Mac или Linux в офисе или дома без необходимости принимать входящие подключения на удаленном устройстве (автономный доступ). Установите TeamViewer Host на устройства, чтобы легко управлять ими.
Как установить TeamViewer на Ubuntu и Linux Mint
TeamViewer — это приложение, которое позволяет вам получать удаленный доступ к другим компьютерам, чтобы вы могли изменять, обслуживать или управлять ими, где бы вы ни находились, как если бы вы действительно были там. Более того, приложение работает со всеми основными платформами: Windows, macOS и Linux (также в ограниченных формах на iOS и Android). Вы можете использовать TeamViewer для передачи файлов на/с удаленного компьютера, общаться в режиме реального времени со своими пользователями, синхронизировать содержимое буфера обмена и многое другое. TeamViewer также прост в использовании: вы устанавливаете приложение на оба компьютера, а затем подключаетесь, используя уникальный идентификатор и пароль, генерируемые приложением. Хотя основной набор функций этого инструмента больше ориентирован на ИТ-специалистов, агентов службы поддержки и разработчиков, его можно использовать бесплатно для личного использования (и он идеально подходит для помощи расстроенному родственнику). В этом посте я покажу вам, как установить Team Viewer на Ubuntu 20.04 LTS и выше. Вы можете выполнить те же шаги, чтобы установить TeamViewer в Linux Mint и почти в любом другом дистрибутиве Linux на основе Ubuntu. Примечание. Я не рассматриваю причины, по которым вы можете захотеть использовать TeamViewer по сравнению с любой альтернативой (существует множество статей, в которых этот инструмент сравнивается, так что оцените его в Яндекс). В этом посте основное внимание уделяется тому, как установить TeamViewer в Ubuntu, Linux Mint и связанных с ними дистрибутивах и поддерживать его в актуальном состоянии.
Установите TeamViewer на Ubuntu

wget -c https://download.teamviewer.com/download/linux/teamviewer_amd64.deb Затем, чтобы установить (при условии, что вы находитесь в том же каталоге, из которого вы загрузили установщик выше), запустите:
sudo apt install ./teamviewer_amd64.deb
Независимо от того, какой метод вы выберете для установки TeamViewer в Ubuntu, установка .deb добавит официальный репозиторий TeamViewer Linux в список источников программного обеспечения вашей системы. Это позволит вам получать будущие обновления инструмента вместе с остальными обновлениями вашей системы и приложений. Все, что осталось, — это запустить TeamViewer.
Хотя TeamViewer можно использовать бесплатно, это не программное обеспечение с открытым исходным кодом. Кроме того, хотя большинство функций доступны для использования с бесплатной некоммерческой учетной записью, могут быть расширенные функции (например, многопользовательская поддержка), для которых требуется платный план.
Средняя оценка 0 / 5. Количество оценок: 0
Оценок пока нет. Поставьте оценку первым.
How To Install TeamViewer on Linux Mint 20 / Linux Mint 19
![]()
TeamViewer is the most widely used software for desktop sharing, online meetings, web conferencing, and file transfer between computers.
TeamViewer is available for Microsoft Windows, Linux, Mac OS X, iOS, and Android operating systems.
You can also control a machine running TeamViewer via a web browser.
Install TeamViewer
Open a terminal ( Ctrl + Alt + T ) and update the repository index.
Download the latest version (v15.x) of TeamViewer from the official website.
wget https://download.teamviewer.com/download/linux/teamviewer_amd64.deb
Install TeamViewer using the apt command.
sudo apt install -y ./teamviewer_amd64.deb
Start TeamViewer
Start TeamViewer in Cinnamon desktop: Menu >> Internet >> TeamViewer.
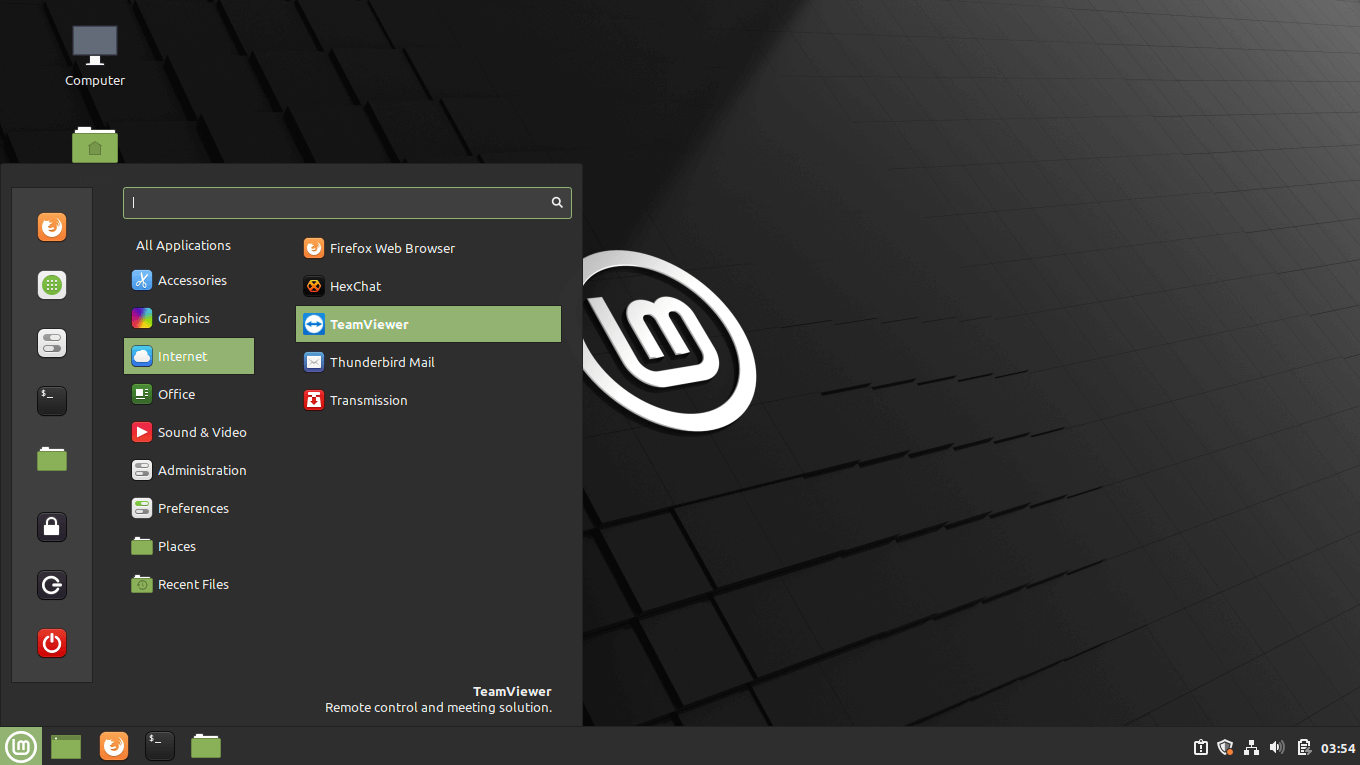
Run the following command in the terminal to open the TeamViewer.
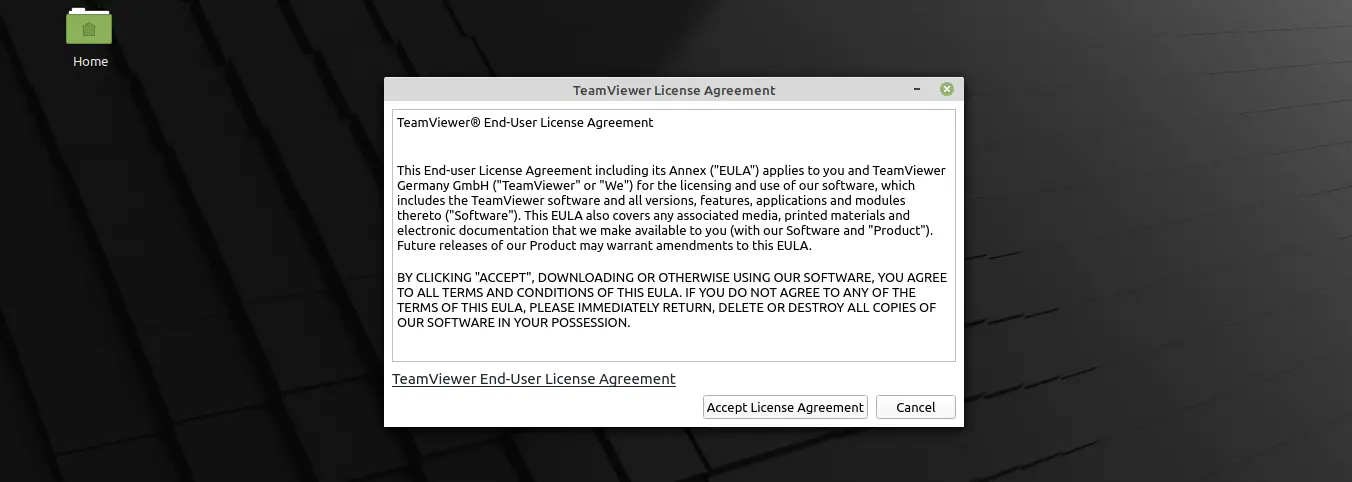
Upon starting the TeamViewer application for the first time, you would need to accept TeamViewer’s License Agreement.
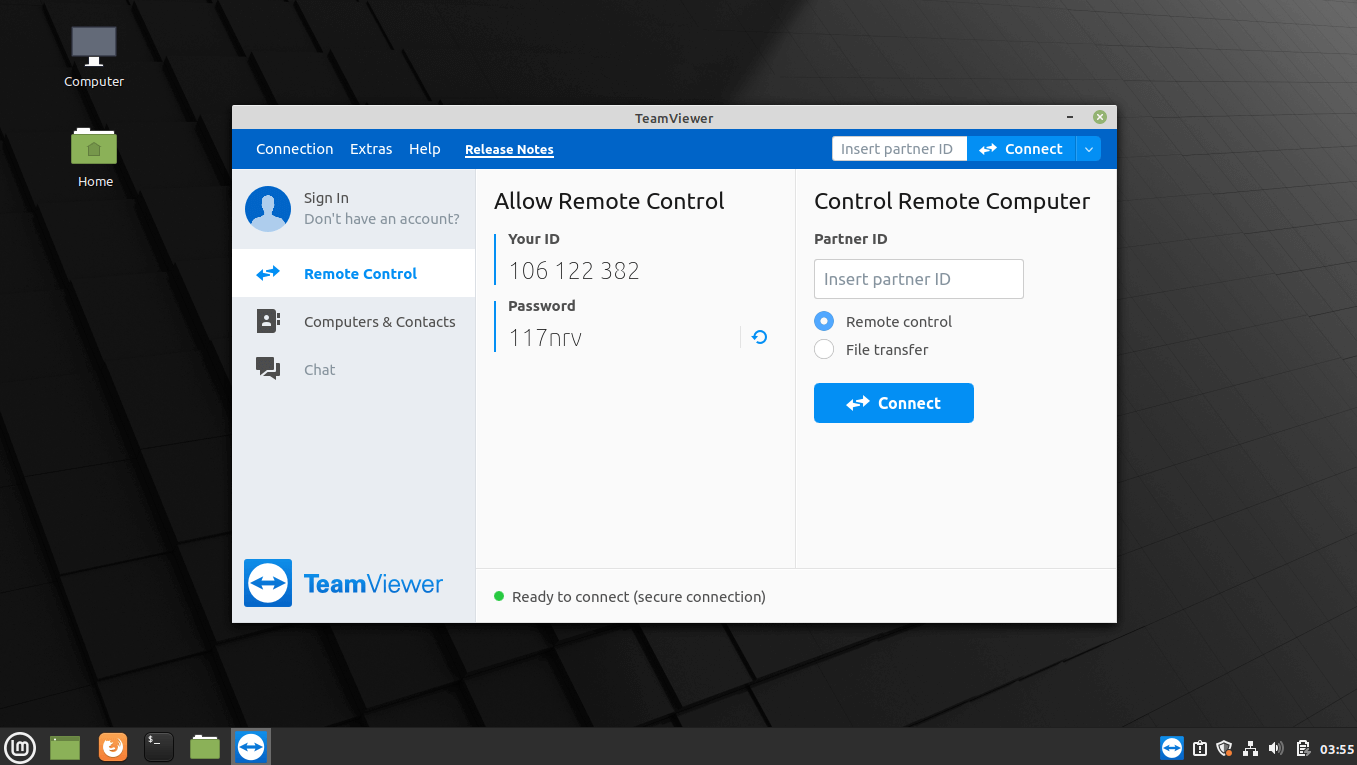
You should now get the TeamViewer window with ID and Password.
Conclusion
That’s All. You have successfully installed TeamViewer on Linux Mint 20 / Linux Mint 19.
How to Install TeamViewer on Ubuntu & Linux Mint
Better yet, the app works with all major platforms: Windows, macOS, and Linux (also in limited forms on iOS and Android too). You can use TeamViewer to transfer files to/from a remote computer and host; chat in real time with its users; sync clipboard contents, and more.
TeamViewer is also simple to use: you install the app on both computers, then connect using the unique ID and password the app generates. While this tool’s core feature set is skewed more towards IT professionals, support agents, and developers it is free to use for personal use (and ideal for helping a frustrated relative).
In this post I show you how to install Team Viewer on Ubuntu 20.04 LTS and above. You can follow the same steps to install TeamViewer on Linux Mint, Zorin OS, and pretty much ant other Ubuntu-based Linux distribution out there.
Note: I do not look at reasons why you may want to use TeamViewer versus any alternative (there are plenty of articles that compare the tool, so give it a Google). The focus on this post is just how to install TeamViewer on Ubuntu, Linux Mint, and related distributions, and keep it updated.
Install TeamViewer on Ubuntu
As mentioned, you can download and install TeamViewer for Windows, macOS, and Linux (and mobile clients for Android and iOS are also available) from the app’s official website.
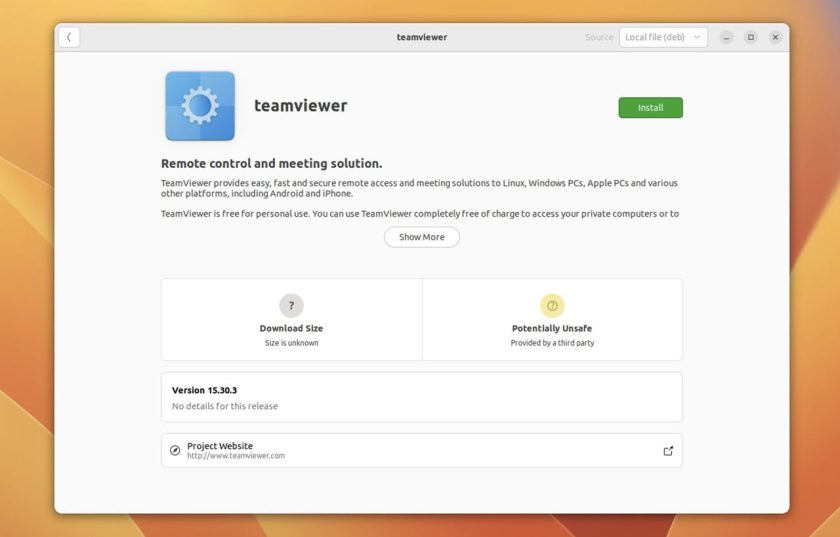
Go to the TeamViewer Linux download page in your favourite web browser and download the .deb installer listed for Ubuntu users (note: .rpm and binary versions are also available to download but this guide does not cover using those versions).
After the TeamViewer download completes — it’s around 60MB in size — double-click on the .deb to trigger installation through the Ubuntu Software app (or a similarly compatible packaging tool on a different distro):
If you want to save time you can choose to download TeamViewer’s Linux release using the command line.
To do this, run the following command as-is in a new Terminal window:
wget -c https://download.teamviewer.com/download/linux/teamviewer_amd64.deb
Then, to install (assuming you’re in same directory you downloaded the installer above from) run:
sudo apt install ./teamviewer_amd64.deb
This should take care of the whole process.
Regardless of which method you choose to install TeamViewer on Ubuntu installing the .deb will add the official TeamViewer Linux repo to your system’s list of software sources. This will allow you to get future updates to the tool alongside the rest of your system and app updates.
All that’s left is to launch TeamViewer and, depending on your needs, create an account/sign-in or use it as-is.
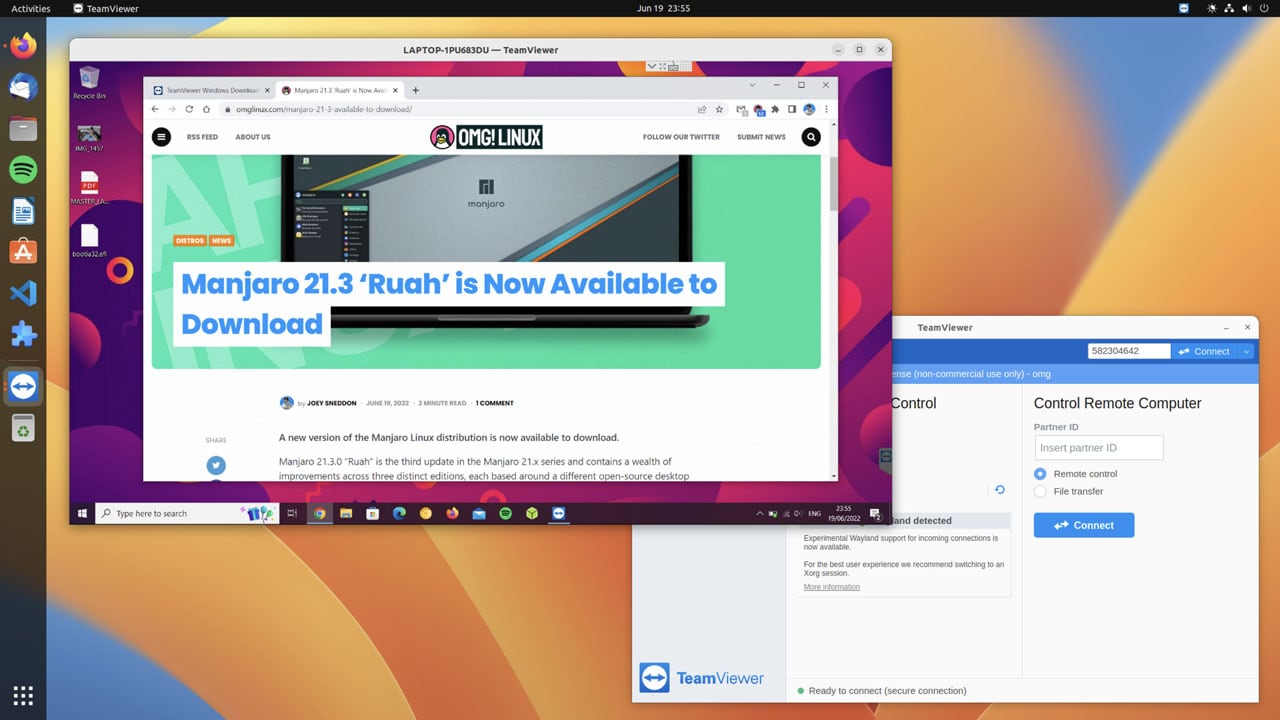
Connecting couldn’t be easier (and Windows and macOS hosts can run their versions in a one-time only mode that doesn’t require an account). Enter the ID from the Team Viewer app running on the remote system into the “Control Remote Computer” field in your TeamViewer app and enter the associated password when prompted:
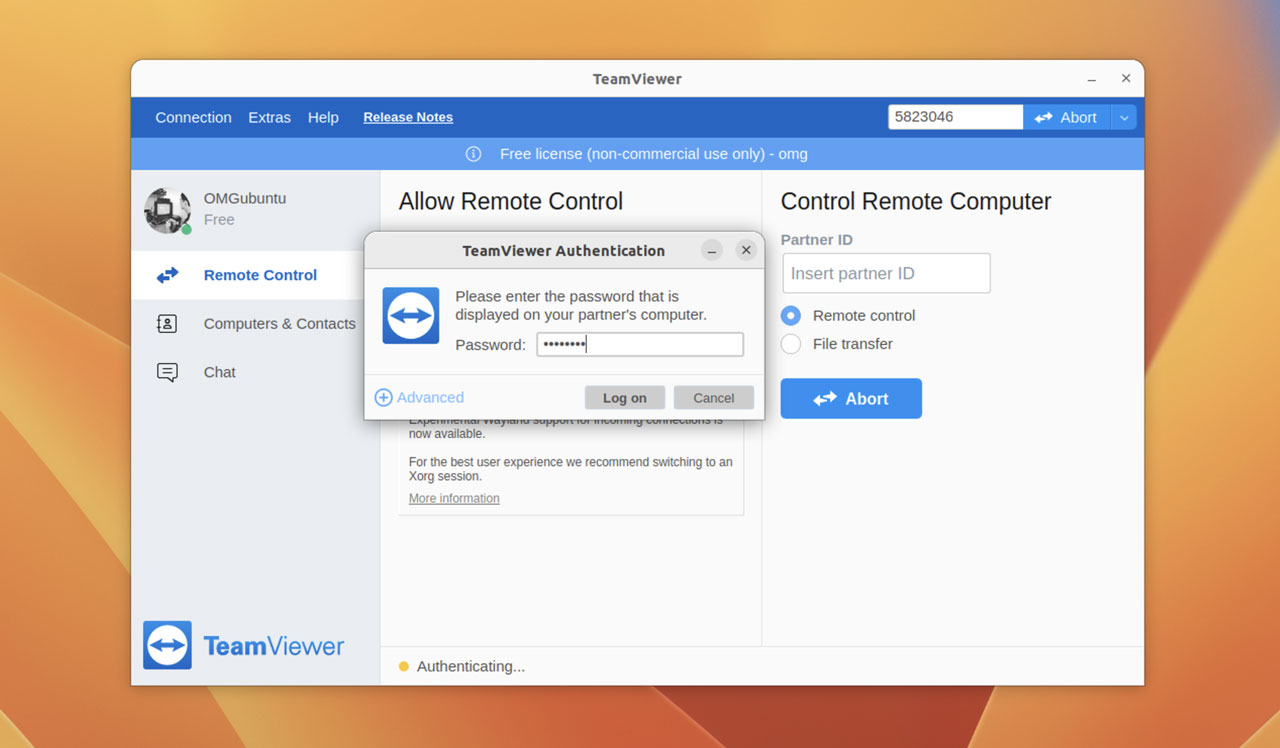
The app will then authorise the connection and, ta-dah, a Remote Desktop on your Ubuntu desktop:
There are a ton of settings you can play with at your own leisure, though some options will be platform-specific.
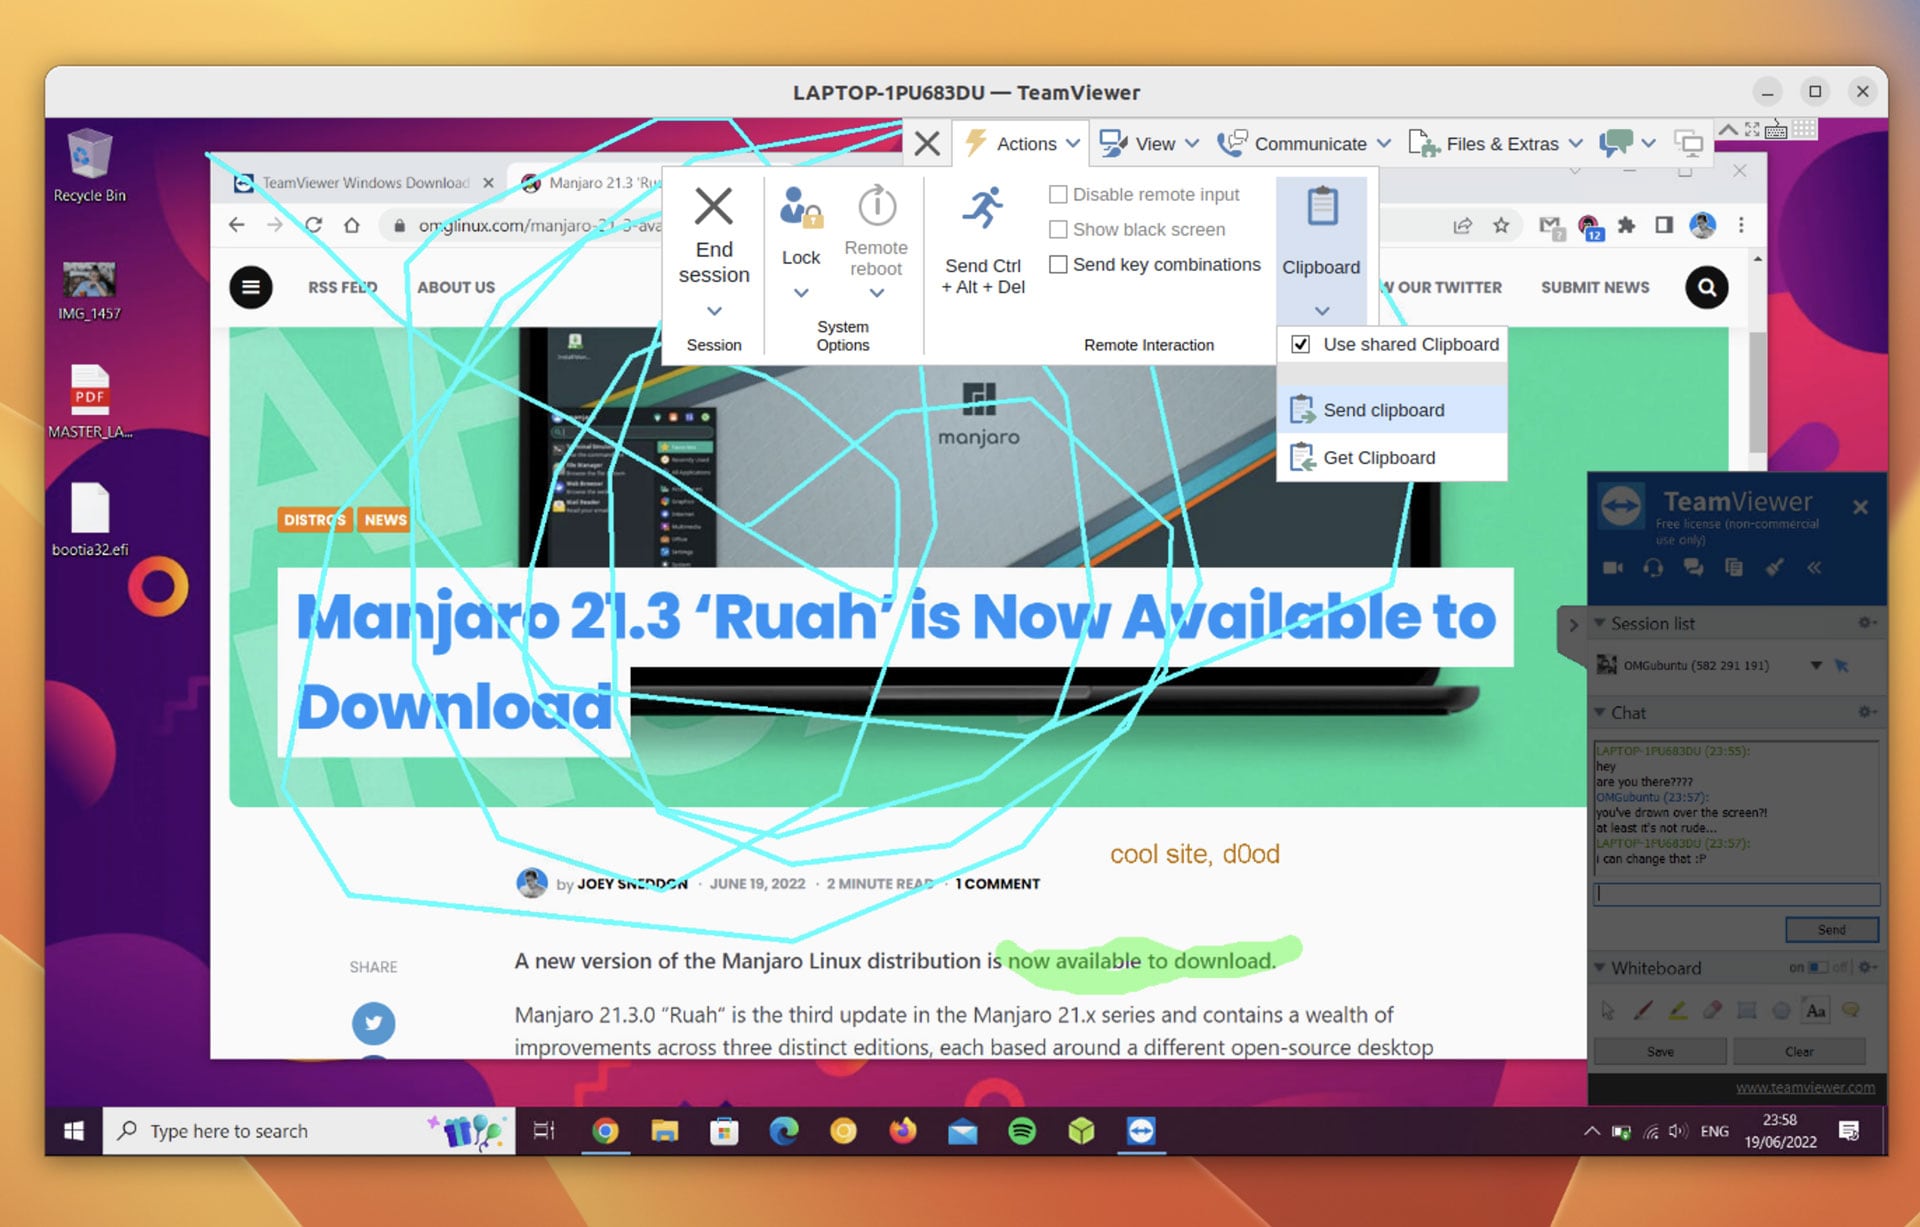
Although TeamViewer now has experimental Wayland support (Ubuntu’s default display server) you may find that some features work best/better in a Xorg session. You can choose which session you use at the Ubuntu login screen, by clicking the cog icon in the lower-right corner.
While TeamViewer is free to use it is not open-source software. Additionally, while most features are available to use with a free non-commercial account there may be advanced features (like multi-user support) that require a paid plan.
Home / How To / How to Install TeamViewer on Ubuntu & Linux Mint