- Как установить TeamViewer на Ubuntu и Linux Mint
- Установите TeamViewer на Ubuntu
- Загрузить последнюю версию TeamViewer для Linux
- TeamViewer Full Client
- TeamViewer QuickSupport
- TeamViewer Host
- Как установить TeamViewer в Ubuntu
- Установка TeamViewer в Ubuntu
- How to Install TeamViewer on Ubuntu 20.04 LTS
- Installation of TeamViewer Through Ubuntu Command Line
- Step 1: Download and add the TeamViewer repository key
- Step 2: Add the TeamViewer repository
- Step 3: Install TeamViewer through the apt command
- Step 4: Launch TeamViewer
- Uninstall TeamViewer
- TeamViewer Installation on Ubuntu Through Graphical Installer
- Launch TeamViewer
- Uninstall
Как установить TeamViewer на Ubuntu и Linux Mint
TeamViewer — это приложение, которое позволяет вам получать удаленный доступ к другим компьютерам, чтобы вы могли изменять, обслуживать или управлять ими, где бы вы ни находились, как если бы вы действительно были там. Более того, приложение работает со всеми основными платформами: Windows, macOS и Linux (также в ограниченных формах на iOS и Android). Вы можете использовать TeamViewer для передачи файлов на/с удаленного компьютера, общаться в режиме реального времени со своими пользователями, синхронизировать содержимое буфера обмена и многое другое. TeamViewer также прост в использовании: вы устанавливаете приложение на оба компьютера, а затем подключаетесь, используя уникальный идентификатор и пароль, генерируемые приложением. Хотя основной набор функций этого инструмента больше ориентирован на ИТ-специалистов, агентов службы поддержки и разработчиков, его можно использовать бесплатно для личного использования (и он идеально подходит для помощи расстроенному родственнику). В этом посте я покажу вам, как установить Team Viewer на Ubuntu 20.04 LTS и выше. Вы можете выполнить те же шаги, чтобы установить TeamViewer в Linux Mint и почти в любом другом дистрибутиве Linux на основе Ubuntu. Примечание. Я не рассматриваю причины, по которым вы можете захотеть использовать TeamViewer по сравнению с любой альтернативой (существует множество статей, в которых этот инструмент сравнивается, так что оцените его в Яндекс). В этом посте основное внимание уделяется тому, как установить TeamViewer в Ubuntu, Linux Mint и связанных с ними дистрибутивах и поддерживать его в актуальном состоянии.
Установите TeamViewer на Ubuntu

wget -c https://download.teamviewer.com/download/linux/teamviewer_amd64.deb Затем, чтобы установить (при условии, что вы находитесь в том же каталоге, из которого вы загрузили установщик выше), запустите:
sudo apt install ./teamviewer_amd64.deb
Независимо от того, какой метод вы выберете для установки TeamViewer в Ubuntu, установка .deb добавит официальный репозиторий TeamViewer Linux в список источников программного обеспечения вашей системы. Это позволит вам получать будущие обновления инструмента вместе с остальными обновлениями вашей системы и приложений. Все, что осталось, — это запустить TeamViewer.
Хотя TeamViewer можно использовать бесплатно, это не программное обеспечение с открытым исходным кодом. Кроме того, хотя большинство функций доступны для использования с бесплатной некоммерческой учетной записью, могут быть расширенные функции (например, многопользовательская поддержка), для которых требуется платный план.
Средняя оценка 0 / 5. Количество оценок: 0
Оценок пока нет. Поставьте оценку первым.
Загрузить последнюю версию TeamViewer для Linux
Устанавливая и используя TeamViewer, вы принимаете наши Условия и положения и Политику конфиденциальности.
TeamViewer Full Client
- Устанавливайте входящие и исходящие подключения к устройствам
- Удаленный доступ и техническая поддержка в реальном времени
- Мониторинг, исправление и защита ваших устройств
Ubuntu/Debian
15.43.7
Red Hat, CentOS, Fedora
15.43.7
Suse
15.43.7
Other Systems (not officially supported)
15.43.7
TeamViewer QuickSupport
Получите мгновенную удаленную поддержку. TeamViewer QuickSupport — это небольшой клиентский модуль, который не требует установки или прав администратора — просто загрузите файл, дважды щелкните по нему и присоединитесь к удаленному сеансу, введя код сеанса, предоставленный вам экспертом. Вы также можете напрямую перейти по отправленной вам ссылке на сеанс.
15.43.7
TeamViewer Host
TeamViewer Host используется круглосуточно семь дней в неделю для доступа к удаленным компьютерам, что делает его идеальным решением для таких целей использования, как удаленный мониторинг, техобслуживание сервера или подключение к ПК, устройствам Mac или Linux в офисе или дома без необходимости принимать входящие подключения на удаленном устройстве (автономный доступ). Установите TeamViewer Host на устройства, чтобы легко управлять ими.
Как установить TeamViewer в Ubuntu
TeamViewer — это кроссплатформенное проприетарное приложение, позволяющее пользователю удаленно получать доступ к рабочему столу другого пользователя, совместно использовать рабочий стол и даже разрешающее передачу файлов между компьютерами через Интернет-соединение. Это приложение популярно среди сотрудников службы технической поддержки и приходит на помощь при оказании помощи удаленным пользователям, которые испытывают трудности и не могут найти достойную помощь.
Установка TeamViewer в Ubuntu
Перед началом работы рекомендуется обновить системные пакеты. Это гарантирует, что вы начнете с чистого листа. Так что откройте свой терминал и выполните команду ниже.
$ sudo apt update -y && sudo apt upgrade -y
Как только вы закончите обновление системы, перейдите на официальную страницу загрузки Teamviewer и загрузите пакет Teamviewer Debian. Или же вы можете скопировать ссылку на скачивание и загрузить пакет Debian, используя команду wget.
$ sudo wget https://download.teamviewer.com/download/linux/teamviewer_amd64.deb
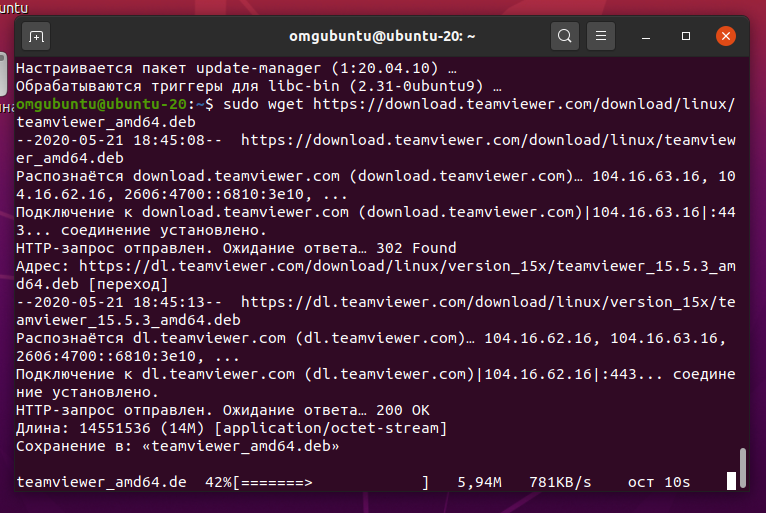
После успешной загрузки файла можно проверить его существование с помощью команды ls.
$ ls | grep teamviewer teamviewer_amd64.deb
Чтобы установить TeamViewer, выполните указанную команду. Она позволит установить TeamViewer наряду с другими зависимостями.
$ sudo apt install ./teamviewer_amd64.deb
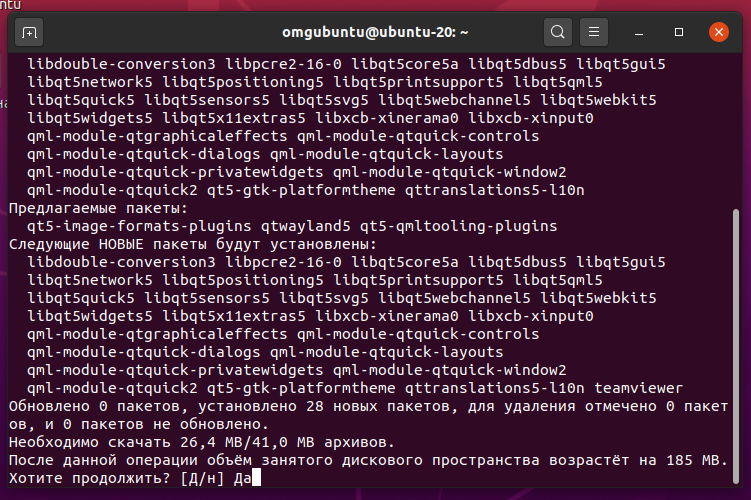
Когда появится запрос на продолжение установки, введите ‘Д’ для ‘Да’ и нажмите кнопку ‘ENTER’.
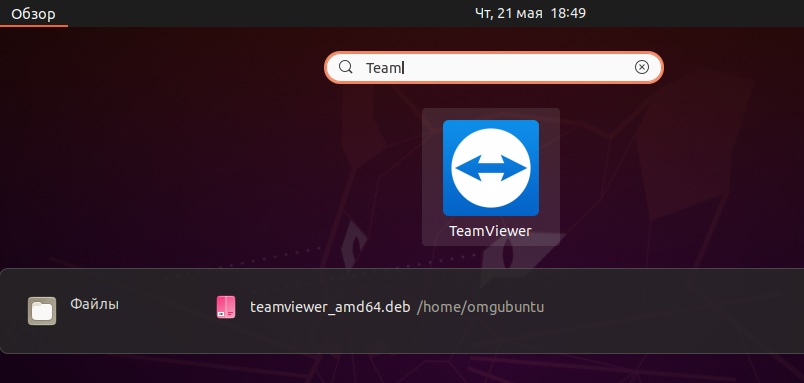
После завершения установки вы можете перейти к запуску Teamviewer. Чтобы запустить Teamviewer, выполните следующую команду на терминале.
Также вы можете использовать менеджер приложений для поиска и запуска приложения TeamViewer, как показано на рисунке.
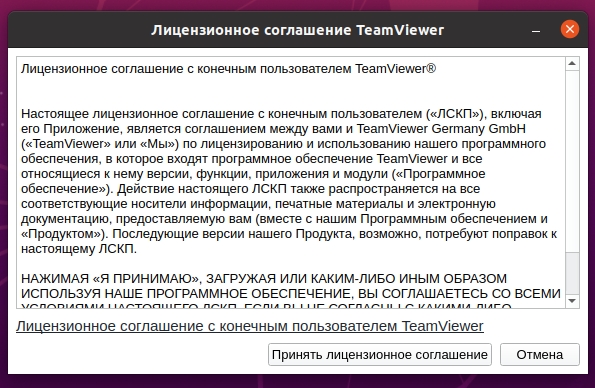
После запуска необходимо принять соглашение EULA, чтобы продолжить.
И, наконец, откроется пользовательский интерфейс TeamViewer, показанный ниже.
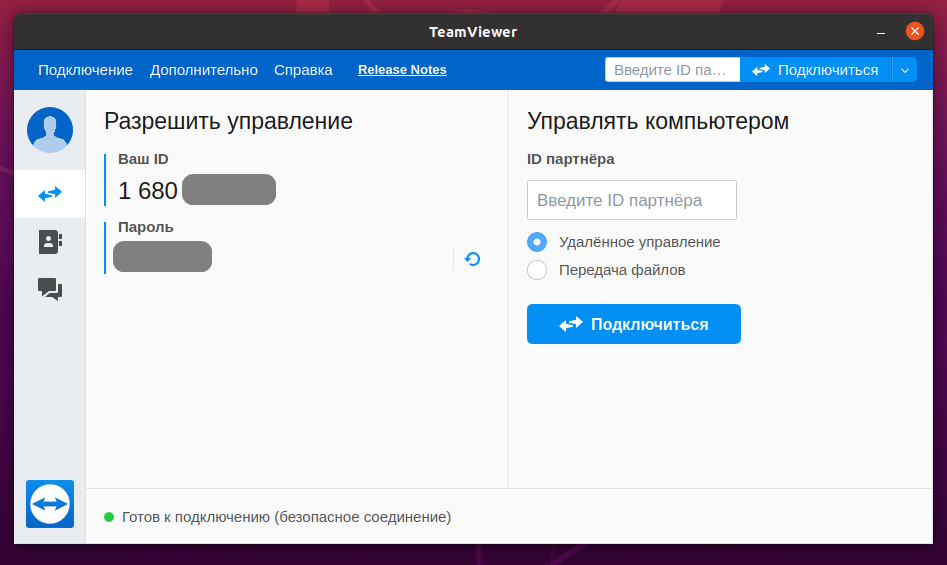
Чтобы установить удаленное соединение с другим пользователем, просто скажите ему ваш ID и пароль. Пользователь вставит ID в текстовое поле «ID партнера», после чего нажмет кнопку «Подключиться». Позже ему будет предложено ввести пароль, который затем даст возможность удаленного подключения к вашему рабочему столу.
Именно так устанавливается TeamViewer на Ubuntu. Спасибо, что уделили время этой статье.
How to Install TeamViewer on Ubuntu 20.04 LTS

TeamViewer is a popular software for remote access over the Internet to and from your system for Linux, macOS, and Windows. This application can connect to any personal computer or server, so you can use it as if you were sitting right in front of it. TeamViewer works as a remote control for your partner’s computer system and allows you to establish a remote session. Both you and your partner need to have this little application installed and running, even if you’re not an administrator. All you need to know is your partner’s ID and password to control their computer.
In this article, we will explain how to install the TeamViewer application on your Ubuntu system, both from the user interface and from the command line.
The commands and procedures mentioned in this article were run on an Ubuntu 20.04 LTS system. The same instructions can also be used for the older Ubuntu 18.04 version.
Installation of TeamViewer Through Ubuntu Command Line
If you prefer the command line over the graphical interface, follow these steps in order to install TeamViewer through the Ubuntu Terminal application:
Step 1: Download and add the TeamViewer repository key
Open the Terminal either through the system Dash or the Ctrl+Alt+T shortcut.
First, you need to download the TeamViewer repository key as we will install TeamViewer through its official website. Run the following command in order to download the key:
$ cd /tmp $ wget https://download.teamviewer.com/download/linux/signature/TeamViewer2017.asc

The .asc key file will be downloaded to your Downloads folder by default.
Please add this key to your system through the following apt-key command as sudo:
$ sudo apt-key add TeamViewer2017.asc

Step 2: Add the TeamViewer repository
Run the following command to add the official TeamViewer repository from where we will be installing TeamViewer.
For TeamViewer Stable version:
$ sudo sh -c 'echo "deb http://linux.teamviewer.com/deb stable main" >> /etc/apt/sources.list.d/teamviewer.list'
For the TeamViewer Preview version:
$ sudo sh -c 'echo "deb http://linux.teamviewer.com/deb preview main" >> /etc/apt/sources.list.d/teamviewer.list'
We are adding the repository for the TeamViewer Preview version in this tutorial.
![]()
Now, enter the following command as root in order to update your system’s repository index with that on the internet:

Step 3: Install TeamViewer through the apt command
Finally, run the following command as sudo in order to install TeamViewer to your system:
$ sudo apt install teamviewer

The system will prompt you with a Y/n option in order to continue the installation procedure. Please enter Y and hit Enter to continue. TeamViewer will then be installed on your system.
Step 4: Launch TeamViewer
If you wish to launch TeamViewer through the command line, enter the following command in your Terminal:
Uninstall TeamViewer
In order to uninstall TeamViewer from your system without removing any configurations you might have made, enter the following command as sudo:
$ sudo apt remove teamviewer

The system will prompt you with a Y/n option in order to begin the uninstall procedure. Please enter Y and hit Enter to begin. TeamViewer will then be removed from your system.
If you have made any configurations, you can remove TeamViewer and all those by using the following command:
$ sudo apt purge teamviewer
TeamViewer Installation on Ubuntu Through Graphical Installer
For a person who does not want to open the Command Line much, installing software present in the Ubuntu repository through the UI is very simple. For Teamviewer, we will be downloading the .deb package and then installing it through the Ubuntu Software Install.
You can download the official .deb installation package from the following website:
Scroll down on the page and click on the download link for Ubuntu, Debian (stable version) or TeamViewer Preview version.

Save the file on your system, which will be saved to the Downloads folder by default.
Open the Downloads folder where you will be able to see the TeamViewer .deb package.

Right-click on the package and select the Open with Software Install option from the menu. This will open the following installer:

Click the Install button on the above window. The following authentication dialog will display for you to provide the authentication details for a sudo user as only an authorized user can install software on Ubuntu.

Enter your password and click the Authenticate button. After that, the installation process will begin, displaying a progress bar as follows.

TeamViewer will then be installed to your system and you will get the following message after a successful installation:

Launch TeamViewer
You can launch TeamViewer any time you want by entering ‘TeamViewer’ in the Ubuntu Dash or access it from the Applications list.

TeamViewer will open in the following view; through which you can connect or be connected to a remote computer.
Uninstall
Uninstalling Teamviewer through the UI is fairly simple. On your Ubuntu desktop Activities toolbar, click the Ubuntu Software icon.
The Ubuntu Software manager will open in the following view:

Click on the Installed tab and locate the TeamViewer entry from the list of installed software.

Click the Remove icon against the TeamViewer entry.

A dialog box will ask you if you are sure that you want to remove the software from your system. Please click the Remove button to uninstall TeamViewer. An authentication dialog is displayed where you need to provide authentication credentials for a sudo user, as only an authorized user can install software on Ubuntu. Enter your password and click the Authenticate button. After that, the uninstallation process will begin, which will remove TeamViewer from your system.
By following the steps described in this article, you can learn how to download and install the latest version of TeamViewer on your Ubuntu system, both from the graphical user interface and the command line.