Темы Windows для Linux Mint
Пользователей, недавно сменивших Windows на Linux, порой мучает ностальгия по привычному интерфейсу. Да и тем, чей компьютер в течение долгих работает под управлением Linux Mint, может стать интересно превратить её в другую ОС, по крайней мере визуально.
Специально для таких случаев были созданы темы, имитирующие интерфейс других операционных систем, в частности Microsoft Windows. Наиболее популярные из них — темы Windows XP, 7 и 10.
Темы Windows для Linux Mint
1. Windows XP
Эта тема относится к стандартным темам Linux Mint. Установить её можно, открыв путь: Меню → Параметры → Темы → Добавить/Удалить. В списке тем она называется Mint-XP.
В сравнении с темами Windows 7 и Windows 10 тема Windows XP Linux Mint выглядит наиболее приближённо к оригиналу. Во многом такой эффект достигается за счёт хорошей прорисовки панели задач и подбора цветовой схемы. Если дополнить тему обоями, по умолчанию использовавшимися в Windows XP, внешний вид рабочего стола Linux Mint мало чем будет отличаться от его аналога в Windows.
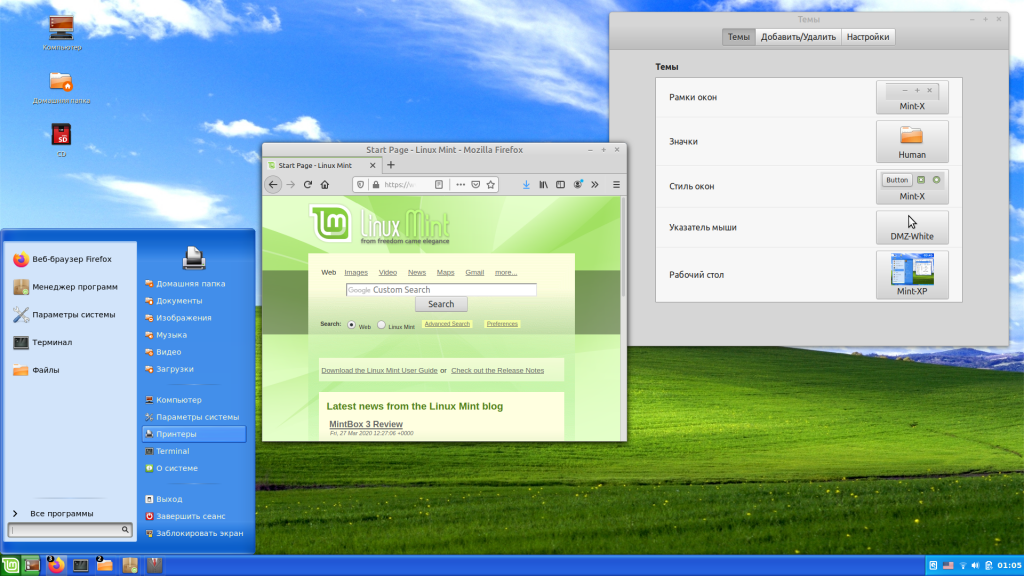
Впрочем, у пользователей Linux Mint Cinnamon 19.3 могут возникнуть проблемы с установкой обоев — предложенный автором темы стиль окон блокирует любые попытки сменить фон. Чтобы решить эту проблему, следует вместо стиля окон Mint-XP выбрать один из стандартных.
2. Windows 7
Тему Windows 7 для Linux пытались создать многие дизайнеры. Наилучшей схожести с прототипом удалось добиться команде B00merang-Project. Особой похвалы заслуживают рамки окон.
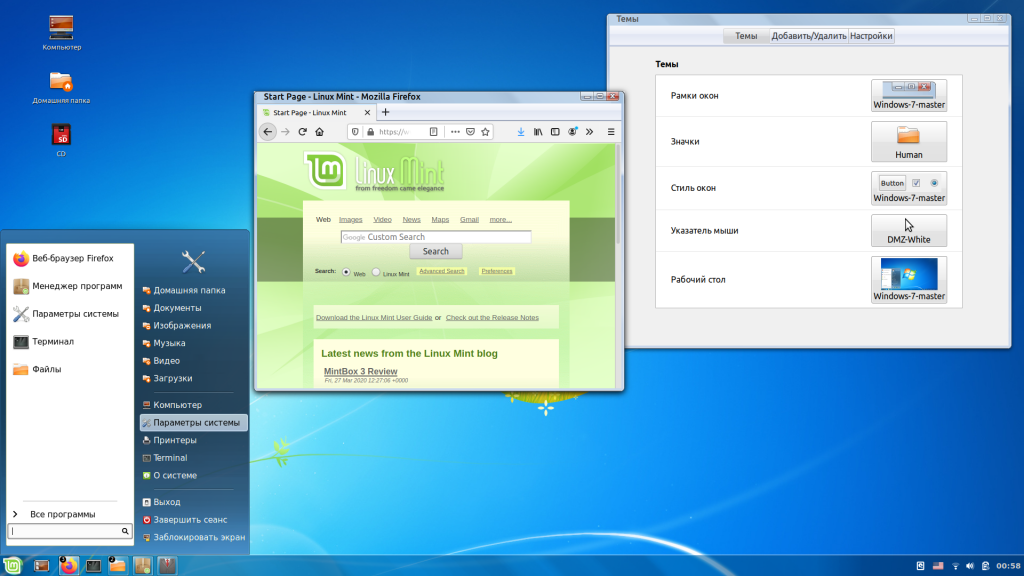
К сожалению, в перечне стандартных эта тема отсутствует. Windows 7 тема Linux Mint доступна для загрузки по ссылке. Полученный архив следует распаковать, а его содержимое переместить в папку /home/USERNAME/.themes.
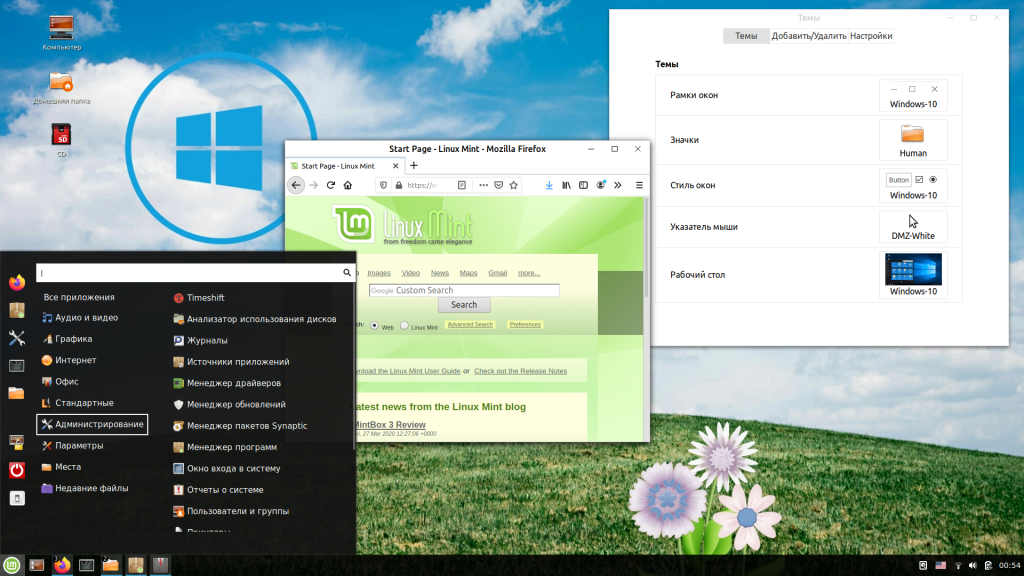
3. Windows 10
В списке стандартных тем присутствует также тема windows linux mint под названием Windows 10 Light Theme. Почему она так называется понять сложно. Оформление основных элементов интерфейса имеет мало общего с оригинальным дизайном Windows 10.
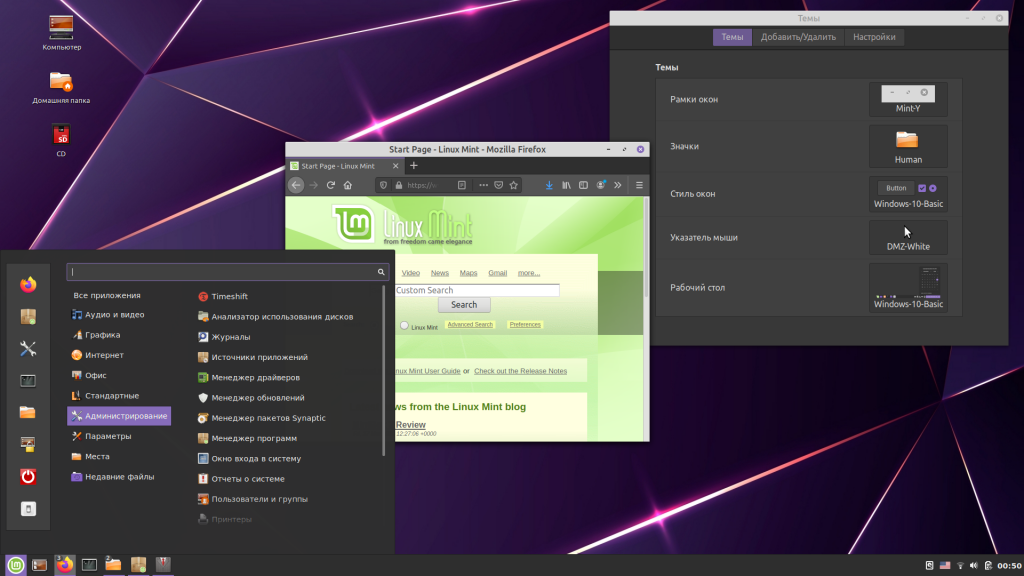
Пользователям, желающим придать своему рабочему столу схожесть с MS Windows 10, стоит обратить внимание на тему от уже упомянутого B00merang-Project. Она тоже неидеальна, но это лучшее, что имеется на данный момент (ссылка).
Меню Windows в Linux Mint
Даже если установить в Linux Mint Cinnamon тему Windows, меню останется прежним. Это не критично для Windows 10, а вот для Windows XP и Windows 7 желательно приблизить вид меню к оригинальному путём замены апплета Меню на CinnVIIStark Меню.
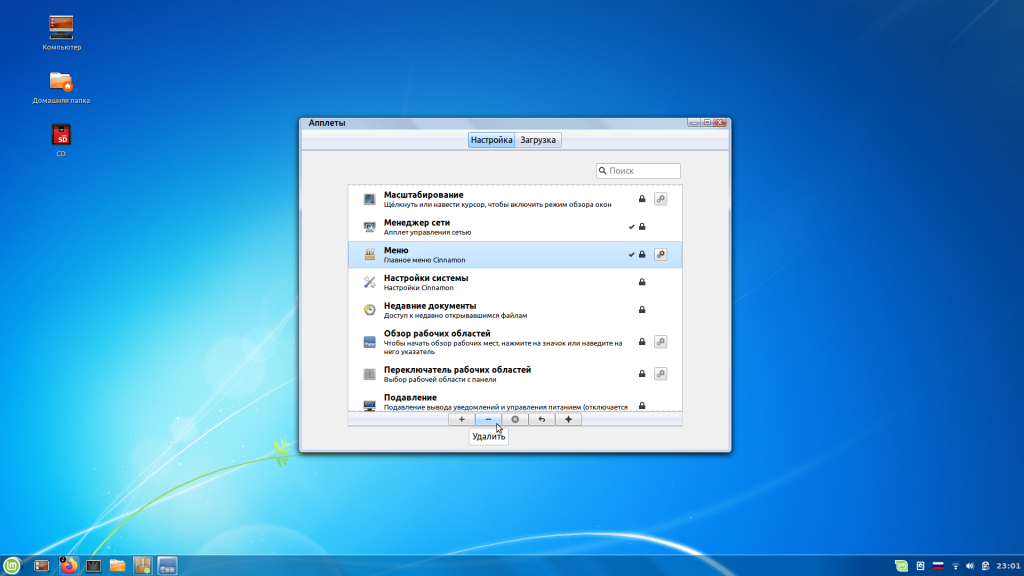
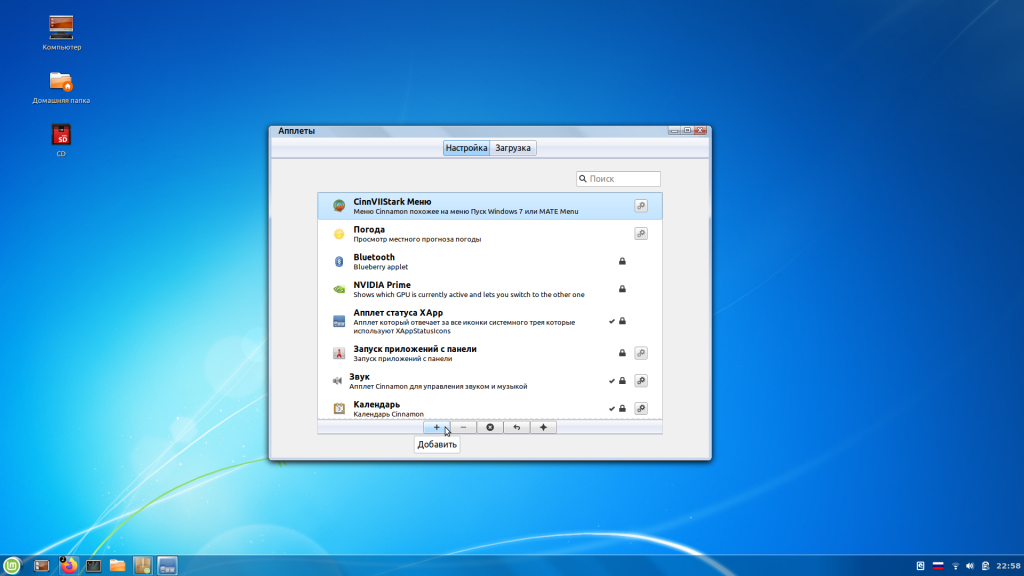
Сделать это несложно — достаточно навести курсор на Панель задач, щёлкнуть правой кнопкой и выбрать пункт Апплеты. На вкладке Настройка найти в списке строку-пункт Меню и выделить её, щёлкнув на нем левой кнопкой. Затем удалить эту строку-пункт Меню, воспользовавшись кнопкой «—» внизу. После этого перейти на вкладку Загрузка, найти в списке CinnVIIStark Меню и нажать на стрелку справа от названия.
Когда апплет загрузится, вернуться на вкладку Настройка, отыскать в списке CinnVIIStark Меню и выделить его, щёлкнув левой кнопкой мыши на названии. Далее добавить этот апплет, нажав на «+» внизу.
Если на Панели задач появился значок нового меню, значит, всё сделано правильно. Останется только переместить его на его привычное место — в левый угол. Для этого следует навести курсор на Панель задач, щёлкнуть правой кнопкой и включить режим редактирования панели. Потом захватить мышкой значок меню, перетащить туда, где ему положено быть, и выключить режим редактирования панели.
Выводы
Сымитировать интерфейс Windows в операционной системе Linux Mint Cinnamon гораздо проще, чем кажется большинству пользователей. В этой статье мы собрали три лучшие темы Windows Linux Mint. Если у вас остались вопросы об установке тем, задавайте их в комментариях.
Обнаружили ошибку в тексте? Сообщите мне об этом. Выделите текст с ошибкой и нажмите Ctrl+Enter.
Make Linux Mint look like Windows XP Luna
This post will go through how you can dress up Linux Mint 19.1 Cinnamon as the venerable Windows XP “Luna” theme, complete with sound effects.
The beauty of Linux Mint is not only the freedom from Windows Updates and Microsoft telemetry, but also:
- built-in driver support for many types of hardware
- integration of essential features:
- PDF reading, fully-featured Office suite, graphics editor, music player, email client, video player, OpenVPN, SSH, keyboard shortcut management
Linux has really come a far way compared to 5-10 years ago, where now you are able to set it up without touching the command line. It is also customizable in almost every way, as is the theme of this post.
I have wiped Windows and installed Linux Mint on all of my laptops except one which I sadly need to run Windows for work purposes. I have set up my Linux Mint laptops as “faux Windows XP” machines, complete with the look and feel as well as the startup, shutdown, and other Windows XP sound effects.
My experience so far can be summarized by the following sentence: using Linux feels like your computer is awaiting your next action, while Windows is the opposite.

(I positioned my panel to the top of my screen, just a personal preference. Default is bottom.)
The guide on how to achieve the same look follows.
Requirements
- Linux Mint 19.1 Cinnamon: https://linuxmint.com/release.php?id=34 (you can follow steps #1-13 under “How to Install” in my previous blog post, substituting the link in step #3 on that page with this link)
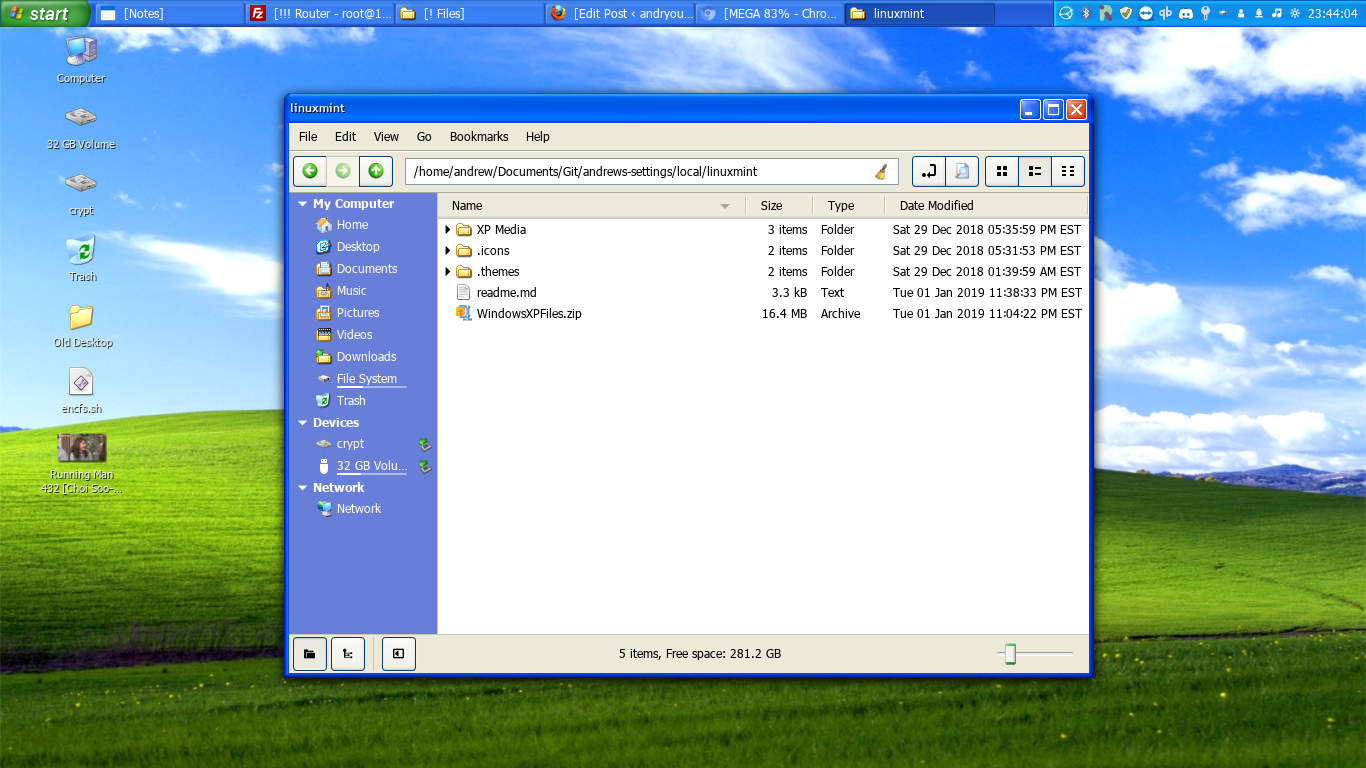
- Asset Files (contains themes, sounds, wallpaper): https://gitlab.com/andryou/andrews-settings/raw/master/local/linuxmint/WindowsXPFiles.zip
- Credits: B00merang-Artwork, B00merang-Project, CinnXP
Fonts
- Run in Terminal: sudo mkdir /usr/share/fonts/truetype/msttcorefonts
- Copy font files in the XP Media/Fonts folder to the above folder (you will need to navigate to it in the file explorer, right-click in the folder and open as root)
- Run in terminal: sudo fc-cache -fv
- Start => Preferences => Font Selection
- Tahoma (Default, Desktop, Document)
- Trebuchet MS Bold (Window Title)
- (optional) DejaVu Sans Mono Book (Monospace)
- Font size for all: 9
- Hinting: Full
- Antialiasing: Greyscale
Theme
- Copy the “.icons” and “.themes” folders to your Home directory (press CTRL + H in the file explorer to toggle hidden folders)
- Run: ln -s ~/.icons/cinnxp/cursors/ ~/.icons/default
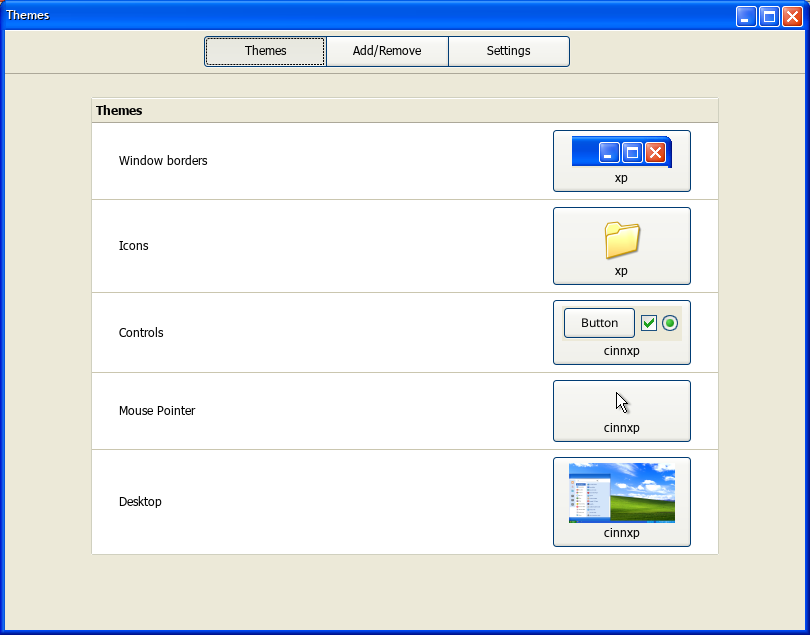
- Right-click on an empty space on your panel and click on “Themes”
- Window Borders: xp
- Icons: xp
- Controls: cinnxp
- Mouse Pointer: cinnxp
- Desktop: cinnxp
- Right-click on an empty space on your panel and click on “Panel settings”
- Panel Height: 27px
- Icon size (all): 16px
- Adjust the above to your personal preference
- Right-click on an empty space on your panel and click on “Add applets to the panel”
- Add applet “CinnVIIStarkMenu” from “Download” tab (update cache when asked)
- Once downloaded, go to “Manage” tab, click on CinnVIIStarkMenu and press the + button
- Right-click on your panel and switch “Panel edit mode” on
- Drag and drop new menu applet to far left of panel
- Right-click on the old menu and remove it
- (optional) If you prefer to not have any launchers, right-click on launcher area (to the right of the start menu) and remove “Panel launchers” (or from the “Add applets to the panel” dialog)
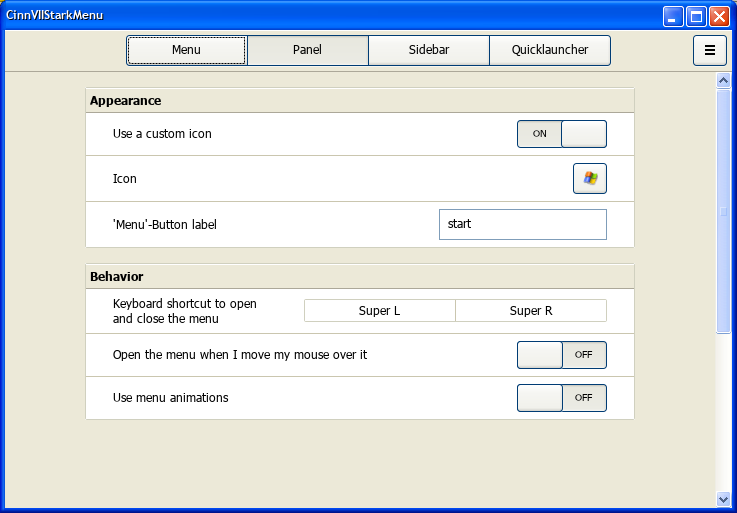
- Right-click on the new start menu and click on Configure…
- Panel => Use a custom icon – on, then for Icon click on the icon button and navigate to /home/USERNAME/.themes/cinnxp/cinnamon/menu.png and select it (if you don’t see the .theme folder, press CTRL + H to toggle hidden folders)
- Set ‘Menu’-Button label to: start
- (optional) Configure Window List applet to disable thumbnails by right-clicking on a window button in your taskbar, Preferences, Configure… and setting “Show windows thumbnails on hover” to Off
- Start => search for “effects” => disable window effects, fade effect, and session startup animation
- Copy XP Media/windows_xp_bliss.jpg to your Pictures folder then right-click on your desktop => Change Desktop Background => Pictures => browse to and select the Bliss wallpaper
- Run: sudo apt install dconf-editor
- Run: dconf-editor
- Navigate to: org => gnome => nautilus => desktop => trash-icon-name, set “Use default value” to off and set custom value to “Recycle Bin“
- Start => search for “desktop”, enable Trash and disable Home
Sounds:
- Copy sound files in the XP Media/Sounds folder to any folder, I’d recommend creating a new subfolder under Music
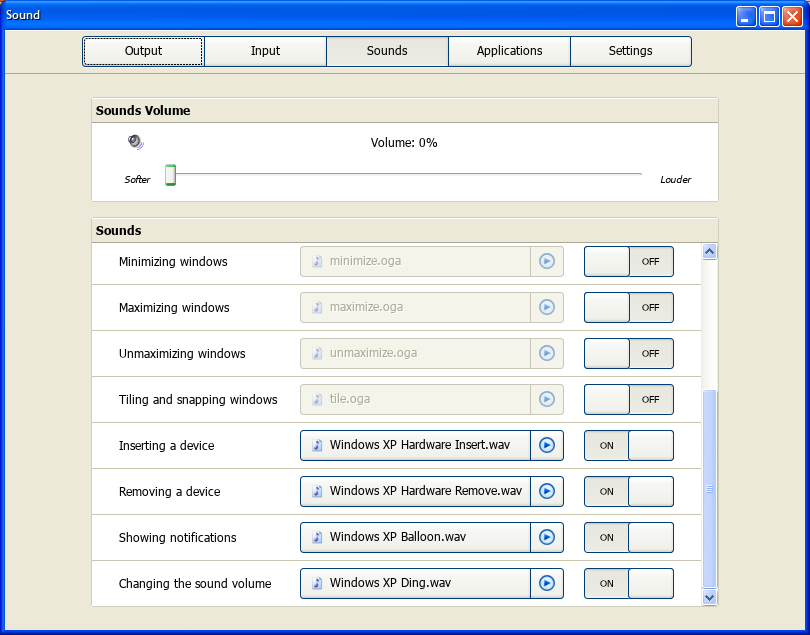
- Start => search for sound => “Sounds” tab:
- Starting Cinnamon – Windows XP Startup.wav
- Leaving cinnamon – Windows XP Shutdown.wav
- Inserting a device – Windows XP Hardware Insert.wav
- Removing a device – Windows XP Hardware Remove.wav
- Showing notifications – Windows XP Balloon.wav
- Changing the sound colume – Windows XP Ding.wav
This Windows XP Theme Will Help Switchers Adapt to Linux
While the vast majority of those will be upgrading to newer versions of Windows on shiny new PCs, or finding themselves lured in by $99 Chromebook offers, a number will be forgoing the expense and keeping their existing computer running — but powering it up with Linux.
As we wrote about recently, our top tip for people looking to switch to Linux is Lubuntu. Being both light enough to run on the sort of older hardware that Windows XP would’ve shipped on and using a desktop layout similar to that used on Windows, it makes an ideal compromise between the old and the new.
While Lubuntu is, thankfully, mercifully free of the atrocious crayola colour scheme Windows XP is famed for, many switchers may find themselves missing it. It’s a look they’re used to; it’s familiar and comforting.
The good news is that the flexibility of Linux allows for it to be replicated and used on desktops like Lubuntu’s. The theme we’re highlighting in this article is not the only such offering, nor is it a perfect pixel-for-pixel clone. But it is close enough to let new users use Lubuntu with a dose of familiarity.
It comes with all three of the standard XP colour themes:
Also included are Openbox themes for each, the famous Windows XP background and a tux-themed XP style start button.
I’d be surprised if most ‘average’ users had any issues using Lubuntu with this theme.
For details, screenshots, and the all important download, check out the link above. A quick Google will also throw up results for various Windows XP-esque icon packs should you wish to go further than simply theming.
Installing
Because installing themes on Lubuntu can be a bit of a hassle, I’d recommend anyone taking charge of helping a family member or friend upgrade to Lubuntu also take the time to install this theme pack for them.
To install, download the zip file in the link above and unpack it to the .themes folder (create if necessary) in the user’s home directory. Then, open up the appearance settings from the Lubuntu menu, apply the widget and Openbox themes and select the accompanying wallpaper.
Home / Themes / This Windows XP Theme Will Help Switchers Adapt to Linux