- About ConEmu
- Disclaimer
- Documentation and links
- Description
- Requirements
- Installation
- 4 Ways to Run Linux Commands in Windows
- Using Linux commands inside Windows
- 1. Use Linux Bash Shell on Windows 10 with WSL
- 2. Use Git Bash to run Bash commands on Windows
- 3. Using Linux commands in Windows with Cygwin
- 4. Use Linux in a virtual machine
- Conclusion
- Ламповый Linux-like терминал в Windows
- Установка нужных программ
- Настройка
- Немного «свистелок»
- Заключение
About ConEmu
ConEmu-Maximus5 aims to be handy, comprehensive, fast and reliable terminal window where you may host any console application developed either for WinAPI (cmd, powershell, far) or Unix PTY (cygwin, msys, wsl bash).
As Windows console window enhancement (local terminal emulator), ConEmu presents multiple consoles and simple GUI applications (like PuTTY for example) as one customizable tabbed GUI window with various features.
Moreover, due to deep integration, ConEmu is the best companion for Far Manager (FAR in Wikipedia), my favorite shell replacement.
ConEmu is an active project, open to suggestions.


Take a look at screencasts about ConEmu.

Disclaimer
ConEmu is not a shell, so it does not provide «shell features» like remote access, tab-completion, command history and others. ConEmu is an advanced console window where you can run any shell of your choice. However, some of these features have been placed in the RoadMap. You may also try Clink for bash-style completion in cmd.exe and PSReadLine or PowerTab in powershell.exe.
Or even choose bash or any other unix-like shell from cygwin, git-for-windows, msys2, mingw and others.
Documentation and links
Description
ConEmu starts a console program in a hidden console window, and provides an alternative customizable GUI window with various features:
- smooth and friendly window resizing;
- tabs for editors, viewers, panels and consoles;
- run simple GUI apps like PuTTY in tabs;
- Windows 7 Jump Lists and Progress on Taskbar buttons;
- easily run old DOS applications (games) in Windows 7 or 64-bit OS;
- thumbnails and tiles in Far Manager;
- normal, maximized and full screen graphical window modes;
- window font anti-aliasing: standard, ClearType, disabled;
- window fonts: family, height, width, bold, italic, etc.;
- Chinese versions of Windows supported;
- using normal/bold/italic fonts for different parts of the console simultaneously;
- using 24-bit colors in Far Manager 3.x;
- ANSI X3.64 and Xterm 256 colors;
- cursor: standard console (horizontal) or GUI (vertical);
- optional per-application settings (e.g. palette);
- vertical console buffer scrolling using the keyboard (BufferHeight mode);
- show full output (1K+ lines) of last command in Far Manager’s editor/viewer;
- customizable Far Manager right click behaviour (long click opens context menu);
- drag and drop (explorer style) of files and folders in Far Manager;
- limited support of BDF fonts;
- user friendly text and block selection;
- transparency and desktop mode;
- customizable starting tabs;
- configurable and clickable status bar;
- and more, and more. take a look at Documentation, Settings pages and What’s New.
All settings are read from the registry or ConEmu.xml file (multiple named configurations are supported), after which the command line parameters are applied. Parameters /Config and /BufferHeight can only be specified on the command line. Most settings are configured using the Settings dialog, not from the command line.
Requirements
Installation
In general, ConEmu installation is easy. Just unpack or install to any folder and run `ConEmu.exe`.
For more information about installation options refer to Installation page.
4 Ways to Run Linux Commands in Windows
Want to use Linux commands but don’t want to leave Windows? Here are several ways to run Linux bash commands in Windows.
If you are learning Shell scripting probably as a part of your course curriculum, you need to use Linux commands to practice the commands and scripting. Your school lab might have Linux installed but you don’t have a Linux laptop but a regular Windows computer like everyone else. Your homework needs to run Linux commands and you wonder how to run Bash commands and scripts on Windows. You can install Linux alongside Windows in dual boot mode. This method allows you to choose either Linux or Windows when you start your computer. But taking all the trouble to mess with partitions for the sole purpose of running Linux commands may not be for everyone. You can also use Linux terminals online but your work won’t be saved here. The good news is that there are several ways you can run Linux commands inside Windows, like any regular application. Isn’t it cool?
Using Linux commands inside Windows
As an ardent Linux user and promoter, I would like to see more and more people using ‘real’ Linux but I understand that at times, that’s not the priority. If you are just looking to practice Linux to pass your exams, you can use one method to run Bash commands on Windows.
1. Use Linux Bash Shell on Windows 10 with WSL
Did you know that you can run a Linux distribution inside Windows 10? The Windows Subsystem for Linux (WSL) allows you to run Linux inside Windows. The upcoming version of WSL will be using the real Linux kernel inside Windows. This WSL, also called Bash on Windows, gives you a Linux distribution in command-line mode running as a regular Windows application. Don’t be scared with the command line mode because your purpose is to run Linux commands. That’s all you need. 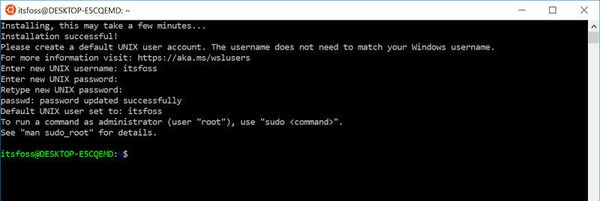 You can find some popular Linux distributions like Ubuntu, Kali Linux, openSUSE etc in Windows Store. You just have to download and install it like any other Windows application. Once installed, you can run all the Linux commands you want.
 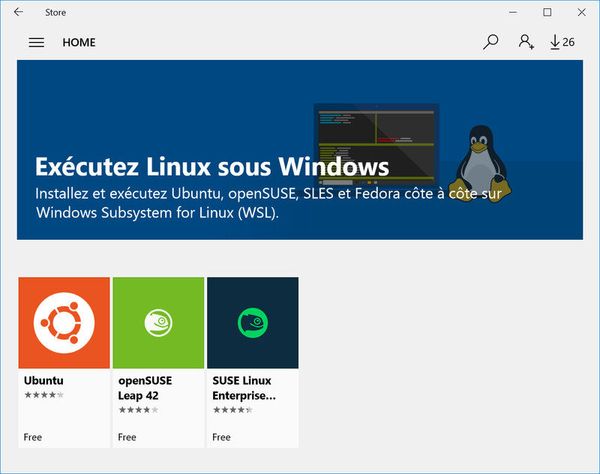 Please refer to this tutorial about installing Linux bash shell on Windows.
2. Use Git Bash to run Bash commands on Windows
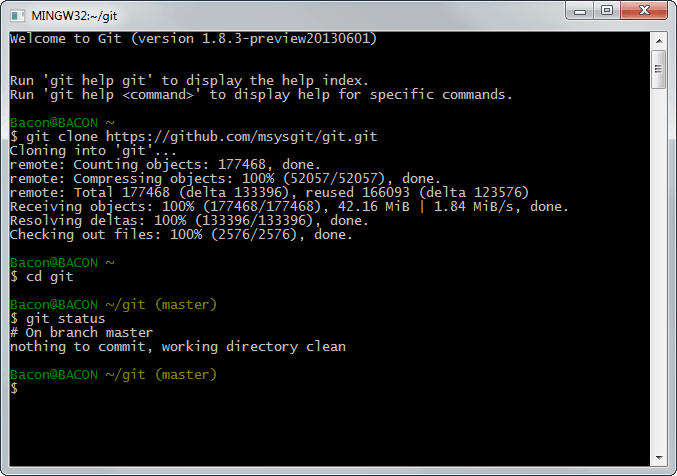
You probably know what Git is. It’s a version control system developed by Linux creator Linus Torvalds. Git for Windows is a set of tools that allows you to use Git in both command line and graphical interfaces. One of the tools included in Git for Windows is Git Bash. Git Bash application provides and emulation layer for Git command line. Apart from Git commands, Git Bash also supports many Bash utilities such as ssh, scp, cat, find etc. In other words, you can run many common Linux/Bash commands using the Git Bash application. You can install Git Bash in Windows by downloading and installing the Git for Windows tool for free from its website.
3. Using Linux commands in Windows with Cygwin
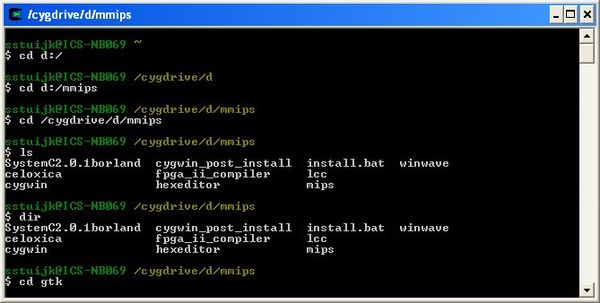
If you want to run Linux commands in Windows, Cygwin is a recommended tool. Cygwin was created in 1995 to provide a POSIX-compatible environment that runs natively on Windows. Cygwin is a free and open source software maintained by Red Hat employees and many other volunteers. For two decades, Windows users use Cygwin for running and practicing Linux/Bash commands. Even I used Cygwin to learn Linux commands more than a decade ago. You can download Cygwin from its official website below. I also advise you to refer to this Cygwin cheat sheet to get started with it.
4. Use Linux in a virtual machine
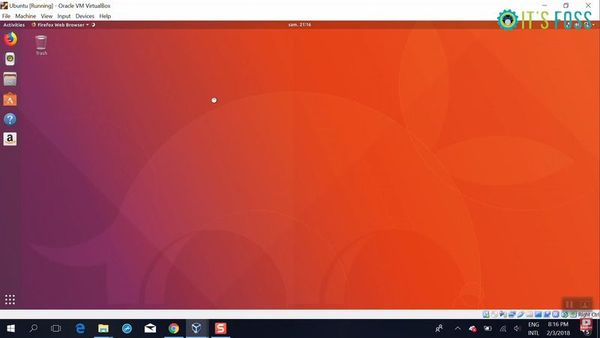
Another way is to use virtualization software and install Linux in it. This way, you install a Linux distribution (with a graphical interface) inside Windows and run it like a regular Windows application. This method requires that your system has a good amount of RAM, at least 4 GB but better if you have over 8 GB of RAM. The good thing here is that you get the real feel of using a desktop Linux. If you like the interface, you may later decide to switch to Linux completely. There are two popular tools for creating virtual machines on Windows, Oracle VirtualBox and VMware Workstation Player. You can use either of the two. Personally, I prefer VirtualBox. You can follow this tutorial to learn how to install Linux in VirtualBox.
Conclusion
The best way to run Linux commands is to use Linux. When installing Linux is not an option, these tools allow you to run Linux commands on Windows. Give them a try and see which method is best suited for you.
Ламповый Linux-like терминал в Windows
Для меня, автоматизатора-линуксоида, использвание Windows на основной рабочей станции первое время было просто болью и страданием. Но с этим я ничего поделать не мог: корпоративные стандарты и софт, кторый работает только на Windows. В попытке найти золотую середину, я прошёл три стадии. Сначала я только изредка переключался на винду по необходимости. Затем виртуалка на virtualbox-е с X-server-ом. После этого захотелось хоть чуть-чуть того консольного комфорта, который был на линуксе (я использовал Terminator в качестве основного терминала).
После яростного гугления и установки всех эмуляторов терминала под Windows, которые только удалось найти, оказалось, что нет ни одного хоть немного подходящего мне. А хотелось, чтобы вёл себя терминал максимально приближенно к линуксовым вариантам. Например, естественно нужны табы, сплит, выделение текста с прокруткой (когда нужно выделить больше чем один экран), копирование текста в буфер сразу при выделении и т.д.
В итоге я получил «комбайн» как на скриншоте ниже. О том, как это настроить, можно узнать, заглянув под кат.
До того, как получить результат, я даже всерьёз задумался о своём велосипеде (портирование, написание своего). Но лень и здравый смысл взяли свое…
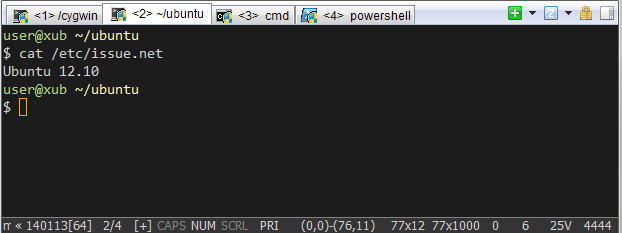
В процессе поиска хорошего терминала, я наткнулся на хабра-топик: Альтернативный терминал для Windows. ConEmu — приложение действительно классное, но оно не для тех, кто долгое время использовал линукс-терминалы. Затем я наткнулся на Mintty (был установлен вместе с Cygwin). Программка отличная, ведёт себя максимально близко к таким терминалам как Gnome-terminal и Terminator, но нет табов.
Оказалось, что вышеупомянутый ConEmu умеет запускать GUI-приложения внутри своих табов! И тут искра надежды начала разгораться… Но хватит лирики, пора приступить к делу!
Установка нужных программ
ConEmu ставим отсюда: code.google.com/p/conemu-maximus5
Mintty я ставил вместе с Cygwin: cygwin.com/install.html
Настройка
В ConEmu идём в Settings->Tasks и, нажимая плюсик, добавляем нужные таски как на скриншоте:
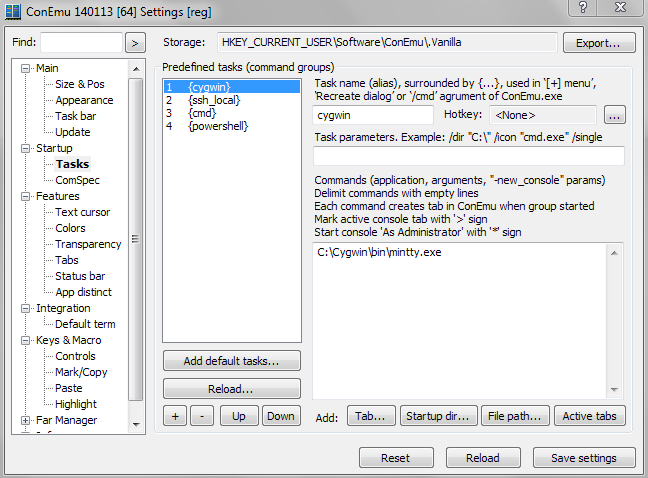
В нашем случае это:
| Имя таска | Команда |
| cygwin | C:\Cygwin\bin\mintty.exe |
| ssh_local | C:\Cygwin\bin\mintty.exe D:\Work\VMssh.bat |
| cmd | cmd |
| powershell | powershell |
Осторожно! Адский CMD!
@ECHO OFF SET VMNAME=xubuntu CALL D:\Work\VMstart.bat %VMNAME% ssh user@localhostВызывает скрипт старта виртуалки, VMNAME заменить на нужное.
@ECHO OFF SET VMNAME="%1" SET isVMRun= IF [%1] == [] ( echo Empty parameter VMNAME. Usage: %0 [name of vm] EXIT /B 1 ) FOR /F %%i IN ('VBoxManage list runningvms') DO SET isVMRun=%%i IF NOT "%isVMRun%" == "%VMNAME%" ( Vboxmanage startvm %VMNAME% --type headless )Проверяет запущена ли виртуалка и если нет, то запускает её. Таким образом, мне не нужно помнить запущена ли виртуалка, запускать отдельно VirtualBox и делать дополнительные клики.
Немного «свистелок»
ForegroundColour=208,208,208 BackgroundColour=28,28,28 CursorColour=255,175,0 IMECursorColour=128,224,160 Black=12,12,12 BoldBlack=10,10,10 Red=215,135,135 BoldRed=223,135,135 Green=175,215,135 BoldGreen=175,223,135 Yellow=247,247,175 BoldYellow=255,255,175 Blue=135,175,215 BoldBlue=135,175,223 Magenta=215,175,215 BoldMagenta=223,175,223 Cyan=175,215,215 BoldCyan=175,223,223 White=230,230,230 BoldWhite=238,238,238 BoldAsFont=no Font=Consolas FontHeight=11 CursorType=block FontSmoothing=full Term=xterm-256color Scrollbar=none Locale= Charset= Общая рабочая папка (файлы доступны на винде и на виртуалке) — нужно настроить в VirualBox-e следующим образом:

Также нужно прописать в fstab на виртуалке, чтобы автоматиечски монтировалось при старте.
Заключение
В результате я получил терминал, в котором хоть как-то можно жить. Я ни в коем случае не претендую на исключительность этого решения, но надеюсь кому-то пригодится. Отдельный плюс такого решения — общий текстовый буфер и общие папки. Таким образом, работаем с линукс-виртуалкой так же как и с остальными табами в терминале.
Для тех, кому не нужны GUI-табы и кто использует tmux, есть статья моего коллеги примерно на ту же больную тему: habrahabr.ru/post/196128.
Особая благодарность хабраюзеру Maximus5 за отличный Windows терминал ConEmu!