- How to Run Memtest in Ubuntu 22.04
- How to install Memtest86+ in Ubuntu 22.04
- How to run Memtest in Ubuntu 22.04
- How to uninstall Memtest86+ in Ubuntu 22.04
- Conclusion
- About the author
- Sharqa Hameed
- How to Run Memtest in Ubuntu 20.04
- Pre-requisites
- How to Run Memtest86+ in Ubuntu 20.04
- Step 1: Access GRUB Menu
- Step 2: Select Memtest86+
- Step 3: Quit Test
- Run Memory Test Using Memtester Utility
- Install Memtester
- Check Errors Using Memtester
- Conclusion
- About the author
- Karim Buzdar
- How to Check RAM on Ubuntu 18.04
- Checking Size and Availability of RAM
- Checking the Type and Speed of RAM
- Checking RAM for Errors
- About the author
- Shahriar Shovon
How to Run Memtest in Ubuntu 22.04
![]()
Memtests are memory-testing programs that check for faults in the RAM of your system. Memtest or Memtest86+ reads data, writes the memory address patterns, and checks the errors. Most Linux distributions, such as Ubuntu 22.04, comprise Memtest86+ apps by default. However, if your distribution does not contain then you can easily install it with the help of the terminal.
This blog will demonstrate how to install, run, and uninstall Memtest86+ in Ubuntu 22.04. So, let’s start!
How to install Memtest86+ in Ubuntu 22.04
Before performing the memory test, it is essential to install “memtest86+” on Ubuntu 22.04. To do so, follow the given instructions.
Step 1: Update system packages
First of all, hit “CTRL+ALT+T” and update the system packages by writing out the following command:

Step 2: Install Memtest86+
Next, install the “memtest86+” package in your Ubuntu 22.04 system with the help of the provided command:

After installing the “memtest86+”, your system is all set to run the Memtest.
How to run Memtest in Ubuntu 22.04
Follow the given instructions for running Memtest in Ubuntu 22.04.
Step 1: Open GRUB menu
Memtest can work without an operating system which means that it can be directly accessed using the GRUB menu. To open the GRUB menu, reboot your system, and hit and hold the “Shift” key.
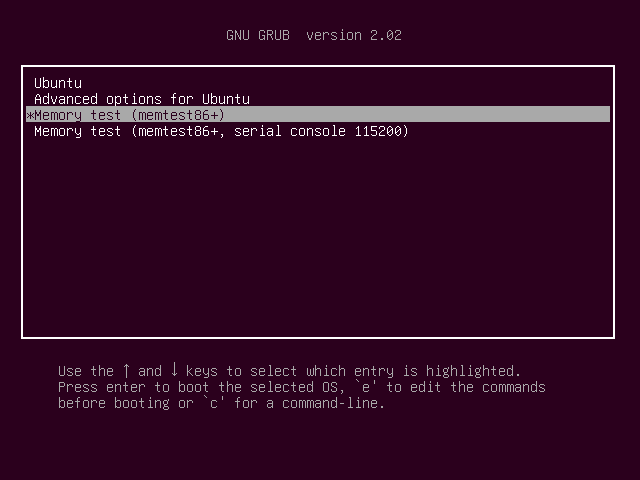
Upon doing so, you will see the following screen, select the “Memory test (memtes86+.elf)” option using the arrow keys and hit “Enter”:

Step 2: Run Memtest86+
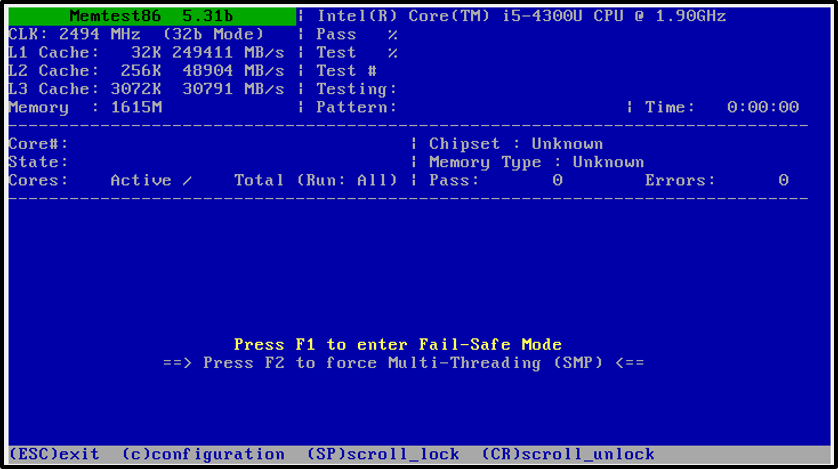
Next, either press “F1” to enter the “Fail-Safe” Mode or hit “F2” to force “Multi-Threading (SMP)” mode. In our case, we will run Memtest86+ in the Fail-Safe mode:
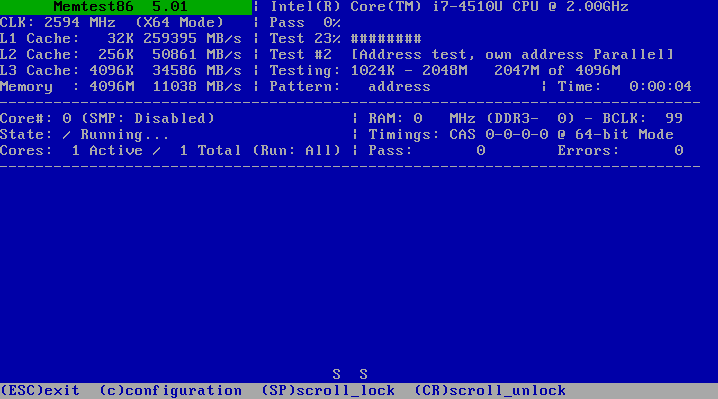
Step 3: Check Memtest86+ status
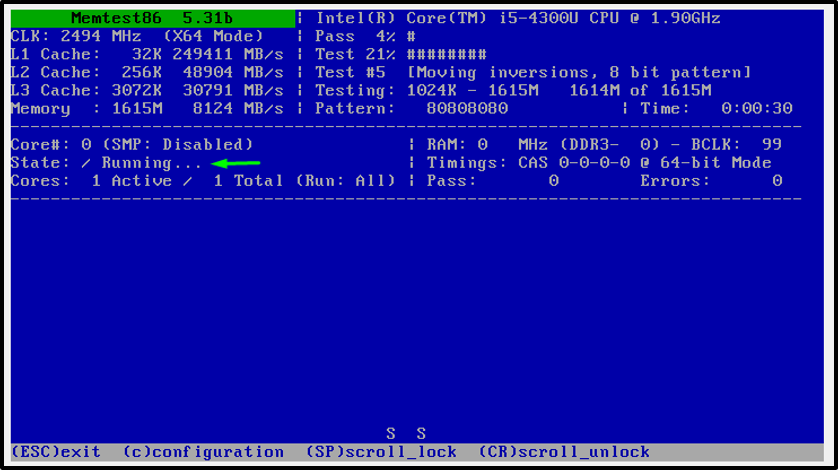
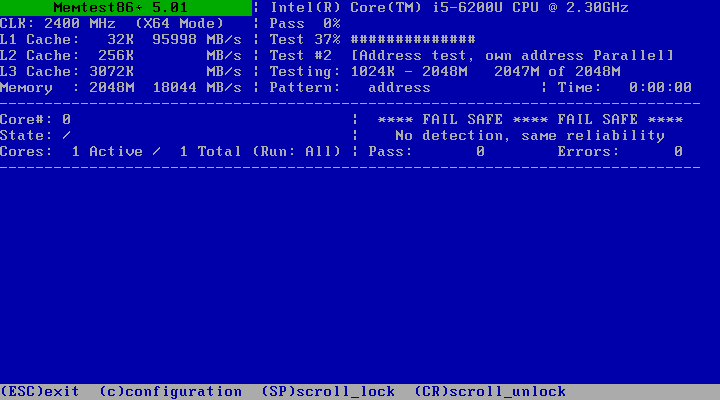
After starting the Memtest86+, verify if it is “running” by checking its “status” from the highlighted section:
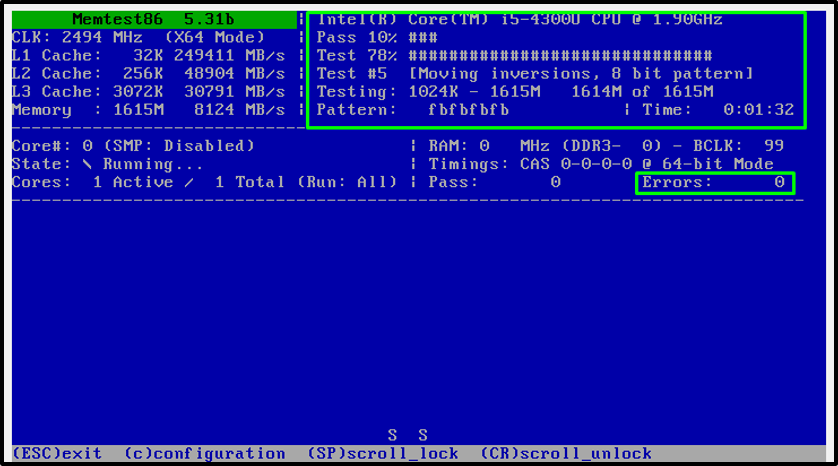
You can also look out for the other details such as the percentages of “Pass”, “Test”, and the number of encountered “Errors” from the top-right side sub-section:
Step 4: Quit Memtest86+
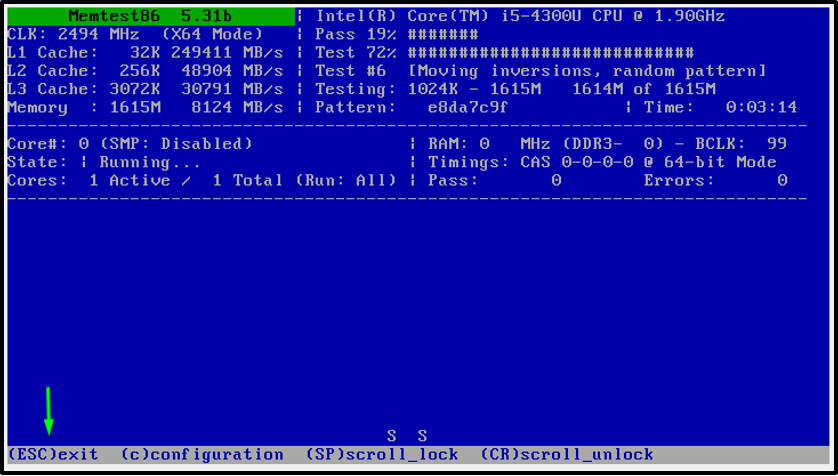
Lastly, press “Esc” when you want to quit the ongoing Memtest86:
How to uninstall Memtest86+ in Ubuntu 22.04
In Ubuntu 22.04 terminal, execute the following command for the uninstallation of the “memtest86+” package:
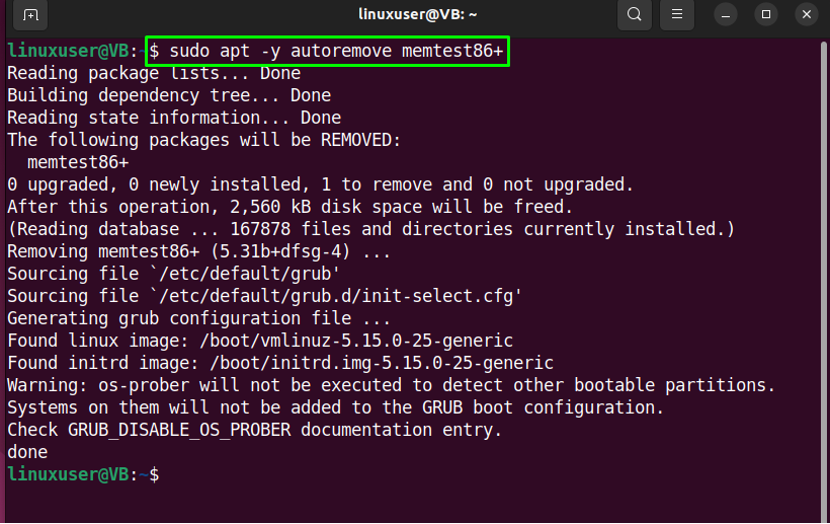
We have compiled the easiest method to install, run, and uninstall Memtest86 in Ubuntu 22.04.
Conclusion
For running Memtest86+ in Ubuntu 22.04, firstly update the packages and run the “$ sudo apt -y install memtest86+” command. After doing so, reboot your system and press and hold the “Shift” key to open up the GRUB menu. Then, utilize the arrow keys for selecting the “Memtest86+” option and start running the memory test. This blog demonstrated the method to install, run, and uninstall Memtest86+ in Ubuntu 22.04.
About the author
Sharqa Hameed
I am a Linux enthusiast, I love to read Every Linux blog on the internet. I hold masters degree in computer science and am passionate about learning and teaching.
How to Run Memtest in Ubuntu 20.04
![]()
Random Access Memory, or RAM, is an important part of any computer system. If you set up a new Ubuntu environment or VPS (Virtual Private Server) and you do not have an idea about the internal memory details of your system, such as how much RAM is installed and used on your system, then you can easily test all information about your computer’s memory using a memtest software program. Memtests are memory test utilities designed to test your computer’s RAM for errors. There are 86+ memtest programs included by default in most Linux distributions, including Ubuntu 20.04. If a memtest program is not included in your distribution, then you can create a portable test drive from the USB from which to boot and run the memtest. This utility writes the test patterns of memory addresses, reads data, and compares for errors.
This article will show you how to run a memtest in Ubuntu 20.04. The article will also explain more about memtester command-line utilities, which can be used to check RAM errors.
Pre-requisites
To perform the memtest shown in this article, Ubuntu 20.04 must be installed on your system, and the memtest86+ option should be available in the GRUB menu.
How to Run Memtest86+ in Ubuntu 20.04
Performing a memory test in Ubuntu is easy compared to other distributions. Perform the following steps to run a memtest on your Ubuntu 20.04 system.
Step 1: Access GRUB Menu
As you may know, Memtest86+ runs without an operating system. Therefore, you must have access to the GRUB menu in Ubuntu. Turn on or restart your system and hold down the ‘Shift’ key to access the GRUB menu. The following window will display upon starting up the system:
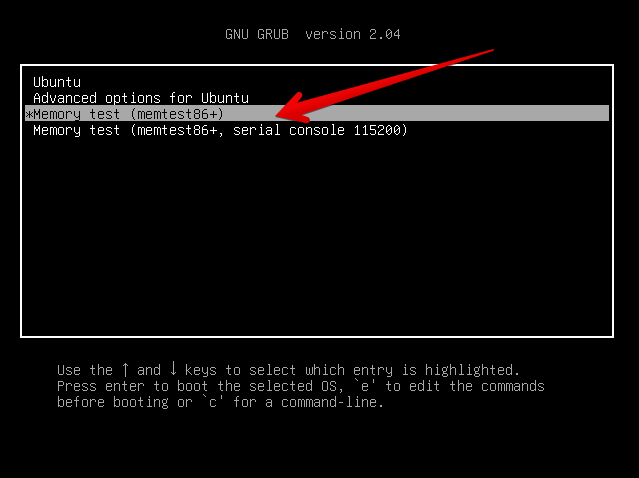
Step 2: Select Memtest86+
The following list of options will be displayed in the GRUB menu. Using the arrow keys, select the ‘Memtest86+’ option, marked with an arrow in the image below:
Press the ‘Enter’ key to run the Memtest86+ program.
Step 3: Quit Test
The test will start to run automatically on your system and continue until and unless you quit the running process by pressing the ‘Esc’ key. It is best practice to run the test for one full pass. In the output window shown in the following image, the details about the test are highlighted in red.
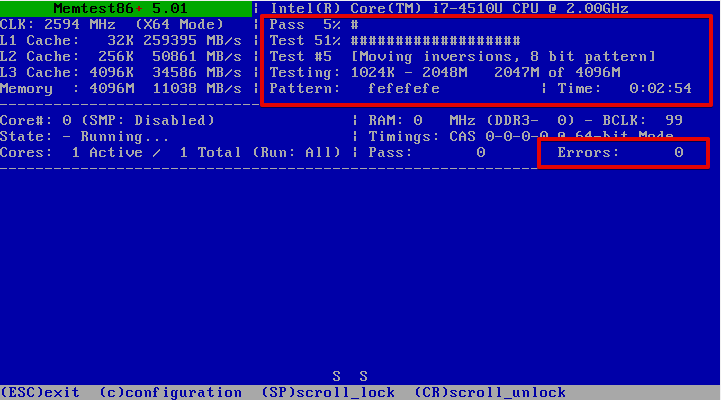
You have now successfully executed the memtest on your Ubuntu system. This is like a game to check if any errors are detected or if your system restarts. It is recommended to run the memtest for many passes, because sometimes, an error might not be detected until a second pass. Each pass may take many hours or days to complete, depending on how much memory is installed on your system. So, it is recommended to run the memory test at the end of the day to obtain the best results. If your system has a large volume of memory and crashing is infrequent, then may be a good idea to run the test over the weekend. If you have Error Correcting Code (ECC) memory, then you can easily get errors with doing one pass only. It will correct all errors on its own. If you have the time to perform a second pass for error detection, in this case, we recommend that you do so.
Run Memory Test Using Memtester Utility
Memtester is a command-line utility that you can use to check your RAM for errors.
Install Memtester
The memtester utility is not installed on the Ubuntu system by default. But, you can install the utility using the following command:

Check Errors Using Memtester
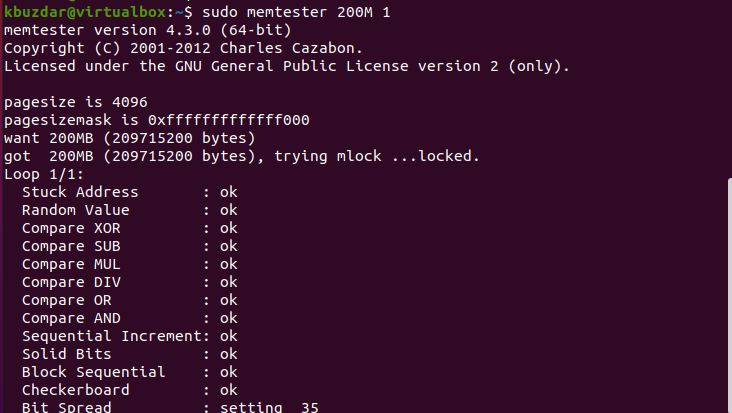
Once the memtester is installed on your system, you can run the memtester command on your system to check the RAM for errors. Use the following syntax to run the memtester command:
In the above command, ‘size’ is the amount of memory that you want to allocate and ‘iteration’ is the number of times to run the command to check for errors, or the number of passes.
For example, to run a memtester command for memory size 200 M for 1 iteration, the above command will change into the following format:
After entering the above command, the following output should display on the terminal:
Conclusion
From the information provided in this article, you learned how to run Memtest86+ in Ubuntu 20.04. This feature can be useful if your system has been crashed many times. Before filing any bug report, first, you should perform the memtest. Moreover, you also learned how to run a memory test using the memtester command-line utility. Hopefully, after reading this article, you are now able to perform a memory test for your own system.
About the author
Karim Buzdar
Karim Buzdar holds a degree in telecommunication engineering and holds several sysadmin certifications. As an IT engineer and technical author, he writes for various web sites. He blogs at LinuxWays.
How to Check RAM on Ubuntu 18.04
Random Access Memory or RAM in short, is a very important part of any computer. If you’ve bought a new pre-configured Ubuntu computer or a Virtual Private Server (VPS) and you don’t know any information about how much RAM it has, how much of it is used, the speed of the RAM installed, the type of the RAM, then this article is for you. In this article, I will show you how to find out information about your installed RAM or memory on Ubuntu 18.04 and also find out if you have any problems in your installed RAM. Let’s get started.
Checking Size and Availability of RAM
You can check how much RAM you have installed on your Ubuntu 18.04 machine using the following command:

As you can see from the marked section of the screenshot below, the total installed RAM on my Ubuntu 18.04 machine is 1.9 Giga Bytes (GB).

You can also find out how much RAM is used and how much RAM is available using free command.
As you can see from the marked section of the screenshot below, the RAM used on my Ubuntu 18.04 machine is 1.5 Giga Bytes (GB) and the RAM available or free is 258 Mega Bytes (MB).

Checking the Type and Speed of RAM
There are different types of RAM available in the market. For example, DDR1, DDR2, DDR3 and DDR4. DDR here means Double Data Rate. At the time of this writing, the most widely used RAM type is DDR3 and DDR4. There are other types of memory for portable devices as well such as SDRAM, DRAM etc.
Every RAM or memory module these days has different profiles. Each of these profile define the clock speed at which the RAM should be running.
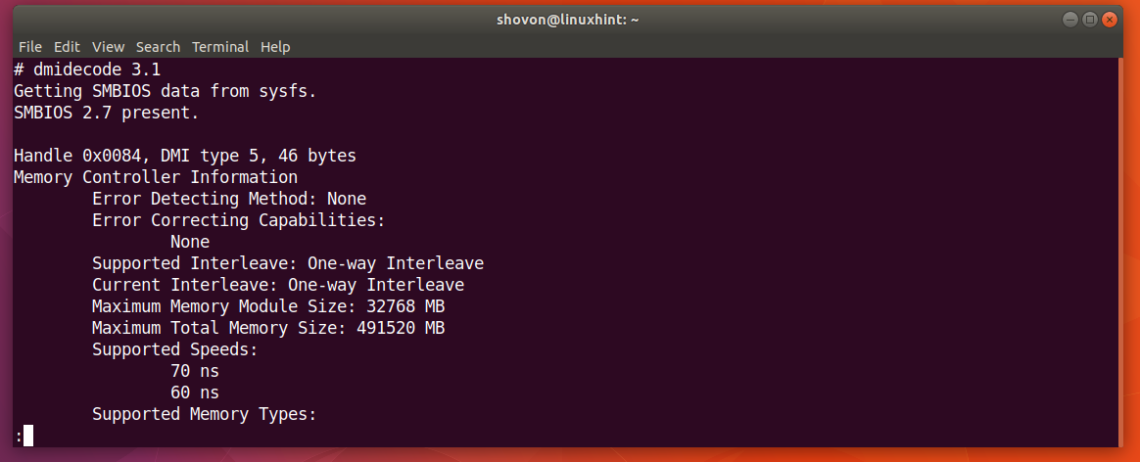
You can check the type of RAM you have installed on your Ubuntu 18.04 machine using the following command:

You should see the following window as shown in the screenshot below. This is a lot of information. You can press the and arrow keys to navigate this information.
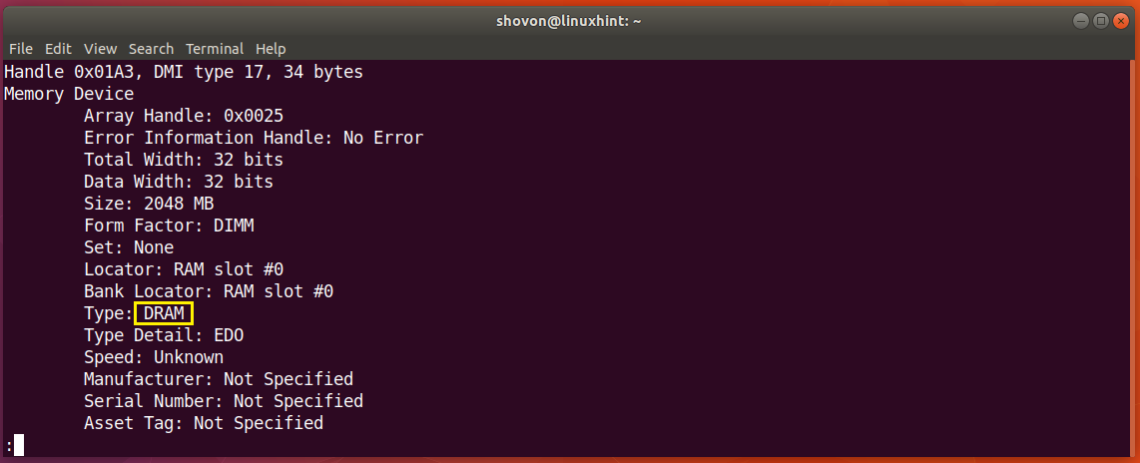
Just scroll down a little bit and you should find information about your RAM. As you can see from the screenshot below, the type of RAM installed on my Ubuntu 18.04 machine is DRAM.
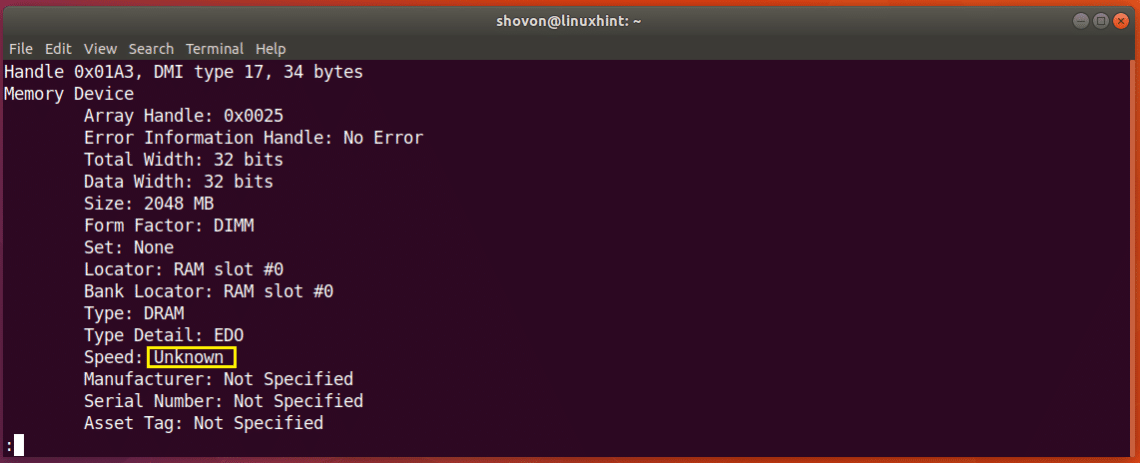
You can also find out the clock speed or speed of the RAM installed on your machine using the dmidecode command. As you see from the marked section of the screenshot below. I don’t have the speed of my RAM listed here as I am using a Virtual Machine. But on real computers, it should be something like 1333 MHz or something like that.
Checking RAM for Errors
At times your RAM may suffer many issues as semiconductor devices like RAM are very fragile. You can check your RAM for errors.
On Ubuntu 18.04, you can use memtester command line utility to check your RAM for errors. memtester is not installed on Ubuntu 18.04 by default. But it is available in the official package repository of Ubuntu 18.04.
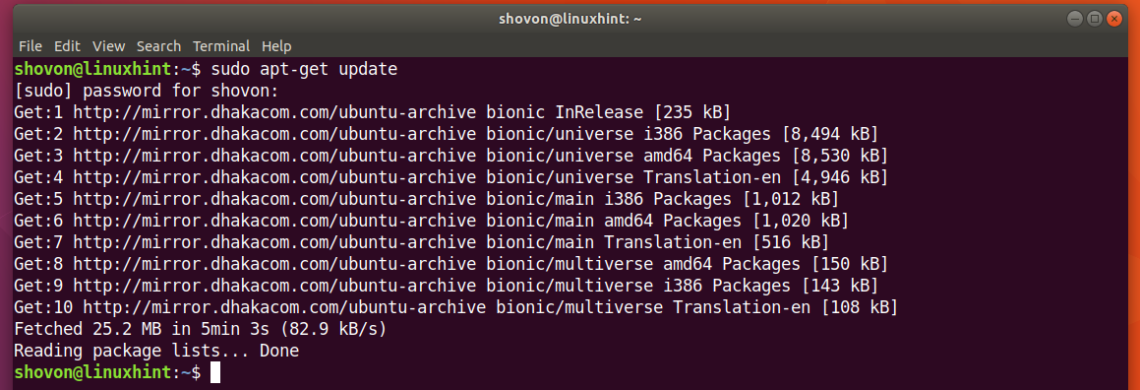
First update the package repository cache of your Ubuntu 18.04 machine with the following command:

The package repository cache should be updated.
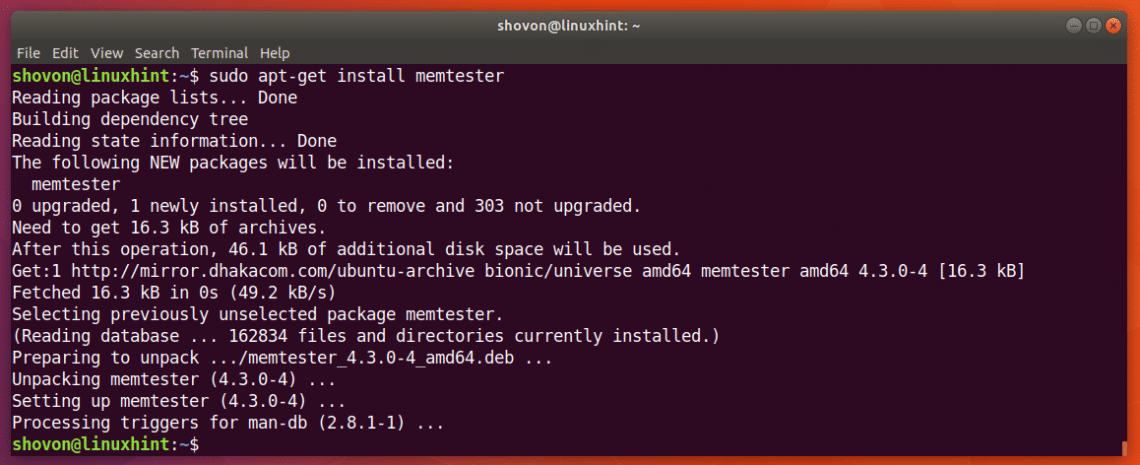
Now you can install memtester on Ubuntu 18.04 with the following command:

memtester should be installed.
Now you can run memtester command to check memory as follows:
Here SIZE is the amount of memory to allocate and test using memtester utility. ITERATIONS is a number that specifies how many times you want memtester to test the allocated memory.
As SIZE you can use B for Bytes, K for Kilobytes, M for Megabytes and G for Gigabytes.
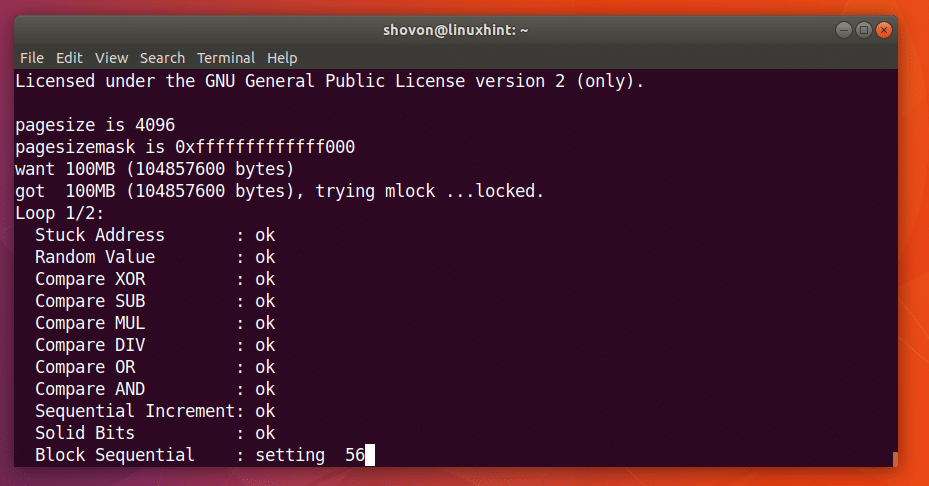
Let’s say you can to allocate 100 Megabytes in RAM and check it twice. You can run the following command to do that:

As you can see from the screenshot below, the memtester program is testing the RAM.
When memtester command is complete, as you can see from the screenshot below, all the tests are successful. It means the RAM has no errors. You can of course allocate more memory at once to perform a thorough test.
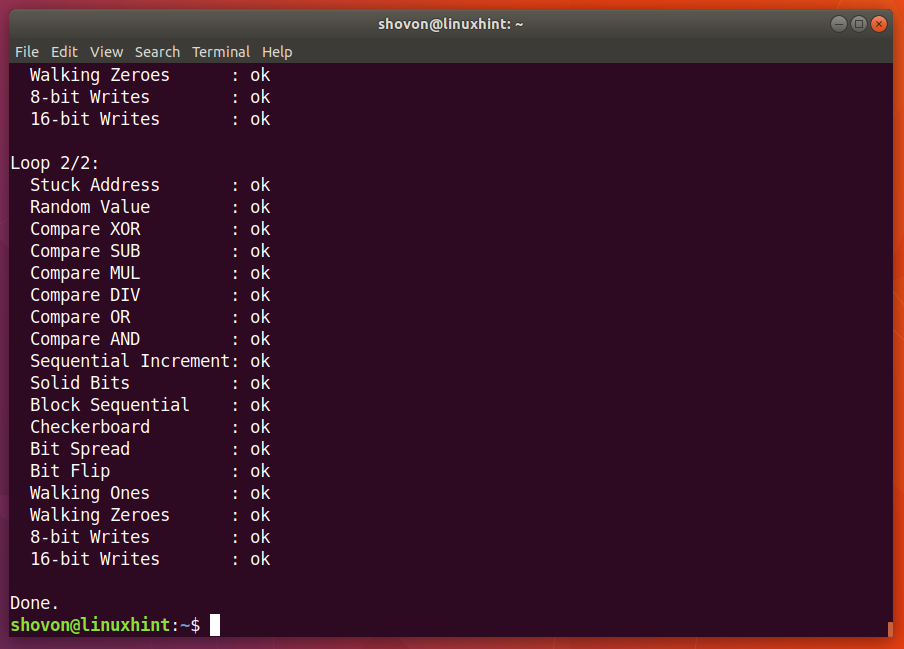
The only downside of memtester utility is that you can’t allocate more RAM than you have available as free.
You can use memtest86+ to do a more thorough check of your RAM. It has no such limitations as memtester. It is installed by default on Ubuntu 18.04.
Just reboot your Ubuntu machine and from the GRUB menu, select Memory test (memtest86+).
You should see the following window. Now press F1 to go to Fail-Safe Mode.

memtest86+ should start checking your RAM for errors as you can see from the screenshot below.
That’s how you find out different information about RAM and check RAM for errors on Ubuntu 18.04 Bionic Beaver. Thanks for reading this article.
About the author
Shahriar Shovon
Freelancer & Linux System Administrator. Also loves Web API development with Node.js and JavaScript. I was born in Bangladesh. I am currently studying Electronics and Communication Engineering at Khulna University of Engineering & Technology (KUET), one of the demanding public engineering universities of Bangladesh.