- How to Install and Use TestDisk Data Recovery Tool in Linux
- What Can TestDisk do?
- How to Install TestDisk on Linux
- Install TestDisk on Debian and Ubuntu
- Install TestDisk on RHEL and CentOS
- Install TestDisk on Fedora and Arch Linux
- How to Run and Use TestDisk in Linux
- Related Posts
- 11 thoughts on “How to Install and Use TestDisk Data Recovery Tool in Linux”
- How to Install and Use the TestDisk on Ubuntu 22.04
- How to Install the TestDisk on Ubuntu 22.04
- How to Use the TestDisk to Recover the Data
- Conclusion
- About the author
- Prateek Jangid
How to Install and Use TestDisk Data Recovery Tool in Linux
TestDisk is a free and opensource, command-line data recovery tool that is used to recover data from deleted or lost partitions. Further, you can use it to revive non-bootable partitions which can be caused by factors such as accidental deletion of partition tables, and malware attacks to mention a few.
The command-line software was written in C programming languages by Christophe Granier and licensed under the GNU/GPLv2 license. TestDisk is a cross-platform tool and runs on almost any desktop operating system: Linux, Windows, macOS, FreeBSD, OpenBSD, and even NetBSD.
What Can TestDisk do?
TestDisk is a powerful, and lightweight software tool that comes with a myriad of data recovery applications as outlined below:
- TestDisk is able to repair a corrupt or damaged partition table.
- It can seamlessly recover a deleted disk partition.
- It restores files from Windows filesystems such as NTFS, FAT, FAT32, exFAT and ext2 Linux filesystem.
- It can copy files from deleted or corrupt Windows filesystems such as NTFS, FAT32, and exFAT and Linux partitions (ext2, ext3, and ext4).
- TestDisk can recover and rebuild the NTFS, FAT32 and FAT16 boot sectors from their backups.
- TestDisk can also repair corrupt FAT32 tables as well as the MFT by riding with the help of the MFT mirror.
In this article, we will show you how to install the TestDisk data recovery utility to recover an unbootable partition on Linux.
How to Install TestDisk on Linux
The package TestDisk is available to install from the default system repositories in most Linux distribution using the default package manager as shown.
Install TestDisk on Debian and Ubuntu
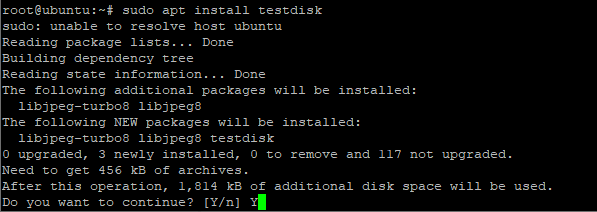
To start off, update the system packages and install TestDisk as shown.
$ sudo apt update $ sudo apt install testdisk
To verify that Testdisk is installed and display more information by running the following dpkg command.

Install TestDisk on RHEL and CentOS
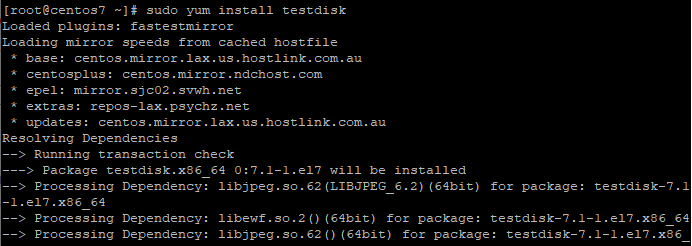
To install TestDisk, first, enable EPEL repository and then install TestDisk as shown.
------------ On RHEL/CentOS 7 ------------ # yum install epel-release # yum update # yum install testdisk ------------ On RHEL/CentOS 8 ------------ # yum install https://dl.fedoraproject.org/pub/epel/epel-release-latest-8.noarch.rpm # yum update # yum install testdisk
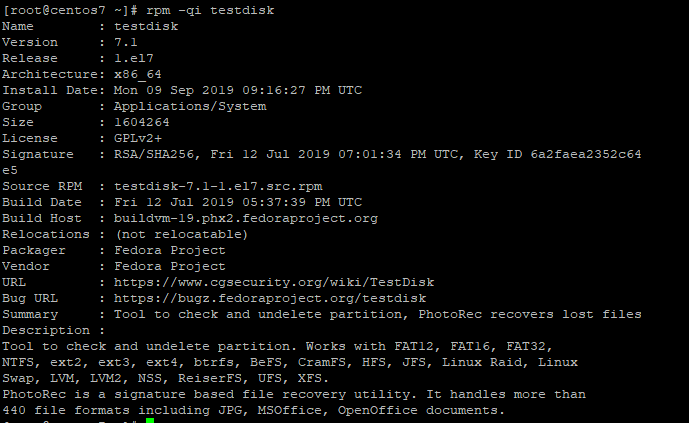
To verify that Testdisk is installed and display more information about the TestDisk tool run the following rpm command.
Install TestDisk on Fedora and Arch Linux
For Fedora systems run.
$ sudo dnf install testdisk
For Arch Linux run:
If no suitable package is found for your Linux distribution, download TestDisk from its official site.
How to Run and Use TestDisk in Linux
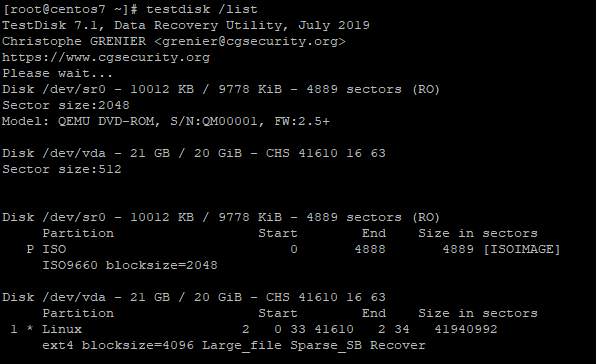
Since testdisk is run from the command line, run the command below to display the partitions on your system.
Now, assume your Linux partition table is lost or corrupt. To restore the Linux partition using TestDisk first run.
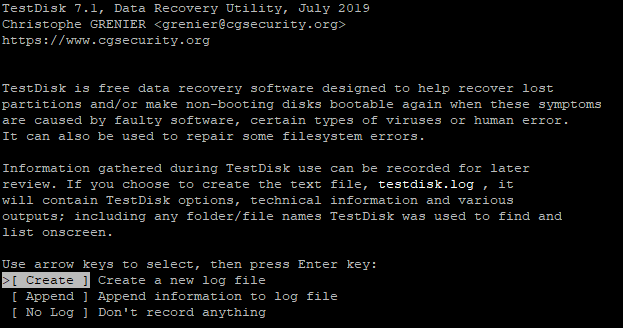
Select ‘Create‘ and hit ENTER. This will display a list of partitions to choose from. In your case, your partitions will be different from what is displayed below.
Next, select the ‘Proceed‘ at the bottom to go on to the next options.

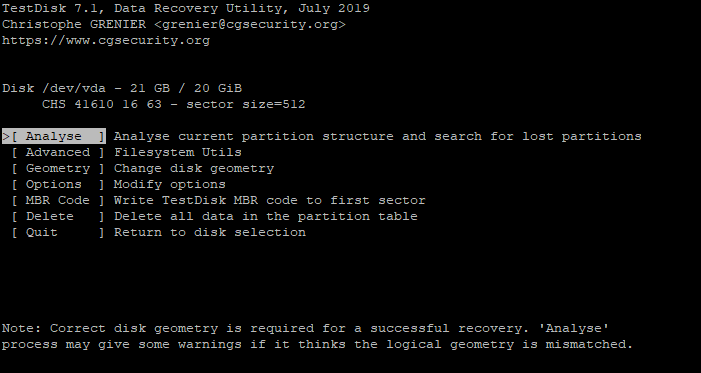
Your system will automatically detect the partition table type you are using. In my case, it is ‘Intel‘. Hit ENTER to continue.

In the next section, select the ‘Analyse‘ option for the testdisk utility to probe your partition structure.
If No bootable partition is found on the Disk, the error below will be printed.
Partition Start End Size in sectors No partition is bootable *=Primary bootable P=Primary L=Logical E=Extended D=Deleted [Proceed ]
Select ‘Proceed‘ option.
A list of available partitions will be displayed on the next screen. Hit ‘ENTER‘ to continue to the next screen.
Select the ‘write‘ option on the next screen. This option will trigger TestDisk to write on the partition table.
Next, press Y to confirm as shown below.
Write partition table, confirm ? (Y/N)
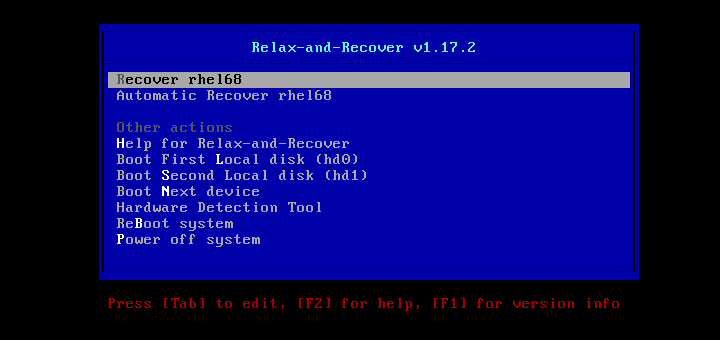
TestDsk will prompt you to reboot your system for the changes to take effect.
You will have to reboot for the change to take effect.
Select the OK option.
On the next screen select ‘Quit‘ to leave the menu and finally select ‘Quit‘ again to exit the TestDisk program.
All you have to do now is to reboot your system. If all went well, the new partition table should allow the system to boot normally.
Conclusion
TeskDisk is an ideal tool when you want to unerase data from corrupt partitions or revive unbootable partitions and get them to boot as expected. It supports a vast range of file systems and can work in any operating system: from Windows to Linux.
In this guide we illustrated how to recover an unbootable partition using TestDisk, however, the tool can be used for so much more!
This is James, a certified Linux administrator and a tech enthusiast who loves keeping in touch with emerging trends in the tech world. When I’m not running commands on the terminal, I’m taking listening to some cool music. taking a casual stroll or watching a nice movie.
Each tutorial at TecMint is created by a team of experienced Linux system administrators so that it meets our high-quality standards.
Related Posts

11 thoughts on “How to Install and Use TestDisk Data Recovery Tool in Linux”
What do I do when I install testdisk and see this at the end? Running `brew cleanup testdisk`…
Disable this behaviour by setting HOMEBREW_NO_INSTALL_CLEANUP.
Hide these hints with HOMEBREW_NO_ENV_HINTS (see `man brew` I installed it on MacBook Apple Silicone. Reply
I screwed up! I intended to work exclusively with /dev/sdb (the second drive attached to my MSI PC which has a complicated layout with GRUB2 installed) and I was using “fdisk“. I think it might be a great idea to have a lock option on “fdisk” to restrict the write/save things to a specific drive unless you know for sure where you are writing the new partition layout. I had been working on a recovery operation for several hours – when I made my mistake. So I removed the USB disk drive and plugged in a spare device – 256 GB SAMSUNG. I was able to install the PenDrive software on it. The PenDrive installation software only runs under Windows but the resulting PenDrive is then bootable and supports whatever you have installed (by a selection tree). There is a wide selection of things you can install from the internet. So I installed “Hirens” and “LXLE” and I am now writing this using the LINUX LXLE installed on my PenDrive I did the install using the “apt” admin toolset as LXLE supports the “apt” command set. The system was able to download the “universe” if it was not installed earlier.
It needed to run ‘apt update‘ before you could run ‘apt install testdisk‘. Right now I’m using SeaMonkey to browse the internet. The terminal service is called “Sakura“. Testdisk is running Analysis and is up to about 20% in its search. If I lose the whole drive due to this big MISTAKE I will learn from it, and backup ALL the drives partition layouts before I start FIXING things. In SUMMARY – it was my mistake on my machine while working on producing a PenDrive on that USB3.1 SAMSUNG 256GB. The USB backup solution would have been “so easy” to recover – I lost time and I lost my pride, but I keep learning. Reply
Small Typo. To verify that Testdisk is installed and display more information by running the following dpkg command.
How to Install and Use the TestDisk on Ubuntu 22.04
![]()
Creating data backups is essential because it can help the users secure the data easily. However, the users sometimes don’t create the backups, and they end up losing the data. Although it can be tough to recover the data, don’t worry because some tools can restore the data.
If you are a Linux user and wants to recover the data, you can install the TestDisk tool. In this short tutorial, we will explain a simple method to install and use the TestDisk on Ubuntu 22.04.
How to Install the TestDisk on Ubuntu 22.04
First, run the following command to update the system because it eliminates the chances of getting errors while installing the TestDisk:
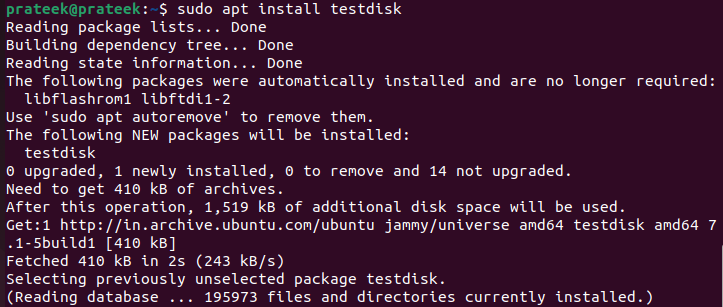
Now, install the TestDisk through the following command in the terminal:
How to Use the TestDisk to Recover the Data
After installing the TestDisk, run the following command to open its command-line interface:
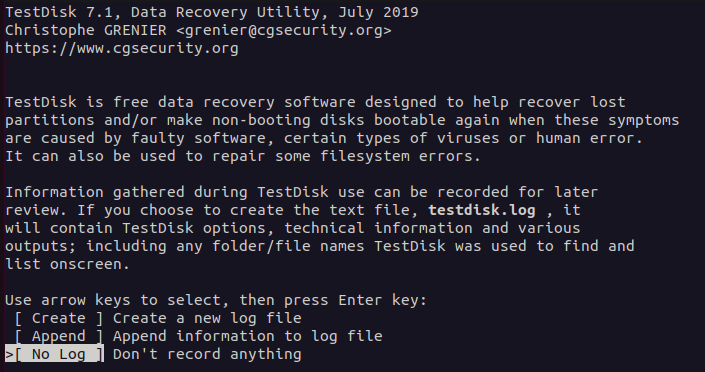
Follow the prompts to select the disk that you want to scan and choose the appropriate options for the type of scan that you want to perform. For example, select “No Log”, “Deeper search”, and “Backup BS” if you want to scan a deleted partition. For example, select “No Log” and proceed further:
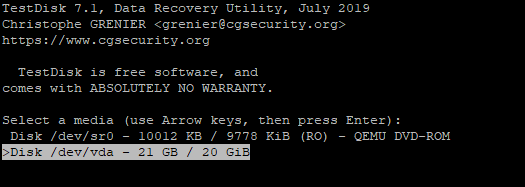
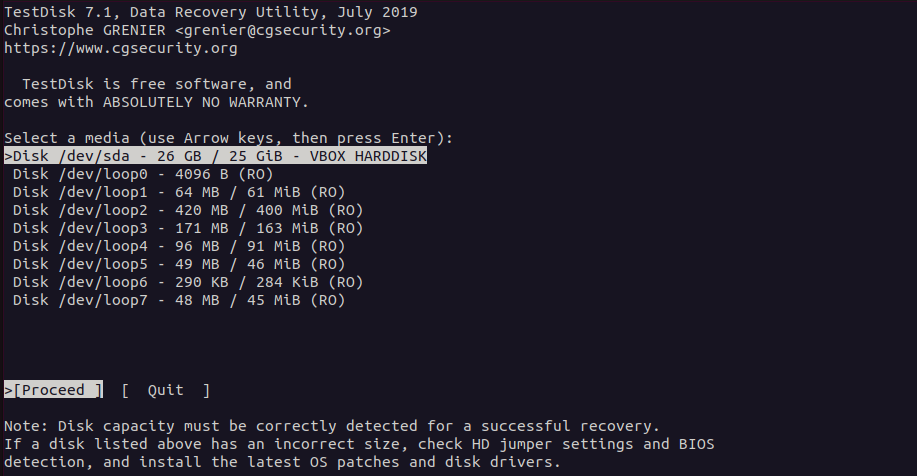
TestDisk displays a list of drives, so select the disk that you want to restore. Then, press the “Enter” button.
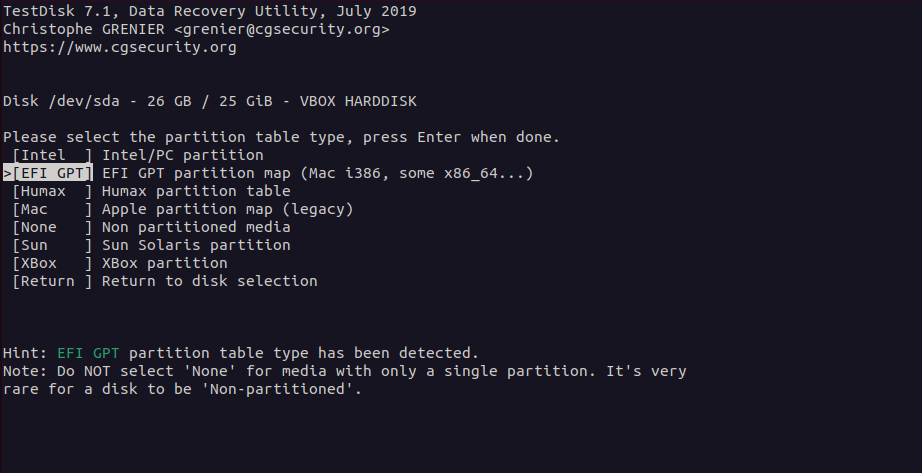
It displays the list of available partitions. Here, you can select the partition table type that you want to recover.
Here, you can explore the various features of TestDisk to recover the data:

For instance, go to the “Advanced” option and select the partition to search for the lost files. Moreover, you can choose the “Analyse” option and search for all the affected files.

TestDisk displays a list of the all available files on the partition.
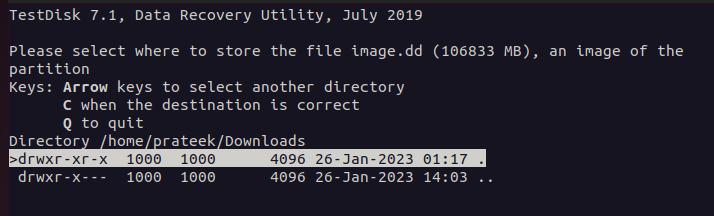
Use the arrow buttons to scroll through the list and press “C” to copy the selected file. Follow the prompts to specify the destination for the copied file.

Note: It is important to save the recovered files to a different location than the original partition to avoid overwriting the data that you are trying to recover.
If it does not contain your desired partition, try running the TestDisk again with different scan options. Try using a different recovery tool since some tools are better at recovering certain data types than the others.
Conclusion
TestDisk is a powerful data recovery tool which is available for free on Ubuntu 22.04. With its easy-to-use command-line interface and wide range of recovery options, TestDisk is a valuable resource for anyone who is looking to recover the lost or deleted data from their hard drive.
About the author
Prateek Jangid
A passionate Linux user for personal and professional reasons, always exploring what is new in the world of Linux and sharing with my readers.