- TFTP
- Server
- tftp-hpa
- URL rewriting
- Debugging
- atftp
- uftpd
- dnsmasq
- Client
- tftp-hpa
- atftp
- curl
- Background
- Introduction
- Installation
- Configuration
- Edit tftpd-hpa Configuration File
- Modify Permissions on TFTP Root Directory
- Restart the tftpd-hpa Service
- Additional Information
- External Links
- Installing and Configuring TFTP Server on Ubuntu
- Installing TFTP Server:
- Configuring TFTP Server:
- Testing TFTP Server:
- About the author
- Shahriar Shovon
TFTP
The Trivial File Transfer Protocol (TFTP) provides a minimalistic means for transferring files. It is generally used as a part of PXE booting or for updating configuration and firmware on devices which have limited memory such as routers, IP phones and printers.
Server
There are several TFTP server implementations, some of which are listed below.
Note: Make sure not to start different TFTP implementations at the same time. They will fail with an error got more than one socket , because only one may listen to the default TFTP port 69 .
tftp-hpa
To modify service parameters edit /etc/conf.d/tftpd .
URL rewriting
This server includes a useful URL rewriting feature via the —map-file option ( —mapfile in some versions). It allows requests to be altered via regular expressions so the files on the server do not have to match the view the client sees, and different files can be returned to different clients even if they request the same file.
Configure a map by adding —map-file /etc/tftpd.map to /etc/conf.d/tftpd and creating a file such as this:
# Add the remote IP address as a folder on the front of all requests. r ^ \i/
This example file will result in each TFTP request being prefixed with the remote IP address. For example if the machine at 192.168.0.1 requests «boot.bin» and the TFTP server root is /srv/tftp then the file /srv/tftp/192.168.0.1/boot.bin will be returned (or /srv/tftp/::ffff:192.168.0.1/boot.bin if the server is listening on an IPv6 port).
The available map file options are documented in in.tftpd(8) § FILENAME REMAPPING .
Debugging
The —verbosity 5 option can be used to turn on all debugging messages. This is very useful for diagnosing why a machine will not successfully boot from the network, as the debug messages list all requests for files, whether rewrite rules were used, where the files were read from on the filesystem and whether the request was successful or not.
It is not possible to log messages to stdout/stderr, as only syslog is supported. This means the messages can be viewed with journalctl or similar.
atftp
To modify service parameters edit /etc/conf.d/atftpd .
uftpd
uftpd AUR is a simple (T)FTP server that can be run from the command line:
# uftpd -n -o ftp=0,tftp=69 /tmp/tftp
The option -o ftp=0 disables the FTP server and only runs TFTP. The server runs in read-only mode by default and passing -o writable allows clients to put files on the server. The -o tftp=69 is redundant in the case of default port, but shows a way to select a different one.
dnsmasq
Client
tftp-hpa
Install tftp-hpa and then tftp your day away!
atftp
The package atftp contains both a server and a client with interactive and batch mode. The client binary is atftp and supports both getting and putting files.
curl
Standard curl has an ability to connect to a TFTP server and upload a file via:
$ curl -o DESTINATION tftp://HOST/file
Where file is relative to the TFTP root directory.
- This page was last edited on 27 June 2022, at 23:24.
- Content is available under GNU Free Documentation License 1.3 or later unless otherwise noted.
- Privacy policy
- About ArchWiki
- Disclaimers
Background
A network administrator may find the need to deploy a TFTP server quickly and cost effectively. The reader may find that there is more than one TFTP server package available for Ubuntu systems.
including tftpd, atftpd, and tftpd-hpa. tftpd-hpa was chosen in this scenario because of its relative «up-to-date-ness» and availability of documentation.
Introduction
This document will guide the reader on how to setup a TFTP server that will allow clients to both download and upload files.
(This process has been completely tested and verified on 11/18/2015 using Ubuntu 14.04.3 Server and the latest version of tftpd-hpa available from the apt repositories (tftpd-hpa_5.2-7ubuntu3_amd64.deb))
Installation
sudo apt-get install tftpd-hpa.
Once the installation is complete, you will have a running TFTP server on your system that will be listening on all active network interfaces, on both IPv4 and IPv6. All you will be able to do is download files from the TFTP server. Uploading will not work. We will fix that in the Configuration section below.
You can confirm this by running.
sudo service tftpd-hpa status
The default configuration file for tftpd-hpa is /etc/default/tftpd-hpa.
The default root directory where files will be stored is /var/lib/tftpboot.
Configuration
Edit tftpd-hpa Configuration File
As mentioned before, all you will be able to do at this point is download files from the TFTP server. If you want to upload to the TFTP server, read on. To begin with, make a copy of the default tftpd-hpa configuration file.
sudo cp /etc/default/tftpd-hpa /etc/default/tftpd-hpa.ORIGINAL
Then, edit the tftpd-hpa configuration file.
sudo vi /etc/default/tftpd-hpa
and change the line that reads.
TFTP_OPTIONS="--secure --create"
and save the file and exit the vi editor.
Modify Permissions on TFTP Root Directory
The root directory where files must be stored in order to access them via TFTP is /var/lib/tftpboot. If you want to be able to upload to that directory, then perform the following command.
sudo chown -R tftp /var/lib/tftpboot
Restart the tftpd-hpa Service
To make the changes take effect, the tftpd-hpa service must be restarted. This can be accomplished by performing the following command.
sudo service tftpd-hpa restart
At this point you should now have a TFTP server that allows you to both download and upload files.
Additional Information
tftpd-hpa seems to be somewhat tied to traditional tftpd. For more information try.
External Links
- http://chschneider.eu/linux/server/tftpd-hpa.shtml — The first «how to» that I used to go through this process.
- http://askubuntu.com/questions/443117/how-to-configure-tftpd-hpa-to-allow-upload-of-new-files — The final link that lead me to discover the process of allowing uploads.
TFTP (последним исправлял пользователь 67 2015-11-19 21:50:29)
The material on this wiki is available under a free license, see Copyright / License for details
You can contribute to this wiki, see Wiki Guide for details
Installing and Configuring TFTP Server on Ubuntu
![]()
TFTP (Trivial File Transfer Protocol) is a simplified version of FTP (File Transfer Protocol). It was designed to be easy and simple. TFTP leaves out many authentication features of FTP and it runs on UDP port 69. As it is very lightweight, it is still used for different purposes.
TFTP is used in places where you don’t need much security. Instead, you need a way to easily upload files to and download files from the server. CISCO devices use TFTP protocol to store configuration files and CISCO IOS images for backup purposes. The network boot protocols such as BOOTP, PXE etc uses TFTP to boot operating systems over the network. Thin clients also use TFTP protocol for booting operating systems. Many electronics circuit boards, microprocessors also use TFTP to download firmware into the chip. Overall, TFTP has many uses even today.
In this article, I am going to show you how to install and configure TFTP server on Ubuntu. So, let’s get started.
Installing TFTP Server:
In this article, I am going to install the tftpd-hpa TFTP server package on Ubuntu (Ubuntu 19.04 in my case). The package tftpd-hpa is available in the official package repository of Ubuntu. So, you can easily install it with the APT package manager.
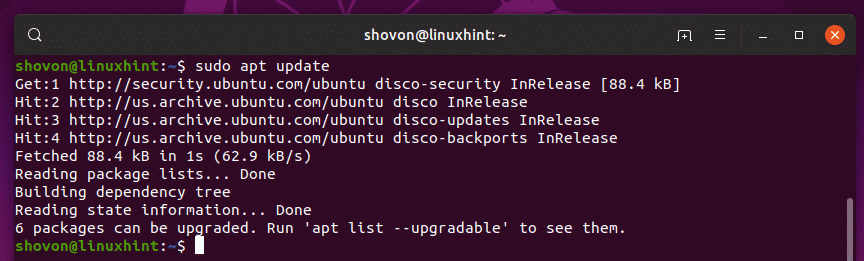
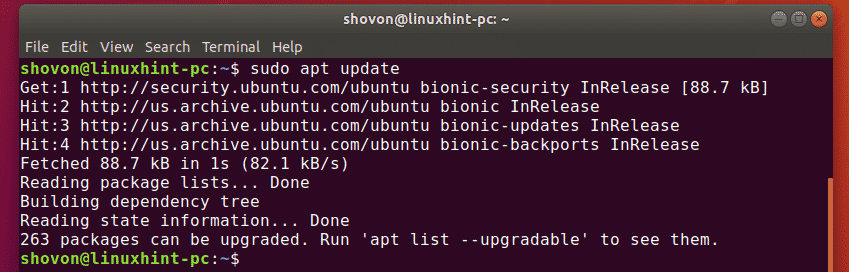
First, update the APT package repository cache with the following command:

The APT package repository cache should be updated.
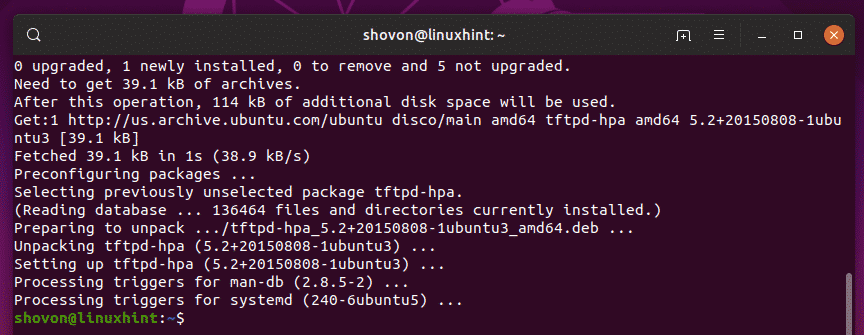
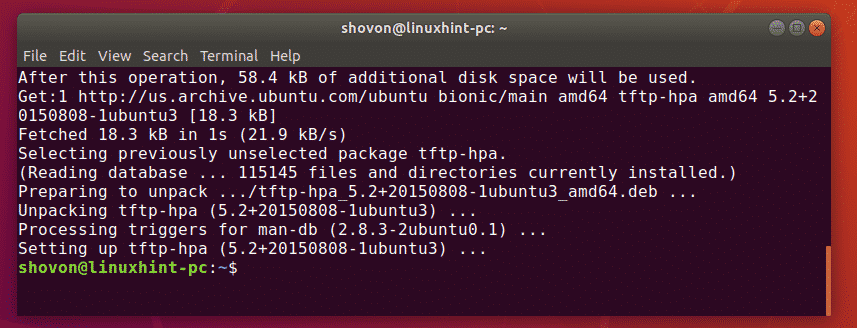
Now, install the tftpd-hpa package with the following command:

tftpd-hpa package should be installed.
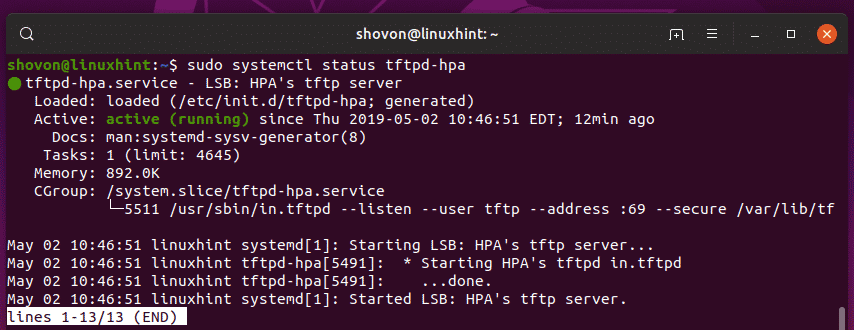
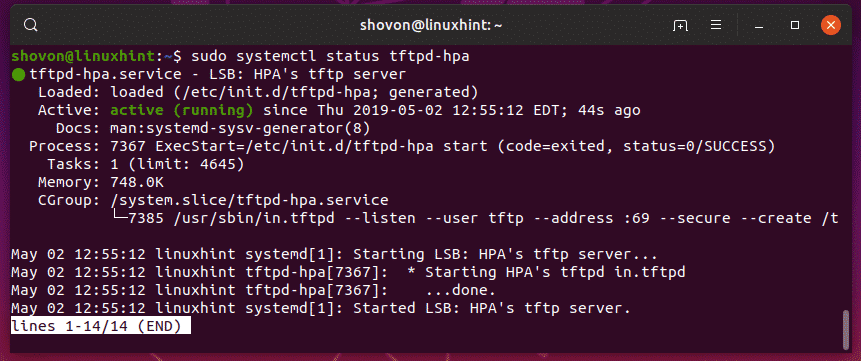
Now, check whether the tftpd-hpa service is running with the following command:

The tftpd-hpa service is running. So, TFTP server is working just fine. In the next section, I will show you how to configure it.
Configuring TFTP Server:
The default configuration file of tftpd-hpa server is /etc/default/tftpd-hpa. If you want to configure the TFTP server, then you have to modify this configuration file and restart the tftpd-hpa service afterword.
To modify the /etc/default/tftpd-hpa configuration file, run the following command:

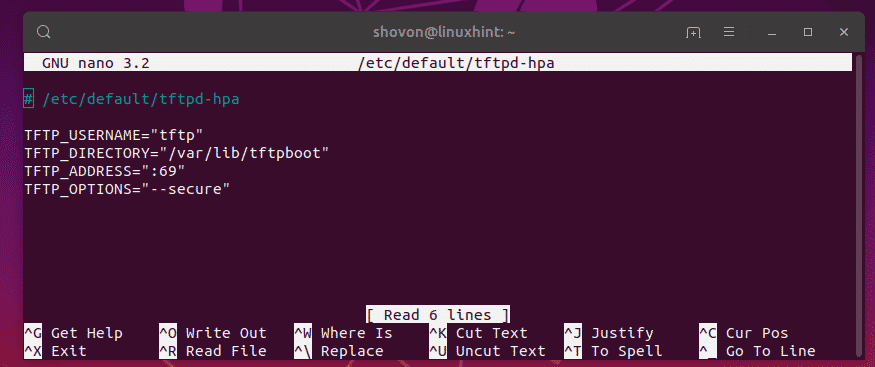
The configuration file should be opened for editing. This is the default configuration of the TFTP server.
Here, TFTP_USERNAME is set to tftp. It means the TFTP server will run as the user tftp.
TFTP_DIRECTORY is set to /var/lib/tftpboot. It means /var/lib/tftpboot is the directory on this server which you will be able to accessing via TFTP.
TFTP_ADDRESS is set to :69. It means TFTP will run on port 69.
TFTP_OPTIONS is set to –secure. This variable sets the TFTP options. There are many options that you can use to configure how the TFTP server will behave. I will talk about some of them later. The –secure option means change the TFTP directory to what is set on the TFTP_DIRECTORY variable when you connect to the TFTP server automatically. This is a security feature. If you hadn’t set the –secure option, then you would have to connect to the TFTP server and set the directory manually. Which is a lot of hassle and very insecure.
Now, I only want to change the TFTP_DIRECTORY to /tftp and add the –create option to the TFTP_OPTIONS. Without the –create option, you won’t be able to create or upload new files to the TFTP server. You will only be able to update existing files. So, I think the –create option is very important.
The final configuration file should look as follows. Now, press + x followed by y and then to save the changes.

Now, you have to create a new directory /tftp. To do that, run the following command:

Now, change the owner and group of the /tftp directory to tftp with the following command:

Now, restart the tftpd-hpa service with the following command:

Now, check whether the tftpd-hpa service is running with the following command:

As you can see, the tftpd-hpa service is running. So, the configuration is successful.
Testing TFTP Server:
Now, to access the TFTP server, you need a TFTP client program. There are many TFTP client programs out there. You most likely will not need one other than for testing the TFTP server because the devices that will use the TFTP server will have the client program already installed on it. For example, CISCO routers and switches already have a TFTP client program installed.
For testing, I am going to use the tftp-hpa TFTP client in this article. I am going to upload an ISO image to the TFTP server and retrieve it later just to verify whether the TFTP server is working as expected.
To install the tftp-hpa TFTP client on Ubuntu, run the following commands:

The tftp-hpa client program should be installed.
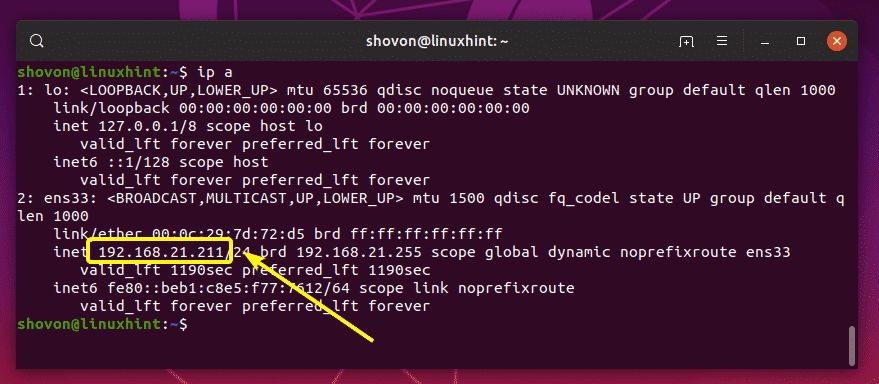
Now, run the following command on your TFTP server to find the IP address of the TFTP server.
As you can see, the IP address of my TFTP server is 192.168.21.211. It will be different for you, so make sure to replace it with yours from now on.
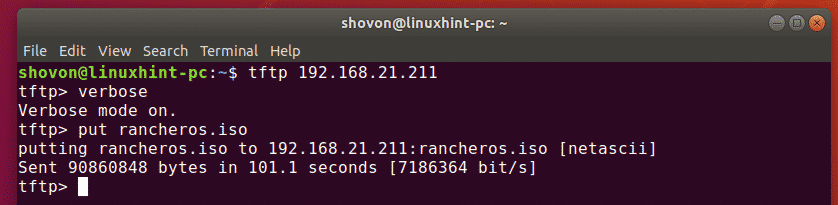
Now, from your other computer, connect to the TFTP server with the following command:


Now, enable verbose mode with the following command:

Now, to upload a file (rancheros.iso) from the current working directory (from where you ran tftp command), run the following command:
As you can see, the file is being uploaded to the TFTP server.

I removed the file from my computer. Now, let’s try to download it from the tftp server.
To download the file (rancheros.iso) from the tftp server, run the following command:
The file is being downloaded.


The TFTP server is working as expected.
Finally, run the following command to exit out of the tftp shell.

So, that’s how you install and configure TFTP server on Ubuntu. Thanks for reading this article.
About the author
Shahriar Shovon
Freelancer & Linux System Administrator. Also loves Web API development with Node.js and JavaScript. I was born in Bangladesh. I am currently studying Electronics and Communication Engineering at Khulna University of Engineering & Technology (KUET), one of the demanding public engineering universities of Bangladesh.