- How can I limit the login times in linux for certain users?
- 1 Answer 1
- 4 Ways to Watch or Monitor Log Files in Real Time
- 1. tail Command – Monitor Logs in Real Time
- 2. Multitail Command – Monitor Multiple Log Files in Real Time
- 3. lnav Command – Monitor Multiple Log Files in Real Time
- 4. less Command – Display Real Time Output of Log Files
- How to Enable Automatic Login in Ubuntu 22.04 [With Time Delay]
- Method 1: Enable Automatic Login via Gnome Settings:
- Method 2: Enable Automatic Login by Editing Configuration File:
- Option a.) Enable Automatic Login with no delay:
- Option b.) Automatic Login with a few seconds delay:
- Fix “Unlock Login Keyring” issue:
- Enable and disable automatic login on Ubuntu 22.04
- How to enable and disable automatic login on Ubuntu 22.04
- Enable and disable automatic login on Ubuntu 22.04 using GUI
- Enable and disable automatic login on Ubuntu 22.04 using Terminal
How can I limit the login times in linux for certain users?
How can I limit the login times in linux for certain users? For example I have to a user that only needs to be enabled from 8am till 5pm? Is there a way of automating this. My environment is a Centos server administered via webmin.
1 Answer 1
You need to configure one of the PAM subsystem’s modules, called «pam_time». It’s pretty simple to do by hand, just by editing the text file that controls the module’s behavior. I don’t know about webmin, specifically—there may be webmin interface option for this, already.
In short, you’ll edit the file ‘/etc/security/time.conf’ and add some configuration options that describe what user you want to restrict, and exactly when you want him to be restricted. Since this is a security-related system file, you’ll need root privileges in order to make the edit.
Here’s an example of the text you’d add to that file, on a set of new lines (quoted directly from the example in the tutorial I link to, below):
login ; * ; !bobby ; MoTuWeThFr0800-2000 login ; * ; !root ; !Al0000-2400 http ; * ; !bobby ; MoTuWeThFr0800-2000 http ; * ; !root; !Al0000-2400 «These rules restrict user bobby from logging on between the hours of 0800 and 2000, and they also restrict Internet access during these hours. Root would be able to logon at any time and browse the Internet during all times as well.»
The complete pam_time documentation is here, and it explains the rest of the possible config options and controls:
and there is an easy-to-follow tutorial, here, with step by step instructions, where I found the example I quoted, above:
4 Ways to Watch or Monitor Log Files in Real Time
How can I see the content of a log file in real time in Linux? Well there are a lot of utilities out there that can help a user to output the content of a file while the file is changing or continuously updating. Some of the most known and heavily used utility to display a file content in real time in Linux is the tail command (manage files effectively).
1. tail Command – Monitor Logs in Real Time
As said, tail command is the most common solution to display a log file in real time. However, the command to display the file has two versions, as illustrated in the below examples.
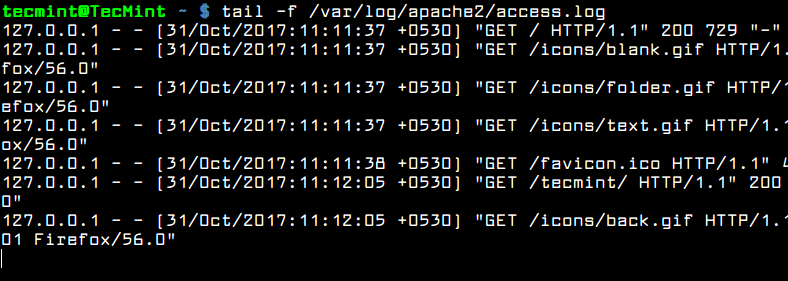
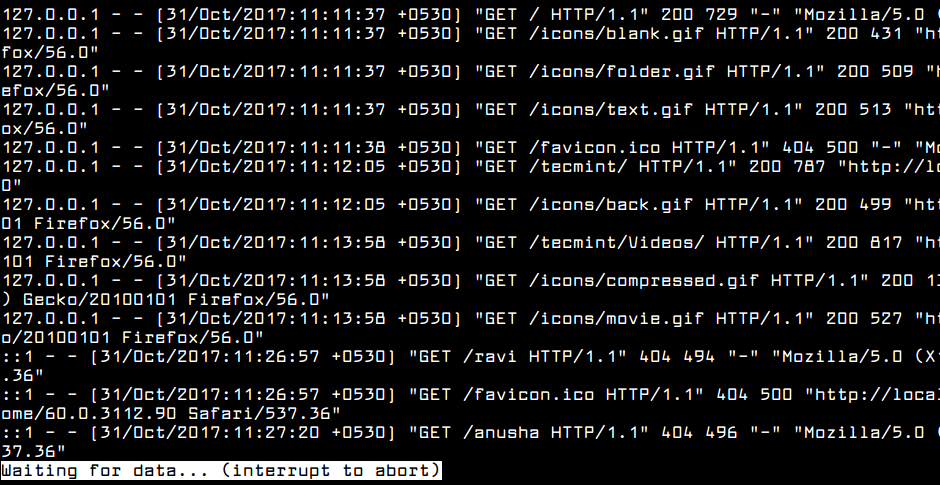
In the first example the command tail needs the -f argument to follow the content of a file.
$ sudo tail -f /var/log/apache2/access.log
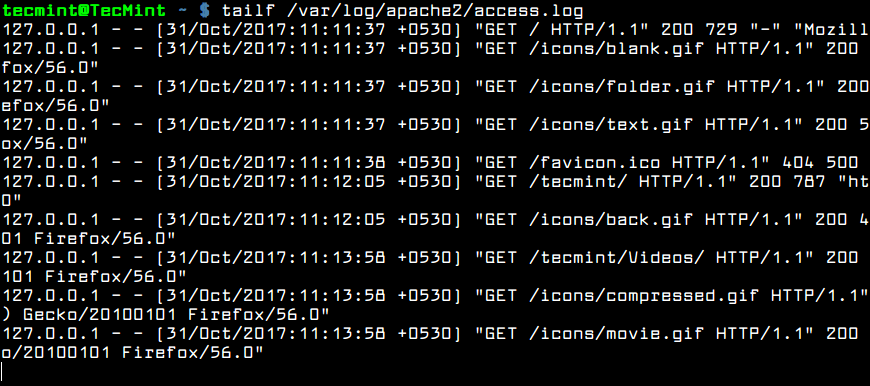
The second version of the command is actually a command itself: tailf. You won’t need to use the -f switch because the command is built-in with the -f argument.
$ sudo tailf /var/log/apache2/access.log
Usually, the log files are rotated frequently on a Linux server by the logrotate utility. To watch log files that get rotated on a daily base you can use the -F flag to tail command.
The tail -F will keep track if new log file being created and will start following the new file instead of the old file.
$ sudo tail -F /var/log/apache2/access.log
However, by default, tail command will display the last 10 lines of a file. For instance, if you want to watch in real time only the last two lines of the log file, use the -n file combined with the -f flag, as shown in the below example.
$ sudo tail -n2 -f /var/log/apache2/access.log

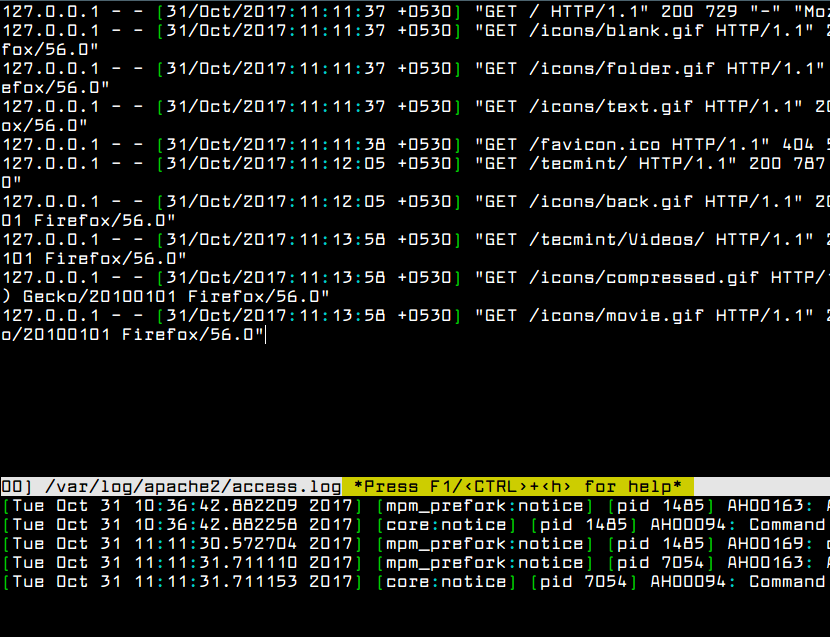
2. Multitail Command – Monitor Multiple Log Files in Real Time
Another interesting command to display log files in real time is multitail command. The name of the command implies that multitail utility can monitor and keep track of multiple files in real time. Multitail also lets you navigate back and forth in the monitored file.
To install mulitail utility in Debian and RedHat based systems issue the below command.
$ sudo apt install multitail [On Debian & Ubuntu] $ sudo yum install multitail [On RedHat & CentOS] $ sudo dnf install multitail [On Fedora 22+ version]
To display the output of two log file simultaneous, execute the command as shown in the below example.
$ sudo multitail /var/log/apache2/access.log /var/log/apache2/error.log
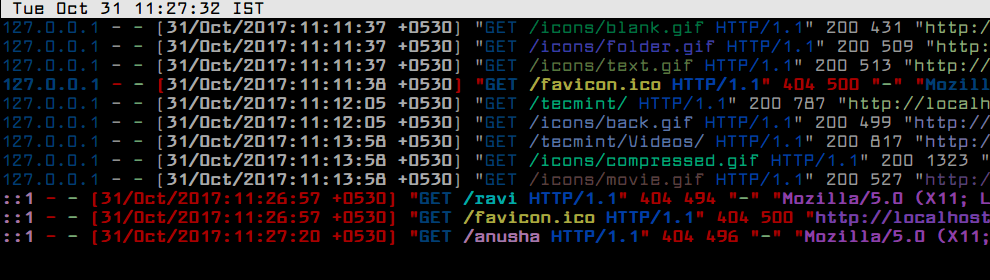
3. lnav Command – Monitor Multiple Log Files in Real Time
Another interesting command, similar to multitail command is the lnav command. Lnav utility can also watch and follow multiple files and display their content in real time.
To install lnav utility in Debian and RedHat based Linux distributions by issuing the below command.
$ sudo apt install lnav [On Debian & Ubuntu] $ sudo yum install lnav [On RedHat & CentOS] $ sudo dnf install lnav [On Fedora 22+ version]
Watch the content of two log files simultaneously by issuing the command as shown in the below example.
$ sudo lnav /var/log/apache2/access.log /var/log/apache2/error.log
4. less Command – Display Real Time Output of Log Files
Finally, you can display the live output of a file with less command if you type Shift+F .
As with tail utility, pressing Shift+F in a opened file in less will start following the end of the file. Alternatively, you can also start less with less +F flag to enter to live watching of the file.
$ sudo less +F /var/log/apache2/access.log
That’s It! You may read these following articles on Log monitoring and management.
In this article, we showed how to watch data being appended in log files in real-time on the terminal in Linux. You can ask any questions or share your thoughts concerning this guide via the comment form below.
How to Enable Automatic Login in Ubuntu 22.04 [With Time Delay]

For personal computers and public access terminals, you can set Linux to login automatically since typing user password may be meaningless. Here’s how to enable this function in GNOME desktop based Linux, such as Ubuntu, Fedora workstation, Debian and Arch Linux, etc.
Method 1: Enable Automatic Login via Gnome Settings:
Firstly, you need to open the System Settings by clicking on top-right corner system tray menu and choose “Settings”. You may alternatively press Windows key on keyboard, search for and open ‘Settings’ in overview.

When it opens, navigate to Users from the left pane. Then you need to click the “Unlock…” button in the top-right to authenticate before you’re able to do any change.

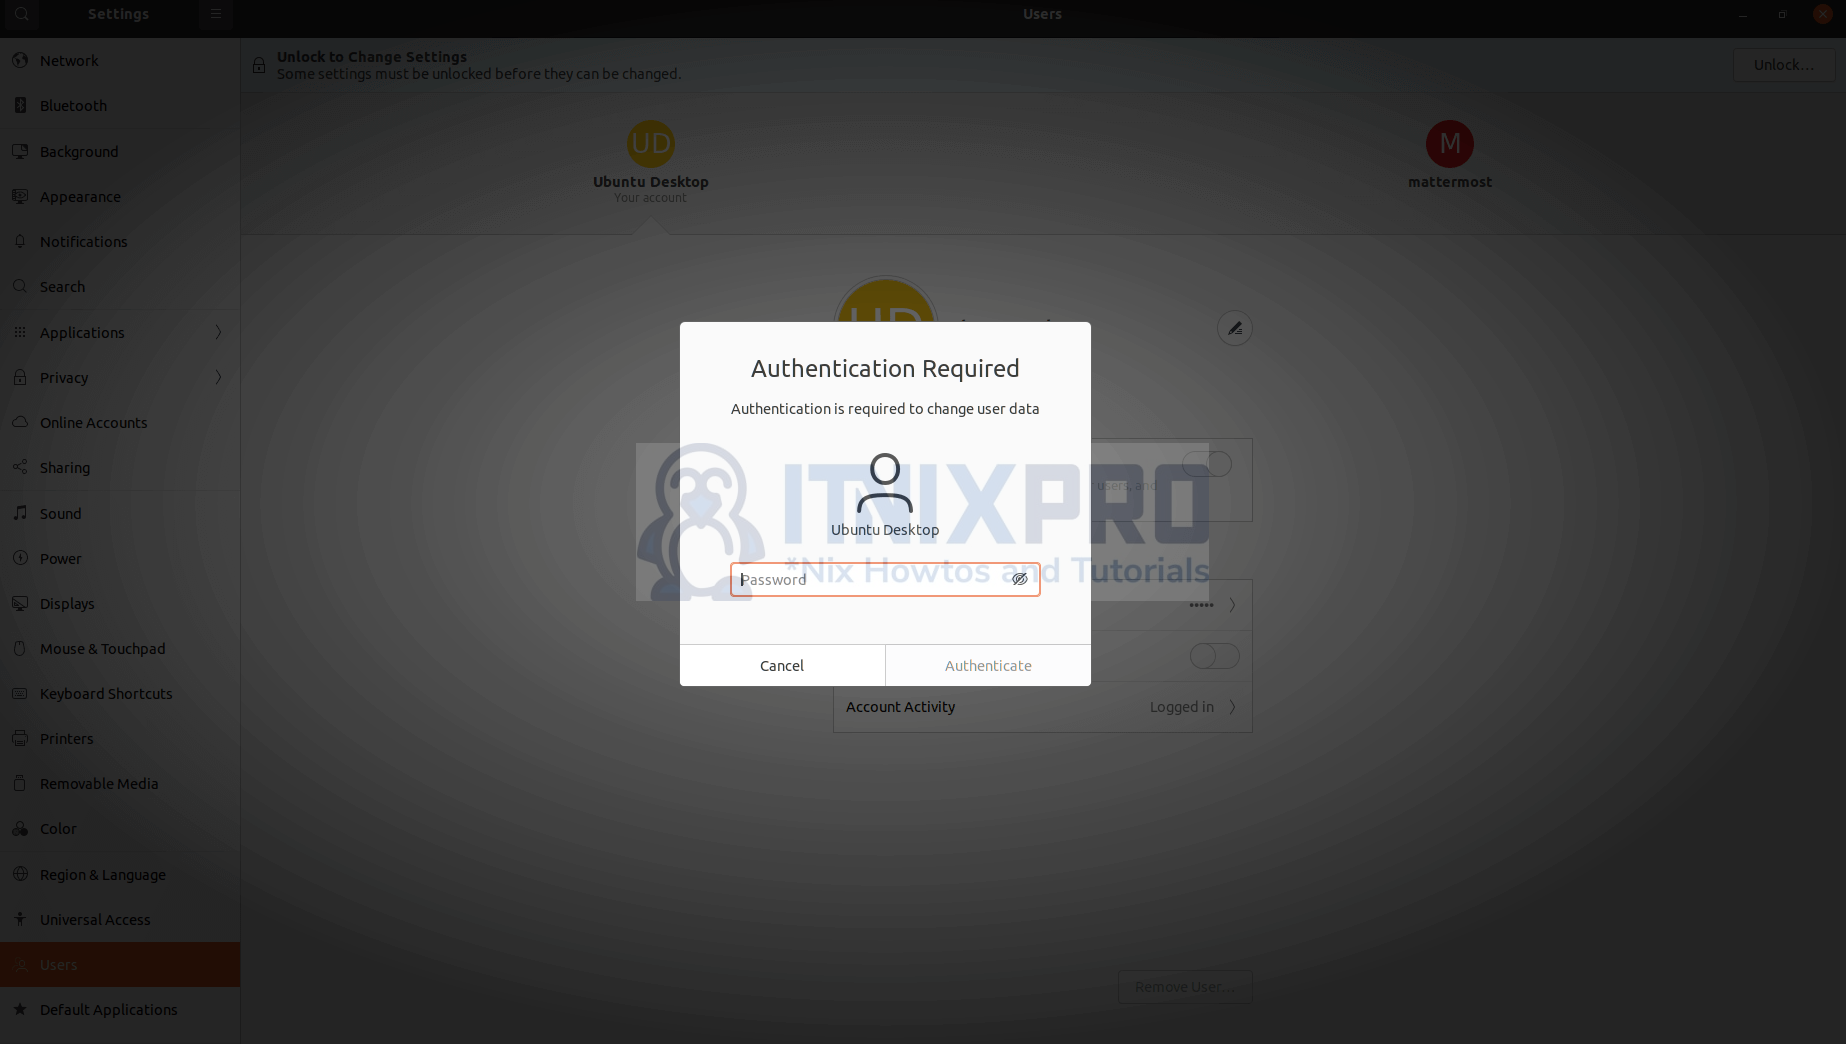
Next, it will pop up an authentication window prompts you to type user password to get pass. If you’re doing this in a Standard user session (non-administrator), it will ask for an Administrator account password instead.

Finally, choose any account by clicking on its icon from the list. Scroll down and turn on the “Automatic Login” slider icon. After that, Ubuntu will log into that account automatically in next boot.

For computer with multiple user accounts, without disable automatic login, you can switch accounts temporarily either using the “Switch User” option in Power Off menu or just log out and choose log in with another account.
Method 2: Enable Automatic Login by Editing Configuration File:
If you have no access to the GNOME desktop, such as remote SSH with command line. Or, you want to set time delay before login automatically. This method may help by changing the configuration file.
1.) Firstly, open “terminal” by searching it from Activities overview or connect to the system from command console.

2.) Next, run command to edit the “/etc/gdm3/custom.conf” file:
sudo nano /etc/gdm3/custom.conf
NOTE: The configuration file varies on different Linux distributions. For Fedora 35, it's "/etc/gdm/custom.conf". And Debian 11 has the file at "/etc/gdm3/daemon.conf"
When the file opens in text editor (you may replace nano with your favorite editor), do below steps for your choice.
Option a.) Enable Automatic Login with no delay:
Under “[daemon]” section, add (or un-comment by removing # at the beginning) following lines:
AutomaticLoginEnable = true
AutomaticLogin = USER_NAME

Don’t even know usernames? Run ls /home in terminal to get them. Finally, press Ctrl+X, type y and hit Enter to save change.
Option b.) Automatic Login with a few seconds delay:
In case you want to select another user from the login screen, you may enable timed login. So GNOME will start login automatically when inactivity after a specified time.
To do so, first disable (adding # at the beginning) the 2 lines in “Option a.” if enabled. Then add (or un-comment) the lines below, set username and time delay in seconds.
TimedLoginEnable = true
TimedLogin = USER_NAME
TimedLoginDelay = 10

Press Ctrl+X, type y and hit Enter to save change. And, it will function in the next time you boot the Linux system.
Fix “Unlock Login Keyring” issue:
After enabled automatic login, Ubuntu may popup a dialog to ask for “Unlock Login Keyring” at login. You need to type user password until being able to use the system.
Authentication required
The login keyring did not get unlocked when you logged into your computer
This happened in my Ubuntu 20.04 machine but not in Ubuntu 21.10 somehow. To workaround the issue, do the steps below one by one.
1.) Firstly, press Ctrl+Alt+T on keyboard to open terminal. When it opens, run command to install ‘seahorse’, GNOME front end for GnuPG.
sudo apt install seahorse
2.) Next, search for and open ‘seahorse’ from Activities overview screen. It will display as ‘Passwords and Keys’ in search result.

3.) When the app opens, it starts to the GPG key management page if nay. Navigate back to the main page via top-bar arrow button.

4.) Then, right-click on “Login” and select ‘Change Password’ option.

Type your user password for authentication, and finally set EMPTY (leave blank) when it prompts to set new password. That’s all.
NOTE: this will ONLY change the password for GnuPG Login keyring. Your user password will leave unchanged.
Enable and disable automatic login on Ubuntu 22.04

This article is going to take you through on how to enable and disable automatic login on Ubuntu 22.04. The automatic login feature allows a user to log in without entering a password. When you install Ubuntu, you can choose whether or not to use a password to log in to the system in which that option can be changed later.
How to enable and disable automatic login on Ubuntu 22.04
Enable and disable automatic login on Ubuntu 22.04 using GUI
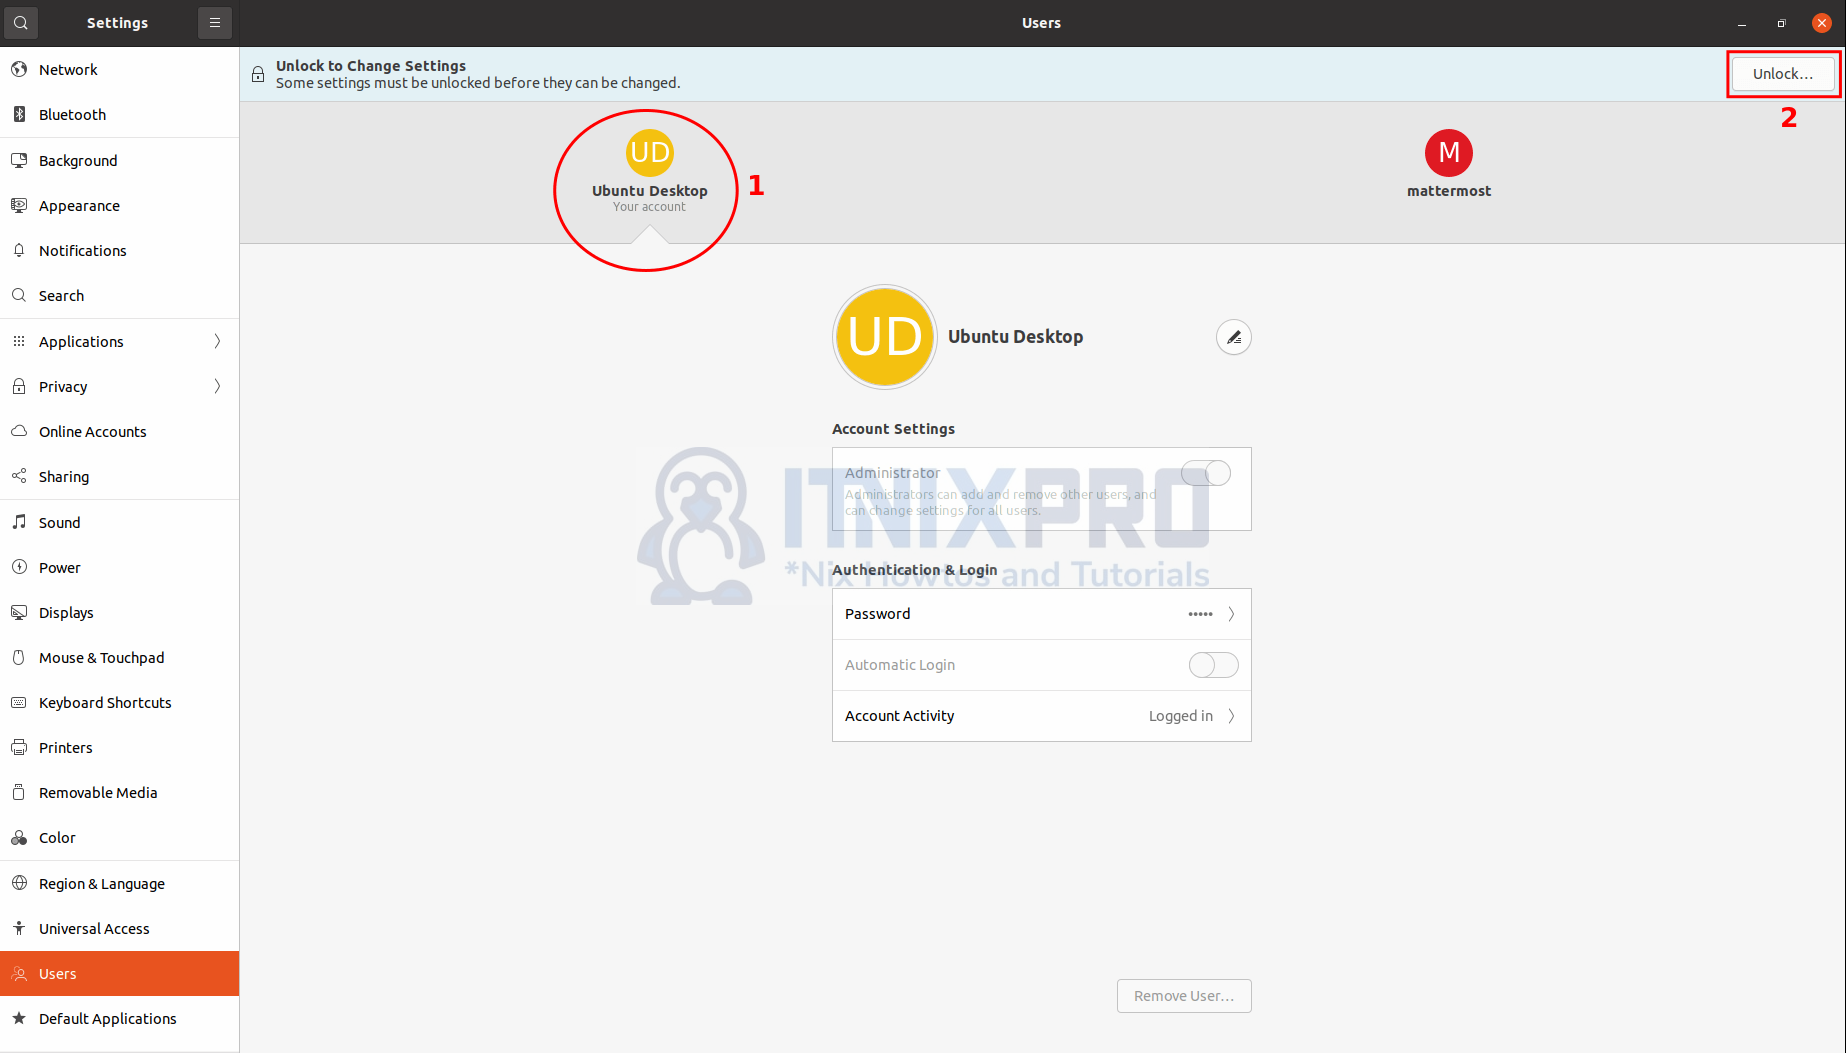
- On the application menu, search for users then click it to open users settings as shown below.

- Next click the user name you want to enable and disable automatic login(In my case I will select Ubuntu desktop). Then on the top right side click unlock button.

Enable and disable automatic login on Ubuntu 22.04 using Terminal
- To enable and disable automatic login on Ubuntu 22.04 using terminal, start by opening the following file.
sudo nano /etc/gdm3/custom.confSample file that will open
# GDM configuration storage # # See /usr/share/gdm/gdm.schemas for a list of availa> [daemon] # Uncomment the line below to force the login screen > #WaylandEnable=false # Enabling automatic login # AutomaticLoginEnable = true # AutomaticLogin = user1 # Enabling timed login # TimedLoginEnable = true # TimedLogin = user1 # TimedLoginDelay = 10 AutomaticLoginEnable=False AutomaticLogin=kigz [security] [xdmcp] [chooser] [debug] # Uncomment the line below to turn on debugging # More verbose logs # Additionally lets the X server dump core if it cras> #Enable=true
AutomaticLoginEnable=False AutomaticLogin=kigzAutomaticLoginEnable=true AutomaticLogin=kigz- Press ctrl+s to save the file and ctrl+x to close the file.
- Then reboot your system for changes to take effect.
- To disable automatic login, repeat the above process and change true to false then reboot your system.
- You can also enable automatic login for other users. Under the enabling automatic login option that is commented out, uncomment by removing the # from the file and replace user1 with your user name. The uncommented option should like the one below.
# Enabling automatic login AutomaticLoginEnable = true AutomaticLogin = ubuntudesktop- Save the file and reboot your machine.
- In case you want to disable the automatic login just comment out the uncommented part above
# Enabling automatic login # AutomaticLoginEnable = true # AutomaticLogin = ubuntudesktop- Then reboot your system to make the changes.
- You have reached the end of the article, Congratulations. You have learned how to Enable and disable automatic login on Ubuntu 22.04.