- Команда traceroute Linux
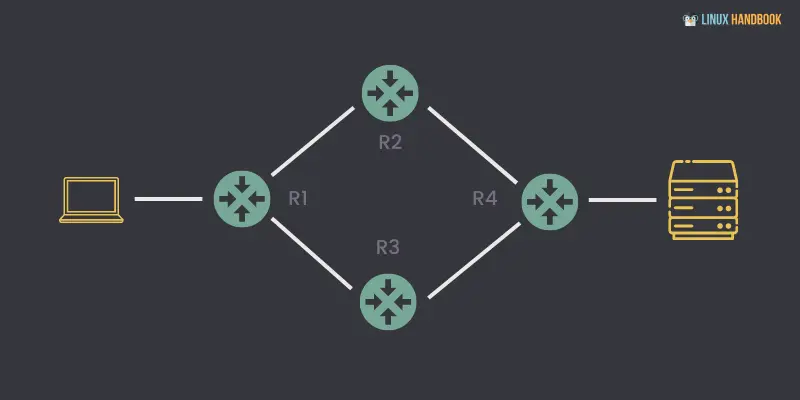
- Как работает traceroute?
- Утилита Traceroute
- Примеры трассировки сети в Linux
- Выводы
- traceroute Command Examples in Linux
- Install traceroute in Linux
- Use the traceroute command in Linux
- 1. Configure wait time
- 2. Change the number of packages sent/received
- 3. Specify the maximum number of hops
- 4. Specify with what TTL to start
- 5. Add alternate source IP address for tracerouting
- 6. Disable hostname mapping to IP address while tracerouting
- 7. Route packages through the gateway using traceroute
- 8. Change the destination port in traceroute
- 9. Set maximum packet length
- 10. Disable probe packet fragmentation
- Wrapping Up
- traceroute command in Linux with Examples
Команда traceroute Linux
Не всегда сеть работает так, как от нее требуется, иногда определенный компьютер в вашей локальной сети компании, или удаленный может не отвечать. Казалось бы, все работает, все подключено, но похоже на каком-то из узлов, на пути от вашего компьютера, до нужного случается ошибка.
Утилита ping позволяет только определить наличие проблемы, что узел не отвечает, но как узнать где обрывается соединение? Для этого применяется утилита traceroure. В этой небольшой инструкции мы рассмотрим как пользоваться traceroute linux, как понимать ее вывод и определить где же все-таки проблема. Но сначала рассмотрим, как работает traceroute.
Как работает traceroute?
Вы, наверное, уже знаете, что вся информация в сети передается в виде пакетов. Поток данных разбивается специальным программным обеспечением на небольшие пакеты и передается через сеть интернет на целевой узел, а там собирается обратно.
Каждый пакет проходит на своем пути определенное количество узлов, пока достигнет своей цели. Причем, каждый пакет имеет свое время жизни. Это количество узлов, которые может пройти пакет перед тем, как он будет уничтожен. Этот параметр записывается в заголовке TTL, каждый маршрутизатор, через который будет проходить пакет уменьшает его на единицу. При TTL=0 пакет уничтожается, а отправителю отсылается сообщение Time Exceeded.
Команда traceroute linux использует UDP пакеты. Она отправляет пакет с TTL=1 и смотрит адрес ответившего узла, дальше TTL=2, TTL=3 и так пока не достигнет цели. Каждый раз отправляется по три пакета и для каждого из них измеряется время прохождения. Пакет отправляется на случайный порт, который, скорее всего, не занят. Когда утилита traceroute получает сообщение от целевого узла о том, что порт недоступен трассировка считается завершенной.
Утилита Traceroute
Перед тем как перейти к примерам работы с утилитой давайте рассмотрим ее синтаксис и основные опции. Синтаксис вызова очень прост:
$ traceroute опции адрес_узла
В качестве адреса может использоваться ip адрес или доменное имя. Рассмотрим основные опции:
- -4 или -6 — использовать ipv4 или ipv6 протокол;
- -I — использовать ICMP пакеты вместо UDP;
- -T — использовать TCP пакеты вместо UDP;
- -F — не фрагментировать пакеты;
- -f — указать TTL с которого нужно начать;
- -g — передавать пакет через указанный шлюз;
- -i — передавать пакет через указанный интерфейс;
- -m — максимальное количество узлов, через которые пройдет пакет;
- -q — количество пакетов, отправляемых за раз, по умолчанию три;
- -n — не узнавать доменные имена;
- -p — указать порт вместо порта по умолчанию;
- -w — установить время ожидания ответа от узла, по умолчанию полсекунды;
- -r — использовать другой роутер вместо того, что указанный в таблице маршрутизации;
- -z — минимальный интервал между пакетами;
- -U — использовать UDP с увеличением номера порта;
- -UL — использовать протокол UDPLITE;
- -D — использовать протокол DCCP;
- —mtu — указать размер пакета;
- -P — протокол, доступны такие значения: raw, dccp, udplite, udp, tcpconn, tcp, icmp.
Это не все опции утилиты, но все основные, которыми вы будете пользоваться. Дальше перейдем практике того, как выполняется трассировка сети Linux.
Примеры трассировки сети в Linux
Например, выполним трассировку до сервера losst.pro:
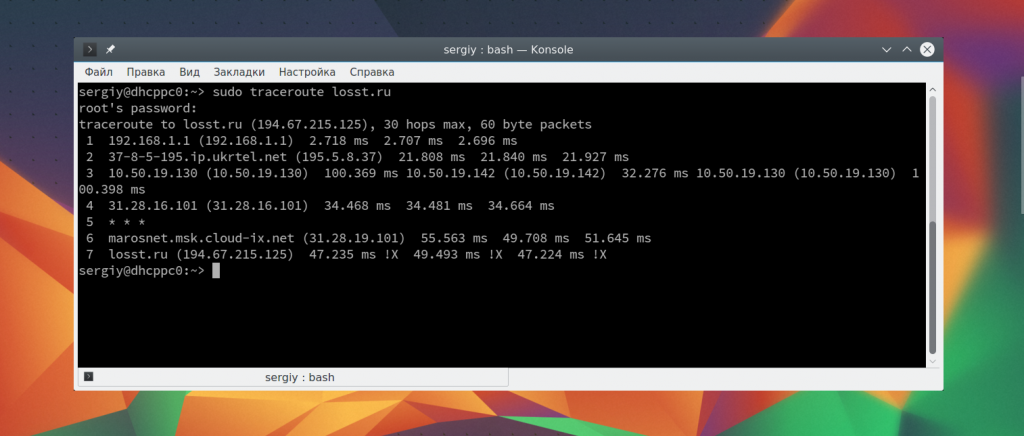
Как видите, пакет прошел через 6 узлов перед тем, как дойти до цели. На каждый узел отправлялось по три пакета и для каждого из них было засечено время прохождения. И если на одном из узлов возникнет проблема, теперь вы будете знать на каком.
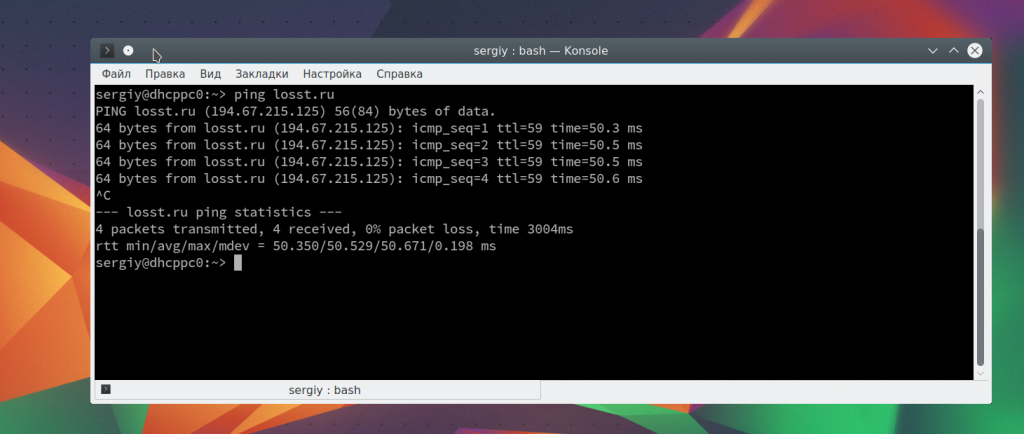
У вас, наверное, возник вопрос, почему время прохождения для некоторых узлов такое долгое? Ведь если выполнить ping, то общее время будет намного меньше. Дело в том, что время засекается для пути пакета туда и обратно. От запроса до ответа. Это раз, но еще нужно учитывать что маршрутизаторы дают высший приоритет для приходящих пакетов, когда для сервисных задержки могут быть более длинными.
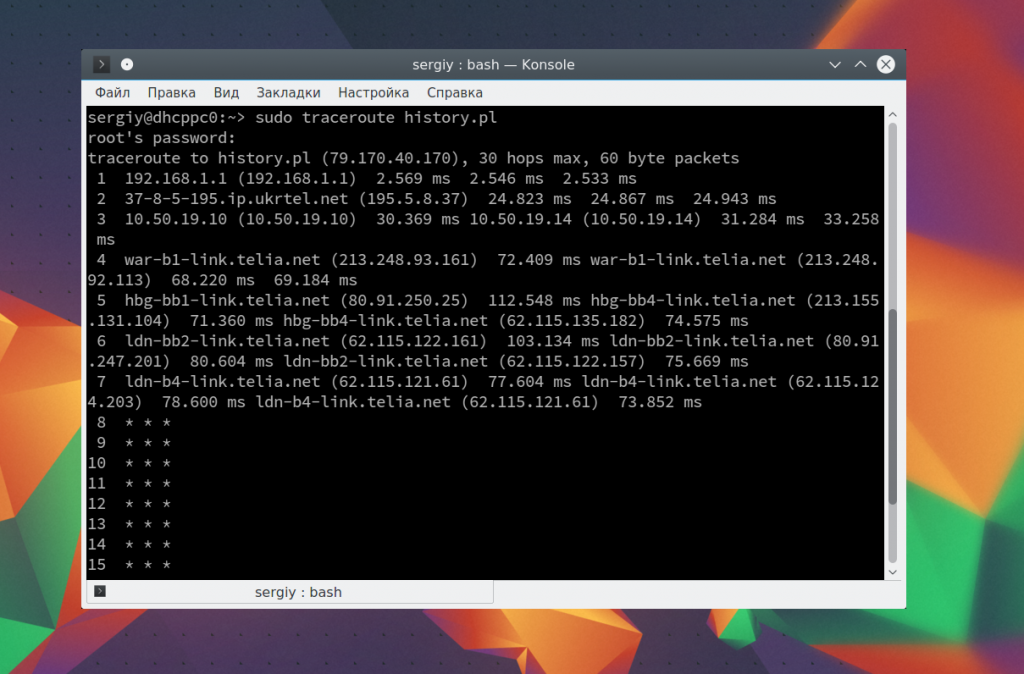
Еще, вместо одного узла вы можете видеть звездочки traceroute. Это еще не значит, что он не работает. Это означает что всего лишь он не захотел нам отвечать. Давайте проверим еще что-нибудь, например, публичный DNS google:
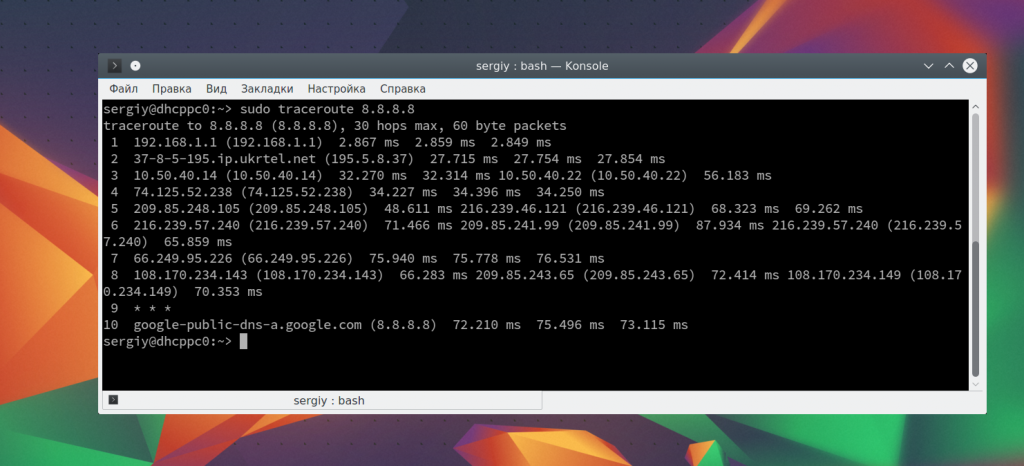
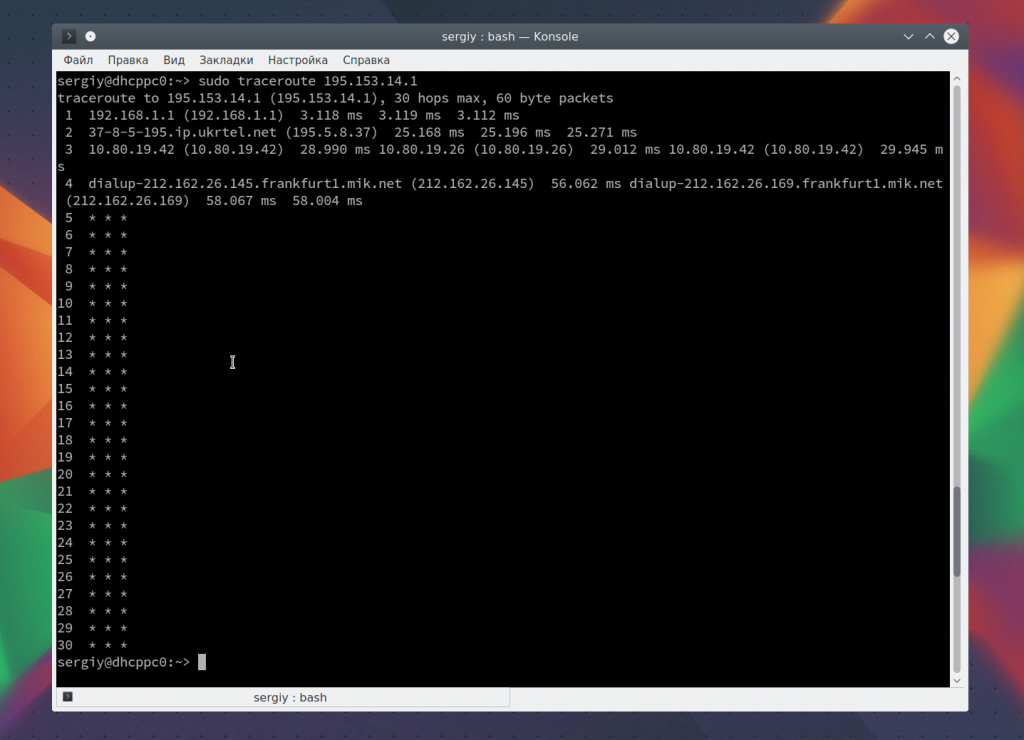
Здесь уже больше узлов, и такая же ситуация со звездочками. Если бы на пути к серверу возникла ошибка, мы бы это увидели. Например, узел 195.153.14.1 нам не ответил и мы смогли отследить запрос только до 212.162.26.169.
sudo traceroute 195.153.14.1
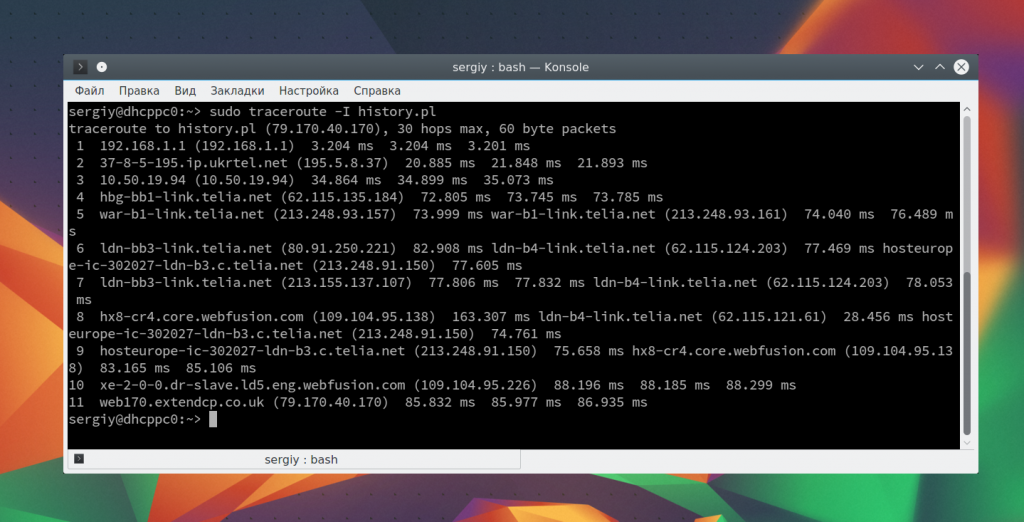
Иногда трассировка с помощью UDP не работает, это может произойти потому, что фаервол блокирует все лишние пакеты. Мы можем воспользоваться ICMP с помощью опции -I.
sudo traceroute history.pl
sudo traceroute -I history.pl
Но трассировка может использоваться не только для обнаружения обрыва в цепочке маршрутизаторов. У нее еще есть достаточно интересное применение по исследованию сети. Например, вы можете попытаться определить использование подсетей провайдером. Отправим три запроса на разные адреса:
sudo traceroute losst.pro
$ sudo traceroute history.pl
$ sudo traceroute habrahabr.ru
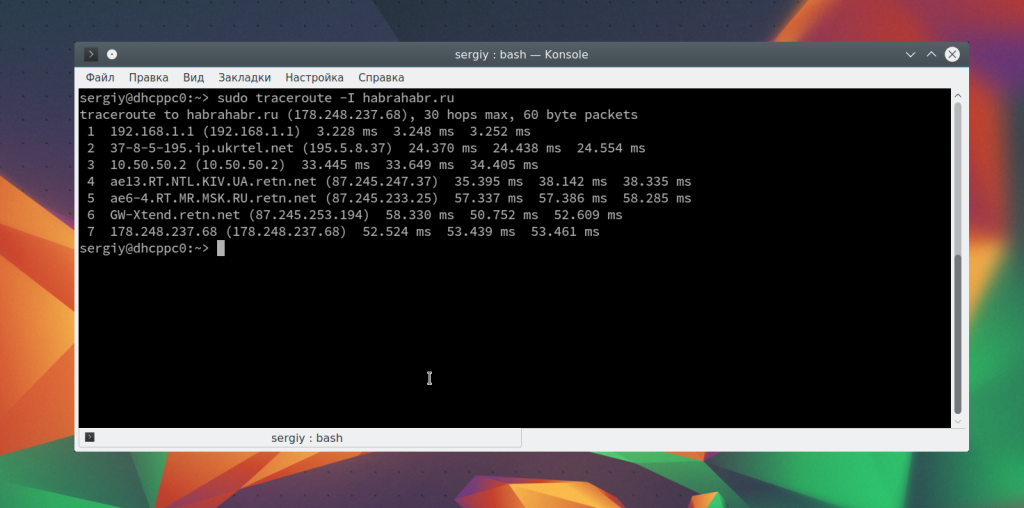
Затем сравните выводы этих команд. Вы увидите, что начальные IP адреса одинаковые. Мы можем сделать вывод, что наш роутер 192.168.1.1 подключен к локальной сети провайдера 195.5.8.0/24, которая, в свою очередь, подключена к сети 10.50.50.0/24 откуда уже получает доступ к внешней сети.
Выводы
В этой статье мы рассмотрели как работает команда traceroute linux, а также как выполняется трассировка сети linux. Эти функции больше нужны системным администраторам, но и обычным пользователям тоже иногда могут пригодиться.
Обнаружили ошибку в тексте? Сообщите мне об этом. Выделите текст с ошибкой и нажмите Ctrl+Enter.
traceroute Command Examples in Linux
One of the most common Linux networking commands is traceroute. It is used for tracing the route to the end server. Here’s how to use the traceroute command.
The traceroute is similar to the ping command but offers more detailed output. It traces the route from the origin to the target system.
If you didn’t know, when you connect to a remote system, the data travels through several intermediate nodes (your router, your ISP’s router, etc.).
Traceroute is used by system admins and networking professionals to troubleshoot the network.
Install traceroute in Linux
The traceroute utility does not come pre-installed in most modern Linux distros.
If you are on an Ubuntu-based distro, the given command should get your job done:
sudo apt install tracerouteSimilarly, if you are on Fedora, you can benefit from the given command:
sudo yum install tracerouteNow, let’s jump to the examples part.
Use the traceroute command in Linux
Let me start with the most basic one, where I will append the hostname to the traceroute command and it will show me the list of routers (with IP) it took to reach the destination:
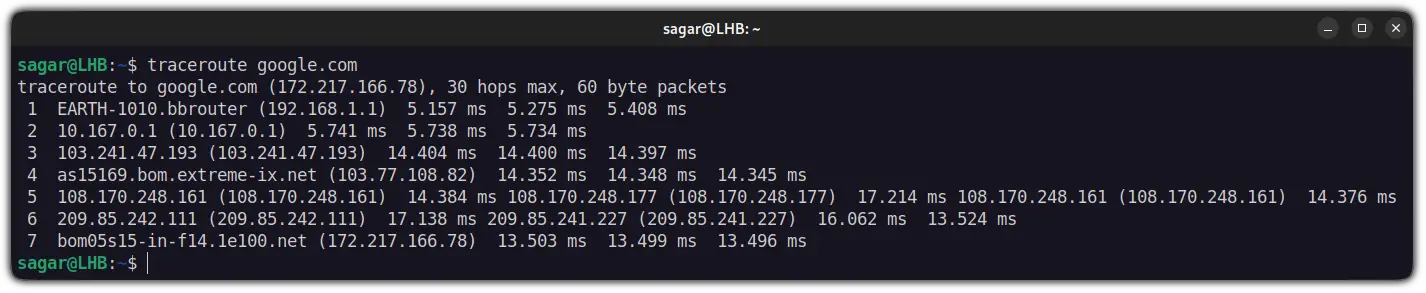
It took 7 routers to reach the destination and by default, it sent 3 packages to each one and returned the time it took to respond.
There are more ways of using the tarecroute command in Linux. Let’s see the examples.
1. Configure wait time
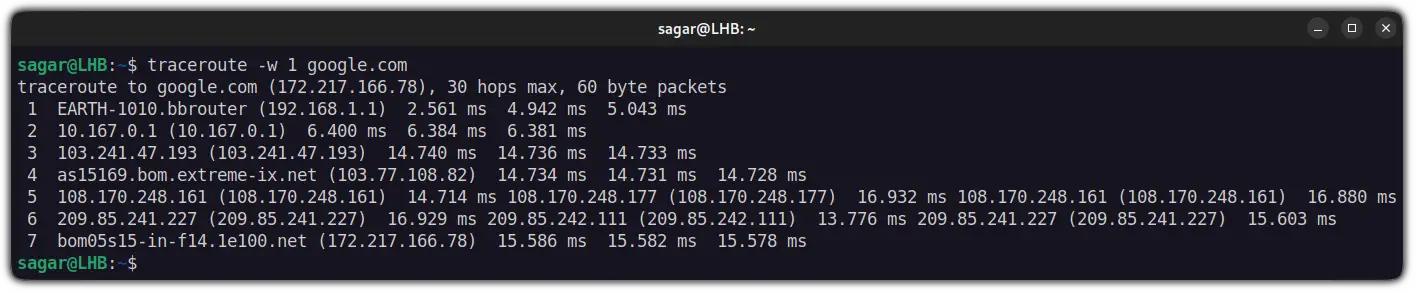
The default wait time in traceroute is 3 seconds meaning it will wait for 5 seconds before jumping to the next one.
And if you want to change the defaults, you can append the number of seconds with the -w option:
For example, I changed the wait time to 1 second for google.com :
2. Change the number of packages sent/received
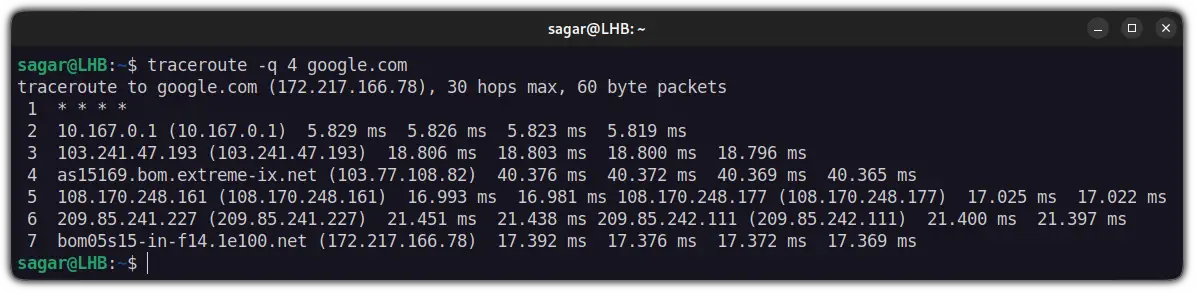
By default, traceroute sends 3 packages for a hop and if you want to change this behavior, you will have to use -q option.
For reference, I will send 4 packets per hop over the google domain:
3. Specify the maximum number of hops
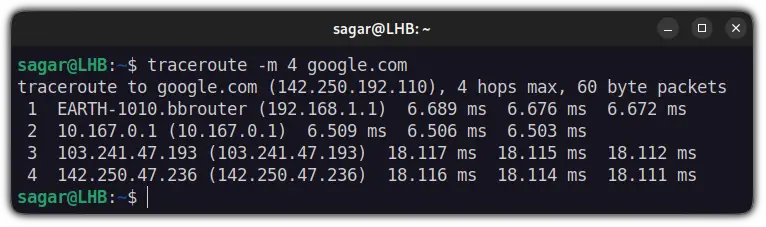
The default maximum number of hops for a single query is 30 in traceroute which can be extended to 255.
For that, you can append the max number of hope with -m option:
4. Specify with what TTL to start
By default, the traceroute will start with the first TTL but you can change this behavior using -f option.
For reference, I wanted to start tracerouting on google’s domain from the 5th TTL so had to use the given command:]

5. Add alternate source IP address for tracerouting
If you want to add an alternate source along with what you generally add for tracerouting, you will need to append the alternate IP with -s option.
For example, I have added an alternate source IP 192.168.1.7 alongside google.com :
traceroute -s 192.168.1.7 google.com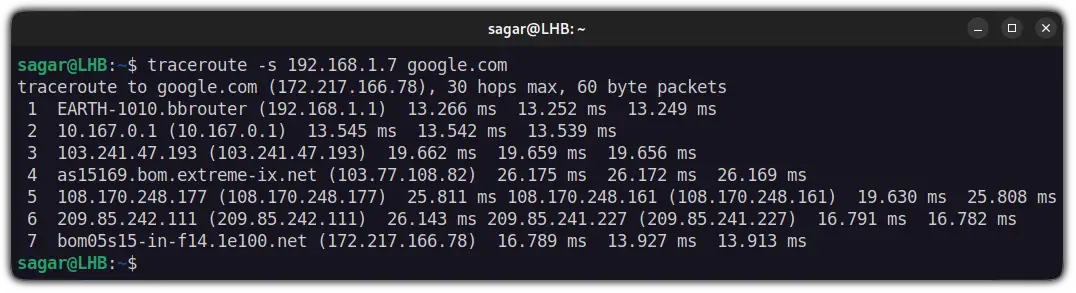
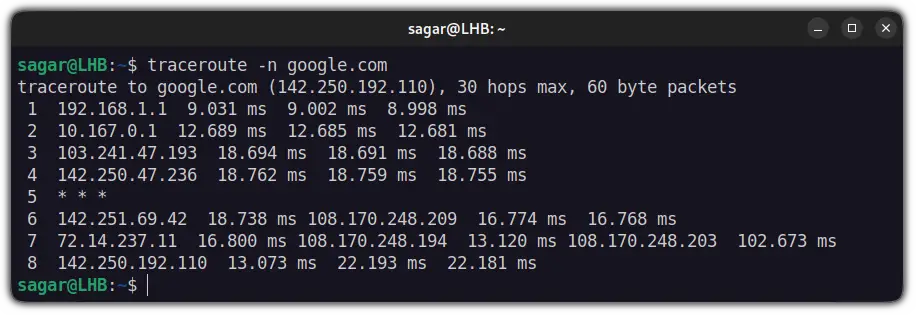
6. Disable hostname mapping to IP address while tracerouting
If you want to disable hostname mapping while tracerouting for some reason, you can use the -n option:
7. Route packages through the gateway using traceroute
You can specify the gateway address using -g option alongside the domain you want to traceroute.
For example, I have added 192.168.1.7 as a gateway address:
traceroute -g 192.168.1.7 google.com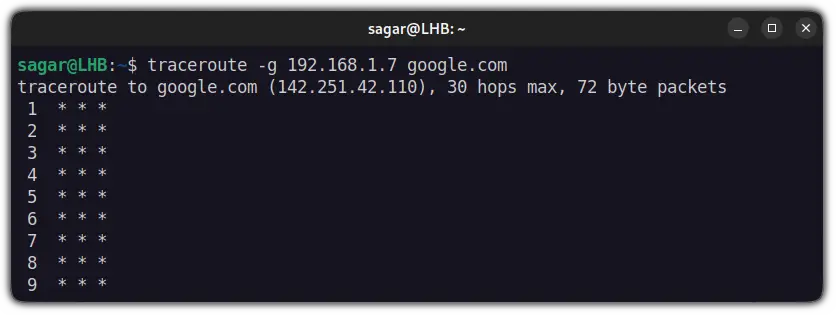
8. Change the destination port in traceroute
If you want to change the destination port of your source domain while tracerouting, you will have to use -p to specify the port.
For example, I have changed my destination port to 29879 :
traceroute -p 29879 google.com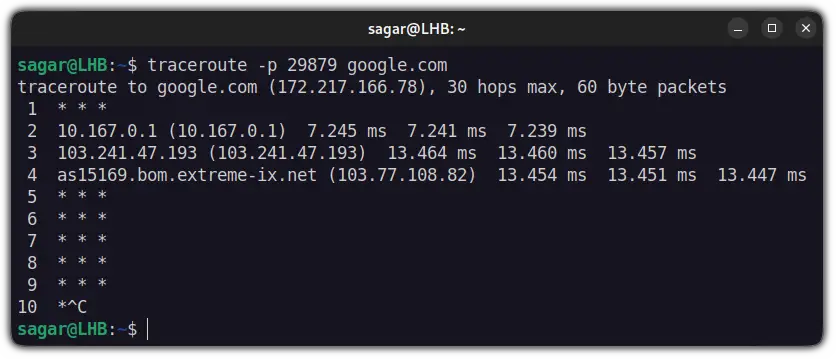
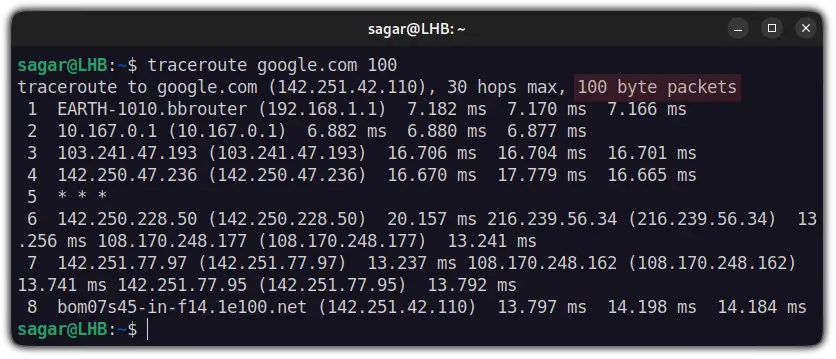
9. Set maximum packet length
By default, traceroute will use a packet length of 60 bytes and you can alter this behavior by just appending packet size to the source IP.
For example, I changed to 100 bytes of maximum packet length while tracerouting:
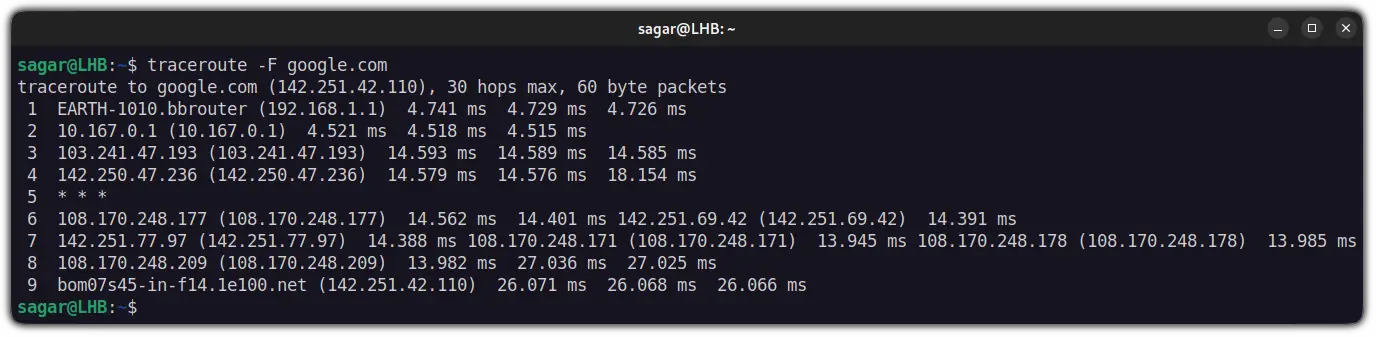
10. Disable probe packet fragmentation
If you don’t want to allow probe packet fragmentation, there is a straightforward way to stop it.
You just have to use -F and there will be no probe packet fragmentation:
Wrapping Up
If you are curious to know how the traceroute works, you can refer to the other guide where I’ve explained the working of the traceroute.
I hope you will find this helpful and if you have any queries, let me know in the comments.
traceroute command in Linux with Examples
traceroute command in Linux prints the route that a packet takes to reach the host. This command is useful when you want to know about the route and about all the hops that a packet takes. Below image depicts how traceroute command is used to reach the Google(172.217.26.206) host from the local machine and it also prints detail about all the hops that it visits in between.
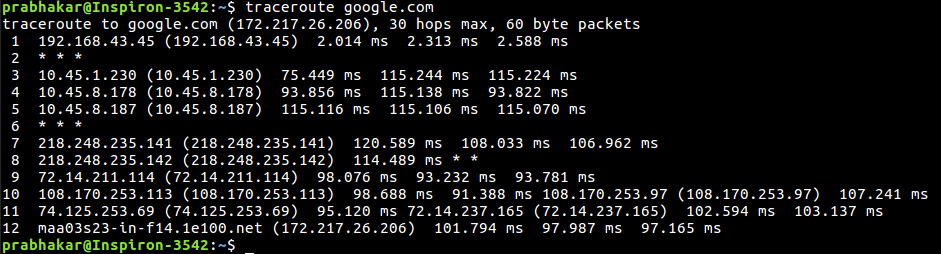
The first column corresponds to the hop count. The second column represents the address of that hop and after that, you see three space-separated time in milliseconds. traceroute command sends three packets to the hop and each of the time refers to the time taken by the packet to reach the hop.
traceroute [options] host_Address [pathlength]
- -4 Option: Use ip version 4 i.e. use IPv4 Syntax:

-6 Option: Use ip version 6 i.e. use IPv6 Syntax:

-F Option: Do not fragment packet. Syntax:

-f first_ttl Option: Start from the first_ttl hop (instead from 1). Syntax:
$ traceroute -f 10 google.com

-g gate Option: Route the packet through gate. Syntax:
$ traceroute -g 192.168.43.45 google.com

-m max_ttl Option: Set the max number of hops for the packet to reach the destination.Default value is 30. Syntax:

-n Option: Do not resolve IP addresses to their domain names. Syntax:

-p port Option: Set the destination port to use. Default is 33434. Syntax:
$traceroute -p 20292 google.com

-q nqueries Option: Set the number of probes per each hop. Default is 3. Syntax:

packetlen Option: The full packet length. Default len is 60 byte packets. Syntax:

–help: Display help messages and exit. Syntax: