- Adding a trusted SSL cert on Nginx
- 3 Creating SSL certificates
- 5 Adding a certification authority to the browser
- 6 Encryption testing
- Добавляем корневой доверенный сертификат в Linux
- Установка корневого сертификата в Linux
- Добавить корневой доверенный сертификат для браузеров Mozilla, Chrome
- Trust a self signed PEM certificate
Adding a trusted SSL cert on Nginx
We will use the root certificate authority (CA) to create all the SSL certificates. But first, we need to create a root certificate. Let’s create a private key rootCA.key by running the command in the terminal:
sudo openssl genrsa -out /etc/ssl/private/rootCA.key 2048sudo openssl genrsa -des3 -out /etc/ssl/private/rootCA.key 2048Now let’s create the rootCA.pem certificate file using the private key rootCA.key by running the command in the terminal:
sudo openssl req -x509 -new -nodes -key /etc/ssl/private/rootCA.key -sha256 -days 3650 -out /etc/ssl/certs/rootCA.pem3 Creating SSL certificates
It is already possible to create new certificates using the root certificate rootCA.pem. But first, we need to create a private key and a key (CSR) to request a signature by running the command in the terminal:
sudo openssl req -new -sha256 -nodes -newkey rsa:2048 -keyout /etc/ssl/private/localhost.key -out /etc/ssl/private/localhost.csr -config /tmp/openssl.cnfNow we will create our certificate file using the root certification authority that we created earlier by running the command in the terminal:
sudo openssl x509 -req -in /etc/ssl/private/localhost.csr -CA /etc/ssl/certs/rootCA.pem -CAkey /etc/ssl/private/rootCA.key -CAcreateserial -out /etc/ssl/certs/localhost.crt -sha256 -days 3650 -extfile /tmp/openssl.cnf -extensions v3_ca4 Configuring Nginx to use SSL
Let’s enable SSL in the Nginx server configuration. We will specify listening on port 443 (HTTPS) and the path to the certificate and private key files. Edit the server configuration file /etc/nginx/sites-available/default:
sudo nano /etc/nginx/sites-available/defaultSave the changes and close the file. Check the configuration for validity by running the command in the terminal:
Now apply the configuration changes by running the command in the terminal:
sudo service nginx reload5 Adding a certification authority to the browser
- Google Chrome
Settings -> Advanced -> Privacy and security -> Manage certificates -> Authorities -> Import (select rootCA.pem file and set all trust settings) - Mozilla Firefox
Preferences -> Privacy & Security -> Certificates -> View Certificates -> Authorities -> Import (select rootCA.pem file and set all trust settings)
6 Encryption testing
Let’s check that our Nginx server is accessible via the HTTPS protocol by entering the following address in the browser:
If you did everything correctly, you will see that the browser has begun to trust your SSL certificate. Your connection will now be encrypted using the HTTPS protocol without displaying a warning about an insecure connection
- Добавление доверенного SSL-сертификата для локальной среды в Nginx на Debian/Ubuntu (используя корневой ЦС) https://develike.com/ru/stati/dobavlenie-doverennogo-ssl-sertifikata-dlya-lokalnoj-sredy-v-nginx-na-debian-ubuntu
Добавляем корневой доверенный сертификат в Linux

28.09.2022

itpro

CentOS, Linux, Ubuntu

комментария 4
В этой статье мы покажем, как добавить (установить) новый сертификат в список доверенных корневых сертификатов в Linux.
Например, вы используете на своем сайте самоподписанный SSL/TLS сертификат и не хотите, чтобы на клиентах при открытии сайта появлялась ошибка SEC_ERROR_UNKNOWN_ISSUER.

В данном примере мы установим в Linux корневой сертификат Минцифры (Russian Trusted Sub CA), на базе которого сейчас выпускаются сертификаты для сайтов многих компаний и гос-органов РФ.
Или это может быть самоподписанный сертификат с сайта IIS на Windows.
Чтобы проверить, что ваш хост Linux не может проверить (и соответственно не доверяет) SSL сертификату на определенном сайте, выполните команду:
$ curl –I https://www.sberbank.ru
curl: (60) SSL certificate problem: unable to get local issuer certificate. More details here: https://curl.haxx.se/docs/sslcerts.html curl failed to verify the legitimacy of the server and therefore could not establish a secure connection to it. To learn more about this situation and how to fix it, please visit the web page mentioned above.

В данном случае нам нужно добавить корневой центр сертификации этого сайта в список доверенных корневых сертификатов Linux.
Установка корневого сертификата в Linux
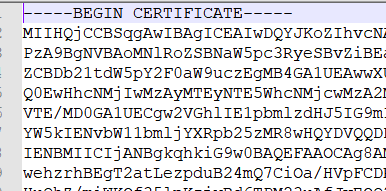
Для обновления хранилища доверенных сертификатов в Linux вам нужен файл сертификата в формате PEM с расширением файла .crt. PEM сертификат представляет собой текстовый файл в формате base64, который содержит в начале файла строку —-BEGIN CERTIFICATE—- и в конце ——END CERTIFICATE——.
Если ваш файл сертификата в формате DER, вы можете конвертировать его в PEM формат с помощью утилиты openssl:
$ openssl x509 -in my_trusted_sub_ca.der -inform der -out my_trusted_sub_ca.cer
Сначала рассмотрим, как добавит корневой сертификат вашего CA в доверенные в дистрибутивах Linux на базе DEB (Ubuntu, Debian, Mint, Kali Linux).
Скопируйте файлы ваших сертификаты в хранилище сертификатов в каталог usr/local/share/ca-certificates/:
$ sudo cp my_trusted_sub_ca.crt /usr/local/share/ca-certificates/
$ sudo cp my_trusted_root_ca.crt /usr/local/share/ca-certificates/
Обновите хранилище сертификатов командой:
$ sudo update-ca-certificates -v
$ sudo apt-get install -y ca-certificates

Если сертификаты успешно добавлены, появится сообщение о том, что сертфикат скопирован в /etc/ssl/certs/:
Updating certificates in /etc/ssl/certs… 2 added, 9 removed; done. Running hooks in /etc/ca-certificates/update.d
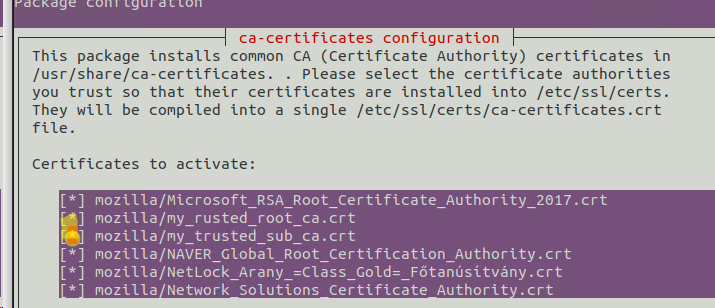
$ sudo dpkg-reconfigure ca-certificates
Выберите из списка сертификаты, которые нужно добавить в доверенные.
В Linux список доверенных сертификатов содержится в файле /etc/ssl/certs/ca-certificates.crt. Обе рассмотренные выше команды обновят этот файл и добавят в информацию о новых сертификатах.
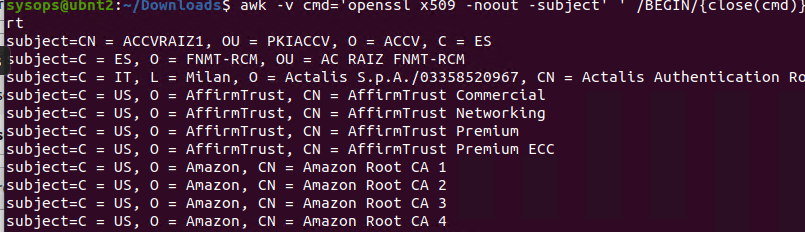
Вы можете проверить, что ваши сертификаты были добавлены в доверенные с помощью команды:
Укажите часть Common Name вашего сертификата вместо YourCASubj для поиска в хранилище по subject.
Вы можете убедиться, что ваша ОС доверяет сертификату с помощью команду:
$ openssl verify my_trusted_sub_ca.crt

error 20 at 0 depth lookup: unable to get local issuer certificate error my_trusted_sub_ca.crt: verification failed
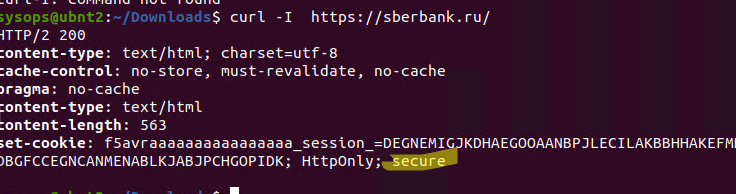
Теперь проверьте, что на сайте используется доверенный SSL сертификат с помощью curl:
$ curl –I https://www.sberbank.ru
Все ок, сертификат доверенные < HTTPOnly: secure >.
$ sudo mkdir /usr/share/ca-certificates/extra
Чтобы удалить сертификат, удалите ваш crt файл:
$ sudo rm /usr/local/share/ca-certificates/yourcert.crt
$ sudo update-ca-certificates —fresh
В дистрибутивах Linux на базе RPM (CentOS, Oracle, RHEL, Rocky Linux, Fedora) для добавления сертификата в доверенные:
- Установите пакет ca-certificates: # yum install ca-certificates
- Скопируйте файл сертификата в каталог /etc/pki/ca-trust/source/anchors/: # cp mycert.crt /etc/pki/ca-trust/source/anchors/
- Обновите хранилище:
# update-ca-trust force-enable
# update-ca-trust extract
Добавить корневой доверенный сертификат для браузеров Mozilla, Chrome
Теперь все системные утилиты будут доверять сайтам, использующим данный CA. Но это не повлияет на веб браузеры Mozilla Firefox или Google Chrome. Они по-прежнему будут показывать предупреждение о недоверенном сертификате.
Дело в том, что браузеры Firefox, Chromium, Google Chrome, Vivaldi и даже почтовый клиент Mozilla Thunderbird не используют системное хранилище сертификатов Linux. Хранилище сертификатов для этих программ находится в директории пользователя в файле cert8.db (для Mozilla) или cert9.db (для Chromium и Chrome). Для обновления этих хранилищ сертификатов используется утилита certutil из пакета libnss3-tools.
$ sudo apt install libnss3-tools
Теперь выполните следующие скрипты для добавления ваших сертификатов в хранилище через NSS:
#!/bin/bash
certfile=»my_rusted_root_ca.crt»
certname=»My Root CA1″
for certDB in $(find ~/ -name «cert8.db»)
do
certdir=$(dirname $);
certutil -A -n «$» -t «TCu,Cu,Tu» -i $ -d dbm:$
done
for certDB in $(find ~/ -name «cert9.db»)
do
certdir=$(dirname $);
certutil -A -n «$» -t «TCu,Cu,Tu» -i $ -d sql:$
done
После запуска скрипта, сайтам с данным CA будут доверять все браузеры.
![]() Предыдущая статья Следующая статья
Предыдущая статья Следующая статья ![]()
Trust a self signed PEM certificate
Can this be made more specific? For example: host A sends mail to host B and complains about not being able to verify the identity of B. On host B, we have created a self-signed certificate: /etc/ssl/certs/ssl-cert-snakeoil.pem (this is what the Debian package ssl-cert creates for you). We copy it to host A and call it /etc/ssl/certs/host-B.pem (since this host might already have a ssl-cert-snakeoil.pem ). Then we run ln -s /etc/ssl/certs/host-B.pem $(openssl x509 -noout -hash -in /etc/ssl/certs/host-B.pem) .
@AlexSchröder I’ve edited above. They should not import your snakeoil certificate, but if you’ve setup your own CA, it is reasonable for them import your CA. I haven’t yet identified trust issues between SMTP servers. Most clients can be told to trust individual certificates.
Thanks. I found this question when I was looking for an explanation for a log entry I’m getting. The explanation I found was that where as A will send mail to B, A will report that it wasn’t possible to verify the identity of B.
This is exactly what I was looking for! — thank you! Now I can use davfs to mount my secured webDAV without as much annoyance.
On Debian and Ubuntu you have to copy the certificate.pem to /usr/local/share/ca-certificates/certificate.crt and then run dpkg-reconfigure ca-certificates . /etc/ssl/certs is managed by that command.
Browsers have a list of trusted «certification authority» (CA) certificates. If a server’s certificate is signed by one of those CA certificates and properly formed, you won’t get the SSL warning.
Many browsers ship with many common CA certificates such as Verisign, Thawte, etc. Most browsers allow you to import a new CA into this list of trusted CAs.
Like creating your own self-signed server certificate, you can create your own self-signed CA certificate. You can then use that to sign your server certificate. If your CA is not provided by a well-known company, which it wouldn’t be if it’s one you made, it will have to be explicitly imported on the server side.
I’ve used xca to do this before. It has templates for CAs and HTTP servers. The procedure is this:
- Create a private key for your CA
- Create a self-signed CA using this key using the «CA» template
- Create a private key for your proxy server
- Create a «certificate signing request» (CSR) using the second key, referencing the CA you just made.
- «Sign» the CSR and you’ll have the proxy server certificate, which references your own CA.
You will then need to export (as a file if using xca ) the CA certificate (but don’t include private key of course). A .pem will be generated but you can change the extension to .crt . When a user clicks on that, it will be offered to be installed on Firefox and Internet Explorer, and possibly other major browsers. As far as automatic installation of this .crt, you can:
- use group policy on IE
- direct users to an introduction page asking them to download/install the .crt if they want to avoid warnings.
You can then use the export functions on HTTP server certificate (export both private key and certificate for the server side) to put on your proxy server.