- Устанавливаем шрифты Microsoft в Linux
- Шрифты Microsoft в Debian/Ubuntu
- Шрифты Microsoft в Fedora
- Шрифты Microsoft в Manjaro
- Заключение
- Install Microsoft fonts on Ubuntu 20.04 Focal Fossa Desktop
- Software Requirements and Conventions Used
- Install Microsoft fonts on Ubuntu 20.04 Focal Fossa Desktop step by step instructions
- Related Linux Tutorials:
- NEWSLETTER
- WRITE FOR US
- TAGS
- FEATURED TUTORIALS
- LATEST TUTORIALS
- Install Microsoft fonts on Ubuntu 22.04 Jammy Jellyfish Desktop
- Install Microsoft fonts on Ubuntu 22.04 Jammy Jellyfish Desktop step by step instructions
- Closing Thoughts
- Related Linux Tutorials:
Устанавливаем шрифты Microsoft в Linux
Часто бывает, что при открытии какого нибудь файла, необходимы определенные шрифты. Как пример, это может быть какой-нибудь документ, который создавался в операционной системе Windows, и там использовались шрифты от Microsoft. И в случае, когда у вас в системе Linux нет такого шрифта, то система автоматически подбирает ближайший похожий шрифт. Но может возникнуть проблема в размере шрифта, в итоге, текст может “поплыть”. А то и хуже, вместо отображения текста, могут появиться не разборчивые символы, вы это могли видеть в тех же играх. Ситуация может усугубляться еще и тем, что шрифты от Microsoft распространяются по лицензии. По этому в других операционных системах их нет. Но, их можно установить, по крайне мере, некоторые из них.
Шрифты Microsoft в Debian/Ubuntu
И так, возможно некоторые из вас слышали о пакете под названием “ttf-mscorefonts-installer”, этот пакет содержит некоторые шрифты от компании Microsoft. Касательно установки в Debian 10, у вас должны быть подключены репозитории с не свободным программным обеспечением. То есть – “non-free contrib”, как их добавить, и в целом про репозитории Debian написано в данной статье. Для его установки “ttf-mscorefonts-installer” воспользуемся командой:
sudo apt install ttf-mscorefonts-installer

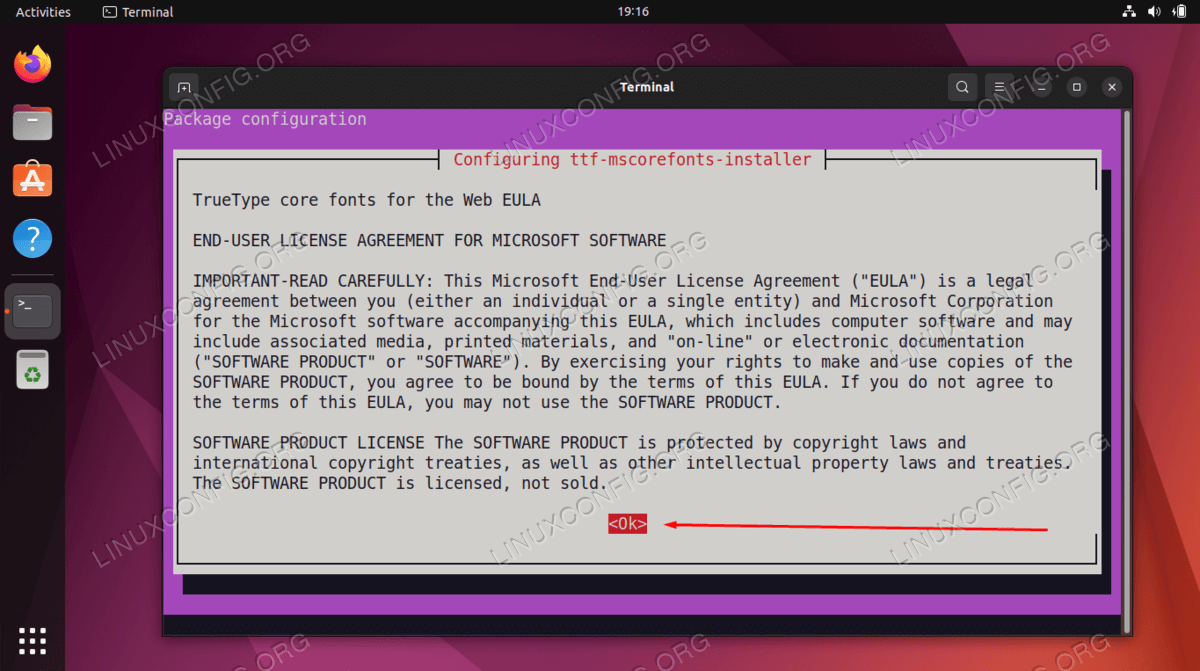
Соглашаемся с условиями лицензии, можно нажать на “Tab” и когда кнопка “OK” изменит свой цвет, то есть выделится, тогда нажимаем на “Enter”:

Затем, еще раз соглашаемся на установку шрифтов:

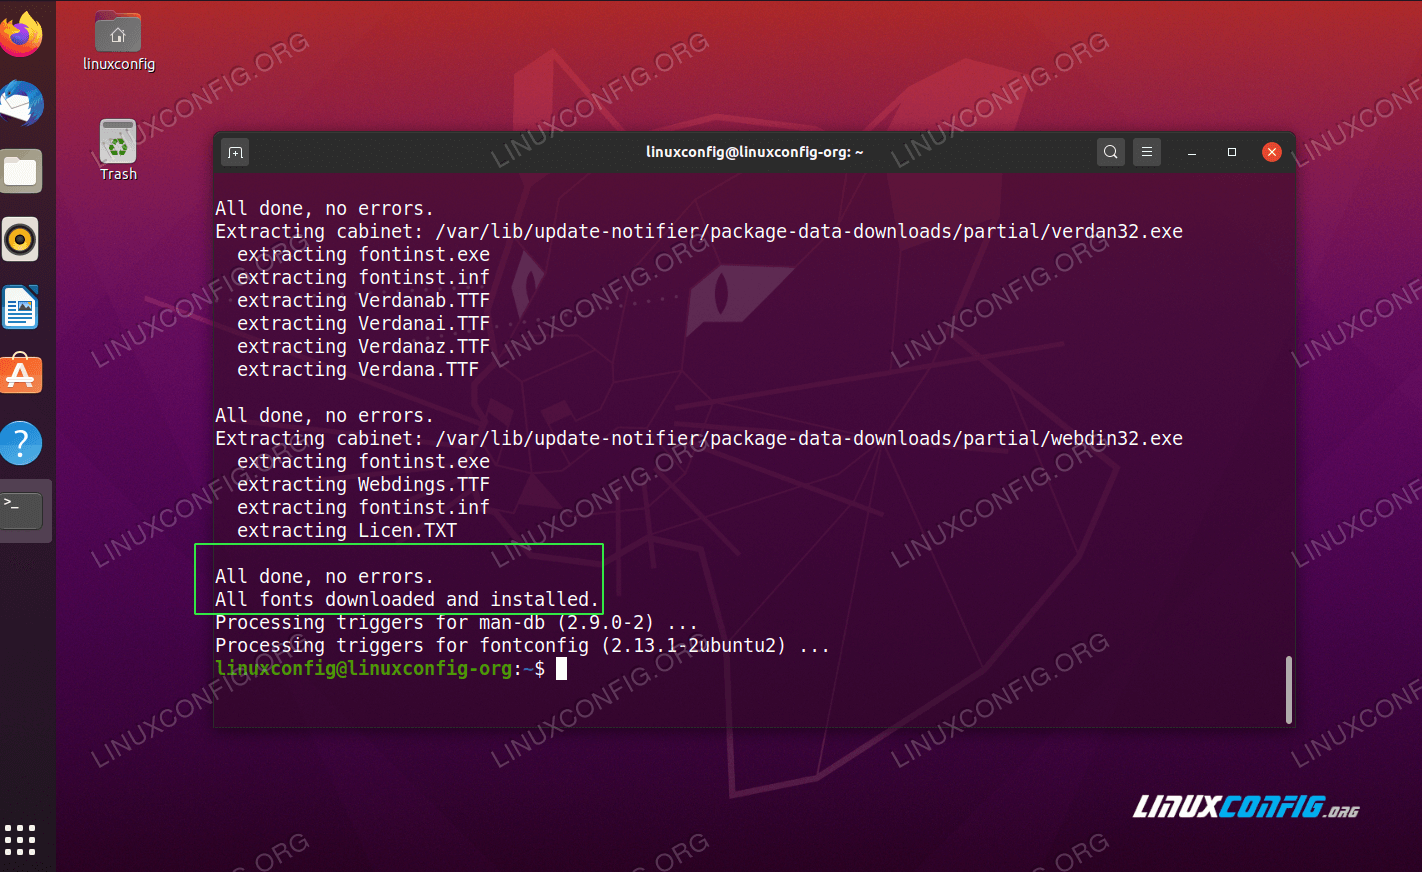
И дожидаемся окончания установки. Далее установим еще парочку пакетов, этот пакет содержит свободные шрифты, которые являются неким аналогом шрифтов от Microsoft в плане размерности:
sudo apt install fonts-liberation fonts-liberation2
Шрифты Microsoft в Fedora
В дистрибутиве Fedora установка шрифтов от Microsoft немного отличается, сначала необходимо установить некоторые зависимости:
sudo dnf install curl cabextract xorg-x11-font-utils fontconfig

Затем установим шрифты из пакета, выполнив команду:
sudo rpm -i https://downloads.sourceforge.net/project/mscorefonts2/rpms/msttcore-fonts-installer-2.6-1.noarch.rpm

Шрифты Microsoft в Manjaro
В дистрибутиве Linux Mnajaro пакет со шрифтами Microsoft носит иное название, и называется он ttf-ms-fonts. Данный пакет можно установить из AUR, для этого конечно у вас должен быть подключен данный репозиторий, это можно сделать в настройках Pacman. Далее просто в поисковой строке вводите название пакета и нажимаете на кнопку собрать:

Так же можно установить пакет ttf-vista-fonts, точно так же через Pacman.
Заключение
Пакет “ttf-mscorefonts-installer”, который мы устанавливали в операционных системах Debian/Ubuntu и Fedora, содержит следующие шрифты от компании Microsoft:
Andale Mono Arial Black Arial (Bold, Italic, Bold Italic) Comic Sans MS (Bold) Courier New (Bold, Italic, Bold Italic) Georgia (Bold, Italic, Bold Italic) Impact Times New Roman (Bold, Italic, Bold Italic) Trebuchet (Bold, Italic, Bold Italic) Verdana (Bold, Italic, Bold Italic) Webdings
Первый пакет – “ttf-ms-fonts” который устанавливали в Manjaro содержит шрифты
Andalé Mono Arial Arial Black Comic Sans Comic New Georgia Impact Lucida Sans Lucida Console Microsoft Sans Serif Times New Roman Trebuchet Verdana Webbindings Wingdings
Calibri Cambria Candara Consolas Constantia Corbel
Как видите, в установке шрифтов от Microsoft не вызывает каких либо трудностей. А с учетом того, что данные шрифты от Microsoft пользуются популярностью, то в работе с документами и с запуском игр могут быть необходимы в Linux системах. При необходимости более экзотических и необычных шрифтов, можно найти сайт со свободными шрифтами, например этот, и скачав понравившийся шрифт добавить его в систему.
А на этом сегодня все. Надеюсь данная статья будет вам полезна.
Журнал Cyber-X
Install Microsoft fonts on Ubuntu 20.04 Focal Fossa Desktop
In this tutorial we will perform the installation of Microsoft’s core TTF fonts on Ubuntu 20.04 Focal Fossa Desktop.
In this tutorial you will learn:
- How to install Microsoft fonts
- How to update fonts cache files
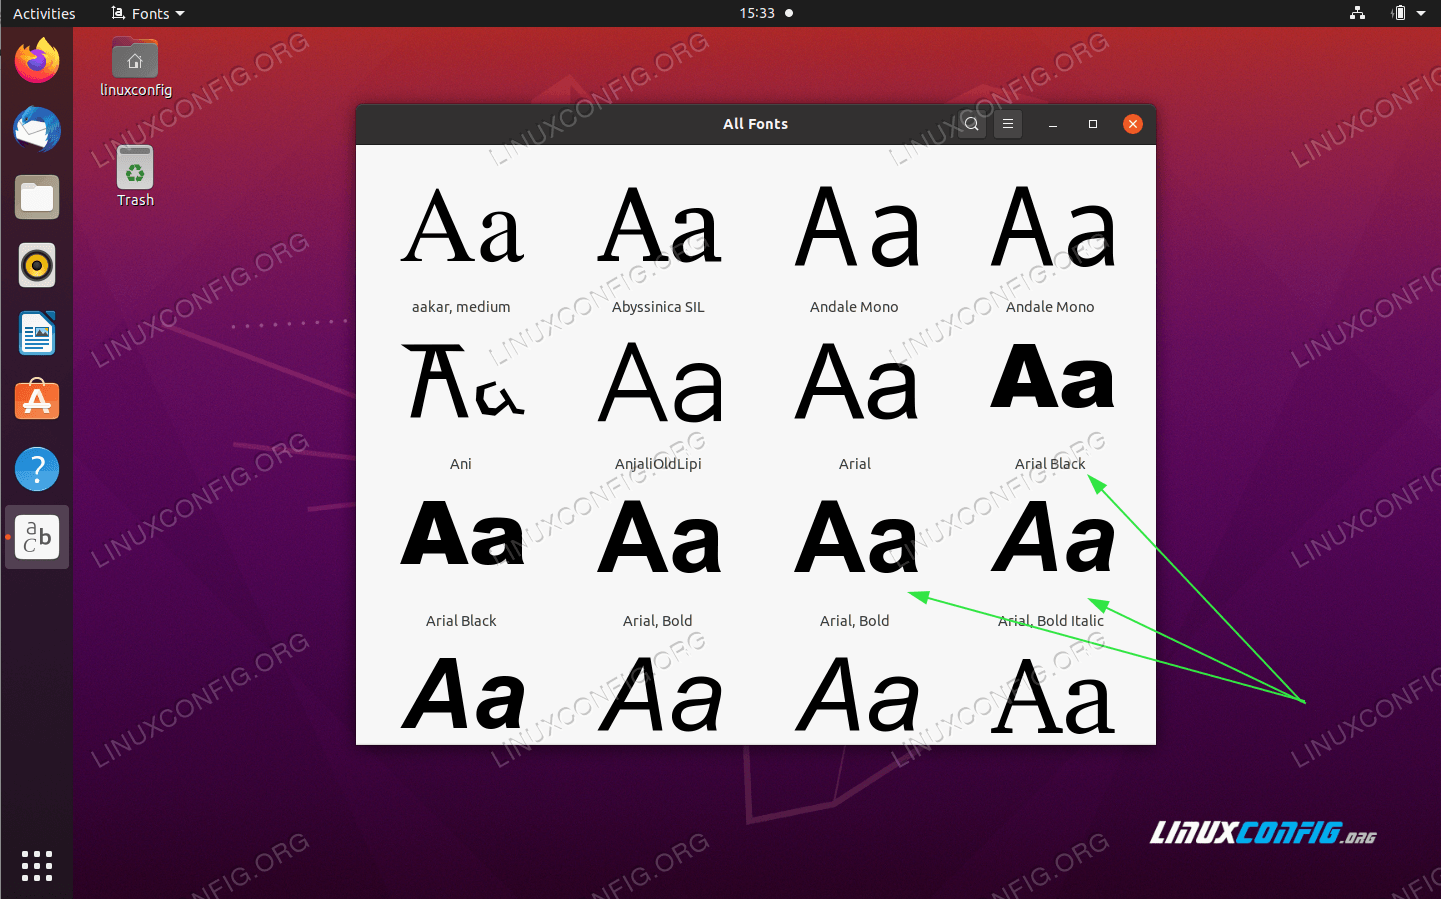
- How to confirm new fonts installation

Software Requirements and Conventions Used
Software Requirements and Linux Command Line Conventions| Category | Requirements, Conventions or Software Version Used |
|---|---|
| System | Installed Ubuntu 20.04 or upgraded Ubuntu 20.04 Focal Fossa |
| Software | ttf-mscorefonts-installer |
| Other | Privileged access to your Linux system as root or via the sudo command. |
| Conventions | # – requires given linux commands to be executed with root privileges either directly as a root user or by use of sudo command $ – requires given linux commands to be executed as a regular non-privileged user |
Install Microsoft fonts on Ubuntu 20.04 Focal Fossa Desktop step by step instructions
- The Microsoft fonts are not a part of the Ubuntu repository, however we can install the Installer for Microsoft TrueType core fonts which will fetch and install the fonts for us. To begin the installation open up a terminal window and execute the following command:
$ sudo apt install ttf-mscorefonts-installer


Related Linux Tutorials:
NEWSLETTER
Subscribe to Linux Career Newsletter to receive latest news, jobs, career advice and featured configuration tutorials.
WRITE FOR US
LinuxConfig is looking for a technical writer(s) geared towards GNU/Linux and FLOSS technologies. Your articles will feature various GNU/Linux configuration tutorials and FLOSS technologies used in combination with GNU/Linux operating system.
When writing your articles you will be expected to be able to keep up with a technological advancement regarding the above mentioned technical area of expertise. You will work independently and be able to produce at minimum 2 technical articles a month.
TAGS
FEATURED TUTORIALS
- VIM tutorial for beginners
- How to install the NVIDIA drivers on Ubuntu 20.04 Focal Fossa Linux
- Bash Scripting Tutorial for Beginners
- How to check CentOS version
- How to find my IP address on Ubuntu 20.04 Focal Fossa Linux
- Ubuntu 20.04 Remote Desktop Access from Windows 10
- Howto mount USB drive in Linux
- How to install missing ifconfig command on Debian Linux
- AMD Radeon Ubuntu 20.04 Driver Installation
- Ubuntu Static IP configuration
- How to use bash array in a shell script
- Linux IP forwarding – How to Disable/Enable
- How to install Tweak Tool on Ubuntu 20.04 LTS Focal Fossa Linux
- How to enable/disable firewall on Ubuntu 18.04 Bionic Beaver Linux
- Netplan static IP on Ubuntu configuration
- How to change from default to alternative Python version on Debian Linux
- Set Kali root password and enable root login
- How to Install Adobe Acrobat Reader on Ubuntu 20.04 Focal Fossa Linux
- How to install the NVIDIA drivers on Ubuntu 18.04 Bionic Beaver Linux
- How to check NVIDIA driver version on your Linux system
- Nvidia RTX 3080 Ethereum Hashrate and Mining Overclock settings on HiveOS Linux
LATEST TUTORIALS
- Enabling SSH on Raspberry Pi: A Comprehensive Guide
- Boot Your Raspberry Pi from a USB: A Tutorial
- Checking Your Raspberry Pi’s OS Version
- Install an OS on Your Raspberry Pi: Step-by-Step
- Finding Your Raspberry Pi’s IP Address: A Quick Guide
- Easy Steps to Update Your Raspberry Pi
- Connecting Your Raspberry Pi to Wi-Fi: A How-To
- How to install RealVNC viewer on Linux
- How to check Raspberry Pi RAM size and usage
- How to check Raspberry Pi model
- Understanding UEFI and BIOS in Relation to Linux Nvidia Driver Installation
- How to orchestrate Borg backups with Borgmatic
- How to monitor filesystem events on files and directories on Linux
- Debian USB Firmware Loader Script
- How to install and self host an Ntfy server on Linux
- How to backup your git repositories with gickup
- How to bind an SSH public key to a specific command
- Creating a Bootable USB for Windows 10 and 11 on Linux
- How to list all displays on Linux
- List of QR code generators on Linux
Install Microsoft fonts on Ubuntu 22.04 Jammy Jellyfish Desktop
In this tutorial, we will perform the installation of Microsoft’s core TTF fonts on Ubuntu 22.04 Jammy Jellyfish Desktop. This includes fonts such as Andale Mono, Arial, Arial Black, Comic Sans, Courier New, Georgia, Impact, Times New Roman, Trebuchet, Verdana, and Webdings. These fonts have been around for many years and see constant use in all sorts of publications, so they are great to have as an option on Ubuntu 22.04 Jammy Jellyfish.
In this tutorial you will learn:
- How to install Microsoft fonts
- How to update fonts cache files
- How to confirm new fonts installation

| Category | Requirements, Conventions or Software Version Used |
|---|---|
| System | Ubuntu 22.04 Jammy Jellyfish |
| Software | ttf-mscorefonts-installer |
| Other | Privileged access to your Linux system as root or via the sudo command. |
| Conventions | # – requires given linux commands to be executed with root privileges either directly as a root user or by use of sudo command $ – requires given linux commands to be executed as a regular non-privileged user |
Install Microsoft fonts on Ubuntu 22.04 Jammy Jellyfish Desktop step by step instructions
- The Microsoft fonts are not a part of the Ubuntu repository, however we can install the Installer for Microsoft TrueType core fonts which will fetch and install the fonts for us. To begin the installation open a command line terminal and execute the following command:
$ sudo apt install ttf-mscorefonts-installer


Next, scan the font directories on the Ubuntu 22.04 system to build fresh font information cache files. To do so execute the below command from the terminal window:


Closing Thoughts
In this tutorial, you saw how to install the Microsoft true type fonts on Ubuntu 22.04 Jammy Jellyfish Linux. This will make the fonts available in applications such as LibreOffice Writer. The Microsoft fonts are well known and used in many sources, so having the original Microsoft fonts available on Ubuntu can be very helpful.