- How to Turn On WiFi Calling in Google Pixel 6 Pro and Pixel 6
- How to Turn On and Use WiFi Calling on Pixel 6 Pro
- How to Activate WiFi Calling on Google Pixel 6 and Pixel 6 Pro
- How to Set Up WiFi Calling on Pixels (Android 12) Using Google Phone App
- How to Disable WiFi Calling on Pixels – Android 12
- About Bestusefultips
- Google Wifi router setup & security
- Google Wifi Quick links:
- 2.Change Google Wifi Default Login and Password
- Choose a complex and hard-to-guess password for your Google which only you can remember
- Protect it
- Usability first
- 3.Change Google Wifi Default WiFi name (SSID) and WiFi Password and enable Network Encryption
- 4.Update router firmware in Google Wifi and turn on Automatic Updates
- 5.Security is a continuous process
- Google Wifi Router Reset instructions
- How to Reset the Google Wifi Router To Factory Default
- Google Wifi Password Does not Work
- Forgot Password for Google Wifi Router
- How to boost Google Wifi WiFi and overcome connectivity issues
- 1.Place the Google Wifi in a perfect spot
- 2.Find a Good Wireless Channel Instead of Auto on your Google Wifi router
- 3.Check the frequency of Google Wifi
- 4.Hardwire gaming consoles / media streamers into your Google Wifi instead of WiFi
- 5. Reboot Google Wifi on schedule
- How to turn on Wi-Fi automatically when you reach Home, Office or any other regular place
- How to turn on Wi-Fi automatically
- On Pixel/stock UI phones
- On Samsung Galaxy phones
- On any other Android phones
How to Turn On WiFi Calling in Google Pixel 6 Pro and Pixel 6
Here’s how to turn on WiFi calling in Google Pixel 6 Pro and Pixel 6. When Wi-Fi calling is on, your phone can use Wi-Fi or cellular networks to make calls on your Pixels that depending on your preferences and which signal is stronger. By default turned off WiFi calling feature on your Pixel devices running stock Android (Android 12) devices. Check out the below-given methods to enable WiFi calling on Pixel 6 Pro and Pixel 6.
How to Turn On and Use WiFi Calling on Pixel 6 Pro
Step 1: Swipe down the notification panel twice at the top and tap on the Settings icon.
Step 2: Scroll down and tap on Network and internet.
Step 3: Tap on Calls and SMS.
Step 4: Tap on SIM in Wi-Fi calling section.
Step 5: Toggle on Use Wi-Fi calling.
How to Activate WiFi Calling on Google Pixel 6 and Pixel 6 Pro
Step 1: Go to Phone Settings.
Step 2: Tap Network & internet.
Step 3: Tap on SIM.
Step 4: Scroll down and tap on Wi-Fi calling under the Calling section.
Step 5: Toggle on Use Wi-Fi calling.
How to Set Up WiFi Calling on Pixels (Android 12) Using Google Phone App
Step 1: Open the Google Phone app in your Pixels.
Step 2: Tap on Three vertical dots at the top right.
Step 3: Tap Settings.
Step 4: Tap on Calls under the general section.
Step 5: Tap on Wi-Fi calling.
Step 6: Toggle on Use Wi-Fi calling.
How to Disable WiFi Calling on Pixels – Android 12
Step 1: Go to Phone Settings.
Step 2: Scroll down and tap Network and internet.
Step 3: Tap Calls and SMS.
Step 4: Tap SIM in Wi-Fi calling section.
Step 5: Toggle off Use Wi-Fi calling.
And that’s all. Do you still have any questions about turn on WiFi calling on Google Pixel 6 Pro? Tell us in below comment box.
About Bestusefultips
I’m Arpit Patel, a techno lover from India. Bestusefultips is a technology website focused on the latest Android news, tricks & tips related to Android devices, tutorials and videos.
Google Wifi router setup & security

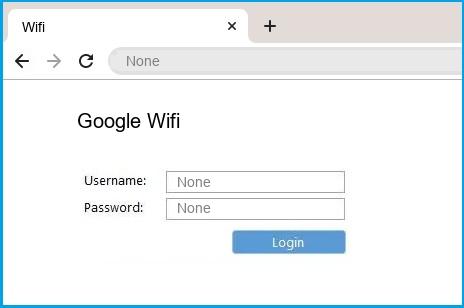
- To login to Google Wifi Router, Open your web browser and type the default IP Address in the address bar
- You should now see the router login page with 2 text fields where you can type a username and a password
- The default username for your Google Wifi router is admin and the default password is admin
- In the login page of the router’s web user interface, type-in the username & password, hit «Login» and now you should see the Google Wifi router control panel
(Remember, you must be at home and connected to home WiFi to do this)
And no need to get your breathing rates high in case you have changed the username / password of Google Wifi and forgot them, as you can just reset the Google Wifi router by press-and-hold the reset button with a clip for about 15 seconds.
Google Wifi Quick links:
Try one of these most Common IP Addresses
Try one of these most Common Passwords
| Username | Password |
|---|---|
| admin | admin |
| admin | blank |
| admin | password |
| blank | admin |
| blank | blank |
Is this not your router model ? Search your router
2.Change Google Wifi Default Login and Password
Since, security of a network is vital, the first and foremost task is to change the Google Wifi router Default Login and Password to something more personal and secure.
Google Wifi Router Password Tips:
Choose a complex and hard-to-guess password for your Google which only you can remember
It should be something personal, like &ilostmyvirginity@30, so that you’ll never forget it. Ever
Protect it
The amount of protection directly depends on the password complexity, and the effort taken to protect that password on your Google Wifi router.
Usability first
Give Password for your Google Wifi router that you can remember (usability first). Of course, you can build a strong hash password with special characters, numbers, Greek, and Latin. But ultimately you’ll end up writing it on a sticky and putting it on the router, which defeats the purpose. Here is an example $lasttriptovegas0916
You did good so far. Now consider ⭐ Bookmarking this page. It always helps.
3.Change Google Wifi Default WiFi name (SSID) and WiFi Password and enable Network Encryption
Another small suggestion (as it has no impact on security), is to change the Google Wifi Default WiFi name (SSID) as it will make it more obvious for others to know which network they are connecting to.
Look for Network Name (SSID), this is the WiFi name of your Google Wifi Router. Do not use your name, home address, or other personal information (since this isn’t a Facebook status!) in the SSID name. (No Mr.Paul&Princy) A few funny WiFi name suggestions: I’m cheating on my WiFi!, FBI Surveillance Van #594 (scares away stupid criminals), Lord of the Pings .
Once you enter the name for your network, you have to enable WPA2-PSK encryption on your Google Wifi router. That’s the strongest encryption standard available for home networks.
Enter a new WPA Pre-Shared Key / WiFi Password – this is the password that you will use to connect to your home WiFi. Keep it to 16-20 characters (please!) don’t use the same password that you used for Google Wifi router login!
🤓 Geek out your guests. Print a Free WiFi QR Code Sticker for your fridge now
4.Update router firmware in Google Wifi and turn on Automatic Updates
Router software often contains critical bugs and security vulnerabilities; Check if your router has known vulnerabilities
Its important that you turn on Automatic Firmware updates and always keep your Google Wifi router up-to-date. To turn on Automatic updates, Login to your Google Wifi router and look for the section which contains Automatic updates and turn it «ON»
And even if the router has auto-update, check every now and then to make sure it is actually working, and the router firmware is up-to-date. If your router manufacturer hasn’t released any updates to the firmware in the past 3-5 years, consider upgrading to a «newer» router
5.Security is a continuous process
Just keep in mind to change the passwords often or at least once in every 6 months! on your Google Wifi You don’t want the safety you have worked so hard for to fail just because of ignorance, negligence, or casual laziness! Time for a bulletin on the fridge, folks! We can remind you though? Enter your email below! Nope, we are not spammers!
Google Wifi Router Reset instructions
How to Reset the Google Wifi Router To Factory Default
To reset Google Wifi router,
- Turn on the Google Wifi router
- Look for the reset button. Few routers have a tiny hole and few others have a reset button.
- Press the Factory reset button with a straightened paperclip pin or something that gets through the tiny hole, and hold it for about 15 seconds! (till you see all the lights flashing)
- The Google Wifi router will reboot automatically. the unit has been reset and is ready to use. You can start from Step 1 in this guide to set it up.
Google Wifi Password Does not Work
Passwords find a way to not work! Or, in most cases, users find a way to forget them! In either case, look up the How to Reset the Google Wifi Router To Default Settings section
Forgot Password for Google Wifi Router
Incase if you have changed the default username and password of Google Wifi and forgot it, please see How to Reset the Google Wifi Router To Default Settings section
How to boost Google Wifi WiFi and overcome connectivity issues
1.Place the Google Wifi in a perfect spot
The perfect spot does it all; be it romance or your router! To avail the best signal and network connectivity, make sure you keep your Google Wifi router visible and not facing the wall or behind the curtains
2.Find a Good Wireless Channel Instead of Auto on your Google Wifi router
Auto-channels might fail you once in a while; believe that you’re smarter than the Google router! Find a seamless wireless channel instead of what the router finds automatically. This would ensure that your signal doesn’t interfere with that of your neighbors.
If you’re running a Windows-based PC, you can see what channels neighboring Wi-Fi networks are using.
- Press Start > type “cmd”. Open Command prompt
- In command prompt type netsh wlan show all
You will see a list of all wireless networks and the channels being used in your vicinity. instead of using “Auto” for the control channel, Pick the channel that has the lowest interference
3.Check the frequency of Google Wifi
Check if Google Wifi has dual-band, the most commonly used band would be 2.4GHz; however, switching to 5GHz would bring out better results! It depends on your device though; if you’re running an old lad, you might have to switch back to the conventional
4.Hardwire gaming consoles / media streamers into your Google Wifi instead of WiFi
Gaming consoles/media streamers work better when connected through Ethernet cable of Google Wifi; in fact, as you might not be moving your TV all over the house, why connect it to the Wi-Fi at all? The Gaming consoles / video streaming devices flood the network with data. This means that if possible, you should consider hardwire (using Ethernet cable) the devices that tend to consume a lot of bandwidth. Although this can sort of defeat the purpose of having wireless networks, it can actually help your overall network speed of Google Wifi if you can hardwire the bandwidth hogs.
5. Reboot Google Wifi on schedule
Here’s something important to note! On schedule, folks, reboot your Google Wifi router! Though routers are built to constantly be running at all times, simple tweaks like regular power cycling (a fancy way of saying, unplugging the power cord and shoving it back up) helps with most issues. Rebooting your Google Wifi can fix Internet connection problems, improve slow moving connections, and resolve wireless issues altogether. Try unplugging your Google modem on a quarterly basis to stay proactive (Never reset; always reboot router)
How to turn on Wi-Fi automatically when you reach Home, Office or any other regular place
Since the first public release of Android, Google has done more than its fair share to make the operating system as user-friendly as possible. From little visual tweaks and assistant features to nifty usability enhancements that actually make a difference, we have pretty much seen it all.
Google knows just how important Wi-Fi is to us, and offers a pretty great feature that makes switching to our favorite networks completely hassle-free. Introduced first in Android Oreo, this neat feature enables your Wi-Fi automatically when you’re close to a trusted network/place where you use Wi-Fi frequently.
How to turn on Wi-Fi automatically
The Turn on Wi-Fi automatically feature makes use of another feature called Wi-Fi scanning, which is generally found inside Location Services. It searches for Wi-Fi networks in the background and matches them against your list of saved/trusted networks. If the Wi-Fi network is adjudged to be trusted and of high quality, then the system toggles on Wi-Fi and connects to the network.
On Pixel/stock UI phones
To connect to Wi-Fi automatically on Pixel/near-stock Android smartphones, go to Settings > Network & Internet > Wi-Fi > Wi-Fi preferences > Toggle on Turn on Wi-Fi automatically.

On Samsung Galaxy phones
On Samsung Galaxy devices, go to Settings > Connections > Wi-Fi > tap on the three-dot menu in the top-right corner > Advanced > Toggle on Turn on Wi-Fi automatically.

On any other Android phones
Well, it should be under the Wi-Fi settings somewhere. If you can’t find it, simply tap the search bar at the top after you open the Settings app, and look for Wi-Fi automatically. The option will show up, tap to reach the Settings screen. And then toggle it on.
Sushan
A mediocre engineer hoping to do something extraordinary with his pen (well, keyboard). Loves Pink Floyd, lives football, and is always up for a cup of Americano.