- Конфигурирование и компиляция ядра Linux
- Установка утилит
- Скачиваем исходный код ядра
- Распаковываем исходный код ядра
- Конфигурация ядра
- Компиляция ядра
- Установка (инсталляция) ядра
- Запуск системы с новым ядром
- How to Compile and Install the Linux Kernel on Ubuntu
- The setup I tested this on
- Installing dependencies, downloading the kernel source
- Configuring the kernel
- Compiling
- Installation
- Checking if kernel was installed sucessfully
- Bonus: Modifying the kernel source
- And that’s it
Конфигурирование и компиляция ядра Linux
Пересборка ядра Linux дело очень интересное и почему-то часто отпугивает новичков. Но ничего сложного в этом нет, и скомпилировать ядро Linux бывает не сложнее, чем собрать (скомпилировать) любую другую программу из исходников. Пересборка ядра может понадобиться, когда вам требуются какие-нибудь функции, не включенные в текущее ядро, или же, наоборот, вы хотите что-то отключить. Все дальнейшие действия мы будем выполнять в Ubuntu Linux.
Установка утилит
Для настройки и сборки ядра Linux вам потребуется установить несколько пакетов, которые понадобятся для сборки и настройки ядра: kernel-package , build-essential , libncurses-dev . Сделать это можно командой:
sudo apt-get install build-essential kernel-package libncurses-devСкачиваем исходный код ядра
Теперь нужно скачать исходный код ядра. Мы будем скачивать ядро для Ubuntu. Вы можете скачать определенную версию ядра, например, ту, которую вы в данный момент используете или же скачать самую последнюю версию. Для того, чтобы определить версию ядра Linux, которую вы используете, выполните команду uname с параметром -r :
Вывод команды будет примерно следующим:
Имя пакета, содержащего исходные коды ядра обычно имеет следующий вид: linux-source-Версия. Например, для ядра версии 2.6.24: linux-source-2.6.24. Самая последняя версия ядра в репозиториях Ubuntu называется просто linux-source, без указания версии на конце. Для установки исходных кодов последней версии ядра Ubuntu Linux, выполните команду:
sudo apt-get install linux-sourceЭта команда скачивает исходники ядра и размещает их в директории /usr/src . На момент написания заметки последняя версия ядра, которая была скачана — 2.6.27, ее мы и будем использовать. Если мы теперь перейдем в директорию /usr/src и выполним команду ls , то увидим, что среди файлов присутствует файл linux-source-2.6.27.tar.bz2. Это и есть исходные коды ядра Linux (ядра Ubuntu).
Распаковываем исходный код ядра
Перейдем в директорию /usr/src и разархивируем ядро. Для этого выполните следующие команды:
cd /usr/src sudo tar xjf linux-source-2.6.27.tar.bz2 sudo ln -s linux-source-2.6.27 linuxДля удобства мы создали символьную ссылку с именем linux , которая указывает на директорию с исходниками.
Конфигурация ядра
Теперь перейдем к конфигурированию ядра. Чтобы не создавать конфигурацию с нуля, возьмем за основу конфигурацию ядра, которая в данный момент используется. Получить текущую конфигурацию можно выполнив команду make oldconfig . Выполните в терминале:
cd /usr/src/linux sudo make oldconfigВ результате выполнения команды make oldconfig создастся файл .config , содержащий параметры конфигурации ядра.
Получить справку по всем параметрам make для ядра Linux вы можете, выполнив команду make help .
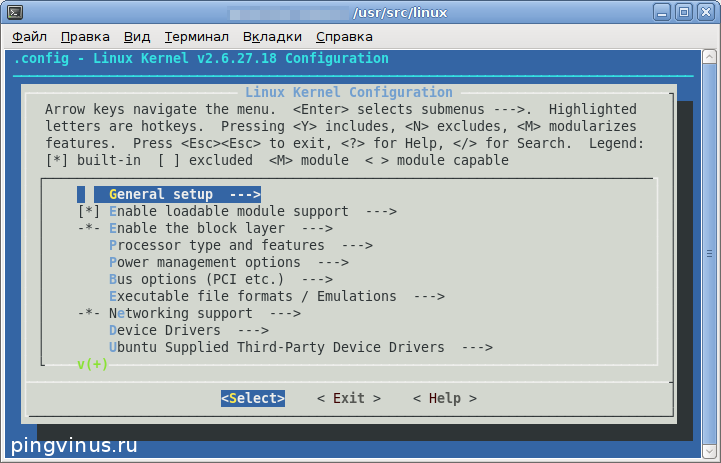
Для изменения конфигурации ядра мы воспользуемся консольной утилитой menuconfig . Для ее запуска выполните:
Перед вами появится интерфейс, в котором вы можете включать или отключать определенные опции ядра:
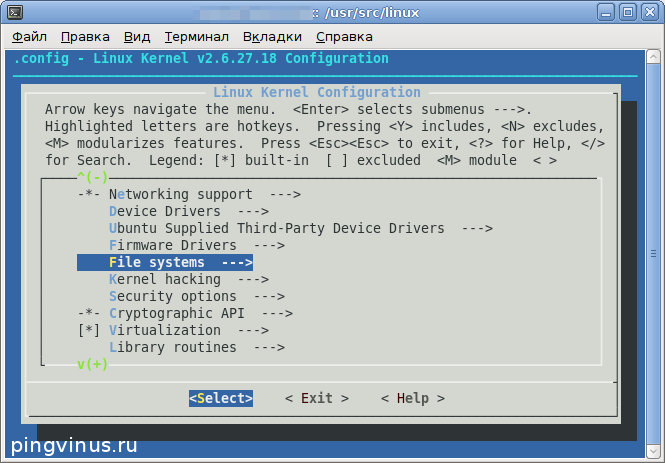
Для примера я включу опцию «NTFS write support». Для этого, нажимая кнопку Вниз , найдите пункт «File systems» и нажмите Enter .
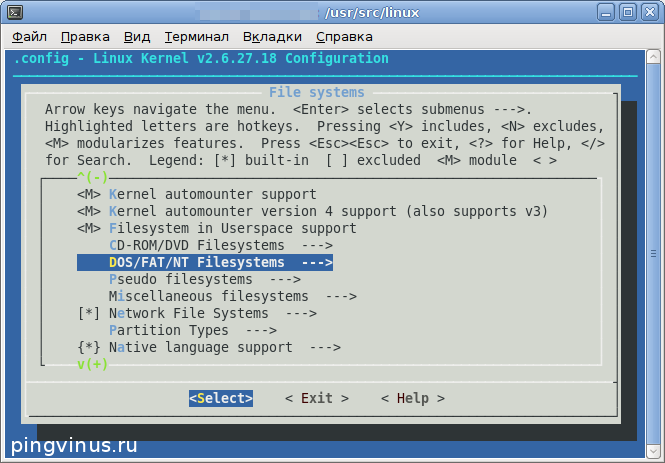
Вы окажетесь в меню настройки файловых систем. Найдите в этом списке пункт «DOS/FAT/NT Filesystems» и нажмите Enter .
Перейдите к пункту «NTFS write support» и нажмите Пробел , рядом с пунктом появится звездочка, означающая, что данная опция будет включена в ядро.
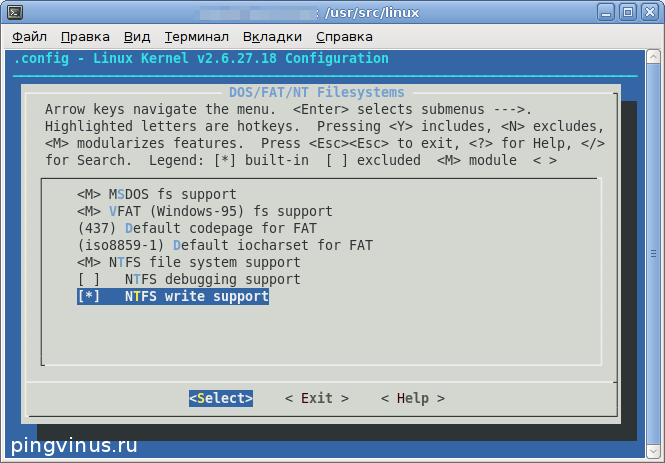
Теперь выберите «Exit» (нажав кнопку Вправо и затем Enter ) и выйдите из утилиты. Перед выходом из утилиты выскочит сообщение с вопросом — сохранить проделанные изменения, выберите Yes.
Компиляция ядра
Пришло время скомпилировать ядро с теми изменениями, которые мы внесли на предыдущем шаге. Для начала выполним команду, которая удалит файлы (если они имеются), оставшиеся от предыдущей компиляции:
Наконец, чтобы запустить компиляцию ядра, выполним команду:
sudo make-kpkg --initrd --append-to-version=-mykernel kernel_image kernel_headersКлюч -append-to-version используется, чтобы добавить к имени файла образа ядра, который мы получим после компиляции, строку -mykernel , чтобы было проще идентифицировать свое ядро. Вместо -mykernel вы можете использовать любой префикс.
Компиляция ядра занимает довольно много времени и может длиться от нескольких десятков минут до нескольких часов, в зависимости от мощности вашего компьютера.
Установка (инсталляция) ядра
После компиляции ядра вы получили на выходе два файла: linux-image-2.6.27.18-mykernel_2.6.27.18-mykernel-10.00.Custom_i386.deb, linux-headers-2.6.27.18-mykernel_2.6.27.18-mykernel-10.00.Custom_i386.deb. Мы воспользуемся командной dpkg -i , которая автоматически установит ядро и пропишет его в ваш загрузчик GRUB (в файл /boot/grub/menu.lst ). Отмечу, что ядро будет установлено, как ядро по умолчанию, поэтому если оно у вас не загрузится вам нужно будет загрузиться, используя ваше предыдущее ядро (оно должно быть в списке меню GRUB при загрузке компьютера) и вручную изменять файл menu.lst . Итак, для установки ядра выполните команды:
dpkg -i linux-image-2.6.27.18-mykernel_2.6.27.18-mykernel-10.00.Custom_i386.deb dpkg -i linux-headers-2.6.27.18-mykernel_2.6.27.18-mykernel-10.00.Custom_i386.debЗапуск системы с новым ядром
Проверим работоспособность системы с новым ядром. Перезагрузите компьютер. В меню загрузчика GRUB вы должны будете увидеть новый пункт, соответствующей вашему новому ядру, которое должно загрузиться по умолчанию. Если все пройдет успешно, то система запустится с новым ядром.
How to Compile and Install the Linux Kernel on Ubuntu
In this post I will show you how to compile and install the Linux kernel from source on Ubuntu.
I know that there are tons of tutorials on compiling the Linux kernel. However, while I tried many of them, none of them worked for me. I always either got error messages during compilation or the compilation terminated without error messages but failed at installation. Therefore, I decided to write down how I did it.
The setup I tested this on
I used a freshly installed VirtualBox with Ubuntu Server 22.04. I did not do any modifications to the machine and didn’t install any packages on it beforehand. Additionally, I also tested the steps presented in this post on a real computer with an AMD Ryzen 7 2700X CPU.
Installing dependencies, downloading the kernel source
First we need to install a few packages that are required for the compilation:
$ sudo apt install build-essential libncurses-dev bison flex libssl-dev libelf-dev fakeroot Additionally we also need to install the dwarves package. When I tried it without the package, the compilation failed with an error message.
Next we need to need to download the kernel source from the offical kernel.org website.
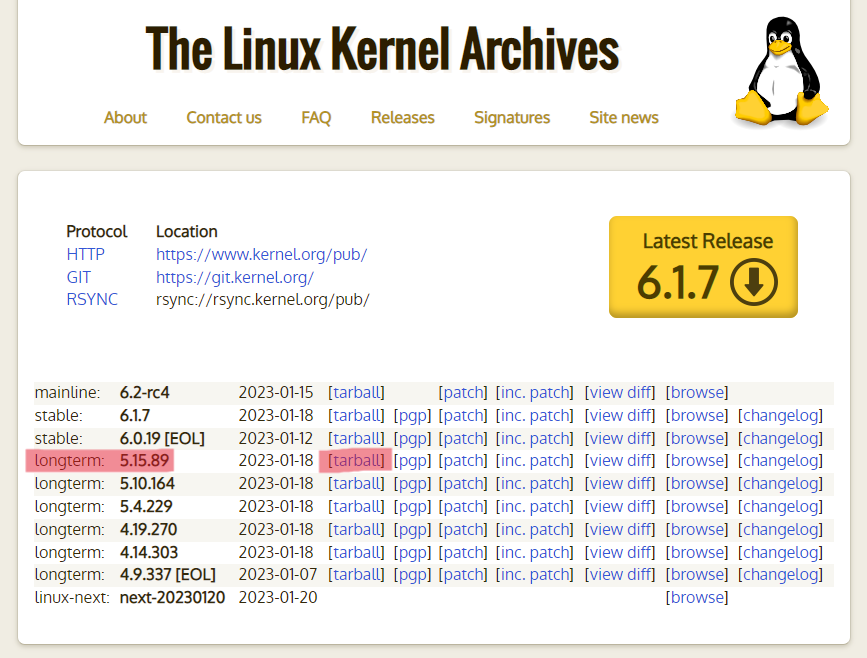
Choose the latest longterm release and copy the link of the tarball hyperlink. Then use this link to download and unpack the kernel source to your Ubuntu machine:
$ wget https://cdn.kernel.org/pub/linux/kernel/v5.x/linux-5.15.89.tar.xz $ tar -xf linux-5.15.89.tar.gz Configuring the kernel
Now enter the directory of the Linux source:
The configuration of the Linux kernel can be specified in a .config file. A good starting point is to copy the config file of your currently installed Linux:
$ cp -v /boot/config-$(uname -r) .config However, this config file includes tons of unnecessary drivers and kernel modules which dramatically increases the build time. To mitigate this, we can use the localmodconfig command. This command looks at the loaded kernel modules of your system and modifies the .config file such that only these modules are included in the build. This should work perfectly fine as long as you don’t plan to use the generated build on another machine than the one you compile the source on.
If, while running the above command, any requests are promted to you, just hit enter each time (without typing an answer).
Next, you need to make four modifications to the configuration. Otherwise the build will fail. To do this, you can either directly modify the .config file or simply run the following commands:
$ scripts/config --disable SYSTEM_TRUSTED_KEYS $ scripts/config --disable SYSTEM_REVOCATION_KEYS $ scripts/config --set-str CONFIG_SYSTEM_TRUSTED_KEYS "" $ scripts/config --set-str CONFIG_SYSTEM_REVOCATION_KEYS "" Compiling
Now it’s time to compile the kernel. For this just run the command
Note that it is very important to run the command with the fakeroot prefix. This was something I had to figure out myself because none of the other tutorials I read mention it. When you don’t run fakeroot make but only make the build process will terminate without any error messages which seems good but isn’t. In reality, the build fails with error code 2 (can be checked by running echo $? afterwards) after some time.
You can also speed up the build by using multiple CPU cores of your machine. For instance,
will use eight cores of your machine.
The build time heavily depends on your machine and is especially slow on virtual machines. On my VirtualBox with only one CPU core it took around 3 hours. On a physical computer with an AMD Ryzen 7 2700X with 8 cores it took only 6 minutes.
After the build finishes, you can check whether it is successful by running
This outputs the return code of the previous command. If it returns 0 , the build was sucessful. For any other value than 0 the build was not sucessful.
Installation
The installation is split into two parts: Installing the kernel modules and installing the kernel itself.
First install the kernel modules by running
$ sudo make modules_install Then install the kernel itself:
After that, reboot your machine:
Checking if kernel was installed sucessfully
You can check the version of the installed kernel by running
This outputs something like

You know that the installation was sucessfull if the displayed Linux version matches the one of the kernel source you downloaded.
Bonus: Modifying the kernel source
Of course you can also modify the Kernel source before installation to make your own custom version Linux. As a very simple example for such a modification I’ll modify the name of the operating system. Any other modification of the source code works the same.
The default name is of course “Linux”. It is stored in the include/linux/uts.h header file, which looks like this:
// include/linux/uts.h /* SPDX-License-Identifier: GPL-2.0 */ #ifndef _LINUX_UTS_H #define _LINUX_UTS_H /* * Defines for what uname() should return */ #ifndef UTS_SYSNAME #define UTS_SYSNAME "Linux" #endif #ifndef UTS_NODENAME #define UTS_NODENAME CONFIG_DEFAULT_HOSTNAME /* set by sethostname() */ #endif #ifndef UTS_DOMAINNAME #define UTS_DOMAINNAME "(none)" /* set by setdomainname() */ #endif #endif We can now change the operating system name by changing the UTS_SYSNAME field. In my case I’ll change it to DavidOS :
// include/linux/uts.h /* SPDX-License-Identifier: GPL-2.0 */ #ifndef _LINUX_UTS_H #define _LINUX_UTS_H /* * Defines for what uname() should return */ #ifndef UTS_SYSNAME #define UTS_SYSNAME "DavidOS" // #ifndef UTS_NODENAME #define UTS_NODENAME CONFIG_DEFAULT_HOSTNAME /* set by sethostname() */ #endif #ifndef UTS_DOMAINNAME #define UTS_DOMAINNAME "(none)" /* set by setdomainname() */ #endif #endif After you modified the file, you can simple re-compile the kernel and then install it:
$ fakeroot make $ sudo make modules_install $ sudo make install $ sudo reboot The compile time should now be significantly shorter than the first time. The reason is that make re-uses some results from the first compilation run.
When you now run uname -rs you get the following:
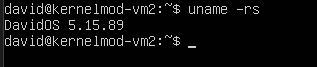
As you can see, it now displays DavidOS instead of Linux .
And that’s it
Now you know how to compile the Linux kernel yourself. You can use this knowledge to upgrade to the latest kernel version long before your Linux distribution does. Besides this you can also customize the kernel to adapt it to your needs.