- Install Ubuntu on WSL2 and get started with graphical applications
- What you will learn:
- What you will need:
- 2. Install WSL
- Installation of WSL from the Microsoft Store
- 3. Download Ubuntu
- Install Ubuntu from the command line
- 4. Configure Ubuntu
- (Optional) Enable systemd
- 5. Install and use a GUI package
- 6. Enjoy Ubuntu on WSL!
- Further Reading
- Install Ubuntu on WSL2 on Windows 10
- 2. Install WSL
- 3. Download Ubuntu
- The one line install!
- 4. Configure Ubuntu
- 5. Install your first package
- 6. Customising your Terminal with Windows Terminal Preview
- 7. Enjoy Ubuntu on WSL!
- Further Reading
Install Ubuntu on WSL2 and get started with graphical applications
Windows Subsystem for Linux (WSL) allows you to install a complete Ubuntu terminal environment in minutes on your Windows machine, allowing you to develop cross-platform applications without leaving windows.
What you will learn:
- How to enable and install WSL on Windows 10 and Windows 11
- How to install and run a simple graphical application that uses WSLg
- How to install and run a much more advanced application that uses WSLg
Note: As of November 2022, WSL is now available as a Windows Store app for both Windows 10 and Windows 11. This means previous tutorials related to installing WSL as a Windows feature are no longer required.
What you will need:
Note: This tutorial doesn’t cover GPU acceleration which is covered in a tutorial of its own.
2. Install WSL
WSL can be installed from the command line. Open a powershell prompt as an Administrator (we recommend using Windows Terminal) and run:
This command will enable the features necessary to run WSL and also install the default Ubuntu distribution of Linux available in the Microsoft Store. It is recommended to reboot your machine after this initial installation to complete the setup.
You can also install WSL from the Microsoft Store.
Installation of WSL from the Microsoft Store
The WSL app is availble to install directly from the Microsoft Store like other Windows applications.
To install the WSL application from the Microsoft Store, open it and search for Windows subsystem.
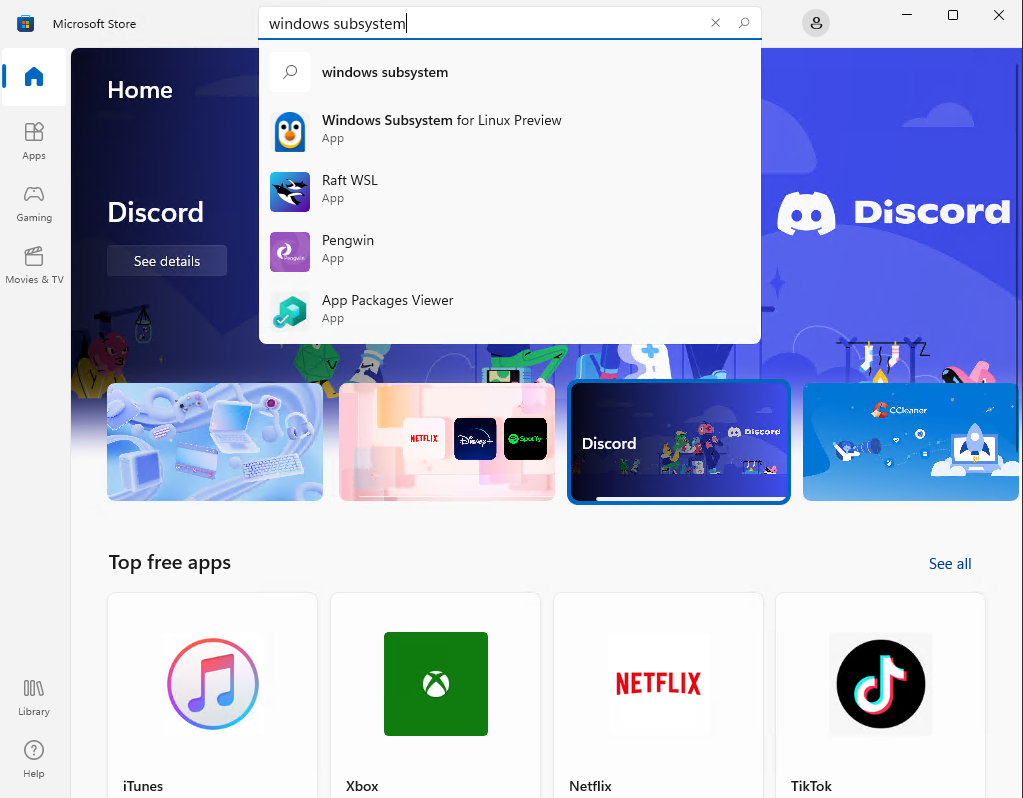
Click on the item Windows Subsystem for Linux to open the corresponding application page.
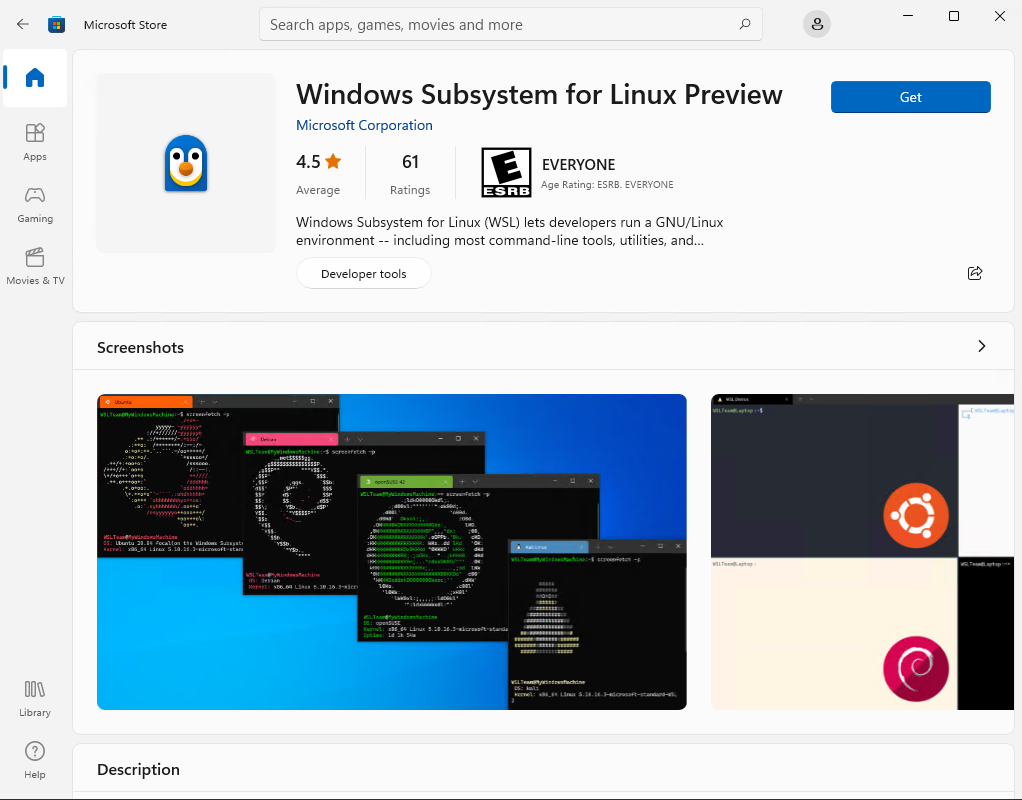
Click on Get to download and install the application.
Upon installation, you can click on Open, but it will not do much since there is no Linux distribution installed.
However, if you really want to open the WSL application without installing a distribution, you’ll see a nice and short help message that you must follow in order to make something useful with WSL:
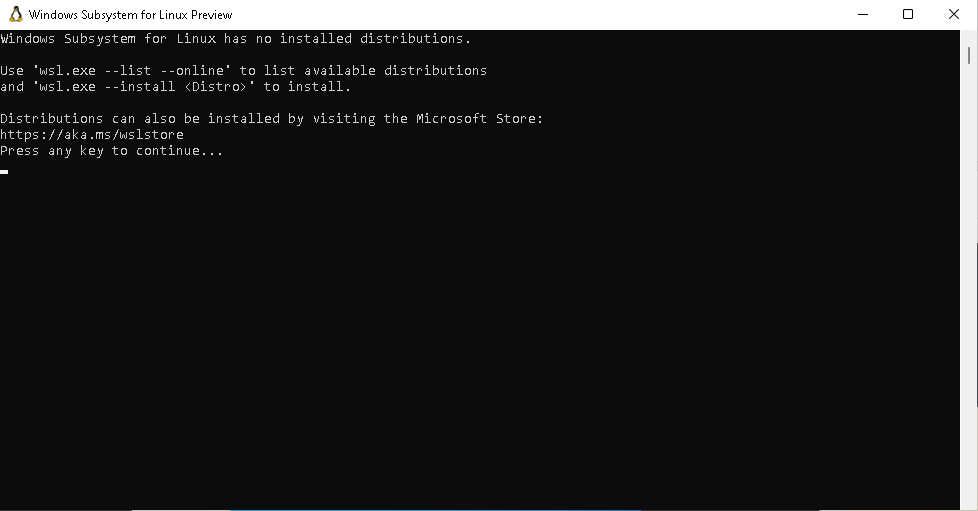
You can now proceed with the installation of Ubuntu.
3. Download Ubuntu
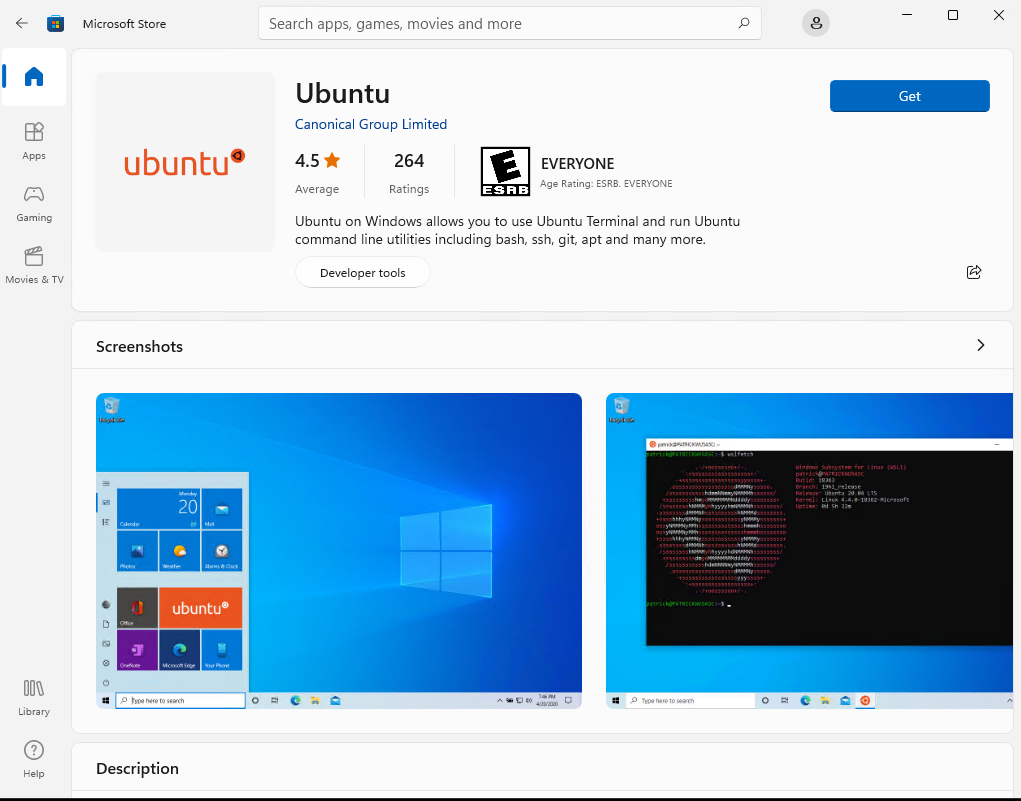
WSL supports a variety of Linux distributions including the latest Ubuntu release, Ubuntu 20.04 LTS and Ubuntu 18.04 LTS. You can find them by opening the Microsoft Store app and searching for Ubuntu.
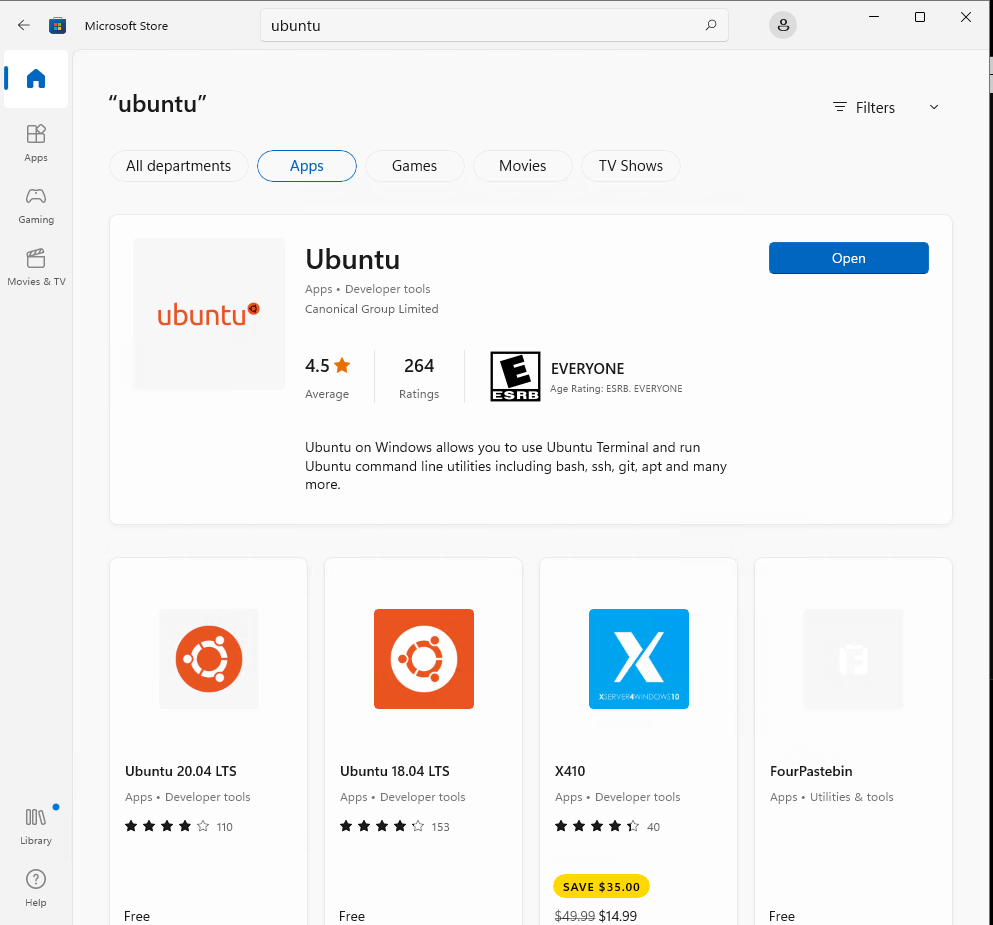
Choose the distribution you prefer and then select Get.
Which version should I choose?
There are three types of Ubuntu releases published to the Microsoft Store:
- Ubuntu with a version number e.g. Ubuntu 20.04.x. This will always be 20.04 and upgrades won’t be proposed.
- Ubuntu without a version number. This is the latest LTS version of Ubuntu after the first point release. At the time of writing, it is Ubuntu 22.04. It will remain Ubuntu 22.04 until the first point release of the next LTS release of Ubuntu, for example 24.04.1 in 2024.
- Ubuntu Preview is a daily build of the latest development version of Ubuntu. You should install it if you want to live on the edge but not for production workload as it doesn’t receive the same amount of QA as stable releases and may break at any time.
Ubuntu will then install on your machine.
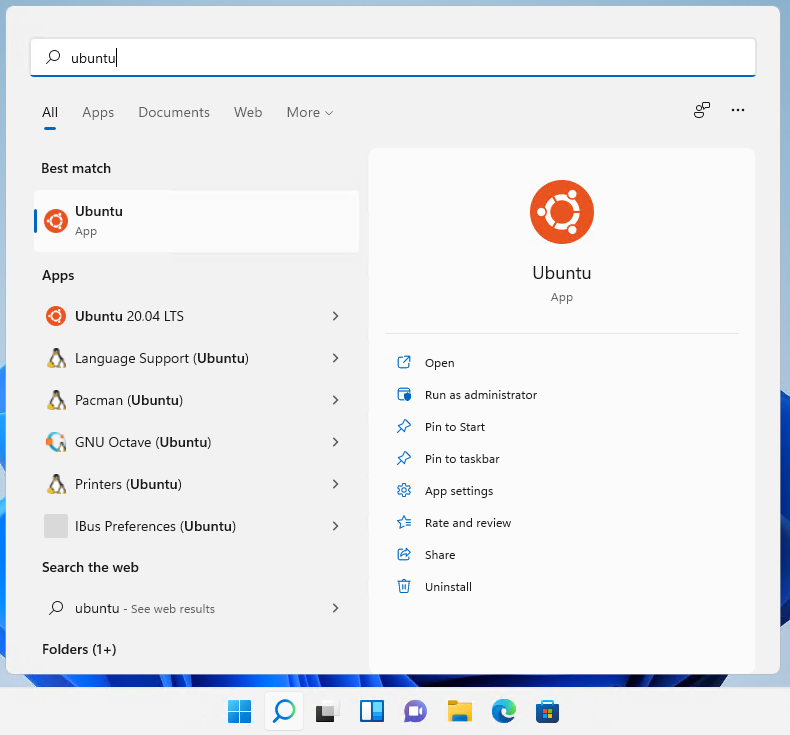
Once installed, you can either launch the application directly from the store or search for Ubuntu in your Windows search bar.
Install Ubuntu from the command line
It is possible to install the same Ubuntu applications available on the Windows Store directly from the command line.
In a Powershell terminal you can run:
wsl —list —online to see all available distros.

You can install a distro using the NAME by running:

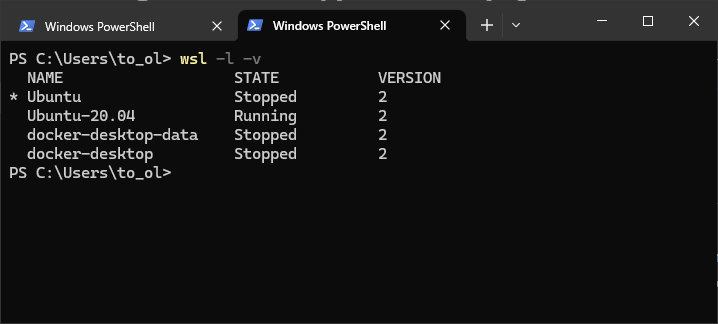
Use wsl -l -v to see all your currently installed distros and which version of WSL they are using:
4. Configure Ubuntu
Congratulations, you now have an Ubuntu terminal running on your Windows machine!
Once it has finished its initial setup, you will need to create a username and password (this does not need to match your Windows user credentials).

Finally, it’s always good practice to install the latest updates with the following commands, entering your password when prompted.
Press Y when prompted.
(Optional) Enable systemd
In September 2022, Microsoft announced support for systemd in WSL. This long-awaited upgrade to WSL unlocks a huge number of quality of life features for managing processes and services. This includes snapd support, which enables users to take advantage of all of the tools and apps available on snapcraft.io.
To enable systemd you will need make a small modification to /etc/wsl.conf in your Ubuntu distribution.
Run `sudo nano /etc/wsl.conf’ to open the file and insert the following lines:
Then restart your distro by running wsl —shutdown in powershell and relaunching.
Systemd is enabled by default in the Ubuntu Preview application.
5. Install and use a GUI package
WSL2 comes with WSLg enabled by default. WSLg allows you to run graphical linux applications.
To check that you have the latest package lists, type:
Then, start with some basic X11 applications:
To run the xeyes, a “follow the mouse” application, type:
The & at the end of the line will execute the command asynchronously. In other words, the shell will run the command in the background and return to the command prompt immediately.
The first launch of a GUI application takes a few seconds while WSL is initializing the graphics stack. Next executions of GUI applications are much faster.
Leave xeyes opened and run the calculator xcalc with:
When you move the cursor over the calculator, xeyes follows the cursor. This shows that several GUI applications can interact together.
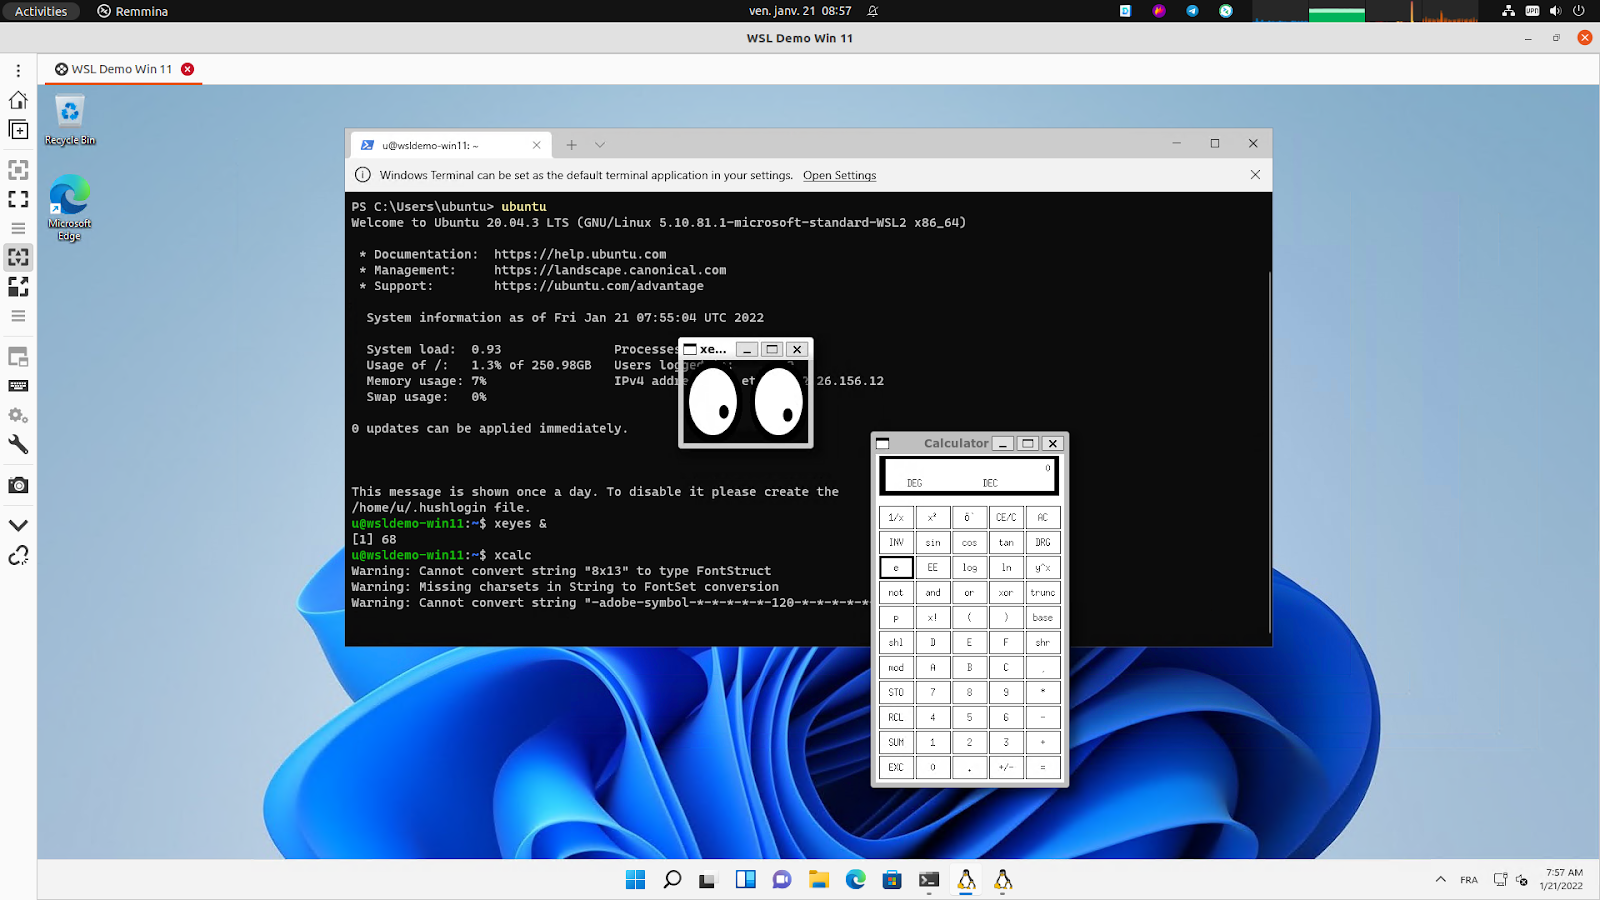
Note that applications running under WSLg display a little penguin at the bottom right corner of their icons in the Windows taskbar. That’s one way you can distinguish applications running on Windows or Ubuntu (besides the window decoration and styling).
![]()
Close xeyes and xcalc by pressing the cross icon on the top right corner of each X application window.
Xcalc and xeyes are very basic X Windows applications but there are plenty of choices in the Linux ecosystem corresponding to your needs and available out of the box on Ubuntu.
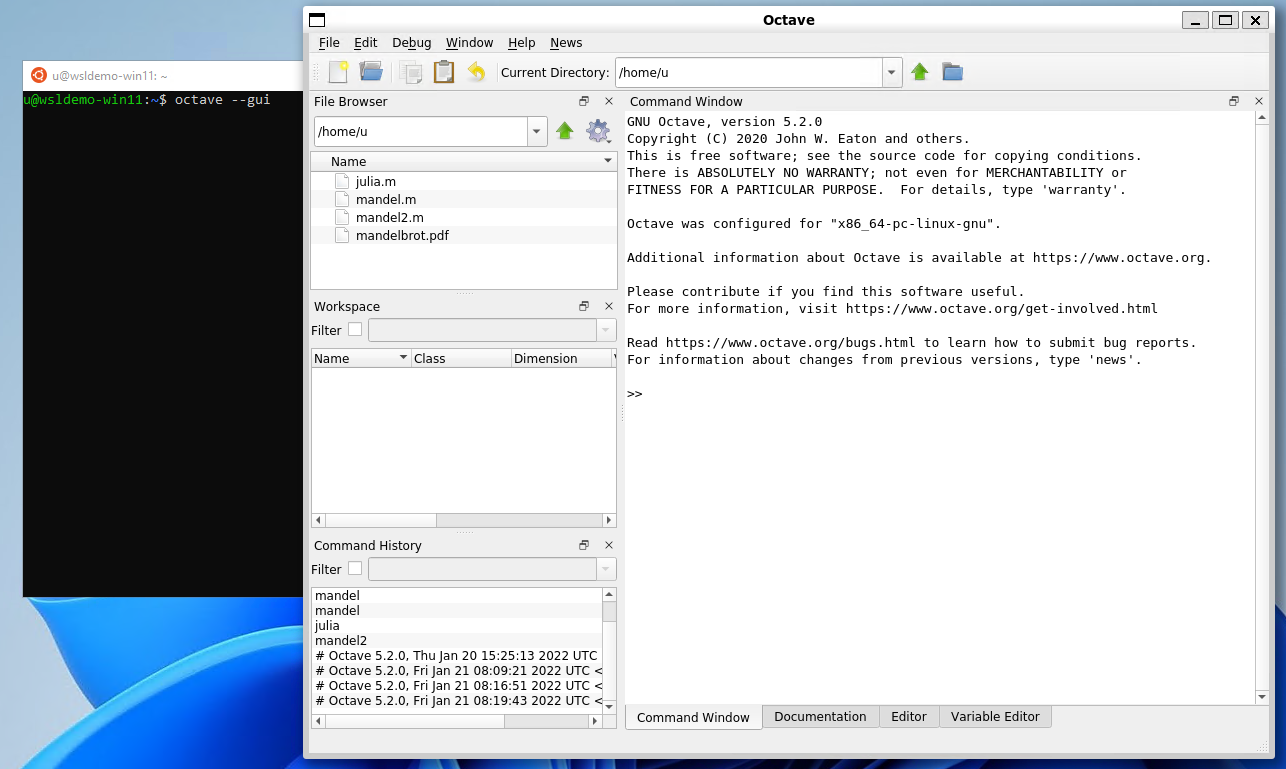
In the following example, we will use GNU Octave to perform numerical computation.
GNU Octave is software featuring a high-level programming language, primarily intended for numerical computations. Octave helps in solving linear and nonlinear problems numerically, and for performing other numerical experiments using a language that is mostly compatible with MATLAB. [GNU / Octave ]
We will use it to calculate and draw a beautiful Julia fractal. The goal here is to use Octave to demonstrate how WSLg works, not to go through the theory of fractals.
First thing is to install the software like we did for x11-apps, from the terminal prompt run:
Then start the application:
Do not forget the ampersand & at the end of the line, so the application is started in the background and we can continue using the same terminal window.
In Octave, click on the New script icon to open a new editor window and copy/paste the following code:
# < Inspired by the work of Bruno Girin ([Geek Thoughts: Fractals with Octave: Classic Mandelbrot and Julia](http://brunogirin.blogspot.com/2008/12/fractals-with-octave-classic-mandelbrot.html)) Calculate a Julia set zmin: Minimum value of c zmax: Maximum value of c hpx: Number of horizontal pixels niter: Number of iterations c: A complex number #>function M = julia(zmin, zmax, hpx, niter, c) %% Number of vertical pixels vpx=round(hpx*abs(imag(zmax-zmin)/real(zmax-zmin))); %% Prepare the complex plane [zRe,zIm]=meshgrid(linspace(real(zmin),real(zmax),hpx), linspace(imag(zmin),imag(zmax),vpx)); z=zRe+i*zIm; M=zeros(vpx,hpx); %% Generate Julia for s=1:niter mask=abs(z) This code is the function that will calculate the Julia set.
Save it to a file named julia.m. Since it is a function definition, the name of the file must match the name of the function.
Open a second editor window with the New Script button and copy and paste the following code:
Jc1=julia(-1.6+1.2i, 1.6-1.2i, 640, 128, -0.75+0.2i); imagesc(Jc1) axis off colormap('default');
This code calls the function defined in julia.m. You can later change the parameters if you want to explore the Julia fractal.
Save it to a file named juliatest.m.
And finally, press the button Save File and Run.

After a few seconds, depending on your hardware and the parameters, a Julia fractal is displayed.
Like Octave, this window is displayed using WSLg completely transparently to the user.
6. Enjoy Ubuntu on WSL!
That’s it! In this tutorial, we’ve shown you how to install WSL and Ubuntu on Windows 11, set up your profile, install a few packages, and run a graphical application.
We hope you enjoy working with Ubuntu inside WSL. Don’t forget to check out our blog for the latest news on all things Ubuntu.
Further Reading
Install Ubuntu on WSL2 on Windows 10
NOTE: As of November 2022, the Windows 10 version of WSL has migrated to support the Windows Store application, bringing feature parity across Windows 10 and Windows 11. Please check out our updated Install Ubuntu on Windows 10 and Windows 11 tutorial for the latest information. This tutorial is now deprecated.
Windows Subsystem for Linux (WSL) allows you to install a complete Ubuntu terminal environment in minutes on your Windows machine, allowing you to develop cross-platform applications without leaving Windows.
In this tutorial, we’ll show you how to get up and running with Ubuntu on WSL. These instructions will work on both Windows 10 or Windows 11.
Whilst WSL is a powerful tool for all users, some features, such as the ability to run graphical Linux applications, are only available on Windows 11. Please check out our Windows 11 tutorial for more information.
2. Install WSL
Installing WSL is now easier than ever. Search for Windows PowerShell in your Windows search bar, then select Run as administrator.
At the command prompt type:
And wait for the process to complete.
For WSL to be properly activated, you will now need to restart your computer.
3. Download Ubuntu
WSL supports a variety of Linux distributions, including the latest Ubuntu release, Ubuntu 20.04 LTS and Ubuntu 18.04 LTS. You can find them by opening the Microsoft store app and searching for Ubuntu.
Choose the distribution you prefer and then click on Get as shown in the following screenshot:
Ubuntu will then install on your machine.
The one line install!
There is a single command that will install both WSL and Ubuntu at the same time.
When opening PowerShell for the first time, simply modify the initial instruction to:
This will install both WSL and Ubuntu! Don’t forget to restart your machine before continuing.
Once installed, you can either launch the application directly from the store or search for Ubuntu in your Windows search bar.
4. Configure Ubuntu
Congratulations, you now have an Ubuntu terminal running on your Windows machine!
If Ubuntu returns an error during this initial installation, then the most common issue is that virtualisation is disabled in your device’s BIOS menu. You will need to turn this on during your device’s boot sequence. The location of this option varies by manufacturer, so you will need to refer to their documentation to find it.
Once Ubuntu has finished its initial setup you will need to create a username and password (this does not need to match your Windows user credentials).
Finally, it’s always good practice to install the latest updates with the following commands, entering your password when prompted.
Press Y when prompted.
5. Install your first package
Installing packages on Ubuntu is as easy as using a single command. Below, you will see how to install bpython, a simple python interpreter for trying out ideas, featuring some nice usability features like expected parameters and autocompletion.
To check that you have the latest package lists, type:
To run the application type:
6. Customising your Terminal with Windows Terminal Preview
Since you’re likely to be using your Ubuntu terminal a fair bit, it’s always nice to do some customisation. We recommend installing Windows Terminal Preview to get the most user-friendly setup. You can find it in the Microsoft Store.
Windows Terminal allows you to open multiple Terminal instances as tabs, so you can have PowerShell running alongside Ubuntu. It also includes a number of customisation options. In the below screenshot, we’ve changed the tab name and colour, and configured the terminal appearance to use the Tango Dark theme and the Ubuntu font!
These customisations can be applied universally using the Appearance menu in Settings or to individual profiles which each have their own Appearance menu. Try it yourself to find something you feel comfortable with!
7. Enjoy Ubuntu on WSL!
That’s it! In this tutorial, you’ve seen how to install WSL and Ubuntu, set up your profile, and install your first package. You also got some tips on how to customise your experience.
We hope you enjoy working with Ubuntu inside WSL. Don’t forget to check out our blog for the latest news on all things Ubuntu.
Further Reading