- How to install Apache web server in Linux step by step
- Install and Configure Apache
- What you’ll learn
- What you’ll need
- 2. Installing Apache
- 3. Creating Your Own Website
- 4. Setting up the VirtualHost Configuration File
- 5. Activating VirtualHost file
- End result
- Install and Configure Apache Web Server on Ubuntu 20.04
- Installing Apache2; Step 1: Update
- Step 2: Install Apache2
- Firewall configuration
- Configuring Apache web server; Verifying Apache service
- Setting Up Virtual Hosts in Apache
- Step 1: Create a directory for your domain
- Step 2: Make a sample page for your website
- Step 3: Create a virtual host file
- Step 4: Activate virtual host configuration file
- Step 5: Test for errors
- Step 6: Test virtual host
- Managing Apache server
- About the author
- Karim Buzdar
How to install Apache web server in Linux step by step
Web servers are an important part of the Internet, but also provide useful services even for local networks. Configuring a web server with Apache is not a difficult task, yet, here we learn how to do that…
However, before moving further let’s know a little bit about the Apache web server.
What is the function of a Web Server?
The key usage of the web servers is to deliver HTML and image content via HTTP or HTTPS protocols. Whenever we enter some web address in our browser to open some website or an HTML page, the browser requests for that to web server on port 80 (“http://”) or port 443 (“https://”), if the page is present there the same will be displayed to you. Well, web servers and browsers are key technologies of the Internet. Both provide an infrastructure to retrieve information, store data, shop online, and communicate on social networks.
In terms of browsers, we have popular Chrome, FireFox, Edge, Brave, Tor and etc. When it comes to Web server software platforms, similarly we have many popular names such as IIS, Apache, LightSpeed, Nginx, and more. However, the Apache HTTP server is one of the most widely used web servers. It has been around for over 20 years and many example configurations refer to Apache. Although many web application users prefer Nginx over Apache because of its less consumption of PC resources and ability to serve huge number of users. While others prefer to use both, Apache as a web server along with Nginx as a reverse proxy. The advantage of this is that the load can be distributed between the two servers and the overall performance can be increased. NGINX vs. Apache: Comparision of web servers to host your website
Well, Apache web server, most of the time installed with other tools because in today’s world mainly we will not use simple, static HTML files on a web server, but will use a CMS or other web application. Such as WordPress, Joomla Nextcloud, and more to create dynamic websites. And for this, the web server needs script languages usually PHP, Perl, or Python. Basically, the web server can start any external programs regardless of the programming language used, whose HTML or text output it forwards to the client (browser).
Install and Configure Apache
Apache is an open source web server that’s available for Linux servers free of charge.
In this tutorial we’ll be going through the steps of setting up an Apache server.
What you’ll learn
What you’ll need
- Ubuntu Server 16.04 LTS
- Secure Shell (SSH) access to your server
- Basic Linux command line knowledge
Got everything ready? Let’s move on to the next step!
Originally authored by Aden Padilla
2. Installing Apache
To install Apache, install the latest meta-package apache2 by running:
sudo apt update sudo apt install apache2 After letting the command run, all required packages are installed and we can test it out by typing in our IP address for the web server.

If you see the page above, it means that Apache has been successfully installed on your server! Let’s move on.
3. Creating Your Own Website
By default, Apache comes with a basic site (the one that we saw in the previous step) enabled. We can modify its content in /var/www/html or settings by editing its Virtual Host file found in /etc/apache2/sites-enabled/000-default.conf .
We can modify how Apache handles incoming requests and have multiple sites running on the same server by editing its Virtual Hosts file.
Today, we’re going to leave the default Apache virtual host configuration pointing to www.example.com and set up our own at gci.example.com .
So let’s start by creating a folder for our new website in /var/www/ by running
We have it named gci here but any name will work, as long as we point to it in the virtual hosts configuration file later.
Now that we have a directory created for our site, lets have an HTML file in it. Let’s go into our newly created directory and create one by typing:
cd /var/www/gci/ nano index.html Paste the following code in the index.html file:
I'm running this website on an Ubuntu Server server!
Now let’s create a VirtualHost file so it’ll show up when we type in gci.example.com .
4. Setting up the VirtualHost Configuration File
We start this step by going into the configuration files directory:
cd /etc/apache2/sites-available/ Since Apache came with a default VirtualHost file, let’s use that as a base. ( gci.conf is used here to match our subdomain name):
sudo cp 000-default.conf gci.conf Now edit the configuration file:
We should have our email in ServerAdmin so users can reach you in case Apache experiences any error:
ServerAdmin yourname@example.com We also want the DocumentRoot directive to point to the directory our site files are hosted on:
The default file doesn’t come with a ServerName directive so we’ll have to add and define it by adding this line below the last directive:
This ensures people reach the right site instead of the default one when they type in gci.example.com .
Now that we’re done configuring our site, let’s save and activate it in the next step!
5. Activating VirtualHost file
After setting up our website, we need to activate the virtual hosts configuration file to enable it. We do that by running the following command in the configuration file directory:
You should see the following output
Enabling site gci. To activate the new configuration, you need to run: service apache2 reload root@ubuntu-server:/etc/apache2/sites-available# To load the new site, we restart Apache by typing:
End result

Now is the moment of truth, let’s type our host name in a browser. Hooray!
Further reading:
Install and Configure Apache Web Server on Ubuntu 20.04
![]()
Apache web server is the most extensively used open-source web server supported on the majority of the OS including Linux, Windows, MacOS, Solaris, etc. It is highly customizable and can be integrated with other modules. Installing and configuring Apache for basic setup is quite easy. This article will explain how to install and configure the Apache web server on Ubuntu operating system.
Note: We have explained the procedure explained in this article on a Ubuntu 20.04 LTS system.
Installing Apache2; Step 1: Update
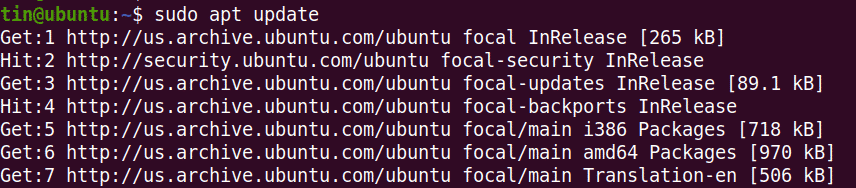
First, we will need to update the system repository index to install the most recent version of Apache2. To do so, launch the Terminal by using the Ctrl+Alt+T shortcut and execute the following command:
Note that, only an authorized user can install, update, or remove the packages from the Linux system.
Step 2: Install Apache2
Next in this step, we will install Apache2 web server. For this, execute the below command in Terminal:
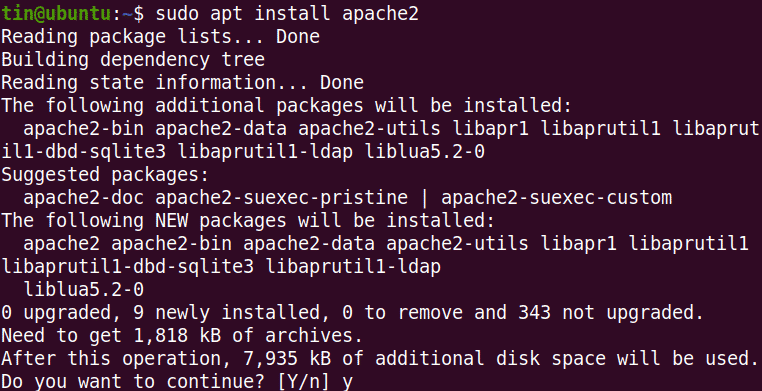
The system might ask for confirmation by providing you with a Y/n option. Hit y and then Enter to continue. After that, the Apache2 web server and its all dependencies will be installed on your system.
Once installed, verify the version of the Apache server as follows:

Firewall configuration
Now, we will need to open certain ports on our system in order to access Apache from outside. First, let’s list the application profiles that we need to give Apache access to. Run the following command to do so:
Here you can see different apache profiles.
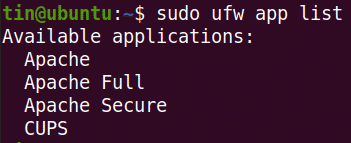
We will use the highly restrictive profile ‘Apache’ to enable network ctivity on port 80.
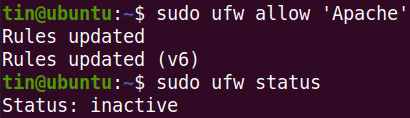
Now check the status which will show Apache allowed in firewall.
Configuring Apache web server; Verifying Apache service
Before moving towards configuration, first, verify if the Apache service is operational. For this, execute the below command in Terminal:

From the above output, you can see the Apache2 service is active and running.
Another approach to verify if Apache is running fine by requesting a web page from the Apache web server. To do so, find your IP address using the following command:

Then open the web browser and access apache welcome page as follows:
Replace the 192.168.72.134 by the IP address of your machine.
By navigating to the above link in the browser, you see the Apache welcome page which is the indication that the Apache server is working properly.
Setting Up Virtual Hosts in Apache
If you have multiple domains that need to be server from the single Apache web server, then you will require to set up virtual hosts. In the following, we will show you how to set up a virtual host in Apache. We will set up the domain name “info.net”. Make sure to replace the info.ne with your own domain name.
Step 1: Create a directory for your domain
In this step, we will create a directory for our domain name. This directory will be used for storing the data on our website.
Run the following command in Terminal by replacing the info.net with your own domain name:

Change the directory ownership to current user:

Assign necessary permissions as follows:

Step 2: Make a sample page for your website
We have setup virtual host and assign necessary permission. Now we, will create a sample page for our website. We will create the sample page using Nano editor, however, any text editor can be used for this purpose.
Copy paste these lines of HML code:
Now use Ctrl+O to save and then Ctrl+X to exit the file.

Step 3: Create a virtual host file
Apache server comes with virtual host file by default. This file is used to serve the contents of the web server. However, we will generate the new virtual host file with the following command:
Now enter the below lines by replacing the info.net by your own domain name.
< VirtualHost * : 80 >
ServerAdmin admin @ info.net
ServerName info.net
ServerAlias info.net
DocumentRoot / var / www / info.net / html
ErrorLog $ / error.log
CustomLog $ / access.log combined

Now use Ctrl+O to save and then Ctrl+X to exit the file.
Step 4: Activate virtual host configuration file
In this step, we will be creating the virtual host configuration file. For this, execute the following command in Terminal:

Now disable the “000-default.conf” default virtual configuration file as follows:

Now restart Apache to activate the new configuration as follows:
Step 5: Test for errors
Once all the configurations are completed, you can test for any configuration errors:
You might receive the following error:

In order to resolve this error, edit the servername.conf file:
Then add this line by replacing the info.net with your own domain name:

Save and exit the servername.conf file and run:

This time, hopefully, you will not receive any error.

Step 6: Test virtual host
Now the Apache web server is ready to serve our domain. Let’s test this by navigating to the following link in the browser:
Replace the info.net with your domain name.
The following index page shows the Apache server is ready to serve our domain name.

Managing Apache server
In order to manage the Apache server, here are some of the useful commands that you can run in Terminal:
To start the Apache server:
To stop the Apache server:
To stop and then start Apache”
To reload apache server to update the new configurations:
To disable Apache at boot:
This article has explained in detail the installation and configuration of Apache web server in Ubuntu 20.04. We have also explained setting up a virtual host. Now you can set up multiple domains in the same Apache server. In the end, we have mentioned some commands that can be very helpful in managing the Apache web server.
About the author
Karim Buzdar
Karim Buzdar holds a degree in telecommunication engineering and holds several sysadmin certifications. As an IT engineer and technical author, he writes for various web sites. He blogs at LinuxWays.