- How to Fix Unable to get Local Issuer Certificate
- Understanding certificate chain
- How to get a free SSL certificate?
- How do Certificate Chains work?
- View Certificate Chain
- Guidelines to verify the certificate chain is valid
- Example of a valid certificate chain
- Validate certificate chain with server and root Certificate
- Validate certificate chain with server, intermediate, and root Certificate
- Добавляем корневой доверенный сертификат в Linux
- Установка корневого сертификата в Linux
- Добавить корневой доверенный сертификат для браузеров Mozilla, Chrome
How to Fix Unable to get Local Issuer Certificate
“Unable to get Local Issuer Certificate” is a common SSL certificate error. It is related to the incomplete certificate chain such as (most commonly) missing the intermediate certificate. The fix is to ensure the entire certificate chain is present.
We will dive into this issue to see why this happens and how to fix it.
Understanding certificate chain
A certificate chain is an ordered list of certificates, containing an SSL/TLS server certificate, intermediate certificate, and Certificate Authority (CA) Certificates, that enable the receiver to verify that the sender and all CA’s are trustworthy.
- Root Certificate. A root certificate is a digital certificate that belongs to the issuing Certificate Authority. It comes pre-downloaded in most browsers and is stored in what is called a “trust store.” The root certificates are closely guarded by CAs.
- Intermediate Certificate. Intermediate certificates branch off root certificates like branches of trees. They act as middle-men between the protected root certificates and the server certificates issued out to the public. There will always be at least one intermediate certificate in a chain, but there can be more than one.
- Server Certificate. The server certificate is the one issued to the specific domain the user is needing coverage for.
We will use these files in this example.
- CA certificate file (usually called ca.pem or cacerts.pem)
- Intermediate certificate file (if exists, can be more than one. If you don’t know if you need an intermediate certificate, run through the steps and find out)
- Server certificate file
How to get a free SSL certificate?
If you need a free SSL certificate for your website, Elementor Cloud Website is a great option. They offer fast speeds, good uptime, and excellent customer support. It is an end-to-end solution gives you everything you need in one place for your website. Web Hosting on Google Cloud + SSL certificate + WordPress + Website Builder + Templates.
We recommend using Elementor Cloud Website to build a website. It is very easy to start. You can get your website online in minutes. The price is $99 for one year. Plus, they offer a 30-day money-back guarantee, so you can try it out with no risk.
How do Certificate Chains work?
When we install our TLS certificate, we also be sent an intermediate root certificate or bundle.
When a browser downloads our website’s TLS certificate upon arriving at our homepage, it begins chaining that certificate back to its root. It will begin by following the chain to the intermediate that has been installed, from there it continues tracing backwards until it arrives at a trusted root certificate.
If the certificate is valid and can be chained back to a trusted root, it will be trusted. If it can’t be chained back to a trusted root, the browser will issue a warning about the certificate.
View Certificate Chain
Use the openssl utility that can display a certificate chain. The following command will display the certificate chain for google.com.
openssl s_client -connect google.com:443 -servername google.com
0 s:/C=US/ST=California/L=Mountain View/O=Google Inc/CN=*.google.com
i:/C=US/O=Google Inc/CN=Google Internet Authority G2
1 s:/C=US/O=Google Inc/CN=Google Internet Authority G2
i:/C=US/O=GeoTrust Inc./CN=GeoTrust Global CA
2 s:/C=US/O=GeoTrust Inc./CN=GeoTrust Global CA
i:/C=US/O=Equifax/OU=Equifax Secure Certificate Authority
In the openssl output, the numbered lines start with the server certificate (#0) followed by the intermediate (#1) and the root (#2).
The s: indicates the certificate subject, and i: indicates the issuing certificate’s subject.
Guidelines to verify the certificate chain is valid
- Subject of each certificate matches the Issuer of the preceding certificate in the chain (except for the Entity certificate).
- Subject and Issuer are the same for the root certificate.
If the certificates in the chain adhere to these guidelines, then the certificate chain is considered to be complete and valid.
- The Subject of the intermediate certificate matches the Issuer of the entity certificate.
- The Subject of the root certificate matches the Issuer of the intermediate certificate.
- The Subject and Issuer are the same in the root certificate.
Example of a valid certificate chain
openssl x509 -text -in entity.pem | grep -E ‘(Subject|Issuer):’
Issuer: C = US, O = Google Trust Services, CN = GTS CA 1O1
Subject: C = US, ST = California, L = Mountain View, O = Google LLC, CN = *.enterprise.apigee.com
Intermediate certificate
openssl x509 -text -in intermediate.pem | grep -E ‘(Subject|Issuer):’
Issuer: OU = GlobalSign Root CA – R2, O = GlobalSign, CN = GlobalSign
Subject: C = US, O = Google Trust Services, CN = GTS CA 1O1
openssl x509 -text -in root.pem | grep -E ‘(Subject|Issuer):’
Issuer: OU = GlobalSign Root CA – R2, O = GlobalSign, CN = GlobalSign
Subject: OU = GlobalSign Root CA – R2, O = GlobalSign, CN = GlobalSign
Validate certificate chain with server and root Certificate
cert.pem: C = Country, ST = State, O = Organization, CN = FQDN
error 20 at 0 depth lookup:unable to get local issuer certificate
We can use the following two commands to make sure that the issuer in the server certificate matches the subject in the ca certificate.
openssl x509 -noout -issuer -in cert.pem
issuer= /CN=the name of the CA
$ openssl x509 -noout -subject -in ca.pem
subject= /CN=the name of the CA
In the following case, we need to add the CAfile to verify the root certificate.
$ openssl verify -CAfile ca.pem cert.pem
Validate certificate chain with server, intermediate, and root Certificate
cert.pem: C = Countrycode, ST = State, O = Organization, CN = yourdomain.com
error 20 at 0 depth lookup:unable to get local issuer certificate
To complete the validation of the chain, we need to provide the CA certificate file and the intermediate certificate file when validating the server certificate file.
We can do that using the parameters CAfile (to provide the CA certificate) and untrusted (to provide intermediate certificate):
$ openssl verify -CAfile ca.pem -untrusted intermediate.cert.pem cert.pem
If we have multiple intermediate CA certficates, we can use the untrusted parameter multiple times like -untrusted intermediate1.pem -untrusted intermediate2.pem .
David is a Cloud & DevOps Enthusiast. He has years of experience as a Linux engineer. He had working experience in AMD, EMC. He likes Linux, Python, bash, and more. He is a technical blogger and a Software Engineer. He enjoys sharing his learning and contributing to open-source.
howtouselinux.com is dedicated to providing comprehensive information on using Linux.
We hope you find our site helpful and informative.
Добавляем корневой доверенный сертификат в Linux

28.09.2022

itpro

CentOS, Linux, Ubuntu

комментария 4
В этой статье мы покажем, как добавить (установить) новый сертификат в список доверенных корневых сертификатов в Linux.
Например, вы используете на своем сайте самоподписанный SSL/TLS сертификат и не хотите, чтобы на клиентах при открытии сайта появлялась ошибка SEC_ERROR_UNKNOWN_ISSUER.

В данном примере мы установим в Linux корневой сертификат Минцифры (Russian Trusted Sub CA), на базе которого сейчас выпускаются сертификаты для сайтов многих компаний и гос-органов РФ.
Или это может быть самоподписанный сертификат с сайта IIS на Windows.
Чтобы проверить, что ваш хост Linux не может проверить (и соответственно не доверяет) SSL сертификату на определенном сайте, выполните команду:
$ curl –I https://www.sberbank.ru
curl: (60) SSL certificate problem: unable to get local issuer certificate. More details here: https://curl.haxx.se/docs/sslcerts.html curl failed to verify the legitimacy of the server and therefore could not establish a secure connection to it. To learn more about this situation and how to fix it, please visit the web page mentioned above.

В данном случае нам нужно добавить корневой центр сертификации этого сайта в список доверенных корневых сертификатов Linux.
Установка корневого сертификата в Linux
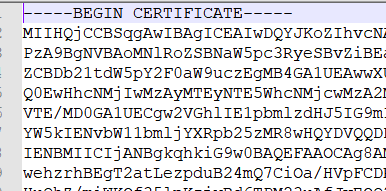
Для обновления хранилища доверенных сертификатов в Linux вам нужен файл сертификата в формате PEM с расширением файла .crt. PEM сертификат представляет собой текстовый файл в формате base64, который содержит в начале файла строку —-BEGIN CERTIFICATE—- и в конце ——END CERTIFICATE——.
Если ваш файл сертификата в формате DER, вы можете конвертировать его в PEM формат с помощью утилиты openssl:
$ openssl x509 -in my_trusted_sub_ca.der -inform der -out my_trusted_sub_ca.cer
Сначала рассмотрим, как добавит корневой сертификат вашего CA в доверенные в дистрибутивах Linux на базе DEB (Ubuntu, Debian, Mint, Kali Linux).
Скопируйте файлы ваших сертификаты в хранилище сертификатов в каталог usr/local/share/ca-certificates/:
$ sudo cp my_trusted_sub_ca.crt /usr/local/share/ca-certificates/
$ sudo cp my_trusted_root_ca.crt /usr/local/share/ca-certificates/
Обновите хранилище сертификатов командой:
$ sudo update-ca-certificates -v
$ sudo apt-get install -y ca-certificates

Если сертификаты успешно добавлены, появится сообщение о том, что сертфикат скопирован в /etc/ssl/certs/:
Updating certificates in /etc/ssl/certs… 2 added, 9 removed; done. Running hooks in /etc/ca-certificates/update.d
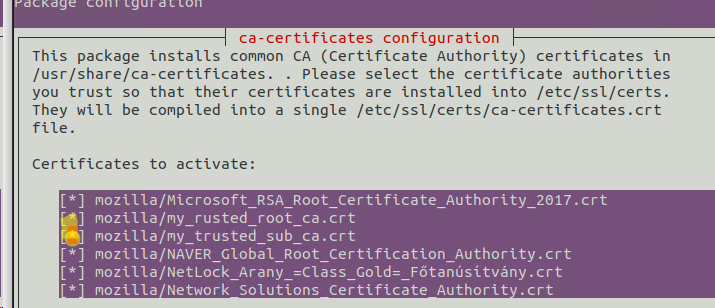
$ sudo dpkg-reconfigure ca-certificates
Выберите из списка сертификаты, которые нужно добавить в доверенные.
В Linux список доверенных сертификатов содержится в файле /etc/ssl/certs/ca-certificates.crt. Обе рассмотренные выше команды обновят этот файл и добавят в информацию о новых сертификатах.
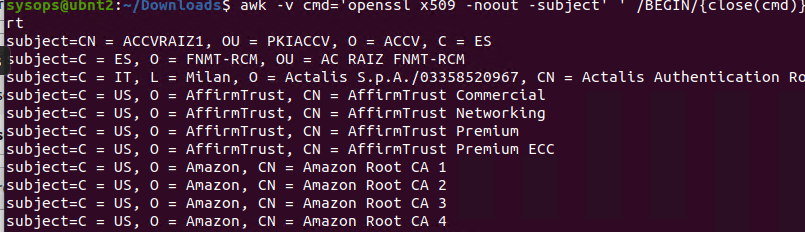
Вы можете проверить, что ваши сертификаты были добавлены в доверенные с помощью команды:
Укажите часть Common Name вашего сертификата вместо YourCASubj для поиска в хранилище по subject.
Вы можете убедиться, что ваша ОС доверяет сертификату с помощью команду:
$ openssl verify my_trusted_sub_ca.crt

error 20 at 0 depth lookup: unable to get local issuer certificate error my_trusted_sub_ca.crt: verification failed
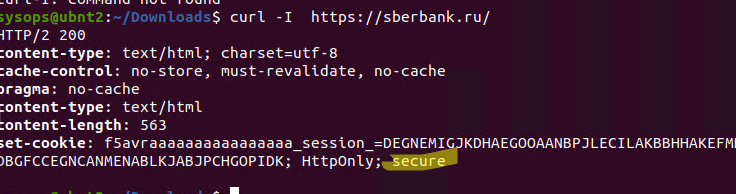
Теперь проверьте, что на сайте используется доверенный SSL сертификат с помощью curl:
$ curl –I https://www.sberbank.ru
Все ок, сертификат доверенные < HTTPOnly: secure >.
$ sudo mkdir /usr/share/ca-certificates/extra
Чтобы удалить сертификат, удалите ваш crt файл:
$ sudo rm /usr/local/share/ca-certificates/yourcert.crt
$ sudo update-ca-certificates —fresh
В дистрибутивах Linux на базе RPM (CentOS, Oracle, RHEL, Rocky Linux, Fedora) для добавления сертификата в доверенные:
- Установите пакет ca-certificates: # yum install ca-certificates
- Скопируйте файл сертификата в каталог /etc/pki/ca-trust/source/anchors/: # cp mycert.crt /etc/pki/ca-trust/source/anchors/
- Обновите хранилище:
# update-ca-trust force-enable
# update-ca-trust extract
Добавить корневой доверенный сертификат для браузеров Mozilla, Chrome
Теперь все системные утилиты будут доверять сайтам, использующим данный CA. Но это не повлияет на веб браузеры Mozilla Firefox или Google Chrome. Они по-прежнему будут показывать предупреждение о недоверенном сертификате.
Дело в том, что браузеры Firefox, Chromium, Google Chrome, Vivaldi и даже почтовый клиент Mozilla Thunderbird не используют системное хранилище сертификатов Linux. Хранилище сертификатов для этих программ находится в директории пользователя в файле cert8.db (для Mozilla) или cert9.db (для Chromium и Chrome). Для обновления этих хранилищ сертификатов используется утилита certutil из пакета libnss3-tools.
$ sudo apt install libnss3-tools
Теперь выполните следующие скрипты для добавления ваших сертификатов в хранилище через NSS:
#!/bin/bash
certfile=»my_rusted_root_ca.crt»
certname=»My Root CA1″
for certDB in $(find ~/ -name «cert8.db»)
do
certdir=$(dirname $);
certutil -A -n «$» -t «TCu,Cu,Tu» -i $ -d dbm:$
done
for certDB in $(find ~/ -name «cert9.db»)
do
certdir=$(dirname $);
certutil -A -n «$» -t «TCu,Cu,Tu» -i $ -d sql:$
done
После запуска скрипта, сайтам с данным CA будут доверять все браузеры.
![]() Предыдущая статья Следующая статья
Предыдущая статья Следующая статья ![]()