- The “uname” Command in Linux [11 Practical Examples]
- A. Description
- B. Syntax
- C. Options
- Practical Examples of the “uname” Command in Linux
- Example 1: Display All the System Information
- Example 2: Display the Kernel Name With the “uname” Command in Linux
- Example 3: Display the Kernel Release Details
- Example 4: Display the Kernel Version With the “uname” Command in Linux
- Example 5: Display the Network Node Hostname
- Example 6: Display the Machine Hardware Name With the “uname” Command in Linux
- Example 7: Display the Processor Type
- Example 8: Display the OS Name With the “uname” Command in Linux
- Example 9: Display Hardware Platform Information
- Example 10: Get Help About the “uname” Command in Linux
- Example 11: Get the Version of the “uname” Command in Linux
- Conclusion
The “uname” Command in Linux [11 Practical Examples]
The uname command, short for UNIX name, is a useful tool in Linux for getting information about the hardware and software of the current system. In this article, I will describe the features and uses of the uname command in Linux with multiple examples.
A. Description
The uname command in Linux is a handy tool used to display and find basic information about a computer, including the operating system, kernel, processor architecture, and network node hostname.
B. Syntax
The syntax of the uname command in Linux is pretty simple, as shown below.
Note: In the syntax above, the OPTION enclosed by the square bracket means it is not mandatory and three dots after the square bracket mean multiple OPTIONS can be used after the uname command.
C. Options
There are numerous options available for the uname command. I have listed a few of them. You can learn more about the uname command, its options and their uses by checking the man page.
- -a or –all: Prints all available information about the system, including the kernel name, network node hostname, kernel release, kernel version, machine hardware name, and processor type (excluding the -p and -i options if they are unknown)
- -s or –kernel-name: Displays the kernel name
- -n or –nodename: Displays the network node hostname
- -r or –kernel-release: Displays the kernel release
- -v or –kernel-version: Displays the version of the kernel
- -m or –machine: Displays the machine hardware name
- -p or –processor: Displays the type of processor
- -i or –hardware-platform: Displays the hardware platform (non-portable)
- -o or –operating-system: Displays the operating system name
- –help: Displays help information
- –version: Prints version information
Note: Commands and their options are case-sensitive in Linux. So, be careful while using them.
Practical Examples of the “uname” Command in Linux
In Linux, the uname command is a helpful tool to find basic information about the operating system, kernel, processor architecture, and network node hostname. In the section below, I will show you some of the most useful applications for the uname command in Linux.
Example 1: Display All the System Information
You can see all the information about your computer using the uname command followed by the option -a or –all. Here, I will display all the basic information of my machine on the terminal with the uname command. You can do the same by following the steps below.
Steps to Follow:
➊ At first, open the Ubuntu Terminal.
➋ Type the following command into the command prompt:
➌ Now, press the ENTER button.
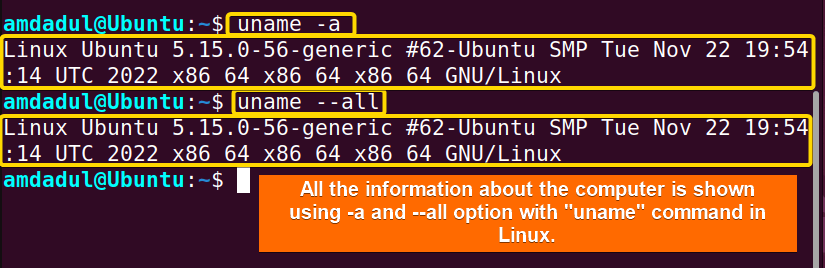
In the following image, you can see that I have displayed all the basic information(kernel name, network node name, release details, kernel version, hardware name, platform, processor type and OS name) about my machine on the terminal using the uname command.
Similar Readings
- The “apt-get” Command in Linux [10 Practical Examples]
- The “firewall-cmd” Command in Linux [7 Practical Examples]
- The “finger” Command in Linux [6 Practical Examples]
- The “env ” Command in Linux [9 Practical Examples]
- The “enable” Command in Linux [6 Practical Examples]
Example 2: Display the Kernel Name With the “uname” Command in Linux
You can see the name of the kernel currently in use, on your Linux machine using the uname command followed by the option -s” or “–kernel-name. Here, I will display the kernel name of my machine on the terminal with the uname command. You can do the same by following the steps below.
Steps to Follow:
➊ At first, open the Ubuntu Terminal.
➋ Type the following command into the command prompt:
➌ Now, press the ENTER button.
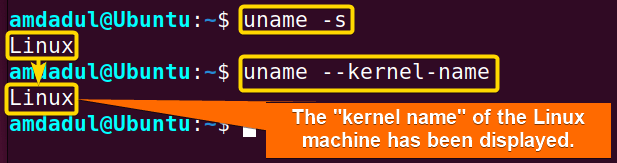
In the following image, you can see that I have displayed the kernel name of my machine on the terminal using the uname command.
Example 3: Display the Kernel Release Details
You can see the release details of the kernel currently in use, on your Linux machine using the uname command followed by the option -r or –kernel-release. Here, I will display the kernel release details of my machine on the terminal with the uname command. You can do the same by following the steps below.
Steps to Follow:
➊ At first, open the Ubuntu Terminal.
➋ Type the following command into the command prompt:
➌ Now, press the ENTER button.
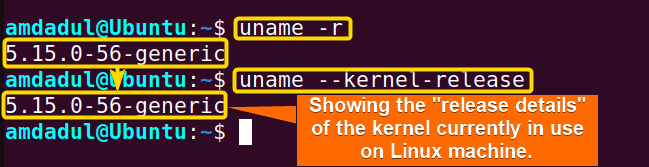
In the following image, you can see that I have displayed the kernel release details of my machine on the terminal using the uname command.
Similar Readings
- The “time” Command in Linux [4 Practical Examples]
- The “tty” Command in Linux [4 Practical Examples]
- The “uptime” Command in Linux [5 Practical Examples]
- The “vmstat” Command in Linux [6 Practical Examples]
Example 4: Display the Kernel Version With the “uname” Command in Linux
The uname command in Linux gives you the opportunity to see the version of the kernel currently in use, on your Linux machine. Here, I will display the kernel version of my machine on the terminal with the uname command. You can do the same by following the steps below.
Steps to Follow:
➊ At first, open the Ubuntu Terminal.
➋ Type the following command into the command prompt:
➌ Now, press the ENTER button.
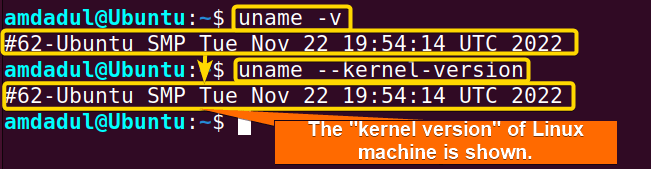
In the following image, you can see that I have displayed the kernel version of my machine on the terminal using the uname command.
Example 5: Display the Network Node Hostname
You can see the network node hostname of your Linux machine using the uname command followed by the option -n or –nodename. Here, I will display the network node hostname of my machine on the terminal with the uname command. You can do the same by following the steps below.
Steps to Follow:
➊ At first, open the Ubuntu Terminal.
➋ Type the following command into the command prompt:
➌ Now, press the ENTER button.
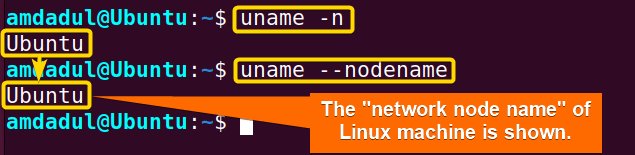
In the following image, you can see that I have displayed the network node name of my machine on the terminal using the uname command.
Similar Readings
- The “free” Command in Linux [8 Practical Examples]
- The “getent” Command in Linux [11 Practical Examples]
- The “groupadd” Command in Linux [7 Practical Examples]
- The “addgroup” Command in Linux [7 Practical Examples]
- The “groups” Command in Linux [6 Practical Examples]
Example 6: Display the Machine Hardware Name With the “uname” Command in Linux
You can see the hardware name of your Linux machine using the uname command followed by the option -m or –machine. Here, I will display the hardware name of my machine on the terminal with the uname command. You can do the same by following the steps below.
Steps to Follow:
➊ At first, open the Ubuntu Terminal.
➋ Type the following command into the command prompt:
➌ Now, press the ENTER button.
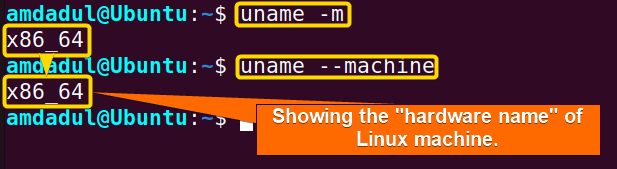
In the following image, you can see that I have displayed the hardware name of my machine on the terminal using the uname command.
Note: “x86_64” refers to the machine being a 64-bit version of the x86 architecture.
Example 7: Display the Processor Type
The uname command in Linux allows you to see the processor type currently in use on your Linux machine. Here, I will display the processor type of my machine on the terminal with the uname command. You can do the same by following the steps below.
Steps to Follow:
➊ At first, open the Ubuntu Terminal.
➋ Type the following command into the command prompt:
➌ Now, press the ENTER button.
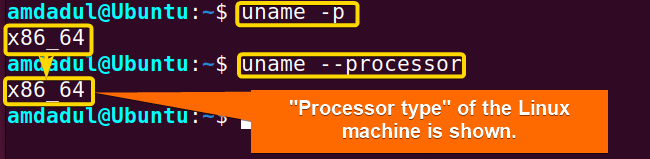
In the following image, you can see that I have displayed the processor type of my machine on the terminal using the uname command.
Note: “x86_64” refers that the processor is a 64-bit version of the x86 architecture.
Similar Readings
- The “groupmod” Command in Linux [5+ Practical Examples]
- The “id” Command in Linux [7+ Practical Examples]
- The “service” Command in Linux [6 Practical Examples]
- The “sestatus” Command in Linux [4 Practical Examples]
- The “shutdown” Command in Linux [7 Practical Examples]
Example 8: Display the OS Name With the “uname” Command in Linux
You can see the OS name of your machine using the uname command followed by the option -o or –operating-system. Here, I will display the name of my machine OS on the terminal with the uname command. You can do the same by following the steps below.
Steps to Follow:
➊ At first, open the Ubuntu Terminal.
➋ Type the following command into the command prompt:
➌ Now, press the ENTER button.
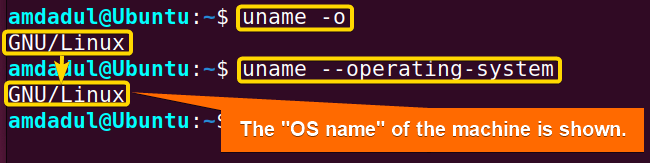
In the following image, you can see that I have displayed the OS name of my machine on the terminal using the uname command.
Example 9: Display Hardware Platform Information
You can see the information about the hardware platform of your machine using the uname command followed by the option -i or –hardware-platform. Here, I will display the hardware platform information of my machine on the terminal with the uname command. You can do the same by following the steps below.
Steps to Follow:
➊ At first, open the Ubuntu Terminal.
➋ Type the following command into the command prompt:
➌ Now, press the ENTER button.
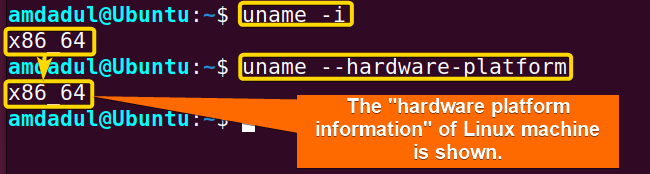
In the following image, you can see that I have displayed the hardware platform information of my machine on the terminal using the uname command.
Note: “x86_64” refers that the hardware platform is a 64-bit version of the x86 architecture.
Similar Readings
- The “dmesg” Command in Linux [7+ Practical Examples]
- The “install” Command in Linux [6+ Practical Examples]
- The “reboot” Command in Linux [3 Practical Examples]
- The “sync” Command in Linux [8 Practical Examples]
- The “chage” Command in Linux [7 Practical Examples]
Example 10: Get Help About the “uname” Command in Linux
In Linux, the help page for the uname command contains a brief description of the command. You can see the help page by following the steps that I mentioned below.
Steps to Follow:
➊ At first, open the Ubuntu Terminal.
➋ Type the following command into the command prompt:
➌ Now, press the ENTER button.
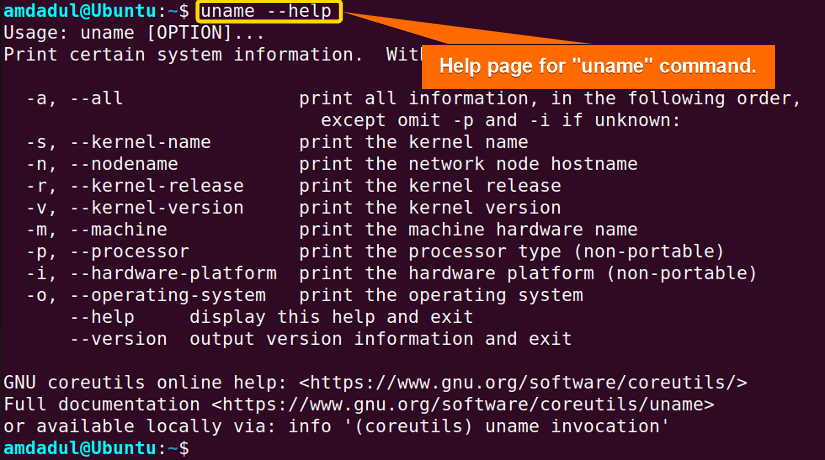
In the following image, you can see the help page of the uname command in Linux.
Example 11: Get the Version of the “uname” Command in Linux
You can see the current version of the uname command in your Linux machine. Here, I will show you the version of the uname command of my machine on the terminal. You can do the same by following the steps below:
Steps to Follow:
➊ At first, open the Ubuntu Terminal.
➋ Type the following command into the command prompt:
➌ Now, press the ENTER button.
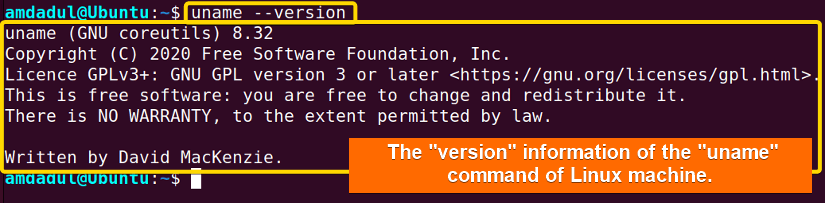
In the following image, you can see that I have displayed the version of the uname command in Linux.
Conclusion
In this article, I’ve illustrated a few of the useful operations of the uname command. I’ve also provided some relevant examples. You should be able to use the uname command effectively on your own if you properly read this article and follow the above-mentioned guidelines. I hope these examples will help you on your journey to be a power user of the Linux command line.
Similar Readings
- The “passwd” Command in Linux [7 Practical Examples]
- The “sudo” Command in Linux [8 Practical Examples]
- The “apt” Command in Linux [13+ Practical Examples]
- The “top” Command in Linux [8 Practical Examples]
- The “htop” Command in Linux [7 Practical Examples]