- Unifi controller upgrade linux
- UniFi — How to Install and Update via APT on Debian or Ubuntu
- Table of Contents
- Introduction
- UniFi Network Controller APT Steps
- Log Files Location
- User Notes & Tips
- Deon1sk4 › Блог › Установка и настройка Unifi controller + DHCP+ VLAN+ MongoDB на основе Ubuntu Server 14.04 LTS
- Unifi controller linux mint
- Did you find this article helpful?
- Как установить Unifi Controller на Ubuntu и Linux Mint
- Как установить на Unifi Controller в Ubuntu и производных
Unifi controller upgrade linux
UniFi — How to Install and Update via APT on Debian or Ubuntu
This article provides the steps to update the UniFi Network Controller on a Debian or Ubuntu system via APT (Advanced Package Tool). If you run into issues following the process described in this article, please take a look at the scripts provided in this Community post that includes UniFi Network Controller software installation on Ubuntu 18.04 and 16.04 and Debian 8/9.
Table of Contents
Introduction
In order to update the UniFi Network Controller via APT, it is necessary to create source files or edit lines in an existing sources.list file with Linux text editors: vi or nano. That is the most common method for package updates and installs for these operating systems. The repo structure should be permanent, but if there are any changes they will be pointed out in the UniFi Network Controller software version release posts, found in the Community. Follow the instructions below to stay with the current stable release, regardless of changes in versions. When there is a new stable release, there will be a post on the Community announcing it.
UniFi Network Controller APT Steps
1. Install required packages before you begin with the following command: 2. Use the following command to add a new source list:
3. Add the GPG Keys. To add the GPG Keys use one of the two methods described below (Method A is recommended). When using the commands below, it is assumed you have sudo and wget installed, more information about sudo can be found here, and wget here. (Method A) Install the following trusted key into /etc/apt/trusted.gpg.d (Method B) Using apt-key. 4. Install and upgrade the UniFi Network Controller. This should restrict Ubuntu from automatically installing Java 11. If you wish to undo this later, replace «hold» with «unhold». 5. This step may not be required, depending on the Linux distro you have. If your distro does not come with MongoDB, and it’s not available in their repo, then please see the MongoDB installation guide. You can find the latest installation guide for Ubuntu here, and Debian here. We recommend at least MongoDB 2.6.10. Some users have changed the backend to use MongoDB 3 successfully too. 6. The UniFi Network Controller should now be accessible at the computer’s configured local or public IP address, by typing that IP address in a browser’s navigation bar (Chrome is recommended). If it is not launching, use the following command: sudo service unifi start .
- To stop the UniFi service: sudo service unifi stop
- To restart the UniFi service: sudo service unifi restart
- To see the status of UniFi service: sudo service unifi status
We strongly recommend staying with the stable release, but for those users who wish to do otherwise, click here to expand and see possible suite names, as well as code names in the table within.
«Testing» refers to the next generation release, it’s not released to the general public yet. «Stable» refers to the current stable release, that is the one supported by Ubiquiti and described in this article. «Old Stable» is the previous stable release, once it has been displaced by the new, current stable release.
| Suite Name | Code Name | Archived Code Names |
| oldstable | unifi-5.10 | The code names below have been archived and are no longer supported, these should only be used in very specific, rare scenarios. |
| stable | unifi-5.11 | |
| testing | * |
unifi3, unifi4, unifi-5.3, unifi-5.4, unifi-5.5, unifi-5.6, unifi-5.7, unifi-5.8, unifi-5.9
*testing is empty at the moment
Log Files Location
Log files will be essential for any troubleshooting you might perform. Find them here:
User Notes & Tips
These notes have been added thanks to user collaboration.
- This Community post shares some scripts for UniFi Controller software installation on Ubuntu 18.04 and 16.04 and Debian 8/9.
- If you are installing in a VM or a headless server, you may encounter entropy issues. This could be anything from slow service start/restart to complete service failure. The fix is to install haveged . This is an external link for a tutorial on the subject.
- Since UniFi Controller version 5.6.x the UniFi service does not run as root. This means that you cannot bind to privileged ports ( apt-get update will result in an error.
- To fix this run the command the following way: apt-get update —allow-releaseinfo-change
- If you receive an error stating the command is not understood in combination with the other options, users have reported that issuing the following two commands has fixed it: issue apt clean and hit enter, followed by apt-get update and enter.
Deon1sk4 › Блог › Установка и настройка Unifi controller + DHCP+ VLAN+ MongoDB на основе Ubuntu Server 14.04 LTS
 Тематика не для этого сайта. Пост для себя, дабы не забыть.
Поставили задачу для реализации бесшовной wifi сети. К хотелкам добавили, что бы была гостевая изолированная сеть и основная корпоративная. Выбрали точки доступа ubiquiti unifi. Что имеется к условиям задачи. Нужно поднять сервак на базе ubuntu 14.04, на основной сетевой интерфейс навесить vlan, поднять DHCP сервер, поднять базу mongoDB ну и поднять сам веб сервер для администрирования точек доступа.
Стартуем)))Устанавливаем Ubuntu 14.04
Обновляем систему:
sudo apt-get update
sudo apt-get upgrade 1. Устанавливаем MongoDB + Unifi Controller
• Для начала правим лист репозиториев
sudo nano /etc/apt/sources.list
Добавляем строки
deb downloads-distro.mongodb.org/repo/debian-sysvinit dist 10gen
deb www.ubnt.com/downloads/unifi/debian unifi5 ubiquiti
deb dl.ubnt.com/unifi/debian unifi5 ubiquiti
• Добавляем ключи:
apt-key adv —keyserver keyserver.ubuntu.com —recv C0A52C50
apt-key adv —keyserver keyserver.ubuntu.com —recv 7F0CEB10
и обновляемся
sudo apt-get update
sudo apt-get update
• Устанавливаем mongodb
sudo apt-get install -y mongodb-org
• Устанавливаем unifi
sudo apt-get install unifi 2. Настройка VLAN 802.1Q
• Включение поддержки vlan
sudo apt-get install vlan• Допустим, нам нужно подключить сеть VLAN200. Для этого создадим логический интерфейс «eth0.200», привязанный к физическому интерфейсу «eth0», который будет обрабатывать пакеты с тегом 200.
vconfig add eth0 200
• Если выскочит ошибка «…Maybe you need to load the 8021q module…», надо будет подгрузить модуль 8021q в ядро Linux следующей командой:
sudo modprobe 8021q
• Повесим ip-адрес на новый интерфейс «eth0.200».
sudo ifconfig eth0.200 10.10.X.X netmask 255.255.0.0 up
посмотреть список интерфейсов:
Ifconfig -a
• Что бы настройки vlan не пропадали после перезагрузки сервера его нужно добавить в файл interfaces (конфиг)
sudo nano /etc/network/interfaces
# interfaces(5) file used by ifup(8) and ifdown(8)
auto lo
iface lo inet loopback
#wan
auto eth0
iface eth0 inet static
address 192.168.X.X
netmask 255.255.0.0
gateway 192.168.X.X
broadcast 192.168.255.255
dns-nameservers 192.168.X.X #vlan 200
auto eth0.200
iface eth0.200 inet static
address 10.10.X.X
netmask 255.255.255.0
broadcast 10.10.X.255
vlan_raw_device eth0
Сохраняемся и выходим.
• После нужно перезагрузить интерфейс командой
sudo service network interfaces restart 3. Устанавливаем dhcp server
• Вводим в командной строке терминала команду:
sudo apt-get install isc-dhcp-server
• Настройка конфигурационного файла DHCP сервера
sudo nano /etc/dhcp/dhcpd.conf
subnet 10.10.X.X netmask 255.255.255.0
Сохраняемся и выходим
• Перезагружаем службу DHCP
sudo service isc-dhcp-server restart
• Смотрим что бы статус был job/running. Если по какой-то причине не не стартует смотрим лог /var/log/syslog
4. Далее настраиваем Настройка IPTABLES и NAT
• Для начала нам нужно создать файл /etc/firewall.sh
Нужно сделать его исполняемым
sudo nano /etc/firewall.sh
• Даем права на исполнение
sudo chmod +x /etc/firewall.sh
• Далее в скрипт вносим следующие параметры
#!/bin/sh sysctl -w net.ipv4.ip_forward=»1″ iptables -t nat -A POSTROUTING -o eth0 -j MASQUERADE iptables -t filter -A INPUT -i eth0 -p tcp —dport 21 -j ACCEPT #// Открытие входящего порта 21 на eth0#// Возможно использование без интерфейса iptables -t nat -A PREROUTING -p tcp —dport 21 -i eth0 -j DNAT —to 10.10.X.X #// Переброс порта 21 с интерфейса eth0 на IP в локальной сети 10.10.X.X #Форвард для изоляции гостевой сети от основной iptables -A FORWARD -d 192.168.0.0/24 -j DROP Источник
Unifi controller linux mint
nmap can be used to find the IP address of your UniFi Wireless Access Point (WAP).
nmap 192.168.0.0/24 --stats-every 5sSomething like this should be returned.
Nmap scan report for 192.168.0.195 Host is up (0.00028s latency). Not shown: 999 closed ports PORT STATE SERVICE 22/tcp open ssh MAC Address: F0:9F:C2:94:1E:65 (Ubiquiti Networks)You can then SSH onto your UniFi WAP with default username and password ubnt / ubnt or root / root.
If using a Red Hat distribution, such as CentOS, Fedora, or Red Hat, use the dnf or yum command to install the UniFi Controller software.
dnf install http://dl.marmotte.net/rpms/redhat/el7/x86_64/unifi-controller-5.8.24-1.el7/unifi-controller-5.8.24-1.el7.x86_64.rpmIf you get the following error, as the output suggests, the —skip-broken flag can be used.
Error: Problem: conflicting requests - nothing provides mongodb-server needed by unifi-controller-5.8.24-1.el7.x86_64If using a Debian distribution, the wget command can be used to download unifi__all.deb.
wget www.ubnt.com/downloads/unifi/debian/pool/ubiquiti/u/unifi/unifi_5.9.29-11384-1_all.debIf using a Debian distribution, such as Ubuntu or Mint, download the UniFi Controller software for Linux from https://www.ubnt.com/download/unifi/. Use the dpkg command to install the UniFi Controller.
~]# dpkg --install /path/to/unifi_sysvinit_all.debIf your system is using systemd, use the systemctl command to start and enable the RabbitMQ Server.
systemctl enable unifi systemctl start unifi systemctl status unifiIf your system is using init, use the chkconfig and service commands to start and enable the RabbitMQ Server.
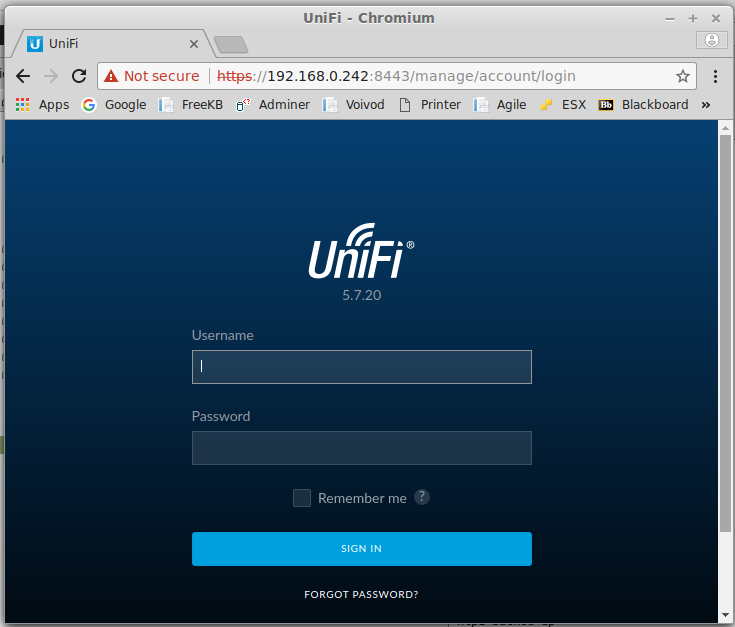
chkconfig unifi on service unifi start service unifi statusYou should now be able to access the UniFi web browser interface at http:// :8080 or https:// :8443. The default username and password will either be root:ubnt or ubnt:ubnt. Once signed in, you will be able to configure your wireless access point.
Did you find this article helpful?
If so, consider buying me a coffee over at
Как установить Unifi Controller на Ubuntu и Linux Mint
Недавно я смог использовать отличный Ubiquiti Unifi nanoHD, один из лучших «маршрутизаторов» на рынке, отлично подходящий для малого и среднего бизнеса или даже для домашнего использования.
В отличие от других распространенных или отечественных моделей, Unifi nanoHD не имеет собственного интерфейса для настройки непосредственно на устройстве, для этого у него есть специальное программное обеспечение.
Как установить на Unifi Controller в Ubuntu и производных
Ubiquiti запустила скрипт для использования и автоматизации процесса установки инструмента, сегодня мы увидим, как мы устанавливаем этот инструмент. инструмент отлично подходит для профессионалов.
Скрипт поддерживает следующие дистрибутивы, в том числе некоторые, не производные напрямую от Ubuntu:
- Ubuntu Precise Pangolin (12.04)
- Ubuntu Trusty Tahr (14.04)
- Ubuntu Xenial Xerus (16.04)
- Убунту бионический бобер (18.04)
- Космическая каракатица Ubuntu (18.10)
- Ubuntu Disco Dingo (19.04)
- Убунту Эоан Эрмине (19.10)
- Дебиан Джесси (8)
- Debian Stretch (9)
- Debian Buster (10)
- Яблочко Debian (11)
- Linux Mint 13 (майя)
- Linux Mint 17 (Киана | Ребекка | Рафаэла | Роза)
- Linux Mint 18 (Сара | Серена | Соня | Сильвия)
- Linux Mint 19 (Тара | Тесса)
- MX Linux 18 (Континуум)
Откройте свой терминал, скопируйте и вставьте следующие команды:
sudo apt-get update; sudo apt-get install ca-certificates wget -y
sudo wget https://get.glennr.nl/unifi/install/unifi-5.11.39.sh
sudo chmod +x unifi-5.11.39.sh
Со временем программное обеспечение может получать обновления, поэтому интересно посмотреть Эта страница получать обновления.
После установки инструмента терминал покажет вам IP-адрес, к которому вы должны получить доступ из браузера для доступа к программному обеспечению. Обратите внимание, что IP-адрес, вероятно, будет другим, поэтому используйте значение, которое сообщает терминал, и используйте порт 8443.
Если вы хотите снова запросить свой IP-адрес, используйте команду:
У нас будет видео на канале Diolinux На следующей неделе на этом устройстве, если вы еще не подписаны на нас, зарегистрируйтесь и активируйте уведомления, чтобы больше не терять наш контент.
Хотите задать вопросы о компьютерных сетях в бизнес-среде? Доступ к нашему форуму, у нас есть отдельная категория для этого,
 Тематика не для этого сайта. Пост для себя, дабы не забыть.
 Устанавливаем Ubuntu 14.04