- How to install Unity3D on Ubuntu 18.04?
- Installing the Unity Hub
- Installing the Unity Editor
- Adding existing instances of the Editor to the Hub
- Troubleshooting for Linux
- Support for Editor versions prior to 2017.1
- Using the Unity Installer to install the Unity Editor
- Unlock your creativity
- Create with Unity in three steps
- Simplify your journey
- Releases
- Linux. Устанавливаем Unity под Linux (Ubuntu).
- Устанавливаем Unity Hub.
- Ручная активация лицензии Unity.
How to install Unity3D on Ubuntu 18.04?
The recommended way of installing Unity on Linux is by first installing Unity Hub.
Make sure that UnityHub.AppImage file is executable.
$ chmod +x path/to/UnityHub.AppImage You can install the preferred version of Unity in the Installs section of Unity Hub application. It will automatically download and install it for you.
I wrote an article describing each step in detail, which you can find from the link below:
This answer worked for me when accepted answer didn’t. I should note however that I had to manually make the UnityHub.AppImage file executable after downloading. +1
Unity3D is being released via a «Download Helper» now. Instructions to use it are as follows:
- Head to the Unity-on-Linux Release Thread and go to the last page. The last post will contain the latest release. As of the time of this posting, that’s this one. Download it.
- Make that download executable. For example, chmod +x UnitySetup-2018.2.7f1
- Install the prerequisites via
sudo apt install libgtk2.0-0 libsoup2.4-1 libarchive13 libpng16-16 libgconf-2-4 lib32stdc++6 libcanberra-gtk-module ~/Downloads/UnitySetup-2018.2.7f1 cd sudo mv Unity-2018.2.7f1 /opt/Unity3D sudo ln -s /opt/Unity3D/Editor/Unity /usr/bin/unity3d Once that’s done, you can type unity3d to launch the Unity3D Editor.
But its not recommended as unity dropped debian packages afterwards and all unity 2018 versions need to be installed in the above way, Unity Hub is also not available on the deb package.
The deb file of the Unity 3D Linux Editor Installer from here doesn’t work in 18.04. It is an older release that was released in 2017.
Looks like it’s working. Good idea to move it to /opt rather than install it directly. It’s a good way to avoid installing as root.
The last .deb version was actually Unity 2017.2.1f1. After that all the other version came in as .sha extension. .deb version actually automatically installs all the required dependencies. But now you have to install the dependencies on your own first.
sudo apt install gconf-service lib32gcc1 lib32stdc++6 libasound2 libc6 libc6-i386\ libcairo2 libcap2 libcups2 libdbus-1-3 libexpat1 libfontconfig1 libfreetype6 libgcc1\ libgconf-2-4 libgdk-pixbuf2.0-0 libgl1-mesa-glx libglib2.0-0 libglu1-mesa libgtk2.0-0\ libnspr4 libnss3 libpango1.0-0 libstdc++6 libx11-6 libxcomposite1 libxcursor1\ libxdamage1 libxext6 libxfixes3 libxi6 libxrandr2 libxrender1 libxtst6 zlib1g debconf npm I also recommend installing build essentials
sudo apt install build-essential Click on .html download links of the Unity version you want and select Linux download assistant.
After it is installed you can simply double click the setup file or run that using command line by:
Installing the Unity Hub
The Unity Hub is a management tool that you can use to manage all of your Unity Projects and installations. Use the Hub to manage multiple installations of the Unity Editor along with their associated components, create new Projects, and open existing Projects.
To install the Unity Hub for Windows, macOS, and Linux visit Download Unity on the Unity website.
Unity officially supports the following Linux distributions:
Note: If Unity Hub fails to launch while you are using Linux, you might need to give UnityHub.AppImage executable permissions. To do this:
- Open your terminal.
- Go to the directory where UnityHub.AppImage is. This will be the Unity Hub directory.
- Run chmod +x UnityHub.AppImage .
To install and use the Unity Editor, you must have a Unity Developer Network (UDN) account. If you already have an account, sign in, choose your licenses type, and proceed to the Installing the Unity Editor section.
If you do not have an account, follow the prompts to create one. You can choose to create a Unity ID or use one of the social sign-ins. For more information on accounts and subscriptions, see Unity Organizations.
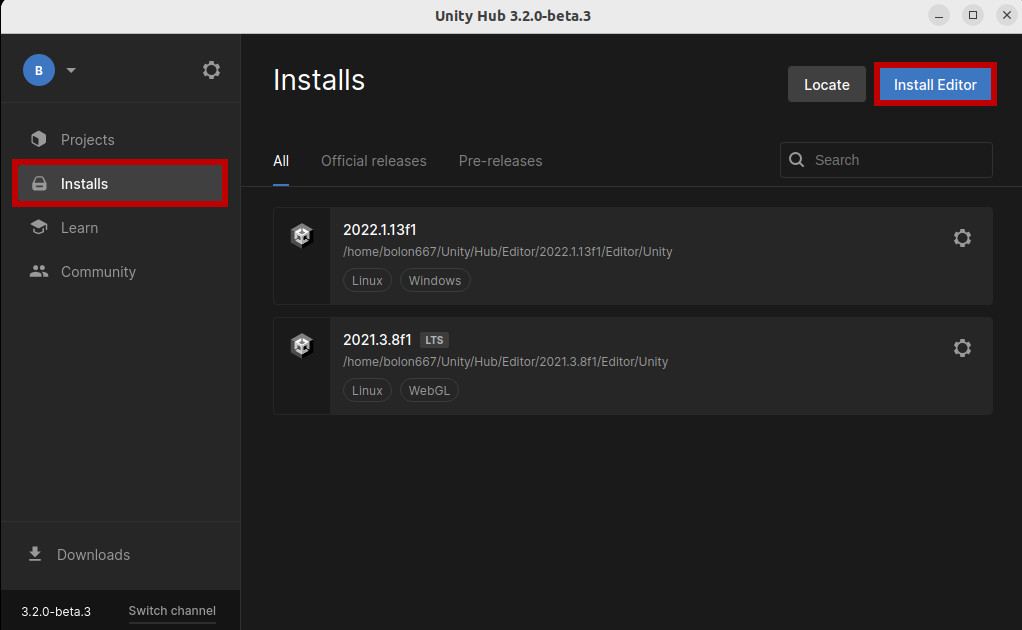
Installing the Unity Editor
- Click the Installs tab. The default install locations are: Windows:
C:\Program Files\Unity\Hub\Editor /Applications/Unity/Hub/Editor Note: If you want to change the default installation location, follow these steps:
- From the top right corner of the Hub window, click the Gear icon.

- In the Editor Folder Location dialog box, enter the new installation location and click Done.


If you are installing multiple Editor versions, the first installation starts as soon as the download is complete. Other selected versions download simultaneously and queue to start when the current installation finishes.
The Hub displays the installation location of each Editor under the corresponding version label.
To add modules to an Editor, locate its files, or uninstall it, click the three dots next to that Editor version.

Adding existing instances of the Editor to the Hub
You can add instances of the Editor to the Hub that you installed outside of the Hub.
- Click the Installs tab.
- Click the Locate button to find existing installations of the Editor.
- In the file dialog, navigate to the location of the Editor installation and select the Unity executable. On MacOS this is Unity.app. On Windows this is Unity.exe. On Windows, the typical location of the Unity.exe is:
C:\Program Files\Unity\Editor\Unity.exe C:\Program Files\Unity\Editor\Unity.exe /Applications/Unity/Hub/Editor//Unity.app To remove the Editor from the Hub, click the three dots next to the Editor version. Removing an Editor that you added in this manner does not uninstall it or modify it in any way.
Troubleshooting for Linux
If Unity fails to start, you might need to install a missing dependency In the context of the Package Manager, a dependency is a specific package version (expressed in the form package_name@package_version ) that a project or another package requires in order to work. Projects and packages use the dependencies attribute in their manifests to define the set of packages they require. For projects, these are considered direct dependencies; for packages, these are indirect, or transitive, dependencies. More info
See in Glossary . On Ubuntu-based distributions, use:
sudo apt install libgconf-2-4 On CentOS, you might need to install the mesa-libGLU dependency. Use:
sudo yum install mesa-libGLU Support for Editor versions prior to 2017.1
Sign-in status is not shared for pre–2017.1 versions of the Editor opened through the Hub. Performing tasks such as Manage License, Open Project, Create Project, and Sign in opens the Unity Launcher instead of the Hub.
If you attempt to use the Unity Hub to open an Editor version 5 or earlier and you do not have an appropriate license file, the Editor will hang on the splash screen.
To avoid this issue, run the Editor directly, external to the Unity Hub, and the Editor will load correctly even if the license file is not detected.
Using the Unity Installer to install the Unity Editor
The Unity installer is a small executable program (approximately 1 MB in size) that lets you select which components of the Unity Editor you want to download and install.
To install previous versions of the Unity Editor using the Installer, visit the Unity download archive. The archive page provides Unity Installer download links for all released versions of the Editor.
For additional information on installing the Editor using the Installer, see the 2018.3 version of the Unity Manual.
- Hub design updated in Unity 2019.1 NewIn20191
- Linux now available from the Hub in Unity 2019.1 onwards
Unlock your creativity
Download the world’s most popular development platform for creating 2D and 3D multiplatform games and interactive experiences.
Create with Unity in three steps
1. Download the Unity Hub
Follow the instructions onscreen for guidance through the installation process and setup.
2. Choose your Unity version
Install the latest version of Unity, an older release, or a beta featuring the latest in-development features.
3. Start your project
Begin creating from scratch, or pick a template to get your first project up and running quickly. Access tutorial videos designed to support creators, from beginners to experts.
OS:
Windows 7 SP1+, 8, 10, 64-bit versions only; Mac OS X 10.13+; Ubuntu 16.04, 18.04, and CentOS 7.
GPU:
Graphics card with DX10 (shader model 4.0) capabilities.
Use the Unity Hub to manage multiple installations of the Unity Editor, create new projects, and access your work.
![]()
Simplify your journey
The Unity Hub comes with fun, guided learning paths to help new users become creators more quickly.
Download the Runner template today
Unity’s new Runner template’s feature sets make it easier to create your own unique, high-quality games in a popular genre that will stand out on app stores.
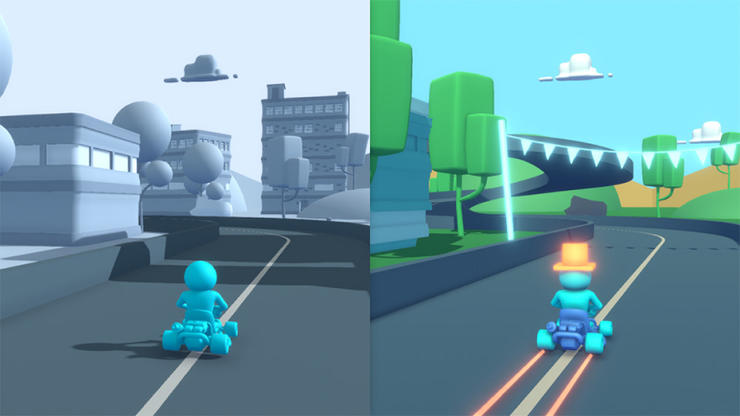
Personalize with Mods
Take the fun of game creation to a whole new level. Through mini-adventures we call Creative Mods, you can easily add your own unique style and ideas to your game.
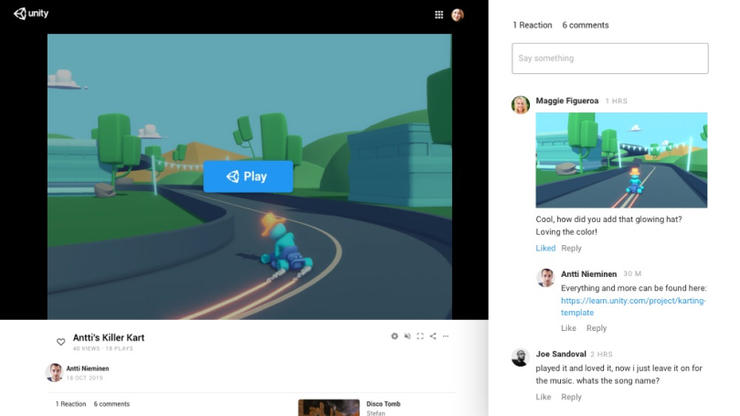
Share your playable game
Show off your new skills and get instant feedback. In just a few steps, you can publish a playable version of your game on the web to share with anyone.
We offer a range of plans for all levels of expertise and industries.
All plans are royalty-free.
Releases
Browse and download the different releases available for Unity.

Unity Long Term Support (LTS)
The release for creators who value maximum stability and support for their next project, the LTS version rolls up the features and improvements made across the year into a single installation. This is our default release, and it’s recommended for creators who are about to lock in production on a specific version of Unity.

Tech Stream
Tech Stream is for creators who value getting earlier access to new features in order to prepare for future projects. These versions are primarily recommended for the preproduction, discovery, and prototyping phases of development, but they can be used to get ready for the next LTS by enabling earlier feature adoption.

Prerelease technology
Get early access to our latest features, and help us improve quality by providing valuable feedback.
Linux. Устанавливаем Unity под Linux (Ubuntu).
В этой статье я расскажу, как установить движок Unity под дистрибутив Ubuntu.
Устанавливаем Unity Hub.
Чтобы установить Unity Hub, выполните следующие комманды в терминале:
sudo sh -c 'echo "deb https://hub.unity3d.com/linux/repos/deb stable main" > /etc/apt/sources.list.d/unityhub.list'wget -qO - https://hub.unity3d.com/linux/keys/public | sudo apt-key add -sudo apt update sudo apt-get install unityhubТеперь, запустите Unity Hub, и через него, установите движок Unity.
Далее, надо создать проект и активировать лицензию.
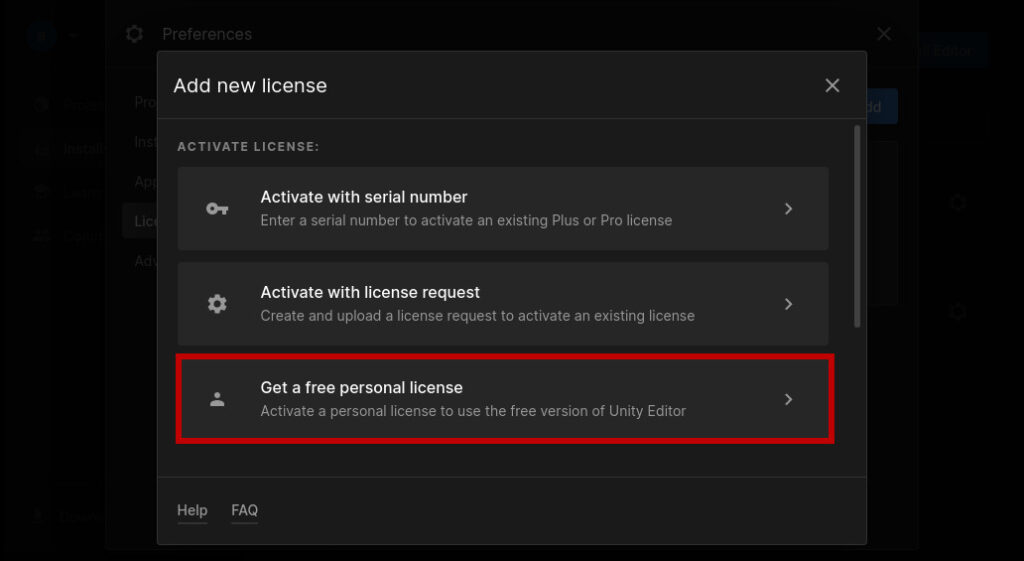
Однако, кнопка Agree and get personal edition license — не работает (на момент написания статьи).
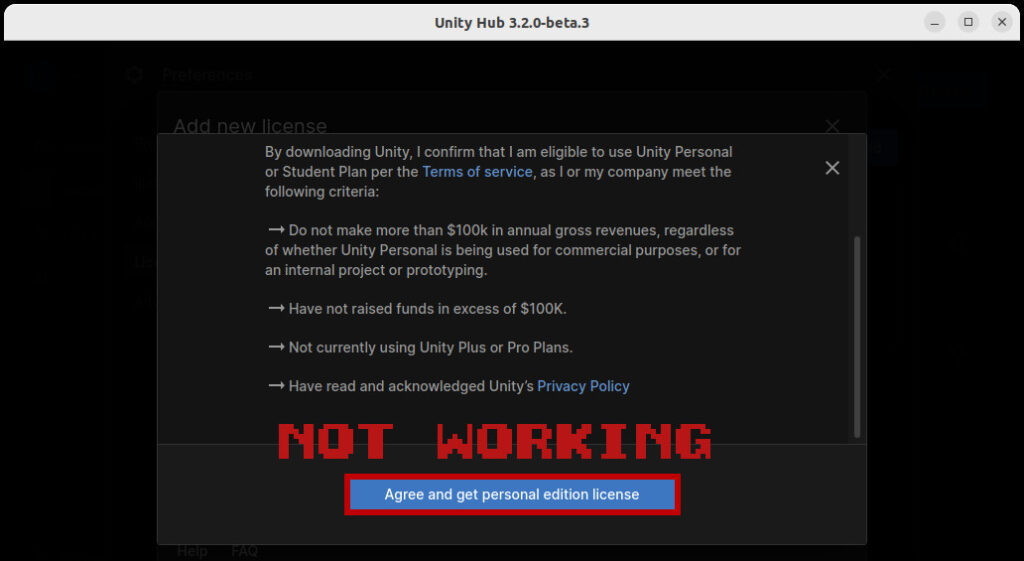
Поэтому, используем ручную активацию.
Ручная активация лицензии Unity.
Зайдите в папку с движком Unity, она расположена по данному адресу:
/home/имя_пользователя/Unity/Hub/Editor/версия_редактораОткройте там терминал, и выполните коммаду:
./Unity -batchmode -createManualActivationFile -logfileДанная комманда сгенерирует alf файл, который нужно загрузить на сайт https://license.unity3d.com/manual.
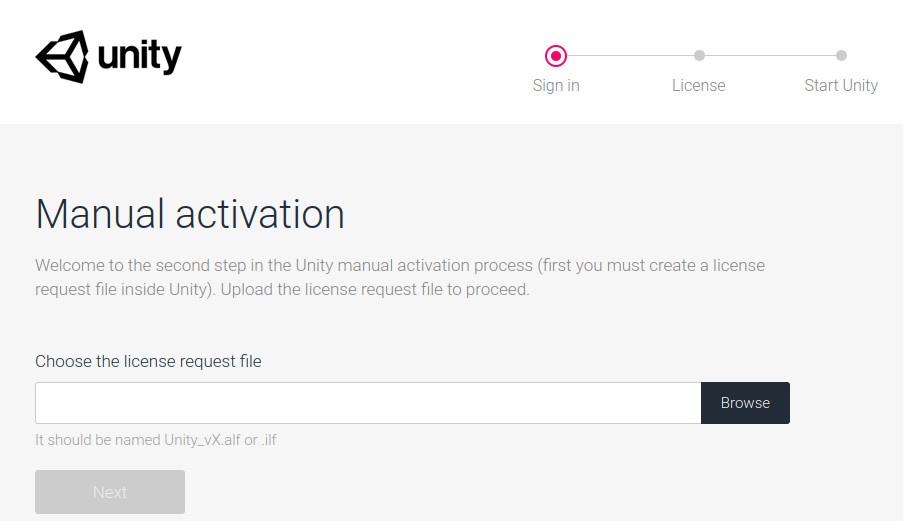
Далее, в графе Licence, выберите Unity Personal Edition -> I don’t use Unity in a professional capacity. После чего, скачайте ulf файл, им и будем активировать лицензию. Ulf файл поместите в папку, из которой вы открывали терминал.
Для активации лицензии, выполните следующую комманду:
./Unity -batchmode -manualLicenseFile ./ваш_ulf_файл -logfileЛицензия активирована, осталось перезагрузить Unity Hub, и создать свой проект.