- How to Use Unzip in Linux
- What Is Zip Used For?
- Debian and Ubuntu Systems
- Install Unzip on Linux CentOS and Fedora
- How to Use Zip and Unzip in Linux
- Create Zip Files in Linux
- Using Linux to Unzip a file
- Remove a File from a .zip File
- How to Update Zip Files
- Move a File to a Zip
- Recursive Use of Zip on Linux
- Exclude Files in a Zip
- Unzip to a Different Directory
- Use Linux Unzip with Multiple Zip Files
- Suppress Output When Using Unzip in Linux
- Exclude Files Using Unzip in Linux
- Using Unzip in Linux with Password Protected Files
- Overriding Zip Files
- Using Linux Unzip Without Overwriting Files
- How to List the Content of a Zip in Linux
- Conclusion
- Как распаковать ZIP в Linux
- Распаковка ZIP Linux
- Как распаковать ZIP Linux с помощью 7z
- Выводы
How to Use Unzip in Linux
Zipping and unzipping files eases a lot of complicated tasks like file transfer! In this tutorial, you’ll learn how to use unzip using Linux commands to improve your VPS workflow!
Zip is a commonly used compression function which is portable and easy to use. You can even unzip files in Windows, that were created in Linux!
Unzip is a utility that is not available on most Linux flavors by default, but can be easily installed. By creating .zip files you can match .tar.gz file compression!
What Is Zip Used For?
Below are a few scenarios in which you may choose to use zip files:
- When you are frequently working between Windows and Unix based systems. Not only does this compress files but also is a file package utility. Works on multiple operating systems
- To save bandwidth. If you have limited or restricted bandwidth, then zip can be used between two servers for file transfer
- Transfers files quickly. Zip utility reduces file size, therefore reducing transfer time
- Upload or download directories at a faster speed
- Save disk space
- Unzip password protected .zip files
- Enjoy a good compression ratio
Remember, before taking advantage of Unzip on Linux, you’ll have to SSH into your virtual private server.
Debian and Ubuntu Systems
Installing unzip is easy! With Ubuntu and Debian use the command below to install unzip:
Sit back and wait a minute, until the installation is finished.
To create zip files, you’ll also have to install zip. You can do this with the following command:
Install Unzip on Linux CentOS and Fedora
This again is simple and can be done using below command:
Once the installation is complete you can check the path with the following command:
After you execute the direction in the command line, you should get an output that looks like this:
You can also confirm everything is installed properly by using the command bellow. It will give a verbose with unzip utility details.
How to Use Zip and Unzip in Linux
Now that we know how to install the utility, we can start learning the basic uses of it:
Create Zip Files in Linux
The basic syntax to create a .zip file is:
zip options zipfile list_Of_files
To test this, we created two files – ExampleFile.txt and ExampleFile1.txt. We’ll compress them into sampleZipFile.zip with the following command:
zip sampleZipFile.zip ExampleFile.txt ExampleFile1.txt
Using Linux to Unzip a file
The unzip command can be used without any options. This will unzip all files to the current directory. One such example is as shown below:
This by default will be unzipped in the current folder provided you have read-write access.
Remove a File from a .zip File
Once a .zip file is created, you can remove or delete files in it. So, if you want to remove ExampleFile.txt from the existing sampleZipFile.zip, then you can use the following command:
zip –d sampleZipFile.zip ExampleFile.txt
Once this command is executed, you can unzip the .zip file using:
Over here you will find that ExampleFile.txt has been removed and can’t be seen on extraction.
How to Update Zip Files
Once a .zip file is created, you can add a new file to an existing .zip file. Suppose a new file ExampleFile2.txt needs to be added to the already existing sampleZipFile.zip. You can do this with the command shown below:
zip –u sampleZipFile.zip ExampleFile2.txt
Now if you extract sampleZipFile.zip, you will find the new file ExampleFile2.txt added to it.
Move a File to a Zip
You can easily move specific files to an the zip file. That means that after adding the files, they will be deleted from their original directories. This is mostly used when you have large file or directory, but need to conserve disk space. This is done by adding the -m option. A sample of this command would be:
zip –m sampleZipFile.zip ExampleFile2.txt
Recursive Use of Zip on Linux
The -r option is used to recursively zip files. This option will compress all the files present within a folder. An example of such command is as shown below:
zip –r sampleZipFile.zip MyDirectory
In the example, MyDirectory is a directory which has multiple files and sub-directories to be zipped.
Exclude Files in a Zip
While creating a .zip file, you can exclude unwanted files. This is done by using the -x option. Below is an example:
zip -x sampleZipFile.zip ExampleFile.txt
Here ExampleFile.txt will not be added to the sampleZipFile.zip.
Unzip to a Different Directory
In case you do not want to unzip to the current directory but want to specify a directory location, then this can also be done. Use the -d option to provide a directory path in the unzip command. An example of such command is as shown below:
unzip sampleZipFile.zip -d /usr/sampleZip/ExampleDir
Use Linux Unzip with Multiple Zip Files
If you want to unzip multiple zip files existing within your current working directory then you can use a command as shown below:
This command will unzip all the individual zip files.
Suppress Output When Using Unzip in Linux
By default, when we use the unzip command, the command prints list of all the files that are getting extracted. A summary of the extraction process is printed. In case you want to suppress these messages, then you can use the -q option. The command would be as shown below:
Exclude Files Using Unzip in Linux
In case you want to extract all files except for one, then you can use a similar command as shown below:
unzip sampleZipFile.zip -x excludedFile.txt
Here the command will unzip all files except excludedFile.txt.
You can also prevent specific file types from getting extracted. One such example is as shown below:
unzip sampleZipFile.zip -x "*.png/*"
The above command will exclude all .png files from being extracted.
Using Unzip in Linux with Password Protected Files
A password protected .zip file can be decompressed using the -P option. A sample of such command is as shown below:
unzip -P Password sampleZipFile.zip
In the above command, Password will be the password for the .zip file.
Overriding Zip Files
When you unzip the same file again in the same location where the file was extracted, by default you will encounter a message asking whether you want to overwrite the current file, overwrite all files, skip extraction for the current file, skip extraction for all files or rename current file.
The options would be as shown below:
You can override these files by using the -o options. One such example is as shown below:
Caution should be taken while executing this command since this will completely overwrite the existing copies. Any changes made in the earlier copy will be overwritten.
Using Linux Unzip Without Overwriting Files
If you have unzipped a file and made some changes but you accidentally deleted a few files, then you can use this approach to restore it! Use the -n option to skip the extraction in case a file already exists. So effectively only files which do not exist will be extracted. An example of such a command is:
How to List the Content of a Zip in Linux
The -l option will list all the files within the .zip along with the timestamp and other basic details. An example of such command is:
Conclusion
That’s it, you’re introduced to all the essential functions of the zip and unzip Linux utilities. Start improving your file management right now!
Как распаковать ZIP в Linux
В операционной системе Windows формат архивов ZIP считается чуть ли не стандартным, он даже поддерживается в этой операционной системе, что называется «из коробки». Если вы только перешли с Windows, то у вас, наверное, есть много таких архивов с различными файлами, также ZIP-архивы могут часто попадаться на просторах интернета. Поэтому работать с такими файлами в Linux вам однозначно придётся.
В этой небольшой статье мы рассмотрим, как распаковать ZIP Linux. Разберём несколько способов и воспользуемся несколькими утилитами, которые справятся с этой задачей.
Распаковка ZIP Linux
Формат ZIP был создан в 1989 году на замену очень медленному формату ARC. Здесь используется сжатие deflate, и на то время оно работало намного быстрее чем ARC. Исторически сложилось так, что стандартным форматом для Linux стали TAR и GZ — это усовершенствованные алгоритмы сжатия и архивации. Многие графические распаковки воспринимают и ZIP-файлы. Но они обрабатывают архивы не сами, а дают команду предназначенным для этого формата утилитам.
Утилита для распаковки ZIP называется unzip, она не всегда установлена по умолчанию. Но вы можете очень просто добавить её в свою систему из официальных репозиториев. Для этого в Ubuntu выполните:
А в системах, использующих формат пакетов Red Hat, команда будет выглядеть немного по-другому:
sudo yum install unzip zip
После установки большинство графических утилит для работы с архивами смогут распаковать архив ZIP Linux. Команда ZIP Linux установлена на случай, если вы захотите создавать ZIP-архивы.
Но этой утилите не нужны дополнительные оболочки для распаковки архива. Вы можете сделать всё прямо из консоли. Давайте рассмотрим синтаксис утилиты:
$ unzip опции файл_архива.zip файлы -x исключить -d папка
- файл архива — это тот файл, с которым нам предстоит работать;
- файлы — здесь вы можете указать файлы, которые нужно извлечь, разделять имена файлов пробелом;
- исключить — файлы, которые извлекать не нужно;
- папка — папка, в которую будет распакован архив.
Теперь рассмотрим опции утилиты, поскольку она позволяет не только распаковывать архивы, но и выполнять с ними определённые действия:
- -l — вывести список файлов в архиве;
- -t — протестировать файл архива на ошибки;
- -u — обновить существующие файлы на диске;
- -z — вывести комментарий к архиву;
- -c — извлекать файлы на стандартный вывод, перед каждым файлом будет выводиться его имя;
- -p — то же самое, только имя выводится не будет;
- -f — извлечь только те файлы, которые уже существуют на диске, и файлы в архиве более новые;
- -v — вывести всю доступную информацию;
- -P — указать пароль для расшифровки архива;
- -n — не перезаписывать существующие файлы;
- -j — игнорировать структуру архива и распаковать всё в текущую папку;
- -q — выводить минимум информации.
Все самые основные опции рассмотрели, теперь давайте рассмотрим несколько примеров работы с программой в терминале. Чтобы распаковать ZIP Linux в текущую папку, достаточно набрать:

Причём расширение указывать не обязательно. Протестировать архив можно с помощью опции -t:

Вы можете протестировать все архивы в текущей папке, выполнив:
Если нужно распаковывать архив не в текущую папку, можно очень просто указать нужную:
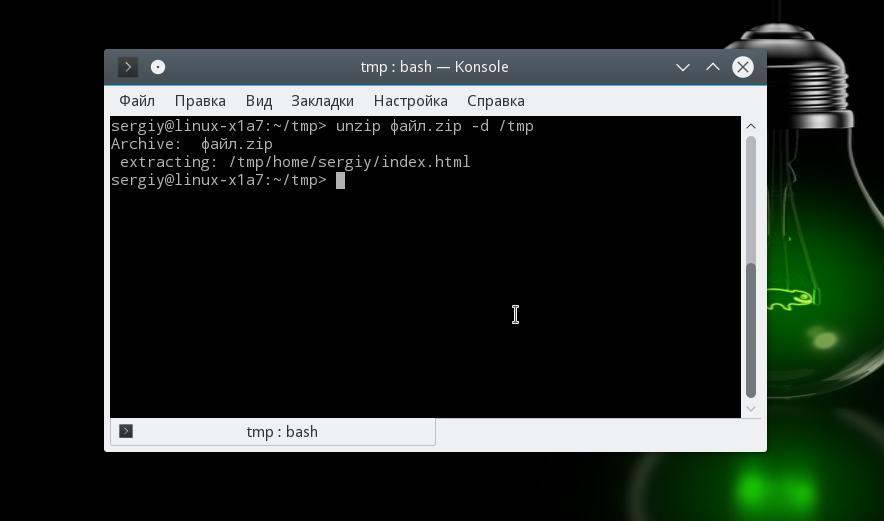
Также можно распаковывать не весь архив, а только нужные файлы или файлы нужного формата:
unzip имя_файла.zip \*.txt -d /tmp
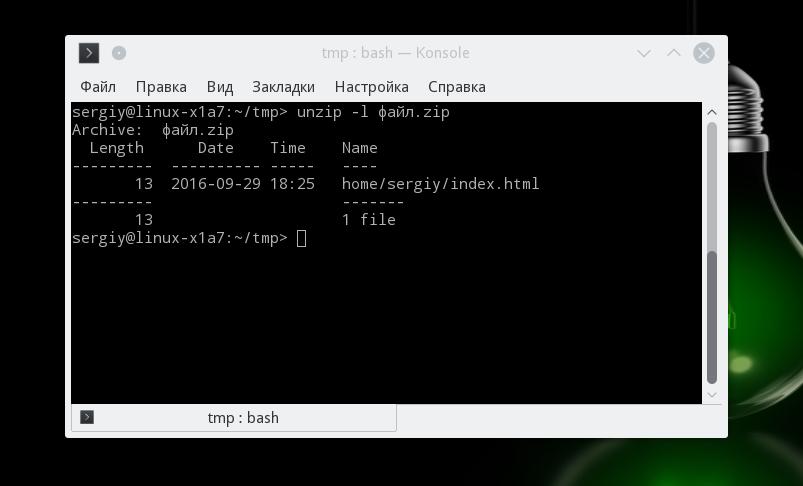
С помощью опции -l вы можете посмотреть список файлов в архиве:
Утилиту unzip разобрали и теперь вы с ней точно справитесь. Но я говорил, что мы рассмотрим несколько способов, как выполняется распаковка ZIP Linux. Поэтому дальше мы поговорим об утилите 7z.
Демонстрация работы утилит zip и unzip в терминале:
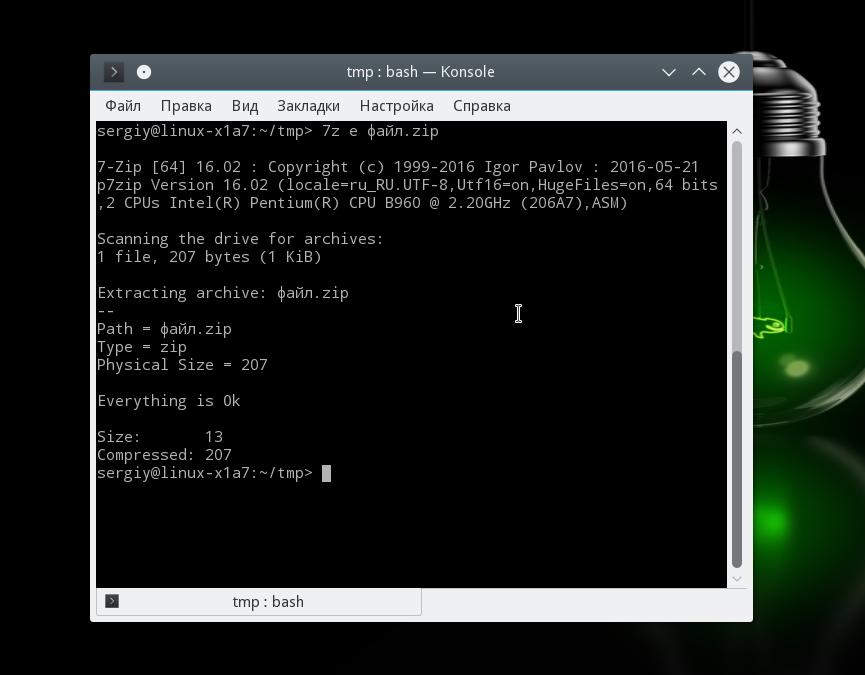
Как распаковать ZIP Linux с помощью 7z
7z — это кроссплатформенный набор утилит для работы с архивами. Кроме собственного формата, здесь поддерживается большое количество других, в том числе tar и zip. Плюс этой утилиты — в контекстное меню файлового менеджера будет добавлен пункт, с помощью которого вы сможете распаковывать или создавать архивы.
Для установки утилиты в Ubuntu или Debian выполните:
sudo apt install p7zip-full
Теперь вы можете использовать контекстное меню вашего файлового менеджера, чтобы распаковать архив ZIP Linux. Также можно использовать программу в консоли. Синтаксис очень похож на unzip:
$ 7z команда опции имя_архива
Команда задаёт нужное действие. Нас будут интересовать только четыре команды:
Теперь рассмотрим самые полезные опции:
- -o — указать папку для распаковки;
- -p — указать пароль;
- -x — не извлекать эти файлы;
- -w — указать рабочую директорию;
- -y — отвечать положительно на все вопросы;
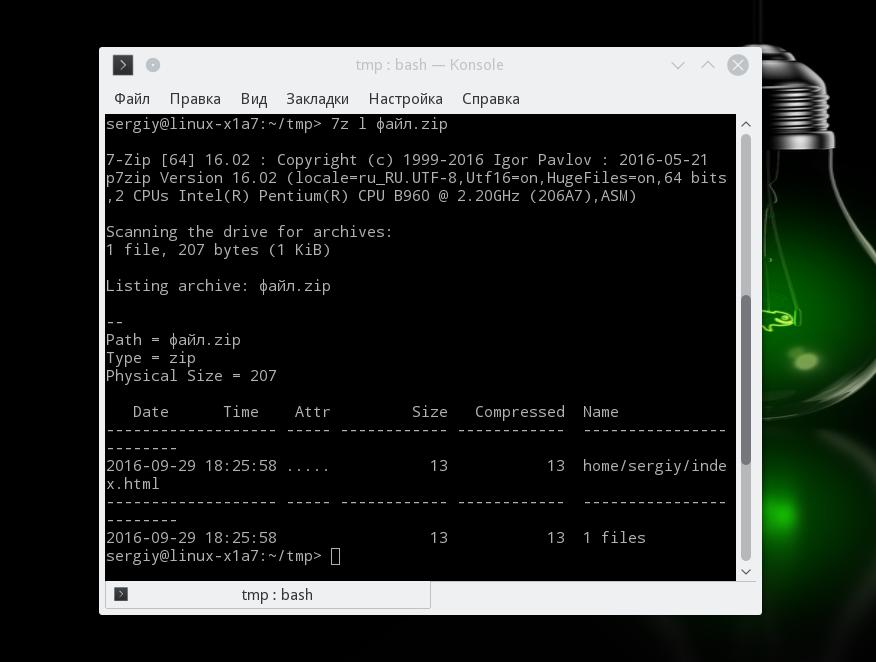
Ну и рассмотрим примеры работы с утилитой. Сначала проверим содержимое архива:
Распаковываем архив, сохраняя структуру подкаталогов:
Или распаковываем все файлы в одну папку, игнорируя подкаталоги:
Или вы можете указать папку, в которую нужно распаковать файлы с помощью опции -o:
Выводы
В этой статье была рассмотрена распаковка ZIP Linux, как видите, это ненамного сложнее, чем распаковка стандартных архивов TAR. Мы рассмотрели два способа ,и теперь вы точно будете знать, что делать, когда столкнетесь с такой ситуацией. Если у вас остались вопросы, спрашивайте в комментариях!
Обнаружили ошибку в тексте? Сообщите мне об этом. Выделите текст с ошибкой и нажмите Ctrl+Enter.